本文主要是介绍三国志14信息查询小程序(历史武将信息一览)制作更新过程03-主要页面的设计,希望对大家解决编程问题提供一定的参考价值,需要的开发者们随着小编来一起学习吧!
1,小程序的默认显示
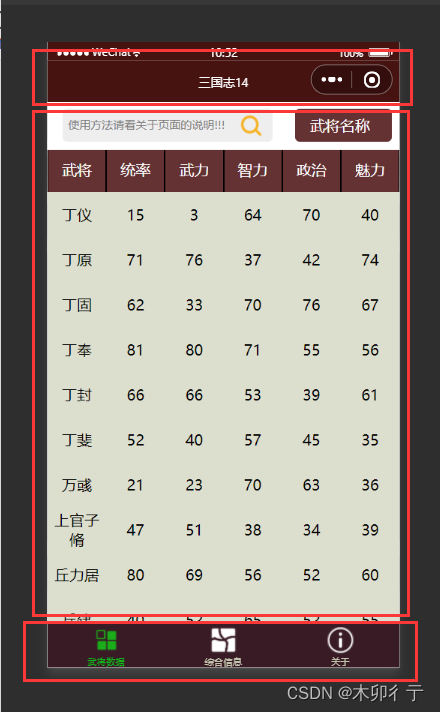
分为三部分,头部的标题、中间的内容区和底部的标签栏。点击标签可以切换不同页面,这是在app.json文件中配置的。代码如下:
//所有用到的页面都需要在 pages 数组中列出,否则小程序可能会出现错误或无法正确加载。
//首页的页面路径放在这个数组的第一个位置。例如,将 pages/index/index 设置为首页。
{"pages": ["pages/index/index","pages/details/details","pages/my/details","pages/about/about"],"subpackages": [],//标题文本设置"window": {"backgroundTextStyle": "light","navigationBarBackgroundColor": "#461311","navigationBarTitleText": "三国志14","navigationBarTextStyle": "white"},//标签,表示小程序的主要功能或页面,用户可以点击切换。"tabBar": {"color": "#bfc1ab","selectedColor": "#13b11c","backgroundColor": "#381B25","list": [{"pagePath": "pages/index/index","iconPath": "image/icon_component.png","selectedIconPath": "image/icon_component_HL.png","text": "武将数据"},{"pagePath": "pages/my/details","iconPath": "image/icon_map.png","selectedIconPath": "image/icon_map_HL.png","text": "综合信息"},{"pagePath": "pages/about/about","iconPath": "image/icon_about.png","selectedIconPath": "image/icon_about_HL.png","text": "关于"}]},"sitemapLocation": "sitemap.json","permission": {"scope.userLocation": {"desc": "获取位置,方便按区域分配 "}}
}
2,武将信息页
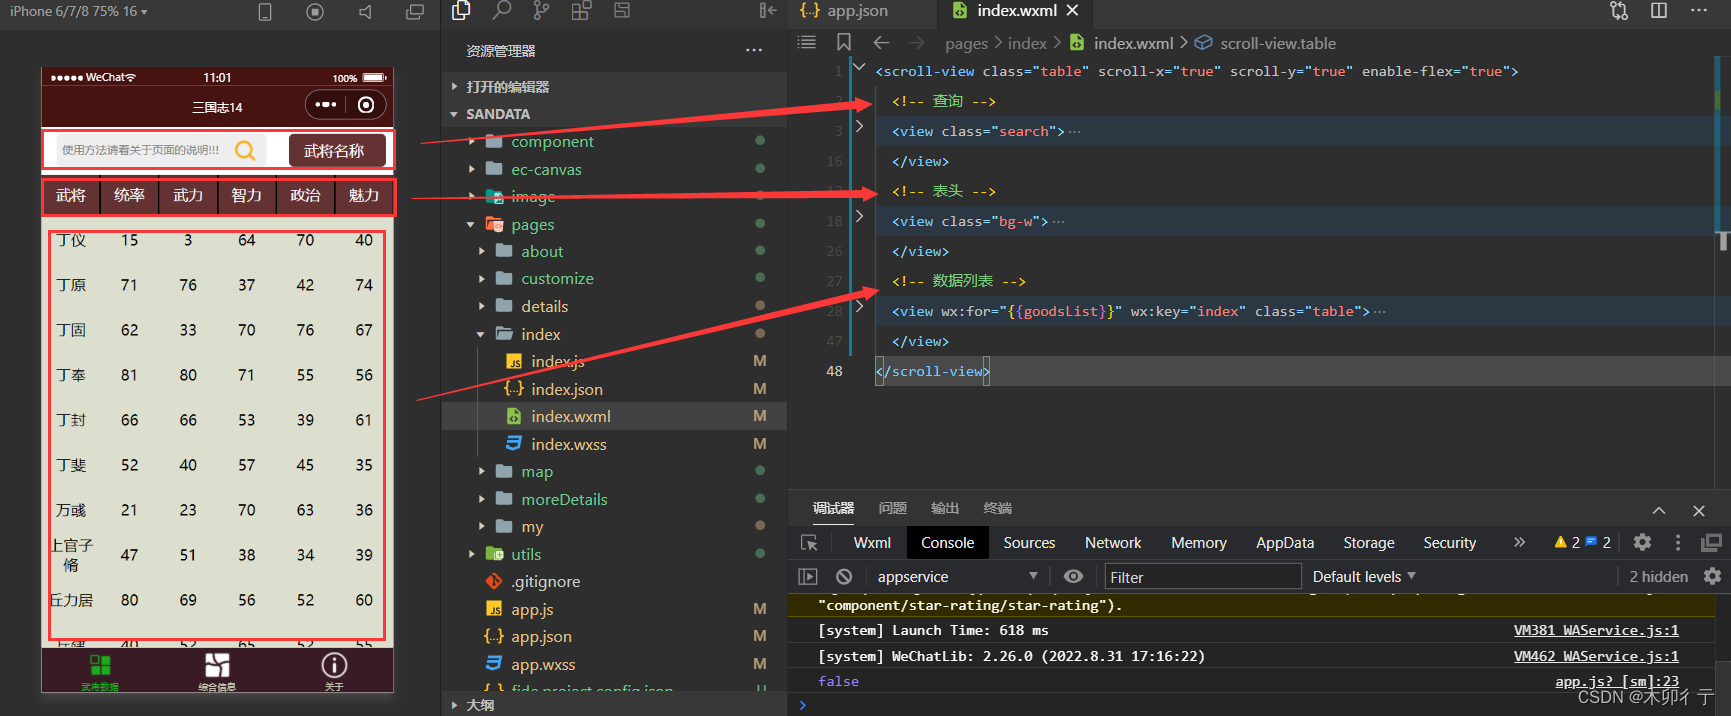
分为三部分,查询工具栏、表头及数据列表
这是数据列表的代码:
<!-- 数据列表 --><view wx:for="{{goodsList}}" wx:key="index" class="table"><view class="tr bg-g" bindtap="onGoodsDetail" data-all="{{item}}" data-name="{{item.name}}"><view class="td">{{item.name}}</view><view class="td">{{item.tongshuai}}</view><view class="td">{{item.wuli}}</view><view class="td">{{item.zhili}}</view><view class="td">{{item.zhengzhi}}</view><view class="td">{{item.meili}}</view></view></view>
可以看到,数据goodsList以循环的形式显示,每行数据上加入了点击事件onGoodsDetail,即跳转到人物详情页。
再看一下js里的方法:
(1)在页面加载时获取数据
onLoad: function (options) {// 调用获取列表数据的方法this.getGoodsList(true)},
(2)获取数据方法:
//获取列表数据并赋值给goodsListgetGoodsList(reachBottom) {...wx.request({url: url_get,//你的后台url地址data: {order: this.data.order,key: this.data.key,page: this.data.queryObj.pagenum,intPageSize: this.data.queryObj.pagesize,},header: {'content-type': 'application/x-www-form-urlencoded'},method: "GET",success(result) {if (reachBottom) {that.setData({goodsList: [...that.data.goodsList, ...result.data.response.data],total: result.data.response.dataCount,})}},fail(error) {console.log('request fail', error);},// 无论获取数据是否成功都会执行该方法complete: () => {wx.hideLoading() // 关闭loadingthis.setData({isLoading: false})}})}
查询,排序也是在改变条件后执行getGoodsList方法。
(3)稍微需要说明的是页面上拉获取数据的方法:
/*** 页面上拉触底事件的处理函数*/onReachBottom: function () {// 判断是否还有下一页数据if (this.data.queryObj.pagenum * this.data.queryObj.pagesize >= this.data.total) {wx.showLoading({title: '数据加载完毕!',})wx.hideLoading() // 关闭loadingreturn}// 判断是否正在请求其它数据,如果是,则不发起额外的请求if (this.data.isLoading) returnlet pagenum = this.data.queryObj.pagenumthis.setData({queryObj: {pagenum: pagenum += 1// 让页码值自增 +1}})this.getGoodsList(true)// 重新获取列表数据},
(4)及点击跳转到武将武将详情页的方法
// 点击详情onGoodsDetail: function (e) {var name = e.currentTarget.dataset.namevar data = JSON.stringify(e.currentTarget.dataset)wx.navigateTo({url: '../details/details?name=' + name + '&data=' + data})},
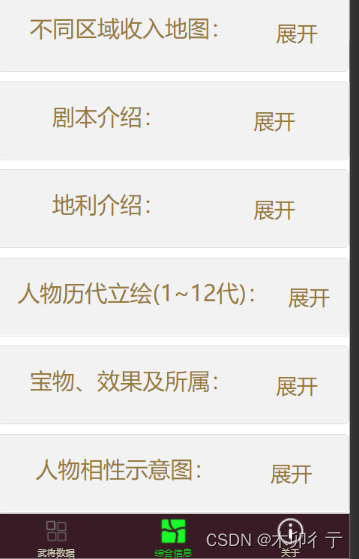
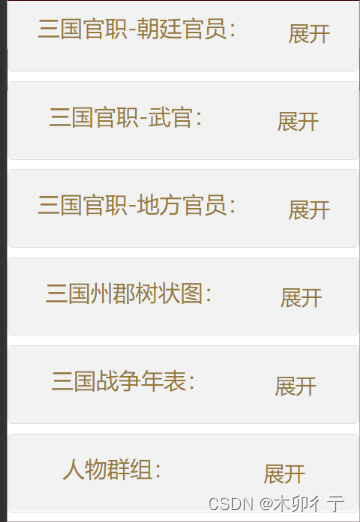
3,综合信息页
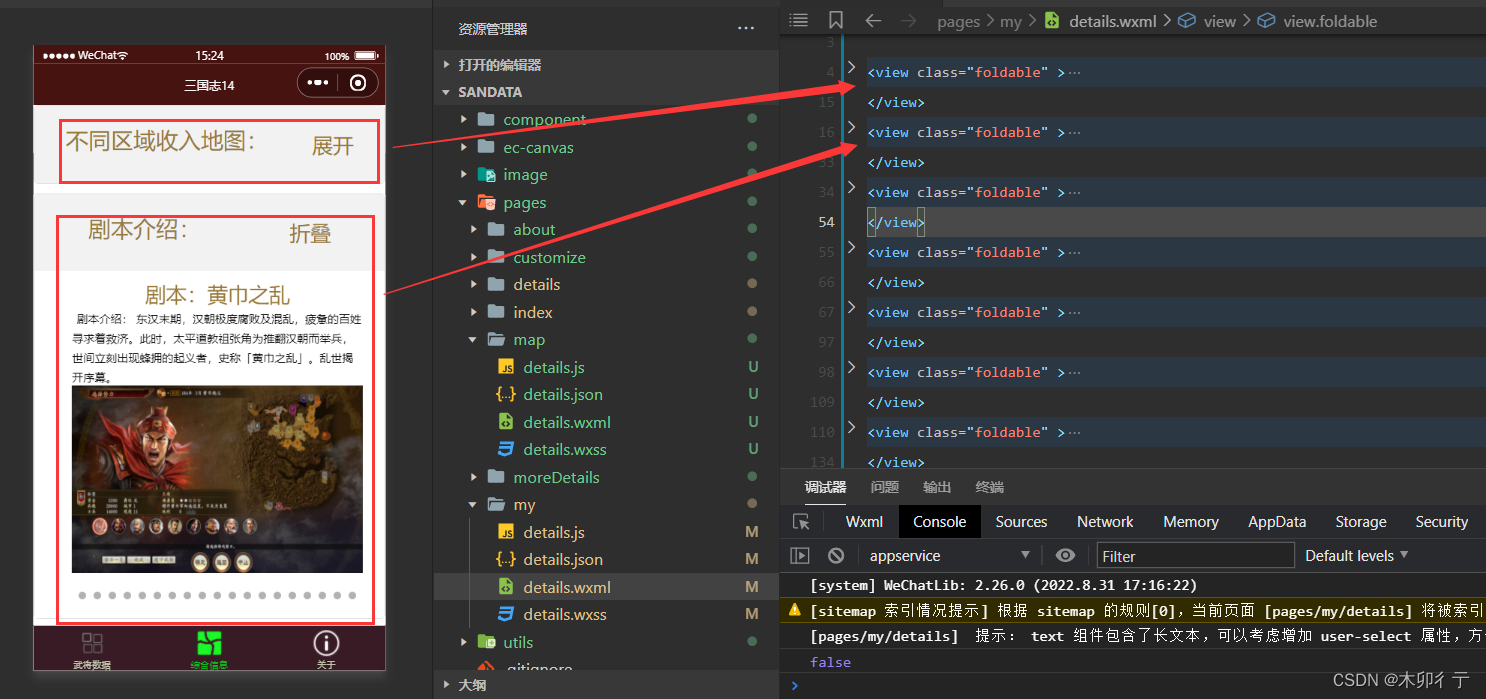
这个页面没有什么好说的,一个个内容摆下来就是了,很多不知道放在哪里的东西都先放在这里了。
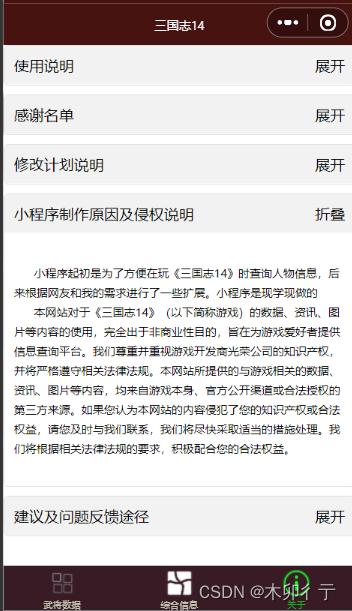
4,关于页
与综合信息页结构相同
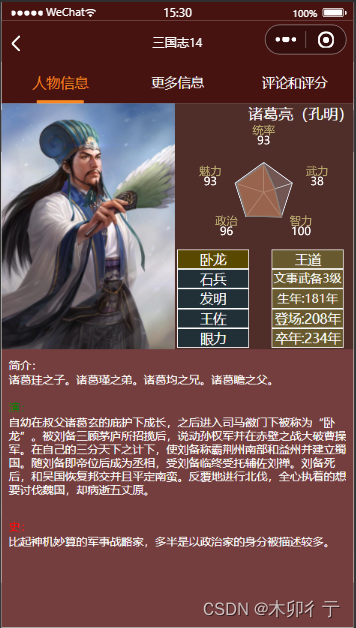
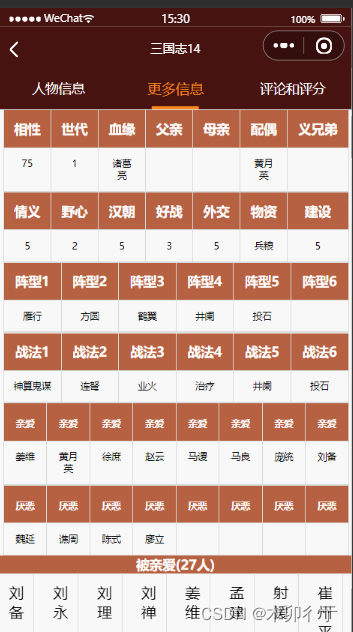
5,人物详情页
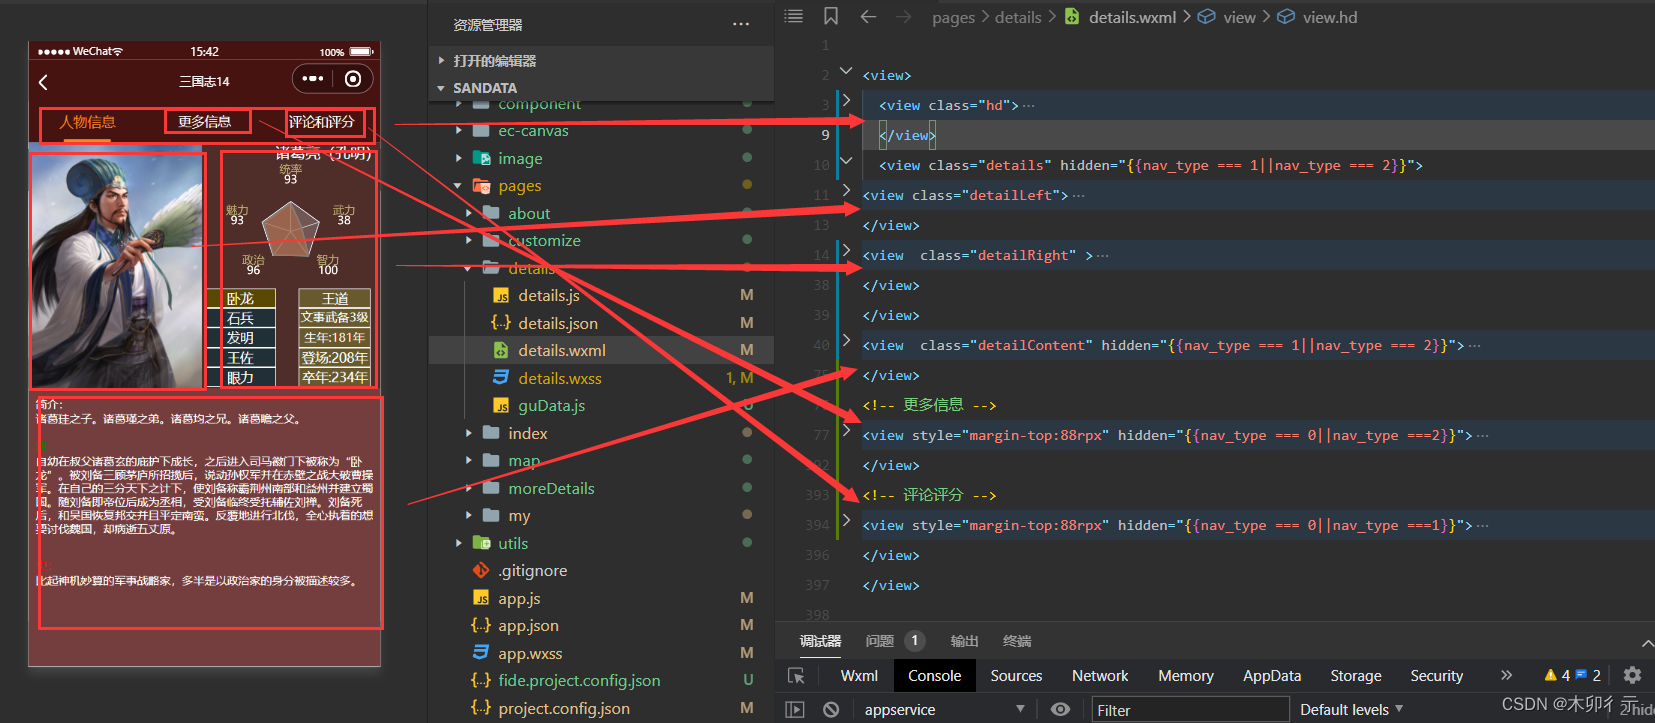
(1)基本详情
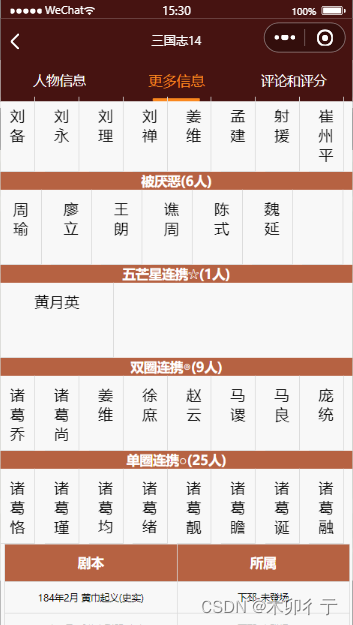
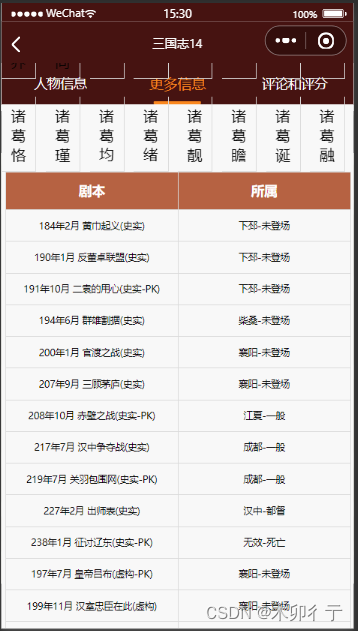
(2)更多详情
(3)评论评分
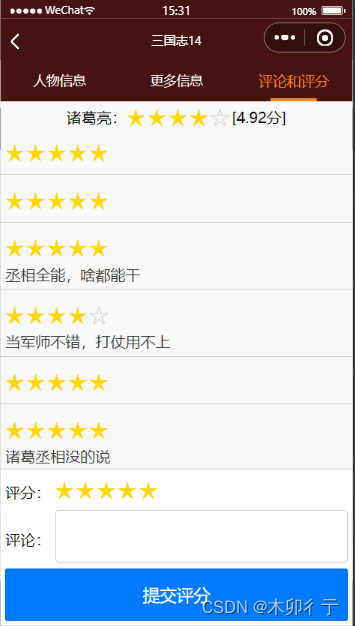
评论评分的页面代码:
wxml文件:
<!-- components/star-rating/star-rating.wxml -->
<view >
<!-- 人物总评分 --><view class="star-rating-center">{{initialName}}:<block wx:for="{{stars_total}}" wx:key="index"><text class="star {{item.selected ? 'selected' : ''}}" data-index="{{index}}">{{item.type}}</text></block>[{{goal}}分]
</view>
<!-- 评分&评论 --><view class="reviews-container"><block wx:for="{{ratingsAndComments}}" wx:key="index" ><view class="single-review"><!-- 这里添加显示单个评分的代码 --><view class="star-container"><block wx:for="{{item.stars}}" wx:key="index"><text class="star {{item.selected ? 'selected' : ''}}" data-index="{{index}}">{{item.type}}</text></block><!-- <view style=" justify-content: center;align-items: center;margin-left;20rpx;margin-top:15rpx">{{item.createTime}}</view> --></view><!-- 评论 --><text class="comment">{{item.comment}}</text></view></block></view>
</view>
<!-- 评分提交 -->
<view class="rating-editor"><!-- 评分 -->
<view class="flex-container"><text class="label">评分:</text><view class="star-container-editor"><block wx:for="{{stars}}" wx:key="index"><text class="star {{item.selected ? 'selected' : ''}}" bindtap="onStarClick" data-index="{{index}}">{{item.type}}</text></block></view>
</view><!-- 评论 -->
<view class="flex-container"><text class="label">评论:</text><view class="textarea-container"><textarea style="height:100rpx" type="text" name="biography" value="{{biography}}" placeholder="" maxlength="5000" bindinput="onTextareaInput"></textarea></view>
</view><button class="submit-button" bindtap="onSubmitRating">提交评分</button>
</view>
js文件:
// components/star-rating/star-rating.js
import { BASE_URL2 } from '../../component/config.js';
Component({properties: {// 初始星级initialRating: {type: Number,value: 0},initialId: {type: String,value: ''},lastClickedTime:0,initialName: {type: String,value: ''},},data: {stars: [],stars_total: [],goal: '暂无评',name: '',ratingsAndComments: [],biography: ''},observers: {'initialRating': function (newVal) {this.setStars(newVal);},},lifetimes: {attached() {// 在组件实例进入页面节点树时执行console.log('组件实例进入页面节点树');},ready() {var that = thislet id = this.data.initialId// 在组件在视图层布局完成后执行wx.request({url: BASE_URL2 + 'GetAllGoal',  //你的后台url地址data: {key: id},header: {'content-type': 'application/x-www-form-urlencoded'},method: "GET",success(result) {let dataList = result.data.response;let num = 0;if (dataList.length > 0) {for (let i = 0; i < dataList.length; i++) {let stars = [];num += dataList[i].goalfor (let j = 1; j <= 5; j++) {stars.push({type: j <= dataList[i].goal ? '★' : '☆',selected: j <= dataList[i].goal});}const currentRatingsAndComments = that.data.ratingsAndComments;that.data.ratingsAndComments.push({stars: stars,createTime: dataList[i].createTime,comment: dataList[i].comment})// 更新数组中特定元素的值currentRatingsAndComments[i].stars = stars;currentRatingsAndComments[i].comment = dataList[i].comment != null ? dataList[i].comment : ""// 使用 setData 更新数据并重新渲染that.setData({ratingsAndComments: currentRatingsAndComments});}num = num / dataList.length//人物评星let star = [];for (let j = 1; j <= 5; j++) {star.push({type: j <= num ? '★' : '☆',selected: j <= num});}//人物得分num = parseFloat(num.toFixed(2));console.log(num)that.setData({stars_total: star,goal: num})}},fail(error) {console.log('request fail', error);},})},},methods: {//评分显示setStars(rating) {let stars = [];for (let i = 1; i <= 5; i++) {stars.push({type: i <= rating ? '★' : '☆',selected: i <= rating});}this.setData({ stars });},//修改评分onStarClick(e) {const index = e.currentTarget.dataset.index;const rating = index + 1;this.setStars(rating);this.triggerEvent('ratingChanged', { rating });},//评论onTextareaInput: function (e) {this.setData({biography: e.detail.value});},//提交评分onSubmitRating() {var that = thislet goal = 0;for (let i = 0; i < 5; i++) {if (this.data.stars[i].selected) {goal += 1}}wx.showModal({title: '确认提交', // 确认框标题content: '您确定要提交吗?', // 确认框内容success(res) {const now = new Date().getTime();if (now - that.data.lastClickedTime < 5000) { // 5秒内不允许重复点击wx.showToast({title: '操作过于频繁',icon: 'none'});return;}if (res.confirm) { // 用户点击了确定按钮wx.request({url: BASE_URL2 + 'PostGoal',//你的后台url地址data: {Id: that.data.initialId,goal: goal,comment: that.data.biography,},header: {'content-type': 'application/x-www-form-urlencoded'},method: "GET",success(result) {that.setStars(5);that.setData({ratingsAndComments: [],biography: "",lastClickedTime:now});let id = that.data.initialId// 在组件在视图层布局完成后执行wx.request({url: BASE_URL2 + 'GetAllGoal',//你的后台url地址data: {key: id},header: {'content-type': 'application/x-www-form-urlencoded'},method: "GET",success(result) {let dataList = result.data.response;let num = 0;if (dataList.length > 0) {for (let i = 0; i < dataList.length; i++) {let stars = [];num += dataList[i].goalfor (let j = 1; j <= 5; j++) {stars.push({type: j <= dataList[i].goal ? '★' : '☆',selected: j <= dataList[i].goal});}const currentRatingsAndComments = that.data.ratingsAndComments;that.data.ratingsAndComments.push({stars: stars,createTime: dataList[i].createTime,comment: dataList[i].comment})// 更新数组中特定元素的值currentRatingsAndComments[i].stars = stars;currentRatingsAndComments[i].comment = dataList[i].comment != null ? dataList[i].comment : ""// 使用 setData 更新数据并重新渲染that.setData({ratingsAndComments: currentRatingsAndComments});}num = num / dataList.length//人物评星let star = [];for (let j = 1; j <= 5; j++) {star.push({type: j <= num ? '★' : '☆',selected: j <= num});}//人物得分num = parseFloat(num.toFixed(2));that.setData({stars_total: star,goal: num})}},fail(error) {console.log('request fail', error);},})}})} else if (res.cancel) {console.log('用户点击取消')}}})},}
})
css文件:
/* components/star-rating/star-rating.wxss */
.star-container {display: flex;
}.star {font-size: 32rpx;color: #ccc;margin-right: 8rpx;cursor: pointer;
}.star.selected {color: yellow;
}
/* 容纳所有评论的容器 */
.reviews-container {display: flex;flex-direction: column;
}/* 单个评论的容器 */
.single-review {display: flex;flex-direction: column;border-bottom: 1px solid #ccc; /* 添加边界分隔每个评论 */margin-bottom: 10rpx;padding: 10rpx;
}/* 星级评分的容器 */
.star-container {display: flex;margin-bottom: 5rpx;
}/* 星星的样式 */
.star {font-size: 50rpx;margin-right: 5rpx;
}.star.selected {color: gold;
}/* 评论文本的样式 */
.comment {font-size: 32rpx;color: #333;
}
/* 用于编辑和提交评分的固定容器 */
.rating-editor {position: fixed;bottom: 0;left: 0;right: 0;background-color: #fff;padding: 10rpx;border-top: 1px solid #ccc;z-index: 999;
}/* 评分编辑器的星级容器 */
.star-container-editor {display: flex;margin-bottom: 10rpx;align-items: center;justify-content: center;
}/* 提交按钮 */
.submit-button {padding: 10rpx;background-color: #007bff;color: white;border: none;border-radius: 4rpx;text-align: center;
}
.reviews-container {padding-bottom: 350rpx; /* 根据 .rating-editor 的高度来调整这个值 */
}
.star-rating-center {display: flex;justify-content: center;align-items: center;
}
.textarea-container {border: 1px solid #ccc; margin-bottom:15rpx;border-radius: 4px;padding: 5rpx;flex: 1; /* 增加 flex 属性 */
}/* 定义一个 flex 容器并垂直居中其内容 */
.flex-container {display: flex;align-items: center; /* 垂直居中 */
}/* 为“评分:”和“评论:”文本设置样式 */
.label {margin-right: 5px; /* 右侧外边距 */
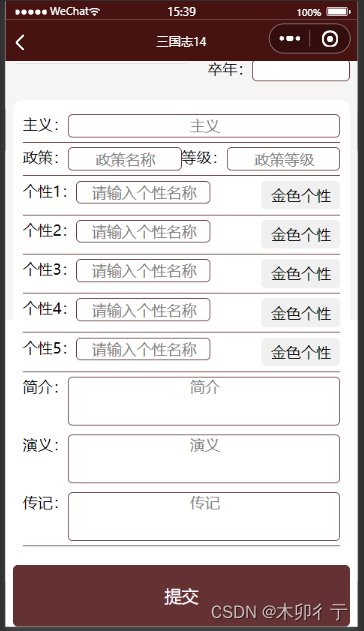
}6,自定义武将页

这篇关于三国志14信息查询小程序(历史武将信息一览)制作更新过程03-主要页面的设计的文章就介绍到这儿,希望我们推荐的文章对编程师们有所帮助!


