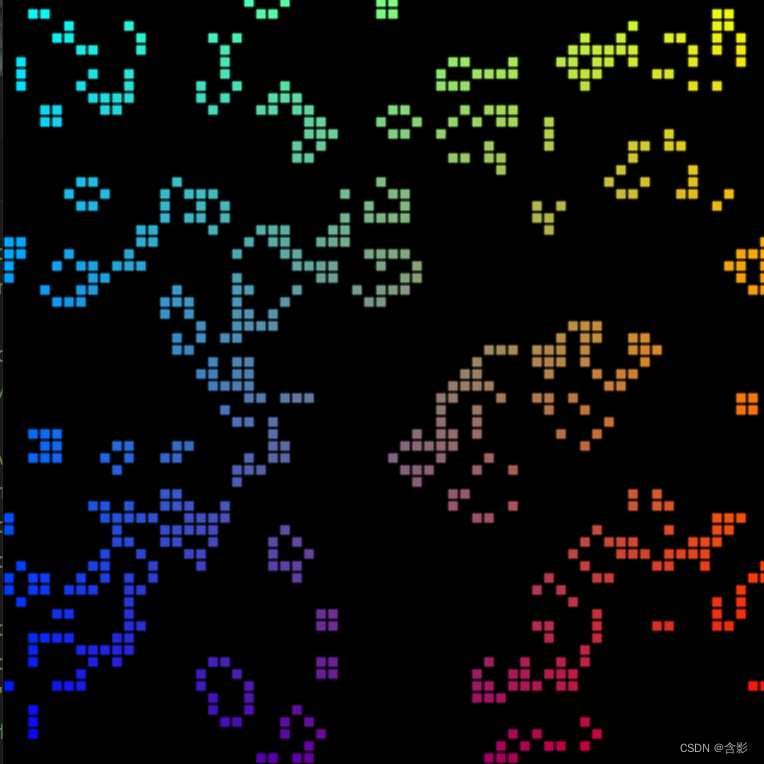
本文主要是介绍轻量封装WebGPU渲染系统示例<19>- 使用GPU Compute材质多pass实现元胞自动机之生命游戏(源码),希望对大家解决编程问题提供一定的参考价值,需要的开发者们随着小编来一起学习吧!
当前示例源码github地址:
https://github.com/vilyLei/voxwebgpu/blob/feature/rendering/src/voxgpu/sample/GameOfLifeMultiMaterialPass.ts
系统特性:
1. 用户态与系统态隔离。
细节请见:引擎系统设计思路 - 用户态与系统态隔离-CSDN博客
2. 高频调用与低频调用隔离。
3. 面向用户的易用性封装。
4. 渲染数据(内外部相关资源)和渲染机制分离。
5. 用户操作和渲染系统调度并行机制。
6. 数据/语义驱动。
7. 异步并行的场景/模型载入。
8. computing与rendering用法机制一致性。
1). 构造过程一致性。
2). 启用过程一致性。
3). 自动兼容到material多pass以及material graph机制中。
当前示例运行效果:

此示例基于此渲染系统实现,当前示例TypeScript源码如下:
const gridSize = 64;
const shdWorkGroupSize = 8;const compShdCode = `
@group(0) @binding(0) var<uniform> grid: vec2f;@group(0) @binding(1) var<storage> cellStateIn: array<u32>;
@group(0) @binding(2) var<storage, read_write> cellStateOut: array<u32>;fn cellIndex(cell: vec2u) -> u32 {return (cell.y % u32(grid.y)) * u32(grid.x) +(cell.x % u32(grid.x));
}fn cellActive(x: u32, y: u32) -> u32 {return cellStateIn[cellIndex(vec2(x, y))];
}@compute @workgroup_size(${shdWorkGroupSize}, ${shdWorkGroupSize})
fn compMain(@builtin(global_invocation_id) cell: vec3u) {// Determine how many active neighbors this cell has.let activeNeighbors = cellActive(cell.x+1, 		cell.y+1) +cellActive(cell.x+1, 	cell.y) +cellActive(cell.x+1, 	cell.y-1) +cellActive(cell.x, 		cell.y-1) +cellActive(cell.x-1, 	cell.y-1) +cellActive(cell.x-1, 	cell.y) +cellActive(cell.x-1, 	cell.y+1) +cellActive(cell.x, 		cell.y+1);let i = cellIndex(cell.xy);// Conway's game of life rules:switch activeNeighbors {case 2: { // Active cells with 2 neighbors stay active.cellStateOut[i] = cellStateIn[i];}case 3: { // Cells with 3 neighbors become or stay active.cellStateOut[i] = 1;}default: { // Cells with < 2 or > 3 neighbors become inactive.cellStateOut[i] = 0;}}
}`;
export class GameOfLifeMultiMaterialPass {private mRscene = new RendererScene();initialize(): void {console.log("GameOfLifeMultiMaterialPass::initialize() ...");this.initScene();}private createUniformValues(): { ufvs0: WGRUniformValue[]; ufvs1: WGRUniformValue[] }[] {const gridsSizesArray = new Float32Array([gridSize, gridSize]);const cellStateArray0 = new Uint32Array(gridSize * gridSize);for (let i = 0; i < cellStateArray0.length; i++) {cellStateArray0[i] = Math.random() > 0.6 ? 1 : 0;}const cellStateArray1 = new Uint32Array(gridSize * gridSize);for (let i = 0; i < cellStateArray1.length; i++) {cellStateArray1[i] = i % 2;}let shared = true;let sharedData0 = { data: cellStateArray0 };let sharedData1 = { data: cellStateArray1 };const v0 = new WGRUniformValue({ data: gridsSizesArray, stride: 2, shared });v0.toVisibleAll();// build rendering uniformsconst va1 = new WGRStorageValue({ sharedData: sharedData0, stride: 1, shared }).toVisibleVertComp();const vb1 = new WGRStorageValue({ sharedData: sharedData1, stride: 1, shared }).toVisibleVertComp();// build computing uniformsconst compva1 = new WGRStorageValue({ sharedData: sharedData0, stride: 1, shared }).toVisibleVertComp();const compva2 = new WGRStorageValue({ sharedData: sharedData1, stride: 1, shared }).toVisibleComp();compva2.toBufferForStorage();const compvb1 = new WGRStorageValue({ sharedData: sharedData1, stride: 1, shared }).toVisibleVertComp();const compvb2 = new WGRStorageValue({ sharedData: sharedData0, stride: 1, shared }).toVisibleComp();compvb2.toBufferForStorage();return [{ ufvs0: [v0, va1], ufvs1: [v0, vb1] },{ ufvs0: [v0, compva1, compva2], ufvs1: [v0, compvb1, compvb2] }];}private mEntity: FixScreenPlaneEntity;private mStep = 0;private createMaterial(shaderCodeSrc: WGRShderSrcType, uniformValues: WGRUniformValue[], shadinguuid: string, instanceCount: number): WGMaterial {return new WGMaterial({shadinguuid,shaderCodeSrc,instanceCount,uniformValues});}private createCompMaterial(shaderCodeSrc: WGRShderSrcType, uniformValues: WGRUniformValue[], shadinguuid: string, workgroupCount = 2): WGCompMaterial {return new WGCompMaterial({shadinguuid,shaderCodeSrc,uniformValues}).setWorkcounts(workgroupCount, workgroupCount);}private initScene(): void {const rc = this.mRscene;const ufvsObjs = this.createUniformValues();const instanceCount = gridSize * gridSize;const workgroupCount = Math.ceil(gridSize / shdWorkGroupSize);let shaderSrc = {shaderSrc: {code: shaderWGSL,uuid: "shader-gameOfLife",vertEntryPoint: "vertMain",fragEntryPoint: "fragMain"}} as WGRShderSrcType;let compShaderSrc = {compShaderSrc: {code: compShdCode,uuid: "shader-computing",compEntryPoint: "compMain"}};const materials: WGMaterial[] = [// build ping-pong rendering processthis.createMaterial(shaderSrc, ufvsObjs[0].ufvs0, "rshd0", instanceCount),this.createMaterial(shaderSrc, ufvsObjs[0].ufvs1, "rshd1", instanceCount),// build ping-pong computing processthis.createCompMaterial(compShaderSrc, ufvsObjs[1].ufvs1, "compshd0", workgroupCount),this.createCompMaterial(compShaderSrc, ufvsObjs[1].ufvs0, "compshd1", workgroupCount),];let entity = new FixScreenPlaneEntity({x: -0.8, y: -0.8, width: 1.6, height: 1.6,materials});rc.addEntity(entity);materials[0].visible = false;materials[2].visible = false;this.mEntity = entity;}private mFrameDelay = 3;run(): void {let rendering = this.mEntity.isRendering();if (rendering) {if (this.mFrameDelay > 0) {this.mFrameDelay--;return;}this.mFrameDelay = 3;const ms = this.mEntity.materials;for (let i = 0; i < ms.length; i++) {ms[i].visible = (this.mStep % 2 + i) % 2 == 0;}this.mStep++;}this.mRscene.run(rendering);}
}
这篇关于轻量封装WebGPU渲染系统示例<19>- 使用GPU Compute材质多pass实现元胞自动机之生命游戏(源码)的文章就介绍到这儿,希望我们推荐的文章对编程师们有所帮助!


