本文主要是介绍Cento7安装mysql5.5以及升级5.7,希望对大家解决编程问题提供一定的参考价值,需要的开发者们随着小编来一起学习吧!
1、配置好yum源

2、 yum install -y mariadb-server mariadb 下载mariadb

3、启动数据库,并且开机自启
[root@test ~]# systemctl start mariadb [root@test ~]# systemctl status mariadb
4、mysql_secure_installation #安全配置初始化
NOTE: RUNNING ALL PARTS OF THIS SCRIPT IS RECOMMENDED FOR ALL MariaDB SERVERS IN PRODUCTION USE! PLEASE READ EACH STEP CAREFULLY!
In order to log into MariaDB to secure it, we'll need the current password for the root user. If you've just installed MariaDB, and you haven't set the root password yet, the password will be blank, so you should just press enter here.
Enter current password for root (enter for none): #请输入root密码,因为我们之前没有密码,所以这里直接回车
Setting the root password ensures that nobody can log into the MariaDB root user without the proper authorisation.
Set root password? [Y/n] #是否要设置root密码 New password: #输入两次密码 Re-enter new password: Password updated successfully! Reloading privilege tables.. ... Success!
By default, a MariaDB installation has an anonymous user, allowing anyone to log into MariaDB without having to have a user account created for them. This is intended only for testing, and to make the installation go a bit smoother. You should remove them before moving into a production environment.
Remove anonymous users? [Y/n] #是否移除匿名用户,为了数据库安全起见,选择y
Normally, root should only be allowed to connect from 'localhost'. This ensures that someone cannot guess at the root password from the network.
Disallow root login remotely? [Y/n] #是否允许root远程登录,要选择y,不然不能通过第三方软件进行登录
By default, MariaDB comes with a database named 'test' that anyone can access. This is also intended only for testing, and should be removed before moving into a production environment.
Remove test database and access to it? [Y/n] #是否要移除测试库,为了安全起见,选择y
-
Dropping test database... ... Success!
-
Removing privileges on test database... ... Success!
Reloading the privilege tables will ensure that all changes made so far will take effect immediately.
Reload privilege tables now? [Y/n] #是否要更新权限表,一定要选择更新 y ... Success!
Cleaning up...
All done! If you've completed all of the above steps, your MariaDB installation should now be secure.
Thanks for using MariaDB!
5、登录:

6、create database jisuanji #创建一个数据库

7、create table test( name varchar(15) ,age int ,password varchar(15)); #创建表并且添加字段:
8、update mysql.user set Host='%' where Host='localhost'; //修改连接的权限,%代表所有ip
flush privileges; //更新
9、给表填充内容
insert into test values('xxxx',99,'123456');

10、 mysqldump -uroot -p -B jisuanji -T test >/opt/test.sql #把计算机这个库的内容导出来
cat /opt/test.sql
-- MySQL dump 10.14 Distrib 5.5.68-MariaDB, for Linux (x86_64)
-- Host: localhost Database: jisuanji
-- Server version 5.5.68-MariaDB
/*!40101 SET @OLD_CHARACTER_SET_CLIENT=@@CHARACTER_SET_CLIENT */; /*!40101 SET @OLD_CHARACTER_SET_RESULTS=@@CHARACTER_SET_RESULTS */; /*!40101 SET @OLD_COLLATION_CONNECTION=@@COLLATION_CONNECTION */; /*!40101 SET NAMES utf8 */; /*!40103 SET @OLD_TIME_ZONE=@@TIME_ZONE */; /*!40103 SET TIME_ZONE='+00:00' */; /*!40014 SET @OLD_UNIQUE_CHECKS=@@UNIQUE_CHECKS, UNIQUE_CHECKS=0 */; /*!40014 SET @OLD_FOREIGN_KEY_CHECKS=@@FOREIGN_KEY_CHECKS, FOREIGN_KEY_CHECKS=0 */; /*!40101 SET @OLD_SQL_MODE=@@SQL_MODE, SQL_MODE='NO_AUTO_VALUE_ON_ZERO' */; /*!40111 SET @OLD_SQL_NOTES=@@SQL_NOTES, SQL_NOTES=0 */;
--
-- Current Database: jisuanji
CREATE DATABASE /*!32312 IF NOT EXISTS*/ jisuanji /*!40100 DEFAULT CHARACTER SET latin1 */;
USE jisuanji;
--
-- Table structure for table test
DROP TABLE IF EXISTS test;/*!40101 SET @saved_cs_client = @@character_set_client */; /*!40101 SET character_set_client = utf8 */; CREATE TABLE test ( name varchar(15) DEFAULT NULL, age int(11) DEFAULT NULL, password varchar(15) DEFAULT NULL ) ENGINE=InnoDB DEFAULT CHARSET=latin1; /*!40101 SET character_set_client = @saved_cs_client */;
--
-- Dumping data for table test
LOCK TABLES test WRITE;/*!40000 ALTER TABLE test DISABLE KEYS */; INSERT INTO test VALUES ('zhangsijin',99,'123456'); /*!40000 ALTER TABLE test ENABLE KEYS */; UNLOCK TABLES; /*!40103 SET TIME_ZONE=@OLD_TIME_ZONE */;
/*!40101 SET SQL_MODE=@OLD_SQL_MODE */; /*!40014 SET FOREIGN_KEY_CHECKS=@OLD_FOREIGN_KEY_CHECKS */; /*!40014 SET UNIQUE_CHECKS=@OLD_UNIQUE_CHECKS */; /*!40101 SET CHARACTER_SET_CLIENT=@OLD_CHARACTER_SET_CLIENT */; /*!40101 SET CHARACTER_SET_RESULTS=@OLD_CHARACTER_SET_RESULTS */; /*!40101 SET COLLATION_CONNECTION=@OLD_COLLATION_CONNECTION */; /*!40111 SET SQL_NOTES=@OLD_SQL_NOTES */;
-- Dump completed on 2022-07-04 22:48:34
11、下载SQL5.7
删除mariadb
rpm -qa | grep mysql && rpm -qa|grep mariadb //查找
rpm -e --nodeps XXXXXX //删除,如rpm -e --nodeps mariadb-*
wget https://dev.mysql.com/get/mysql80-community-release-el7-3.noarch.rpm yum -y localinstall mysql80-community-release-el7-3.noarch.rpm vi /etc/yum.repos.d/mysql-community.repo
把5.7的enabled修改为1,把8.0的修改为0。如果想下载其他版本也可以把它置为1,其余为0
把gpgcheck修改为0,否则可能会出现密匙什么公匙未安装,不适合等问题


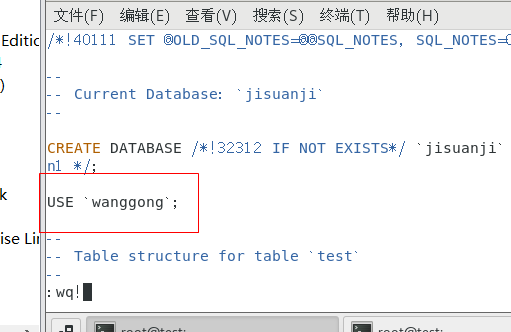
数据库导入的时候一定要与USE字段的数据库名一样,否则无法导入。
mysql -uroot -p123456 wanggong< /opt/test.sql
这篇关于Cento7安装mysql5.5以及升级5.7的文章就介绍到这儿,希望我们推荐的文章对编程师们有所帮助!


