本文主要是介绍办公桌下无挡板裙子_如何整理办公桌下的所有电缆,希望对大家解决编程问题提供一定的参考价值,需要的开发者们随着小编来一起学习吧!

办公桌下无挡板裙子
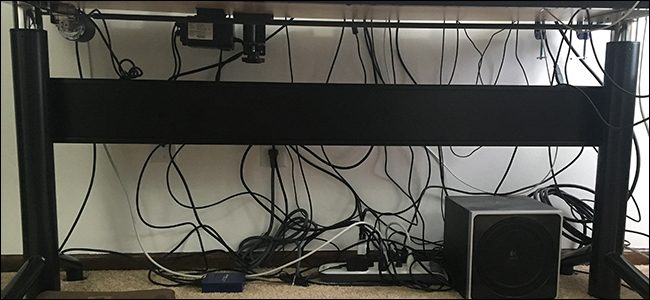
If you looked under your desk and finally got fed up with the mess of cables underneath, here’s how to organize that mess and get your cables under control.
如果您看了看桌子下面的东西,最后对下面的电缆混乱一无所知,请按照以下方法整理这些混乱的电缆,并控制电缆。
Most of the time, you probably don’t care how all of your cables look in the first place. After all, they’re hidden under your desk where no one will see them anyway. But the moment you need to unplug something, you finally realize just what kind of chaos lives down there. Thankfully, you can do something about it—all it takes is a little bit of time and attention.
大多数时候,您可能根本不在乎所有电缆的外观。 毕竟,它们隐藏在您的办公桌下,无论如何没人会看到它们。 但是,当您需要拔出电源插头时,您最终会意识到生活在那儿的混乱情况。 值得庆幸的是,您可以为此做些事情,这只需要一点时间和精力。
第一步:拔出所有插头 (Step One: Unplug Everything)
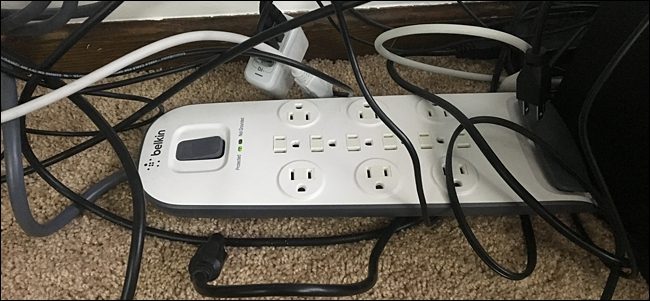
It’s best to start from scratch, which means unplugging everything from the power strip and separating all the cables.
最好从头开始,这意味着从配电盘中拔出所有插头并分开所有电缆。
You can stop right there if you want to, but you can also unplug everything from the other end and completely throw all the cables off to the side for a completely clean slate. This makes things a bit easier, but it’s not absolutely necessary.
如果需要,您可以就此停下来,但也可以从另一端拔下所有插头,并将所有电缆完全扔到一边,以确保完全干净。 这使事情变得容易一些,但这不是绝对必要的。
第二步:将配电盘安装到桌子或墙上 (Step Two: Mount the Power Strip to the Desk or Wall)
Perhaps the most important step is finding the best place to mount the power strip, because all of your cables will converge to that one point.
也许最重要的步骤是找到安装配电盘的最佳位置,因为所有电缆都将汇聚到这一点。
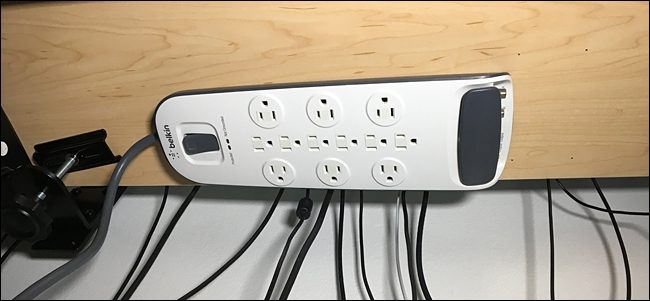
Since I have a standing desk that can move up and down, the best place to mount the power strip is on the underside of the desk, that way it’s mostly hidden and it moves with the desk whenever I switch it to standing or sitting mode. This also allows all of the cables to remain static whenever I adjust the desk’s height.
因为我有一个可以上下移动的站立式办公桌,所以安装电源板的最佳位置是在桌子的下侧,这样一来,它几乎是隐藏的,并且每当我切换到站立或坐着模式时,它就会随桌子一起移动。 每当我调节桌子的高度时,这也可使所有电缆保持静止。
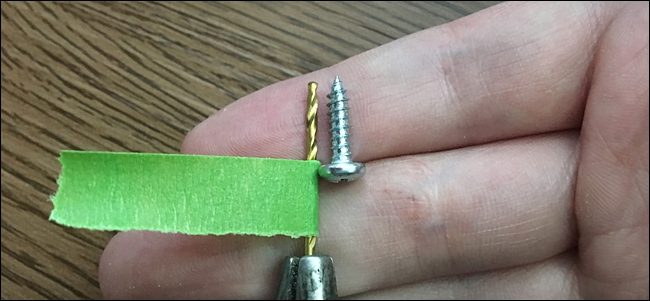
However, my desk surface is only about an inch thick. If yours is the same, you’ll want to make sure to use short screws that won’t pierce through, as well as use a piece of tape on the drill bit so that you don’t drill all the way through the desk surface when drilling the pilot holes.
但是,我的办公桌表面只有大约一英寸厚。 如果您的相同,则要确保使用不会刺穿的短螺丝,并在钻头上使用一块胶带,以免您无法一直钻穿办公桌表面钻导向Kong时 。
However, if you have a regular desk, you could just mount it to the wall. The goal here is to get the power strip off of the floor and into a more ideal location so that all of your cables aren’t dangling all the way down to the floor.
但是,如果您有普通的办公桌,则可以将其安装在墙上。 这里的目标是将配电盘从地板上移到更理想的位置,以使您的所有电缆都不会一直悬挂在地板上。
As for actually mounting the power strip, most (if not all) units have holes on the back where you can slide screw heads into them to secure them to a surface.
对于实际安装配电盘,大多数(如果不是全部)单元的背面都有Kong,您可以在其中滑动螺钉头以将其固定在表面上。

To mount it, you would simply measure the distance between the holes, copy that to the desk or wall surface, and drive in screws, leaving them sticking out just a bit so that you can slide the power strip on.
要安装它,您只需测量Kong之间的距离,将其复制到桌子或墙壁表面,然后拧入螺钉,使螺钉伸出一点,以便您可以将电源板滑到上面。
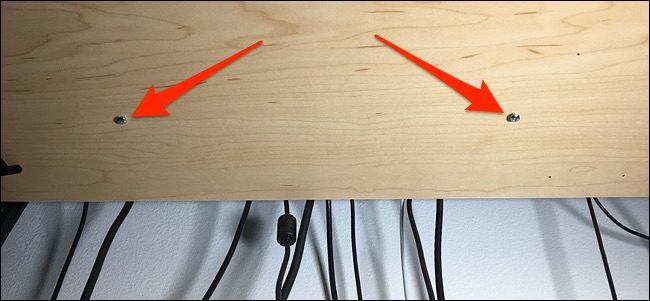
After that, line up the power strip’s holes with the screws and slide it in place. If it’s still pretty lose, tighten the screws down a bit until you finally get a snug fit from your power strip.
之后,用螺钉将配电盘的Kong对齐,并将其滑入到位。 如果仍然很损耗,请稍微拧紧螺丝,直到您终于从电源板上得到了合适的配合。
第三步:缠绕电缆并将其插入 (Step Three: Wrap Cables Up and Plug Them In)
Next, you’ll want to shorten all of the cables as much as you can so that they’re not dangling and causing an unsightly mess. There are a couple of ways to do this.
接下来,您将要尽可能地缩短所有电缆,以免它们悬空并造成难看的混乱。 有两种方法可以做到这一点。
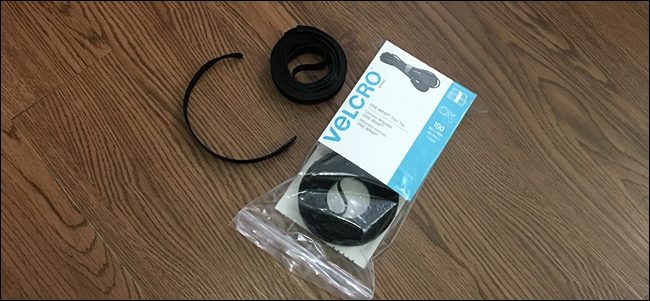
You can either use velcro straps (like the ones pictured above) or zip ties. Zip ties are easier and quicker to work with, but they’re also more permanent. You have to cut them off and use another one if you ever want to change things around in the future.
您可以使用维可牢尼龙搭扣带 (如上图所示)或扎带。 拉链式领带更容易,更快捷地使用,但它们也更持久。 如果您将来想要更改某些事情,则必须切断它们并使用另一个。
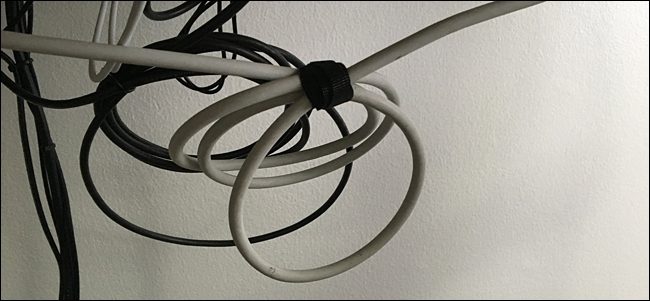
To shorten cables, you can be as neat with it as you want, either bunching up the excess and wrapping a tie around it, or carefully looping the cables and then securing them, as shown above.
为了缩短电缆,您可以根据需要随意整齐,要么将多余的部分捆扎成束并用扎带包住,要么小心地将电缆绕成一圈然后固定,如上所示。
Either way, the goal here is to consolidate all of the excess cable that’s hanging down and hide it the best you can.
无论哪种方式,这里的目标都是合并所有垂悬的多余电缆,并尽其所能将其隐藏起来。
第四步:标记每条电缆(可选) (Step Four: Label Each Cable (Optional))

If you find yourself constantly unplugging and plugging things into your power strip, it might be a good idea to label each cable so that you don’t have to trace them all back every time.
如果您发现自己不断地将电源插头拔出并插入电源板,则最好对每条电缆进行标记,以使您不必每次都追溯所有电缆。
To do this, I like to use masking tape and wrap it around the cable to create a tag of sorts. From there, take your favorite Sharpie and write on the tag what the cable goes to.
为此,我喜欢使用美纹纸胶带并将其缠绕在电缆上以创建各种标签。 从那里,带着您最喜欢的Sharpie并在标签上写下电缆的连接方向。
Again, this step is optional, but it could save you some headache in the future.
同样,此步骤是可选的,但将来可以避免您头疼。
使用适合您的系统 (Use a System That Works For You)

In the end, there’s not one single system that works for everyone, mostly because every desk setup is different and each person has their own definition of what’s organized.
最后,没有一个单一的系统可以为所有人服务,这主要是因为每个办公桌的设置都不同,而且每个人对组织的内容都有自己的定义。
For instance, you could just get one of these cable management under-desk trays and throw everything on that to hide your cable mess, and it would ultimately be quicker and easier. However, if you don’t like tangled cords period, then you might want to take some extra time to separate everything and create clear paths for each cable.
例如,您可以只获得其中一个电缆管理台下托盘,然后将所有内容扔在其上以隐藏电缆混乱,这最终会更快,更容易。 但是,如果您不喜欢电线缠结,则可能需要花费一些额外的时间来分离所有内容并为每条电缆创建清晰的路径。
Overall, don’t be shy to use this guide as a starting point and modify it to fit your own situation. What worked for me may not work for someone else, and vice versa.
总体而言,不要害羞地使用本指南作为起点,并根据自己的情况对其进行修改。 对我有效的方法可能对其他人无效,反之亦然。
翻译自: https://www.howtogeek.com/305821/how-to-organize-all-the-cables-under-your-desk/
办公桌下无挡板裙子
这篇关于办公桌下无挡板裙子_如何整理办公桌下的所有电缆的文章就介绍到这儿,希望我们推荐的文章对编程师们有所帮助!


