本文主要是介绍Android 自定义ViewGroup 实战篇 实现FlowLayout,希望对大家解决编程问题提供一定的参考价值,需要的开发者们随着小编来一起学习吧!
分享一下我老师大神的人工智能教程!零基础,通俗易懂!http://blog.csdn.net/jiangjunshow
也欢迎大家转载本篇文章。分享知识,造福人民,实现我们中华民族伟大复兴!
转载请标明出处:http://blog.csdn.net/lmj623565791/article/details/38352503 ,本文出自【张鸿洋的博客】
1、概述
上一篇已经基本给大家介绍了如何自定义ViewGroup,如果你还不了解,请查看:Android 手把手教您自定ViewGroup ,本篇将使用上篇介绍的方法,给大家带来一个实例:实现FlowLayout,何为FlowLayout,如果对Java的Swing比较熟悉的话一定不会陌生,就是控件根据ViewGroup的宽,自动的往右添加,如果当前行剩余空间不足,则自动添加到下一行。有点所有的控件都往左飘的感觉,第一行满了,往第二行飘~所以也叫流式布局。Android并没有提供流式布局,但是某些场合中,流式布局还是非常适合使用的,比如关键字标签,搜索热词列表等,比如下图:
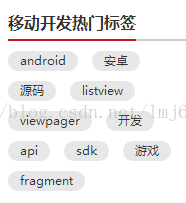

这些都特别适合使用FlowLayout,本篇博客会带领大家自己实现FlowLayout,然后使用我们自己定义的FlowLayout实现上面的标签效果。对了,github已经有了这样FlowLayout,但是我觉得丝毫不影响我们对其的学习,学会使用一个控件和学会写一个控件,我相信大家都明白,授人以鱼不如授人以渔。
2、简单的分析
1、对于FlowLayout,需要指定的LayoutParams,我们目前只需要能够识别margin即可,即使用MarginLayoutParams.
2、onMeasure中计算所有childView的宽和高,然后根据childView的宽和高,计算自己的宽和高。(当然,如果不是wrap_content,直接使用父ViewGroup传入的计算值即可)
3、onLayout中对所有的childView进行布局。
3、generateLayoutParams
因为我们只需要支持margin,所以直接使用系统的MarginLayoutParams
@Override public ViewGroup.LayoutParams generateLayoutParams(AttributeSet attrs) { return new MarginLayoutParams(getContext(), attrs); }4、onMeasure
/** * 负责设置子控件的测量模式和大小 根据所有子控件设置自己的宽和高 */ @Override protected void onMeasure(int widthMeasureSpec, int heightMeasureSpec) { super.onMeasure(widthMeasureSpec, heightMeasureSpec); // 获得它的父容器为它设置的测量模式和大小 int sizeWidth = MeasureSpec.getSize(widthMeasureSpec); int sizeHeight = MeasureSpec.getSize(heightMeasureSpec); int modeWidth = MeasureSpec.getMode(widthMeasureSpec); int modeHeight = MeasureSpec.getMode(heightMeasureSpec); Log.e(TAG, sizeWidth + "," + sizeHeight); // 如果是warp_content情况下,记录宽和高 int width = 0; int height = 0; /** * 记录每一行的宽度,width不断取最大宽度 */ int lineWidth = 0; /** * 每一行的高度,累加至height */ int lineHeight = 0; int cCount = getChildCount(); // 遍历每个子元素 for (int i = 0; i < cCount; i++) { View child = getChildAt(i); // 测量每一个child的宽和高 measureChild(child, widthMeasureSpec, heightMeasureSpec); // 得到child的lp MarginLayoutParams lp = (MarginLayoutParams) child .getLayoutParams(); // 当前子空间实际占据的宽度 int childWidth = child.getMeasuredWidth() + lp.leftMargin + lp.rightMargin; // 当前子空间实际占据的高度 int childHeight = child.getMeasuredHeight() + lp.topMargin + lp.bottomMargin; /** * 如果加入当前child,则超出最大宽度,则的到目前最大宽度给width,类加height 然后开启新行 */ if (lineWidth + childWidth > sizeWidth) { width = Math.max(lineWidth, childWidth);// 取最大的 lineWidth = childWidth; // 重新开启新行,开始记录 // 叠加当前高度, height += lineHeight; // 开启记录下一行的高度 lineHeight = childHeight; } else // 否则累加值lineWidth,lineHeight取最大高度 { lineWidth += childWidth; lineHeight = Math.max(lineHeight, childHeight); } // 如果是最后一个,则将当前记录的最大宽度和当前lineWidth做比较 if (i == cCount - 1) { width = Math.max(width, lineWidth); height += lineHeight; } } setMeasuredDimension((modeWidth == MeasureSpec.EXACTLY) ? sizeWidth : width, (modeHeight == MeasureSpec.EXACTLY) ? sizeHeight : height); }首先得到其父容器传入的测量模式和宽高的计算值,然后遍历所有的childView,使用measureChild方法对所有的childView进行测量。然后根据所有childView的测量得出的宽和高得到该ViewGroup如果设置为wrap_content时的宽和高。最后根据模式,如果是MeasureSpec.EXACTLY则直接使用父ViewGroup传入的宽和高,否则设置为自己计算的宽和高。
5、onLayout
onLayout中完成对所有childView的位置以及大小的指定
/** * 存储所有的View,按行记录 */ private List<List<View>> mAllViews = new ArrayList<List<View>>(); /** * 记录每一行的最大高度 */ private List<Integer> mLineHeight = new ArrayList<Integer>(); @Override protected void onLayout(boolean changed, int l, int t, int r, int b) { mAllViews.clear(); mLineHeight.clear(); int width = getWidth(); int lineWidth = 0; int lineHeight = 0; // 存储每一行所有的childView List<View> lineViews = new ArrayList<View>(); int cCount = getChildCount(); // 遍历所有的孩子 for (int i = 0; i < cCount; i++) { View child = getChildAt(i); MarginLayoutParams lp = (MarginLayoutParams) child .getLayoutParams(); int childWidth = child.getMeasuredWidth(); int childHeight = child.getMeasuredHeight(); // 如果已经需要换行 if (childWidth + lp.leftMargin + lp.rightMargin + lineWidth > width) { // 记录这一行所有的View以及最大高度 mLineHeight.add(lineHeight); // 将当前行的childView保存,然后开启新的ArrayList保存下一行的childView mAllViews.add(lineViews); lineWidth = 0;// 重置行宽 lineViews = new ArrayList<View>(); } /** * 如果不需要换行,则累加 */ lineWidth += childWidth + lp.leftMargin + lp.rightMargin; lineHeight = Math.max(lineHeight, childHeight + lp.topMargin + lp.bottomMargin); lineViews.add(child); } // 记录最后一行 mLineHeight.add(lineHeight); mAllViews.add(lineViews); int left = 0; int top = 0; // 得到总行数 int lineNums = mAllViews.size(); for (int i = 0; i < lineNums; i++) { // 每一行的所有的views lineViews = mAllViews.get(i); // 当前行的最大高度 lineHeight = mLineHeight.get(i); Log.e(TAG, "第" + i + "行 :" + lineViews.size() + " , " + lineViews); Log.e(TAG, "第" + i + "行, :" + lineHeight); // 遍历当前行所有的View for (int j = 0; j < lineViews.size(); j++) { View child = lineViews.get(j); if (child.getVisibility() == View.GONE) { continue; } MarginLayoutParams lp = (MarginLayoutParams) child .getLayoutParams(); //计算childView的left,top,right,bottom int lc = left + lp.leftMargin; int tc = top + lp.topMargin; int rc =lc + child.getMeasuredWidth(); int bc = tc + child.getMeasuredHeight(); Log.e(TAG, child + " , l = " + lc + " , t = " + t + " , r =" + rc + " , b = " + bc); child.layout(lc, tc, rc, bc); left += child.getMeasuredWidth() + lp.rightMargin + lp.leftMargin; } left = 0; top += lineHeight; } }allViews的每个Item为每行所有View的List集合。
mLineHeight记录的为每行的最大高度。
23-48行,遍历所有的childView,用于设置allViews的值,以及mLineHeight的值。
57行,根据allViews的长度,遍历所有的行数
67-91行,遍历每一行的中所有的childView,对childView的left , top , right , bottom 进行计算,和定位。
92-93行,重置left和top,准备计算下一行的childView的位置。
好了,到此完成了所有的childView的绘制区域的确定,到此,我们的FlowLayout的代码也结束了~~静下心来看一看是不是也不难~
6、测试
我准备使用TextView作为我们的标签,所以为其简单写了一点样式:
res/values/styles.xml中:
<style name="text_flag_01"> <item name="android:layout_width">wrap_content</item> <item name="android:layout_height">wrap_content</item> <item name="android:layout_margin">4dp</item> <item name="android:background">@drawable/flag_01</item> <item name="android:textColor">#ffffff</item> </style>flag_01.xml
<?xml version="1.0" encoding="utf-8"?><shape xmlns:android="http://schemas.android.com/apk/res/android" > <solid android:color="#7690A5" > </solid> <corners android:radius="5dp"/> <padding android:bottom="2dp" android:left="10dp" android:right="10dp" android:top="2dp" /></shape>布局文件:
<LinearLayout xmlns:android="http://schemas.android.com/apk/res/android" xmlns:tools="http://schemas.android.com/tools" android:layout_width="fill_parent" android:layout_height="fill_parent" android:background="#E1E6F6" android:orientation="vertical" > <com.zhy.zhy_flowlayout02.FlowLayout android:layout_width="fill_parent" android:layout_height="wrap_content" > <TextView style="@style/text_flag_01" android:text="Welcome" /> <TextView style="@style/text_flag_01" android:text="IT工程师" /> <TextView style="@style/text_flag_01" android:text="学习ing" /> <TextView style="@style/text_flag_01" android:text="恋爱ing" /> <TextView style="@style/text_flag_01" android:text="挣钱ing" /> <TextView style="@style/text_flag_01" android:text="努力ing" /> <TextView style="@style/text_flag_01" android:text="I thick i can" /> </com.zhy.zhy_flowlayout02.FlowLayout> </LinearLayout>效果图:
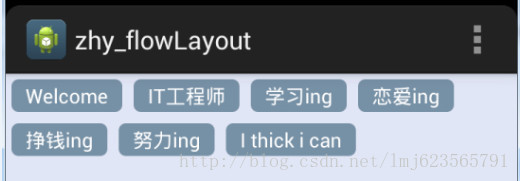
是不是还不错,下面继续简单自定义几个背景:
res/drawble/flog_02.xml
<?xml version="1.0" encoding="utf-8"?><shape xmlns:android="http://schemas.android.com/apk/res/android" > <solid android:color="#FFFFFF" > </solid> <corners android:radius="40dp"/> <stroke android:color="#C9C9C9" android:width="2dp"/> <padding android:bottom="2dp" android:left="10dp" android:right="10dp" android:top="2dp" /></shape>flag_03.xml
<?xml version="1.0" encoding="utf-8"?><shape xmlns:android="http://schemas.android.com/apk/res/android" > <solid android:color="#FFFFFF" > </solid> <corners android:radius="40dp"/> <padding android:bottom="2dp" android:left="10dp" android:right="10dp" android:top="2dp" /></shape>布局文件:
<LinearLayout xmlns:android="http://schemas.android.com/apk/res/android" xmlns:tools="http://schemas.android.com/tools" android:layout_width="fill_parent" android:layout_height="fill_parent" android:background="#E1E6F6" android:orientation="vertical" > <com.zhy.zhy_flowlayout02.FlowLayout android:layout_width="fill_parent" android:layout_height="wrap_content" > <TextView style="@style/text_flag_01" android:text="Welcome" /> <TextView style="@style/text_flag_01" android:text="IT工程师" /> <TextView style="@style/text_flag_01" android:text="学习ing" /> <TextView style="@style/text_flag_01" android:text="恋爱ing" /> <TextView style="@style/text_flag_01" android:text="挣钱ing" /> <TextView style="@style/text_flag_01" android:text="努力ing" /> <TextView style="@style/text_flag_01" android:text="I thick i can" /> </com.zhy.zhy_flowlayout02.FlowLayout> <com.zhy.zhy_flowlayout02.FlowLayout android:layout_width="fill_parent" android:layout_height="wrap_content" android:layout_marginTop="20dp" > <TextView style="@style/text_flag_01" android:background="@drawable/flag_02" android:text="Welcome" android:textColor="#888888" /> <TextView style="@style/text_flag_01" android:background="@drawable/flag_02" android:text="IT工程师" android:textColor="#888888" /> <TextView style="@style/text_flag_01" android:background="@drawable/flag_02" android:text="学习ing" android:textColor="#888888" /> <TextView style="@style/text_flag_01" android:background="@drawable/flag_02" android:text="恋爱ing" android:textColor="#888888" /> <TextView style="@style/text_flag_01" android:background="@drawable/flag_02" android:text="挣钱ing" android:textColor="#888888" /> <TextView style="@style/text_flag_01" android:background="@drawable/flag_02" android:text="努力ing" android:textColor="#888888" /> <TextView style="@style/text_flag_01" android:background="@drawable/flag_02" android:text="I thick i can" android:textColor="#888888" /> </com.zhy.zhy_flowlayout02.FlowLayout> <com.zhy.zhy_flowlayout02.FlowLayout android:layout_width="fill_parent" android:layout_height="wrap_content" android:layout_marginTop="20dp" > <TextView style="@style/text_flag_01" android:background="@drawable/flag_03" android:text="Welcome" android:textColor="#43BBE7" /> <TextView style="@style/text_flag_01" android:background="@drawable/flag_03" android:text="IT工程师" android:textColor="#43BBE7" /> <TextView style="@style/text_flag_01" android:background="@drawable/flag_03" android:text="学习ing" android:textColor="#43BBE7" /> <TextView style="@style/text_flag_01" android:background="@drawable/flag_03" android:text="恋爱ing" android:textColor="#43BBE7" /> <TextView style="@style/text_flag_01" android:background="@drawable/flag_03" android:text="挣钱ing" android:textColor="#43BBE7" /> <TextView style="@style/text_flag_01" android:background="@drawable/flag_03" android:text="努力ing" android:textColor="#43BBE7" /> <TextView style="@style/text_flag_01" android:background="@drawable/flag_03" android:text="I thick i can" android:textColor="#43BBE7" /> </com.zhy.zhy_flowlayout02.FlowLayout></LinearLayout>效果图:
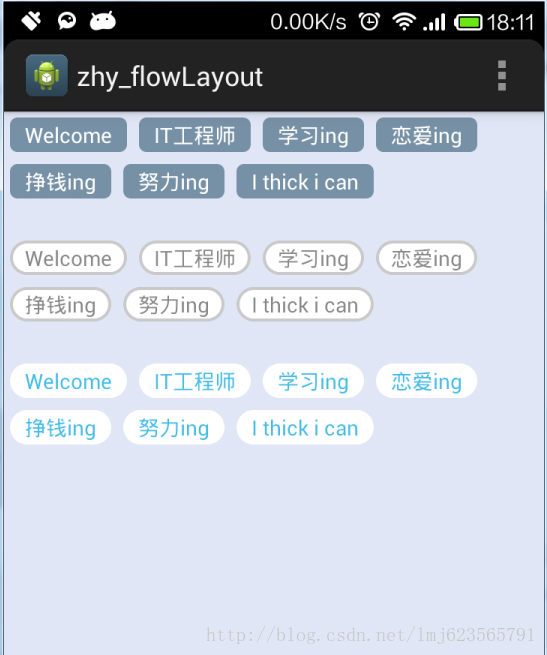
暂不赞~~上面都是match_parent~~下面固定下宽度,实现文章最开始的移动开发热门标签:
flag_04.xml
<?xml version="1.0" encoding="utf-8"?><shape xmlns:android="http://schemas.android.com/apk/res/android" > <solid android:color="#E7E7E7" > </solid> <corners android:radius="30dp" /> <padding android:bottom="2dp" android:left="10dp" android:right="10dp" android:top="2dp" /></shape>布局文件:
<com.zhy.zhy_flowlayout02.FlowLayout xmlns:android="http://schemas.android.com/apk/res/android" xmlns:tools="http://schemas.android.com/tools" android:layout_width="200dp" android:layout_height="wrap_content" android:background="#FFFFFF" > <TextView style="@style/text_flag_01" android:background="@drawable/flag_04" android:text="Welcome" android:textColor="#323232" /> <TextView style="@style/text_flag_01" android:background="@drawable/flag_04" android:text="IT工程师" android:textColor="#323232" /> <TextView style="@style/text_flag_01" android:background="@drawable/flag_04" android:text="学习ing" android:textColor="#323232" /> <TextView style="@style/text_flag_01" android:background="@drawable/flag_04" android:text="恋爱ing" android:textColor="#323232" /> <TextView style="@style/text_flag_01" android:background="@drawable/flag_04" android:text="挣钱ing" android:textColor="#323232" /> <TextView style="@style/text_flag_01" android:background="@drawable/flag_04" android:text="努力ing" android:textColor="#323232" /> <TextView style="@style/text_flag_01" android:background="@drawable/flag_04" android:text="I thick i can" android:textColor="#323232" /></com.zhy.zhy_flowlayout02.FlowLayout>效果图:

是不是完全相同~~o了~
如果你觉得本篇博客对你有用,那么就留个言或者顶一个~~
源码点击下载
该博客视频教程已经上线,如果你还不清楚,或者动态添加控件有问题,可以查看下;(PS:视频中也fix了padding的问题):
Android自定义控件 打造Android流式布局和热门标签
----------------------------------------------------------------------------------------------------------
博主部分视频已经上线,如果你不喜欢枯燥的文本,请猛戳(初录,期待您的支持):
1、高仿微信5.2.1主界面及消息提醒
2、高仿QQ5.0侧滑
3、Android智能机器人“小慕”的实现
给我老师的人工智能教程打call!http://blog.csdn.net/jiangjunshow

这篇关于Android 自定义ViewGroup 实战篇 实现FlowLayout的文章就介绍到这儿,希望我们推荐的文章对编程师们有所帮助!


