本文主要是介绍Python12 PyQt5实现鼠标移动绘制图(自定义画笔粗细和颜色,橡皮擦功能,保存文件),希望对大家解决编程问题提供一定的参考价值,需要的开发者们随着小编来一起学习吧!
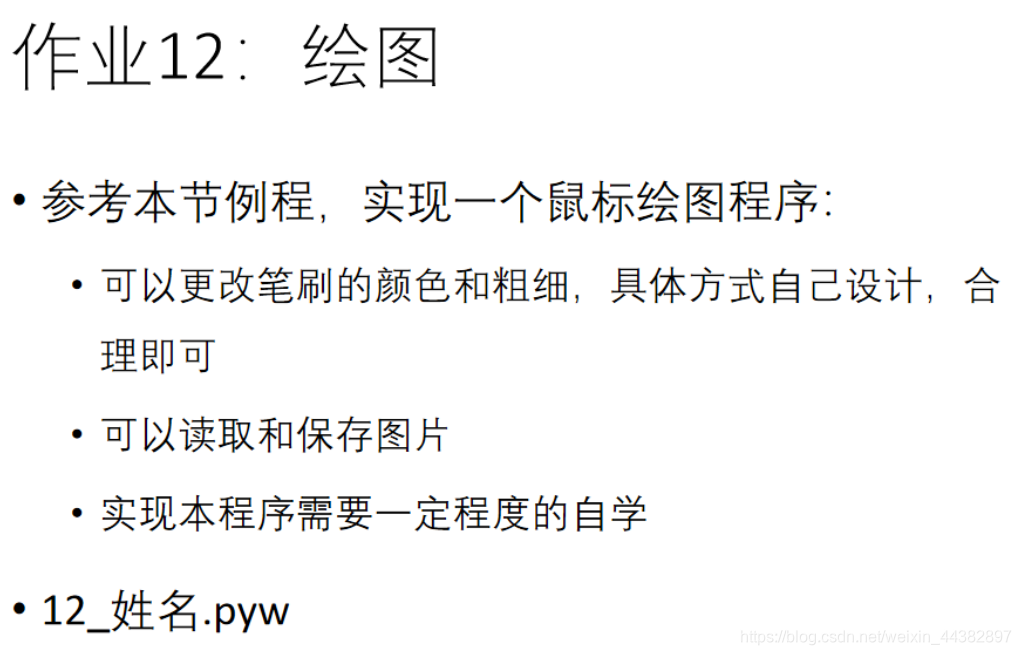
作业要求
下载后直接用python运行软件打开就行了(Tensorflow不支持)
附件链接://download.csdn.net/download/weixin_44382897/12036092
可供参考实现的学习文件
老师给出的例子是可以实现图片的转换,然后让我们按照例子来实现画板程序的制作。老师例子的主要代码如下:
附件链接:
链接:https://pan.baidu.com/s/19CRNcntfriRGlP62_0cZIQ
提取码:ikqp
import os
import platform
import sys
from PyQt5.QtCore import *
from PyQt5.QtGui import *
from PyQt5.QtWidgets import *class myMainWindow(QMainWindow):def __init__(self, parent=None):super().__init__(parent)self.image = QImage()self.dirty = Falseself.filename = Noneself.mirroredvertically = Falseself.mirroredhorizontally = False#图像self.imageLabel = QLabel()self.imageLabel.setAlignment(Qt.AlignCenter)self.imageLabel.setContextMenuPolicy(Qt.ActionsContextMenu)self.setCentralWidget(self.imageLabel)#右侧停靠窗口logDockWidget = QDockWidget("Log", self)logDockWidget.setAllowedAreas(Qt.LeftDockWidgetArea|Qt.RightDockWidgetArea)self.listWidget = QListWidget()logDockWidget.setWidget(self.listWidget)self.addDockWidget(Qt.RightDockWidgetArea, logDockWidget)#状态栏self.sizeLabel = QLabel()self.sizeLabel.setFrameStyle(QFrame.StyledPanel|QFrame.Sunken)status = self.statusBar()status.setSizeGripEnabled(False)status.addPermanentWidget(self.sizeLabel)status.showMessage("Ready", 5000)#各种动作self.fileOpenAction = QAction(QIcon("images/fileopen.png"), "&Open", self)self.fileOpenAction.setShortcut(QKeySequence.Open)self.fileOpenAction.setToolTip("Open an image.")self.fileOpenAction.setStatusTip("Open an image.")self.fileOpenAction.triggered.connect(self.fileOpen)self.fileSaveAction = QAction(QIcon("images/filesave.png"), "&Save", self)self.fileSaveAction.setShortcut(QKeySequence.Save)self.fileSaveAction.setToolTip("Save an image.")self.fileSaveAction.setStatusTip("Save an image.")self.fileSaveAction.triggered.connect(self.fileSaveAs)self.editUnMirrorAction = QAction(QIcon("images/editunmirror.png"), "&Unmirror", self)self.editUnMirrorAction.setShortcut("Ctrl+U")self.editUnMirrorAction.setToolTip("Unmirror the image")self.editUnMirrorAction.setStatusTip("Unmirror the image")self.editUnMirrorAction.setCheckable(True)self.editUnMirrorAction.setChecked(True)self.editUnMirrorAction.toggled.connect(self.editUnMirror)editMirrorHorizontalAction = QAction(QIcon("images/editmirrorhoriz.png"), "Mirror &Horizontally", self)editMirrorHorizontalAction.setShortcut("Ctrl+H")editMirrorHorizontalAction.setToolTip("Horizontally mirror the image")editMirrorHorizontalAction.setStatusTip("Horizontally mirror the image")editMirrorHorizontalAction.setCheckable(True)editMirrorHorizontalAction.toggled.connect(self.editMirrorHorizontal)editMirrorVerticalAction = QAction(QIcon("images/editmirrorvert.png"), "Mirror &Vertically", self)editMirrorVerticalAction.setShortcut("Ctrl+V")editMirrorVerticalAction.setToolTip("Vertically mirror the image")editMirrorVerticalAction.setStatusTip("Vertically mirror the image")editMirrorVerticalAction.setCheckable(True)editMirrorVerticalAction.toggled.connect(self.editMirrorVertical)mirrorGroup = QActionGroup(self)mirrorGroup.addAction(self.editUnMirrorAction)mirrorGroup.addAction(editMirrorHorizontalAction)mirrorGroup.addAction(editMirrorVerticalAction)#菜单栏self.fileMenu = self.menuBar().addMenu("&File")            self.fileMenu.addAction(self.fileOpenAction)self.fileMenu.addAction(self.fileSaveAction)editMenu = self.menuBar().addMenu("&Edit")editMenu.addAction(self.editUnMirrorAction)editMenu.addAction(editMirrorHorizontalAction)editMenu.addAction(editMirrorVerticalAction)#工具栏fileToolbar = self.addToolBar("File")fileToolbar.addAction(self.fileOpenAction)fileToolbar.addAction(self.fileSaveAction)editToolbar = self.addToolBar("Edit")editToolbar.addAction(self.editUnMirrorAction)editToolbar.addAction(editMirrorHorizontalAction)editToolbar.addAction(editMirrorVerticalAction)self.recentFiles = []self.setWindowTitle("Image Changer")      def okToContinue(self): #警告当前图像未保存if self.dirty:reply = QMessageBox.question(self,"Image Changer - Unsaved Changes","Save unsaved changes?",QMessageBox.Yes|QMessageBox.No|QMessageBox.Cancel)if reply == QMessageBox.Cancel:return Falseelif reply == QMessageBox.Yes:return self.fileSaveAs()return Truedef fileOpen(self):if not self.okToContinue():returndir = (os.path.dirname(self.filename)if self.filename is not None else ".")formats = (["*.{}".format(format.data().decode("ascii").lower())for format in QImageReader.supportedImageFormats()])fname = QFileDialog.getOpenFileName(self,"Image Changer - Choose Image", dir,"Image files ({})".format(" ".join(formats)))if fname:print(fname[0])self.loadFile(fname[0])self.updateFileMenu()def loadFile(self, fname=None):if fname is None:action = self.sender()if isinstance(action, QAction):fname = action.data()if not self.okToContinue():returnelse:returnif fname:self.filename = Noneimage = QImage(fname)if image.isNull():message = "Failed to read {}".format(fname)else:self.addRecentFile(fname)self.image = QImage()self.editUnMirrorAction.setChecked(True)self.image = imageself.filename = fnameself.showImage()self.dirty = Falseself.sizeLabel.setText("{} x {}".format(image.width(), image.height()))message = "Loaded {}".format(os.path.basename(fname))self.updateStatus(message)def updateStatus(self, message):self.statusBar().showMessage(message, 5000)self.listWidget.addItem(message)if self.filename:self.setWindowTitle("Image Changer - {}[*]".format(os.path.basename(self.filename)))elif not self.image.isNull():self.setWindowTitle("Image Changer - Unnamed[*]")else:self.setWindowTitle("Image Changer[*]")self.setWindowModified(self.dirty)def updateFileMenu(self):self.fileMenu.clear()self.fileMenu.addAction(self.fileOpenAction)self.fileMenu.addAction(self.fileSaveAction)current = self.filenamerecentFiles = []print(self.recentFiles)for fname in self.recentFiles:if fname != current and QFile.exists(fname):recentFiles.append(fname)if recentFiles:self.fileMenu.addSeparator()for i, fname in enumerate(recentFiles):action = QAction(QIcon("images/icon.png"),"&{} {}".format(i + 1, QFileInfo(fname).fileName()), self)action.setData(fname)action.triggered.connect(lambda: self.loadFile(fname))self.fileMenu.addAction(action)def addRecentFile(self, fname):if fname is None:returnif fname not in self.recentFiles:                 if len(self.recentFiles) < 10:self.recentFiles = [fname] + self.recentFileselse:self.recentFiles = [fname] + self.recentFiles[:8]print(len(self.recentFiles))def fileSaveAs(self):if self.image.isNull():return Truefname = self.filename if self.filename is not None else "."formats = (["*.{}".format(format.data().decode("ascii").lower())for format in QImageWriter.supportedImageFormats()])fname = QFileDialog.getSaveFileName(self,"Image Changer - Save Image", fname,"Image files ({})".format(" ".join(formats)))fname = fname[0]if fname:print(fname)if "." not in fname:fname += ".png"self.addRecentFile(fname)self.filename = fnameif self.image.save(self.filename, None):self.updateStatus("Saved as {}".format(self.filename))self.dirty = Falsereturn Trueelse:self.updateStatus("Failed to save {}".format(self.filename))return False                  return Falsedef editUnMirror(self, on):if self.image.isNull():returnif self.mirroredhorizontally:self.editMirrorHorizontal(False)if self.mirroredvertically:self.editMirrorVertical(False)def editMirrorHorizontal(self, on):if self.image.isNull():returnself.image = self.image.mirrored(True, False)self.showImage()self.mirroredhorizontally = not self.mirroredhorizontallyself.dirty = Trueself.updateStatus(("Mirrored Horizontally"if on else "Unmirrored Horizontally"))def editMirrorVertical(self, on):if self.image.isNull():returnself.image = self.image.mirrored(False, True)self.showImage()self.mirroredvertically = not self.mirroredverticallyself.dirty = Trueself.updateStatus(("Mirrored Vertically"if on else "Unmirrored Vertically"))def showImage(self, percent=None):if self.image.isNull():returnself.imageLabel.setPixmap(QPixmap.fromImage(self.image))app = QApplication(sys.argv)
form = myMainWindow()
form.setMinimumSize(1000, 1000)
form.show()
app.exec_()
代码的运行效果:

根据老师提出的问题,我的解决方案参考了网上其他博客的代码:
在这里插入代码片
# 参考本节例程,实现一个鼠标绘图程序:
# 可以更改笔刷的颜色和粗细,具体方式自己设计,合理即可
# 可以读取和保存图片import platform
import sys
from PyQt5.QtCore import *
from PyQt5.QtGui import *
from PyQt5.QtWidgets import *from PyQt5.QtWidgets import QApplication
import sys
from PyQt5.QtWidgets import QWidget
from PyQt5.Qt import QPixmap, QPainter, QPoint, QPaintEvent, QMouseEvent, QPen,\QColor, QSize
from PyQt5.QtCore import Qt
from PyQt5.Qt import QWidget, QColor, QPixmap, QIcon, QSize, QCheckBox
from PyQt5.QtWidgets import QHBoxLayout, QVBoxLayout, QPushButton, QSplitter,\QComboBox, QLabel, QSpinBox, QFileDialogdef main():app = QApplication(sys.argv)mainWidget = MainWidget() #新建一个主界面mainWidget.show()    #显示主界面exit(app.exec_()) #进入消息循环class PaintBoard(QWidget):def __init__(self, Parent=None):'''Constructor'''super().__init__(Parent)self.__InitData()  # 先初始化数据,再初始化界面self.__InitView()self.setWindowTitle("画笔")def __InitData(self):self.__size = QSize(480, 460)# 新建QPixmap作为画板,尺寸为__sizeself.__board = QPixmap(self.__size)self.__board.fill(Qt.white)  # 用白色填充画板self.__IsEmpty = True  # 默认为空画板self.EraserMode = False  # 默认为禁用橡皮擦模式self.__lastPos = QPoint(0, 0)  # 上一次鼠标位置self.__currentPos = QPoint(0, 0)  # 当前的鼠标位置self.__painter = QPainter()  # 新建绘图工具self.__thickness = 10  # 默认画笔粗细为10pxself.__penColor = QColor("black")  # 设置默认画笔颜色为黑色self.__colorList = QColor.colorNames()  # 获取颜色列表def __InitView(self):# 设置界面的尺寸为__sizeself.setFixedSize(self.__size)def Clear(self):# 清空画板self.__board.fill(Qt.white)self.update()self.__IsEmpty = Truedef ChangePenColor(self, color="black"):# 改变画笔颜色self.__penColor = QColor(color)def ChangePenThickness(self, thickness=10):# 改变画笔粗细self.__thickness = thicknessdef IsEmpty(self):# 返回画板是否为空return self.__IsEmptydef GetContentAsQImage(self):# 获取画板内容(返回QImage)image = self.__board.toImage()return imagedef paintEvent(self, paintEvent):# 绘图事件# 绘图时必须使用QPainter的实例,此处为__painter# 绘图在begin()函数与end()函数间进行# begin(param)的参数要指定绘图设备,即把图画在哪里# drawPixmap用于绘制QPixmap类型的对象self.__painter.begin(self)# 0,0为绘图的左上角起点的坐标,__board即要绘制的图self.__painter.drawPixmap(0, 0, self.__board)self.__painter.end()def mousePressEvent(self, mouseEvent):# 鼠标按下时,获取鼠标的当前位置保存为上一次位置self.__currentPos = mouseEvent.pos()self.__lastPos = self.__currentPosdef mouseMoveEvent(self, mouseEvent):# 鼠标移动时,更新当前位置,并在上一个位置和当前位置间画线self.__currentPos = mouseEvent.pos()self.__painter.begin(self.__board)if self.EraserMode == False:# 非橡皮擦模式self.__painter.setPen(QPen(self.__penColor, self.__thickness))  # 设置画笔颜色,粗细else:# 橡皮擦模式下画笔为纯白色,粗细为10self.__painter.setPen(QPen(Qt.white, 10))# 画线self.__painter.drawLine(self.__lastPos, self.__currentPos)self.__painter.end()self.__lastPos = self.__currentPosself.update()  # 更新显示def mouseReleaseEvent(self, mouseEvent):self.__IsEmpty = False  # 画板不再为空class MainWidget(QWidget):def __init__(self, Parent=None):'''Constructor'''super().__init__(Parent)self.__InitData()  # 先初始化数据,再初始化界面self.__InitView()def __InitData(self):'''初始化成员变量'''self.__paintBoard = PaintBoard(self)# 获取颜色列表(字符串类型)self.__colorList = QColor.colorNames()def __InitView(self):'''初始化界面'''self.setFixedSize(640, 480)self.setWindowTitle("Paint brush")# 新建一个水平布局作为本窗体的主布局main_layout = QHBoxLayout(self)# 设置主布局内边距以及控件间距为10pxmain_layout.setSpacing(10)# 在主界面左侧放置画板main_layout.addWidget(self.__paintBoard)# 新建垂直子布局用于放置按键sub_layout = QVBoxLayout()# 设置此子布局和内部控件的间距为10pxsub_layout.setContentsMargins(10, 10, 10, 10)self.__btn_Clear = QPushButton("清空画板")self.__btn_Clear.setParent(self)  # 设置父对象为本界面# 将按键按下信号与画板清空函数相关联self.__btn_Clear.clicked.connect(self.__paintBoard.Clear)sub_layout.addWidget(self.__btn_Clear)self.__btn_Quit = QPushButton("退出")self.__btn_Quit.setParent(self)  # 设置父对象为本界面self.__btn_Quit.clicked.connect(self.Quit)sub_layout.addWidget(self.__btn_Quit)self.__btn_Save = QPushButton("保存作品")self.__btn_Save.setParent(self)self.__btn_Save.clicked.connect(self.on_btn_Save_Clicked)sub_layout.addWidget(self.__btn_Save)self.__cbtn_Eraser = QCheckBox("  使用橡皮擦")self.__cbtn_Eraser.setParent(self)self.__cbtn_Eraser.clicked.connect(self.on_cbtn_Eraser_clicked)sub_layout.addWidget(self.__cbtn_Eraser)splitter = QSplitter(self)  # 占位符sub_layout.addWidget(splitter)self.__label_penThickness = QLabel(self)self.__label_penThickness.setText("画笔粗细")self.__label_penThickness.setFixedHeight(20)sub_layout.addWidget(self.__label_penThickness)self.__spinBox_penThickness = QSpinBox(self)self.__spinBox_penThickness.setMaximum(20)self.__spinBox_penThickness.setMinimum(2)self.__spinBox_penThickness.setValue(10)  # 默认粗细为10self.__spinBox_penThickness.setSingleStep(2)  # 最小变化值为2self.__spinBox_penThickness.valueChanged.connect(self.on_PenThicknessChange)  # 关联spinBox值变化信号和函数on_PenThicknessChangesub_layout.addWidget(self.__spinBox_penThickness)self.__label_penColor = QLabel(self)self.__label_penColor.setText("画笔颜色")self.__label_penColor.setFixedHeight(20)sub_layout.addWidget(self.__label_penColor)self.__comboBox_penColor = QComboBox(self)self.__fillColorList(self.__comboBox_penColor)  # 用各种颜色填充下拉列表self.__comboBox_penColor.currentIndexChanged.connect(self.on_PenColorChange)  # 关联下拉列表的当前索引变更信号与函数on_PenColorChangesub_layout.addWidget(self.__comboBox_penColor)main_layout.addLayout(sub_layout)  # 将子布局加入主布局def __fillColorList(self, comboBox):index_black = 0index = 0for color in self.__colorList:if color == "black":index_black = indexindex += 1pix = QPixmap(70, 20)pix.fill(QColor(color))comboBox.addItem(QIcon(pix), None)comboBox.setIconSize(QSize(70, 20))comboBox.setSizeAdjustPolicy(QComboBox.AdjustToContents)comboBox.setCurrentIndex(index_black)def on_PenColorChange(self):color_index = self.__comboBox_penColor.currentIndex()color_str = self.__colorList[color_index]self.__paintBoard.ChangePenColor(color_str)def on_PenThicknessChange(self):penThickness = self.__spinBox_penThickness.value()self.__paintBoard.ChangePenThickness(penThickness)def on_btn_Save_Clicked(self):savePath = QFileDialog.getSaveFileName(self, 'Save Your Paint', '.\\', '*.png')print(savePath)if savePath[0] == "":print("Save cancel")returnimage = self.__paintBoard.GetContentAsQImage()image.save(savePath[0])def on_cbtn_Eraser_clicked(self):if self.__cbtn_Eraser.isChecked():self.__paintBoard.EraserMode = True  # 进入橡皮擦模式else:self.__paintBoard.EraserMode = False  # 退出橡皮擦模式def Quit(self):self.close()if __name__ == '__main__':main()
代码实现效果:

这篇关于Python12 PyQt5实现鼠标移动绘制图(自定义画笔粗细和颜色,橡皮擦功能,保存文件)的文章就介绍到这儿,希望我们推荐的文章对编程师们有所帮助!


