本文主要是介绍【OpenPCDet】稀疏卷积SPConv-v1.2代码解读(2),希望对大家解决编程问题提供一定的参考价值,需要的开发者们随着小编来一起学习吧!
【SPConv模块Python部分代码】
在上一篇文章里分别展示了spconv源码中的Python和c++/cuda目录,这里再来看一下spconv编译安装完后的目录结构。
(openpcd) ➜  spconv tree -L 1
.
├── conv.py
├── functional.py
├── identity.py
├── __init__.py
├── libcuhash.so
├── libspconv.so
├── modules.py
├── ops.py
├── pool.py
├── __pycache__
├── spconv_utils.cpython-36m-x86_64-linux-gnu.so
├── spconv_utils.cpython-36m-x86_64-linux-gnu.so.1
├── spconv_utils.cpython-36m-x86_64-linux-gnu.so.1.1
├── tables.py
├── test_utils.py
└── utils
当我们 在Second代码中import spconv就是在导入安装好的spconv package。既然是package,那就必然有__init__.py 文件,别且在导入spconv时__init__.py中的可执行代码会被执行。pcdet/models/backbones_3d/spconv_backbone.py文件中,在导入完spconv后,可以直接使用spconv.SubMConv3d,spconv.SparseConv3d,spconv.SparseConvTensor,spconv.SparseSequential等子模块也是因为spconv的__init__.py代码中已经将它们一一导入了进来。
rom spconv import ops, utils
from spconv.conv import (SparseConv2d, SparseConv3d, SparseConvTranspose2d,SparseConvTranspose3d, SparseInverseConv2d,SparseInverseConv3d, SubMConv2d, SubMConv3d)
from spconv.identity import Identity
from spconv.modules import SparseModule, SparseSequential
from spconv.ops import ConvAlgo
from spconv.pool import SparseMaxPool2d, SparseMaxPool3d
from spconv.tables import AddTable, ConcatTable, JoinTable_LIB_FILE_NAME = "libspconv.so"
if platform.system() == "Windows":_LIB_FILE_NAME = "spconv.dll"
_LIB_PATH = str(Path(__file__).parent / _LIB_FILE_NAME)
torch.ops.load_library(_LIB_PATH)
而其中需要用c++/cuda实现的操作,在spconv编译安装的时候会编译成共享库,在这里通过torch.ops.load_library来加载。从而轻松实现python代码调用c++/cuda实现的操作。__init__.py中同时定义了稀疏卷积的核心数据结构SparseConvTensor。当然,虽然它名字叫
class SparseConvTensor(object):def __init__(self, features, indices, spatial_shape, batch_size,grid=None):"""Args:features: [num_points, num_features] feature tensorindices: [num_points, ndim + 1] indice tensor. batch index saved in indices[:, 0]spatial_shape: spatial shape of your sparse databatch_size: batch size of your sparse datagrid: pre-allocated grid tensor. should be used when the volume of spatial shapeis very large."""self.features = features #e.g. torch.size([16000,4])self.indices = indices #e.g. torch.size([16000,4])self.spatial_shape = spatial_shape #e.g. array([41,1600,1408])self.batch_size = batch_sizeself.indice_dict = {}self.grid = grid@classmethoddef from_dense(cls, x: torch.Tensor):"""create sparse tensor fron channel last dense tensor by to_sparsex must be NHWC tensor, channel last"""x = x.to_sparse(x.ndim - 1)spatial_shape = x.shape[1:-1]batch_size = x.shape[0]indices_th = x.indices().permute(1, 0).contiguous().int()features_th = x.values()return cls(features_th, indices_th, spatial_shape, batch_size)@propertydef spatial_size(self):return np.prod(self.spatial_shape)def find_indice_pair(self, key):if key is None:return Noneif key in self.indice_dict:return self.indice_dict[key]return Nonedef dense(self, channels_first=True):output_shape = [self.batch_size] + list(self.spatial_shape) + [self.features.shape[1]]res = scatter_nd(self.indices.to(self.features.device).long(), self.features,output_shape)if not channels_first:return resndim = len(self.spatial_shape)trans_params = list(range(0, ndim + 1))trans_params.insert(1, ndim + 1)return res.permute(*trans_params).contiguous()@propertydef sparity(self):return self.indices.shape[0] / np.prod(self.spatial_shape) / self.batch_size
SparseConvTensor,但是本身并不是一个torch tensor,只是对稀疏Tensor的一个抽象。其内部成员features,indices和spatial_shape分别表示有效的数据,有效数据的索引以及空间大小。以Second中VoxelBackBone8x第一层的输入为例。假定如下配置参数设定:
POINT_CLOUD_RANGE: [0, -40, -3, 70.4, 40, 1]
VOXEL_SIZE: [0.05, 0.05, 0.1]
MAX_POINTS_PER_VOXEL: 5
MAX_NUMBER_OF_VOXELS: {'train': 40000,'test': 40000
}
BATCH_SIZE_PER_GPU: 2
features和indices 的shape为[N,4]。其中N表示当前batch下2帧点云总的有效的(active)voxel数量。spatial_shape经过POINT_CLOUD_RANGE和VOXEL_SIZE计算后的值为[41,1600,1408]。3D稀疏标准稀疏卷积和3D子流行稀疏卷积分别有SparseConv3d和SparseMConv3d两个类定义。这两个类都派生自SparseConvolution。其输入参数subm用于区分是标准3d稀疏卷积还是3d子流行稀疏卷积。
class SparseConvolution(SparseModule):__constants__ = ['stride', 'padding', 'dilation', 'groups', 'bias', 'subm', 'inverse','transposed', 'output_padding', 'fused_bn']def __init__(self,ndim,in_channels,out_channels,kernel_size=3,stride=1,padding=0,dilation=1,groups=1,bias=True,subm=False,output_padding=0,transposed=False,inverse=False,indice_key=None,fused_bn=False,use_hash=False,algo=ops.ConvAlgo.Native):super(SparseConvolution, self).__init__()assert groups == 1if not isinstance(kernel_size, (list, tuple)):kernel_size = [kernel_size] * ndimif not isinstance(stride, (list, tuple)):stride = [stride] * ndimif not isinstance(padding, (list, tuple)):padding = [padding] * ndimif not isinstance(dilation, (list, tuple)):dilation = [dilation] * ndimif not isinstance(output_padding, (list, tuple)):output_padding = [output_padding] * ndimfor d, s in zip(dilation, stride):assert any([s == 1, d == 1]), "don't support this."self.ndim = ndim #2d,3d,4d,....self.in_channels = in_channelsself.out_channels = out_channelsself.kernel_size = kernel_sizeself.conv1x1 = np.prod(kernel_size) == 1self.stride = strideself.padding = paddingself.dilation = dilationself.transposed = transposedself.inverse = inverseself.output_padding = output_paddingself.groups = groupsself.subm = submself.indice_key = indice_keyself.fused_bn = fused_bnself.use_hash = use_hashself.algo = algo.value #what?self.weight = Parameter(torch.Tensor(*kernel_size, in_channels, out_channels))if bias:self.bias = Parameter(torch.Tensor(out_channels))else:self.register_parameter('bias', None)self.reset_parameters()def reset_parameters(self):n = self.in_channelsinit.kaiming_uniform_(self.weight, a=math.sqrt(5))if self.bias is not None:fan_in, _ = _calculate_fan_in_and_fan_out_hwio(self.weight)bound = 1 / math.sqrt(fan_in)init.uniform_(self.bias, -bound, bound)def forward(self, input):assert isinstance(input, spconv.SparseConvTensor)features = input.features #e.g. torch.Size[N,4]device = features.device#有效特征的coord idx,[batch_idx, z_idx, y_idx, x_idx]indices = input.indices #e.g. torch.Size[N,4] spatial_shape = input.spatial_shape #e.g. array([41,1600,1408])batch_size = input.batch_sizeif not self.subm:if self.transposed:#...else:#获取输出卷积的形状e.g. (41,1600,1408) -> (21,800,704)out_spatial_shape = ops.get_conv_output_size(spatial_shape, self.kernel_size, self.stride, self.padding,self.dilation)else:out_spatial_shape = spatial_shape#单独处理1x1卷积if self.conv1x1:features = torch.mm(input.features,self.weight.view(self.in_channels, self.out_channels))if self.bias is not None:features += self.biasout_tensor = spconv.SparseConvTensor(features, input.indices,input.spatial_shape,input.batch_size)out_tensor.indice_dict = input.indice_dictout_tensor.grid = input.gridreturn out_tensordatas = input.find_indice_pair(self.indice_key)if self.inverse:assert datas is not None and self.indice_key is not None_, outids, indice_pairs, indice_pair_num, out_spatial_shape = datasassert indice_pair_num.shape[0] == np.prod(self.kernel_size), "inverse conv must have same kernel size as its couple conv"else:if self.indice_key is not None and datas is not None:outids, _, indice_pairs, indice_pair_num, _ = dataselse:outids, indice_pairs, indice_pair_num = ops.get_indice_pairs(indices,batch_size,spatial_shape,self.kernel_size,self.stride,self.padding,self.dilation,self.output_padding,self.subm,self.transposed,grid=input.grid,use_hash=self.use_hash)input.indice_dict[self.indice_key] = (outids, indices,indice_pairs,indice_pair_num,spatial_shape)if self.fused_bn:assert self.bias is not Noneout_features = ops.fused_indice_conv(features, self.weight,self.bias,indice_pairs.to(device),indice_pair_num,outids.shape[0], self.inverse,self.subm)else:if self.subm:out_features = Fsp.indice_subm_conv(features, self.weight,indice_pairs.to(device),indice_pair_num,outids.shape[0], self.algo)else:if self.inverse:out_features = Fsp.indice_inverse_conv(features, self.weight, indice_pairs.to(device),indice_pair_num, outids.shape[0], self.algo)else:out_features = Fsp.indice_conv(features, self.weight,indice_pairs.to(device),indice_pair_num,outids.shape[0], self.algo)if self.bias is not None:out_features += self.biasout_tensor = spconv.SparseConvTensor(out_features, outids,out_spatial_shape, batch_size)out_tensor.indice_dict = input.indice_dictout_tensor.grid = input.gridreturn out_tensor为了抓住主要矛盾,示例代码中省略了部分次要代码,或者是在Second网络结构中不会调用的分支。SparseConvolution的forward函数输入必须是一个spconv中自定义的SparseConvTensor类型。在forward中完成稀疏卷积最重要的两个步骤:
Step1:构建Rulebook;
Step2:根据step1构建的Rulebook执行具体稀疏卷积计算;
其中Step1构建Rulebook由ops.get_indice_pairs接口完成,Step2依卷积类型由Fsp.indice_subm_conv或Fsp.indice_conv完成。为什么如此紧密衔接的接口一个在分开在了两个不同的模块ops和fsp中实现呢?其实如果你进一步分析后续代码会发现其实它们殊途同归,Fsp.indice_subm_conv和Fsp.indice_conv经function.py中的SubMConvFunction和SparseConvFunction对象辗转还是会继续调用ops模块中的indice_conv等函数。最终,他们都会以torch.ops.spconv.xx的形式调用c++扩展共享库中的api来完成任务。要数区别,其实这里体现了Pytorch中添加c++扩展的其中两种形式。对于Step1构建Rulebook,它根据输入索引,卷积核大小等参数信息构建Rulebook(规则表),这里直接使用Python调用c++接口。而像Step2是使用torch.autograd.Function进行了一层封装。Function 类本身表示 PyTorch 的一个可导函数,只要为其定义了前向推理和反向传播的实现,我们就可以把它当成一个普通 PyTorch 函数来使用。PyTorch 会自动调度该函数,合适地执行前向和反向计算。对模型部署来说,Function 类有一个很好的性质:如果它定义了 symbolic 静态方法,该 Function 在执行 torch.onnx.export() 时就可以根据 symbolic 中定义的规则转换成 ONNX 算子。这个 symbolic 就是前面提到的符号函数,只是它的名称必须是 symbolic 而已。
import torch
from torch import nn
from torch.autograd import Function
import spconv.ops as ops
class SparseConvFunction(Function):@staticmethoddef forward(ctx, features, filters, indice_pairs, indice_pair_num,num_activate_out, algo):ctx.save_for_backward(indice_pairs, indice_pair_num, features, filters)ctx.algo = algoreturn ops.indice_conv(features,filters,indice_pairs,indice_pair_num,num_activate_out,False,algo=algo)@staticmethoddef backward(ctx, grad_output):indice_pairs, indice_pair_num, features, filters = ctx.saved_tensorsinput_bp, filters_bp = ops.indice_conv_backward(features,filters,grad_output,indice_pairs,indice_pair_num,False,algo=ctx.algo)return input_bp, filters_bp, None, None, None, Noneclass SubMConvFunction(Function):@staticmethoddef forward(ctx, features, filters, indice_pairs, indice_pair_num,num_activate_out, algo):ctx.save_for_backward(indice_pairs, indice_pair_num, features, filters)ctx.algo = algoreturn ops.indice_conv(features,filters,indice_pairs,indice_pair_num,num_activate_out,False,True,algo=algo)@staticmethoddef backward(ctx, grad_output):indice_pairs, indice_pair_num, features, filters = ctx.saved_tensorsinput_bp, filters_bp = ops.indice_conv_backward(features,filters,grad_output,indice_pairs,indice_pair_num,False,True,algo=ctx.algo)return input_bp, filters_bp, None, None, None, None
对于3D稀疏卷积运算这样一个全新的扩展算子,在这里我们不仅要自己实现forward函数,还要实现backward函数。因为在c++端Pytorch目前不支持根据forward函数自动推导出backward函数,所以要必要对新扩展算子的反向传播原理十分清楚。
【附录:Second可以轻易导出onnx吗?】
Pytorch模型转ONNX模型原理
在把 PyTorch 模型转换成 ONNX 模型时,我们往往只需要轻松地调用一句 torch.onnx.export 就行了。torch.onnx.export 中需要的模型实际上是一个 torch.jit.ScriptModule。而要把普通 PyTorch 模型转一个这样的 TorchScript 模型,有跟踪(trace)和记录(script)两种导出计算图的方法。如果给 torch.onnx.export 传入了一个普通 PyTorch 模型(torch.nn.Module),那么这个模型会默认使用trace(跟踪)的方法导出。这一过程如下图所示:

trace(跟踪法)通过运行一遍模型(这就时为什么我们在export的时候要提供输入),在推理的过程中记录所有经过的计算,将这些记录整合成计算图,导出模型的静态图。也因为如此,跟踪法无法识别出模型中的控制流(如循环),记录法则能通过解析模型来正确记录所有的控制流。
Second转ONNX的问题?
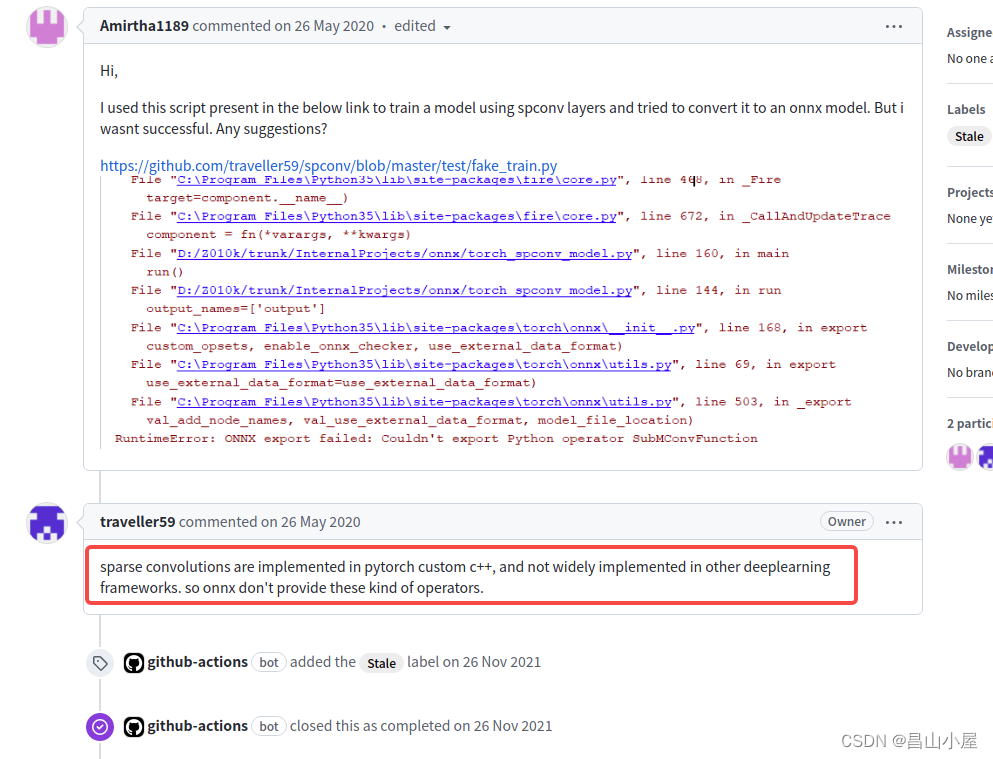
问题1: ops.get_indice_pairs无法识别!
RuntimeError: ONNX export failed on an operator with
unrecognized namespace spconv::get_indice_pairs.
If you are trying to export a custom operator,
make sure you registered it with the right domain and version.
问题2:SparseConFunction中无相关符号函数定义!
【参考文献】
TorchScript 解读(二):Torch jit tracer 实现解析 - 知乎
模型部署入门教程(四):在 PyTorch 中支持更多 ONNX 算子 - 知乎
这可能是关于Pytorch底层算子扩展最详细的总结了! - 知乎
PyTorch扩展自定义PyThon/C++(CUDA)算子的若干方法总结 - 知乎
PyTorch中构建和调用C++/CUDA扩展_NaiveYoungPeo的博客-CSDN博客
这篇关于【OpenPCDet】稀疏卷积SPConv-v1.2代码解读(2)的文章就介绍到这儿,希望我们推荐的文章对编程师们有所帮助!


