本文主要是介绍DPDK实战之l3fwd-vf(虚拟化环境),希望对大家解决编程问题提供一定的参考价值,需要的开发者们随着小编来一起学习吧!
一. 介绍
在虚拟化环境下的L3层转发应用是用DPDK处理数据包的一个简单例子。这个L3层转发应用充分发挥SR-IOV的特征。
这个应用演示如何使用hash和LPM DPDK库去实现数据包转发。这个转发策略是基于输入包的信息。
查询方法既有基于hash的也有基于LPM的,你如何选择在编译的时候决定。当所选择的查找方法是基于hash时,使用hash对象来模拟流分类阶段。 哈希对象与流表相关使用,以便在运行时将每个输入数据包映射到其流。
哈希查询键由DiffServ 5元组表示,它由从输入数据包读取的以下字段组成:源IP地址,目标IP地址,协议,源端口和目标端口。 从识别的流表条目读取输入数据包的输出接口的ID。应用程序使用的一组流在初始化时静态配置并加载到散列中。 当选择的查找方法是基于LPM时,使用LPM对象来模拟IPv4分组的转发阶段。 LPM对象用作路由表,用于在运行时识别每个输入数据包的下一跳。
LPM查找键由从输入数据包读取的目标IP地址字段表示。 输入数据包的输出接口的ID是LPM查询返回的下一跳。应用程序使用的一组LPM规则在初始化时被静态配置并加载到LPM对象中。
二. 运行环境
运行参数样板:
./build/l3fwd-vf [EAL options] -- -p PORTMASK --config(port,queue,lcore)[,(port,queue,lcore)]参数解释:
[EAL options] EAL选项已经在其他例子中已有说明。
-p [端口掩码 -- 网卡掩码,在部署DPDK运行环境时绑定的网卡]: 十六进制表示
--config: 哪个网口哪个队列绑定到哪个逻辑核
–no-numa: 是否关闭对numa结构的识别
运行实例:
./l3fwd-vf -l 1,2 -n 4 -- -p 0x3 --config="(0,0,1),(1,0,2)"-这个实例占用的逻辑核为1,2
-启动1、2号网卡
-端口映射关系为:
0号网卡0号队列映射到1号逻辑核上;
1号网卡0号队列映射到2号逻辑核上;
运行效果如下(添加了一些提示信息):
LPM作为路由查询表:
<span style="font-size:18px;">Initializing port 0 ... Creating queues: nb_rxq=1 nb_txq=1...  Address:A0:36:9F:03:A8:CA, Allocated mbuf pool on socket 0
LPM: Adding route 0x01010100 / 24 (0)
LPM: Adding route 0x02010100 / 24 (1)
LPM: Adding route 0x03010100 / 24 (2)
LPM: Adding route 0x04010100 / 24 (3)
LPM: Adding route 0x05010100 / 24 (4)
LPM: Adding route 0x06010100 / 24 (5)
LPM: Adding route 0x07010100 / 24 (6)
LPM: Adding route 0x08010100 / 24 (7)
txq=0,0,0 PMD: eth_igb_tx_queue_setup(): sw_ring=0x7ffc3814d2c0 hw_ring=0x7ffc3814f300 dma_addr=0x6734f300Initializing port 1 ... Creating queues: nb_rxq=1 nb_txq=1...  Address:A0:36:9F:03:A8:CB, txq=1,0,0 PMD: eth_igb_tx_queue_setup(): sw_ring=0x
7ffc3813b040 hw_ring=0x7ffc3813d080 dma_addr=0x6733d080Initializing rx queues on lcore 1 ... rxq=0,0,0 PMD: eth_igb_rx_queue_setup(): sw_ring=0x7ffc3812aac0 hw_ring=0x7ffc3812af00 dma_addr=0x6732a
f00
Initializing rx queues on lcore 2 ... rxq=1,0,0 PMD: eth_igb_rx_queue_setup(): sw_ring=0x7ffc3811a540 hw_ring=0x7ffc3811a980 dma_addr=0x6731a
980
PMD: eth_igb_start(): <<
done: Port 0
PMD: eth_igb_start(): <<
done: Port 1
L3FWD: entering main loop on lcore 2
L3FWD:  -- lcoreid=2 portid=1 rxqueueid=0
L3FWD: entering main loop on lcore 1
L3FWD:  -- lcoreid=1 portid=0 rxqueueid=0</span>
Hash作为路由查询表:
<span style="font-size:18px;">Initializing port 0 ... Creating queues: nb_rxq=1 nb_txq=1...  Address:A0:36:9F:03:A8:CA, Allocated mbuf pool on socket 0
Hash: Adding key
IP dst = 640a0001, IP src = c80a0001, port dst = 101, port src = 11, proto = 6
Hash: Adding key
IP dst = 64140002, IP src = c8140002, port dst = 102, port src = 12, proto = 6
Hash: Adding key
IP dst = 641e0003, IP src = c81e0003, port dst = 103, port src = 13, proto = 6
Hash: Adding key
IP dst = 64280004, IP src = c8280004, port dst = 104, port src = 14, proto = 6
txq=0,0,0 PMD: eth_igb_tx_queue_setup(): sw_ring=0x7fd48af7fcc0 hw_ring=0x7fd48af81d00 dma_addr=0x67381d00Initializing port 1 ... Creating queues: nb_rxq=1 nb_txq=1...  Address:A0:36:9F:03:A8:CB, txq=1,0,0 PMD: eth_igb_tx_queue_setup(): sw_ring=0x
7fd48af6da40 hw_ring=0x7fd48af6fa80 dma_addr=0x6736fa80Initializing rx queues on lcore 1 ... rxq=0,0,0 PMD: eth_igb_rx_queue_setup(): sw_ring=0x7fd48af5d4c0 hw_ring=0x7fd48af5d900 dma_addr=0x6735d
900
Initializing rx queues on lcore 2 ... rxq=1,0,0 PMD: eth_igb_rx_queue_setup(): sw_ring=0x7fd48af4cf40 hw_ring=0x7fd48af4d380 dma_addr=0x6734d
380
PMD: eth_igb_start(): <<
done: Port 0
PMD: eth_igb_start(): <<
done: Port 1
L3FWD: entering main loop on lcore 2
L3FWD:  -- lcoreid=2 portid=1 rxqueueid=0
L3FWD: entering main loop on lcore 1
L3FWD: -- lcoreid=1 portid=0 rxqueueid=0</span>模拟发包去查询(添加一些实际输出):
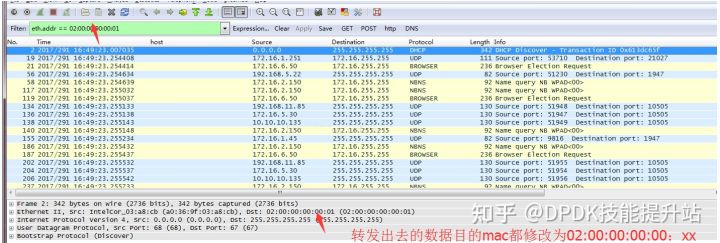
绑定两个网口0,1,连接到另一台服务器,另一台服务器抓包,分析数据包修改的情况,运行效果如下:
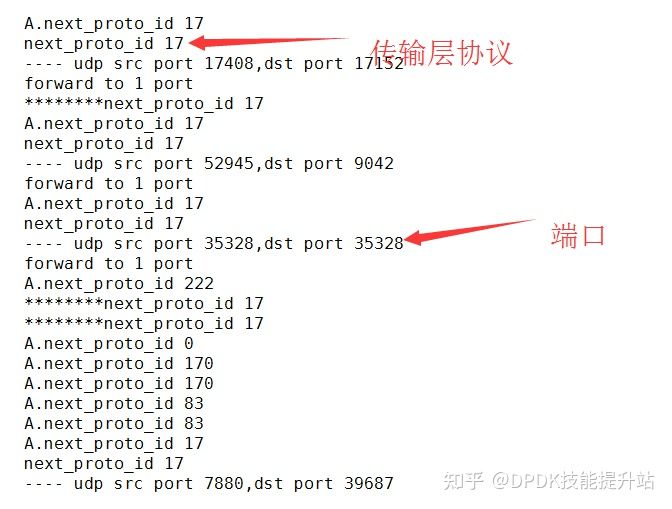
数据包分析:
三. 整体源码分析
#include <stdio.h>
#include <stdlib.h>
#include <stdint.h>
#include <inttypes.h>
#include <sys/types.h>
#include <string.h>
#include <sys/queue.h>
#include <stdarg.h>
#include <errno.h>
#include <getopt.h>
#include <signal.h>#include <rte_common.h>
#include <rte_byteorder.h>
#include <rte_log.h>
#include <rte_memory.h>
#include <rte_memcpy.h>
#include <rte_memzone.h>
#include <rte_eal.h>
#include <rte_per_lcore.h>
#include <rte_launch.h>
#include <rte_atomic.h>
#include <rte_spinlock.h>
#include <rte_cycles.h>
#include <rte_prefetch.h>
#include <rte_lcore.h>
#include <rte_per_lcore.h>
#include <rte_branch_prediction.h>
#include <rte_interrupts.h>
#include <rte_pci.h>
#include <rte_random.h>
#include <rte_debug.h>
#include <rte_ether.h>
#include <rte_ethdev.h>
#include <rte_ring.h>
#include <rte_mempool.h>
#include <rte_mbuf.h>
#include <rte_ip.h>
#include <rte_tcp.h>
#include <rte_udp.h>
#include <rte_string_fns.h>#define APP_LOOKUP_EXACT_MATCH          0     //精确匹配算法
#define APP_LOOKUP_LPM                  1     //最长匹配算法
#define DO_RFC_1812_CHECKS                    //校验检查 如ip头的合法性//#define APP_LOOKUP_METHOD             APP_LOOKUP_EXACT_MATCH  //使用何种查询表
#ifndef APP_LOOKUP_METHOD
#define APP_LOOKUP_METHOD             APP_LOOKUP_LPM
#endif/* 下面是一些相关头文件 */
#if (APP_LOOKUP_METHOD == APP_LOOKUP_EXACT_MATCH)
#include <rte_hash.h>
#elif (APP_LOOKUP_METHOD == APP_LOOKUP_LPM)
#include <rte_lpm.h>
#else
#error "APP_LOOKUP_METHOD set to incorrect value"
#endif#define RTE_LOGTYPE_L3FWD RTE_LOGTYPE_USER1/* 内存池缓存大小 */
#define MEMPOOL_CACHE_SIZE 256/** 该表达式用于根据用户输入计算所需的mbufs数,考虑到rx和tx硬件环的内存,每lcore的缓存和每个端口的mtable .* RTE_MAX用于确保NB_MBUF不会低于最小值 8192。*/#define NB_MBUF RTE_MAX	(																	\(nb_ports*nb_rx_queue*RTE_TEST_RX_DESC_DEFAULT +							\nb_ports*nb_lcores*MAX_PKT_BURST +											\nb_ports*n_tx_queue*RTE_TEST_TX_DESC_DEFAULT +								\nb_lcores*MEMPOOL_CACHE_SIZE),												\(unsigned)8192)/**应优先设置RX和TX预取,主机和写回阈值以获得最佳性
这篇关于DPDK实战之l3fwd-vf(虚拟化环境)的文章就介绍到这儿,希望我们推荐的文章对编程师们有所帮助!


