本文主要是介绍Android 使用BottomNavigationView和Novigation组件实现底部导航功能,希望对大家解决编程问题提供一定的参考价值,需要的开发者们随着小编来一起学习吧!
博主前些天发现了一个巨牛的人工智能学习网站,通俗易懂,风趣幽默,忍不住也分享一下给大家,
👉点击跳转到网站
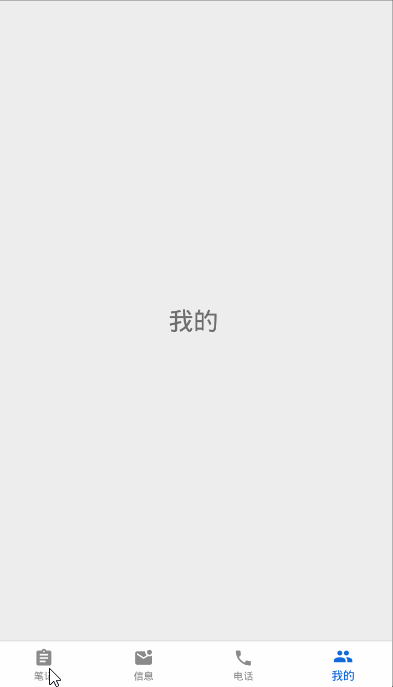
效果图如下:
实现步骤:
在工作之前添加所需的相关依赖,切记这个一定不要忘了
implementation 'androidx.navigation:navigation-fragment:2.2.2'
implementation 'androidx.navigation:navigation-ui:2.2.2'
一、首先做准备工作,创建4个Fragment和对应的布局文件,和menu文件
1.四个Fragment我拿出一个供大家参考
FirstFragment类
public class FirstFragment extends Fragment {private FirstViewModel mViewModel;public static FirstFragment newInstance() {return new FirstFragment();}@Overridepublic View onCreateView(@NonNull LayoutInflater inflater, @Nullable ViewGroup container,@Nullable Bundle savedInstanceState) {return inflater.inflate(R.layout.first_fragment, container, false);}@Overridepublic void onActivityCreated(@Nullable Bundle savedInstanceState) {super.onActivityCreated(savedInstanceState);mViewModel = new ViewModelProvider(this).get(FirstViewModel.class);// TODO: Use the ViewModel}}
对应的first_fragment.xml布局文件
<?xml version="1.0" encoding="utf-8"?>
<LinearLayout xmlns:android="http://schemas.android.com/apk/res/android"xmlns:tools="http://schemas.android.com/tools"android:layout_width="match_parent"android:layout_height="match_parent"android:gravity="center"tools:context=".fragment.FirstFragment"><TextViewandroid:layout_width="wrap_content"android:layout_height="wrap_content"android:text="笔记"android:textSize="30sp" /></LinearLayout>
2、接下来就是在menu文件夹下创建my_bottom_navigation.xml:
这里面就是放置底部导航的图标和对应的文字。
特别说明:这里的图标颜色可以随意,没有限制,因为后面可以在BottomNavigationView标签中设置具体的图标选中前和选中后的颜色。
这里我用的是矢量图,优点就是没有任何锯齿,在任何尺寸的屏幕上都可以更好的展示图标。
<?xml version="1.0" encoding="utf-8"?>
<menu xmlns:android="http://schemas.android.com/apk/res/android"><itemandroid:id="@+id/firstFragment"android:icon="@drawable/first_normal"android:title="笔记" /><itemandroid:id="@+id/secondFragment"android:icon="@drawable/second_normal"android:title="信息" /><itemandroid:id="@+id/thirdFragment"android:icon="@drawable/third_normal"android:title="电话" /><itemandroid:id="@+id/fourthFragment"android:icon="@drawable/fourth_normal"android:title="我的" />
</menu>
二、接下来在res目录下,创建资源类型为Navigation,名称为可以自定义,这里设置为了my_bottom_navigation.xml
<?xml version="1.0" encoding="utf-8"?>
<navigation xmlns:android="http://schemas.android.com/apk/res/android"xmlns:app="http://schemas.android.com/apk/res-auto"xmlns:tools="http://schemas.android.com/tools"android:id="@+id/my_bottom_navigation"app:startDestination="@id/firstFragment"><fragmentandroid:id="@+id/firstFragment"android:name="com.example.exampletest.fragment.FirstFragment"android:label="first_fragment"tools:layout="@layout/first_fragment" /><fragmentandroid:id="@+id/secondFragment"android:name="com.example.exampletest.fragment.SecondFragment"android:label="second_fragment"tools:layout="@layout/second_fragment" /><fragmentandroid:id="@+id/thirdFragment"android:name="com.example.exampletest.fragment.ThirdFragment"android:label="third_fragment"tools:layout="@layout/third_fragment" /><fragmentandroid:id="@+id/fourthFragment"android:name="com.example.exampletest.fragment.FourthFragment"android:label="fourth_fragment"tools:layout="@layout/fourth_fragment" />
</navigation>
在这里面说明一下:
- app:startDestination=“@id/firstFragment” 属性:默认进来之后的一个页面,就是FirstFragment这个页面。
- label 这个属性表示标签 就是标题栏中的字体,我这里因为设置了主题为没有ActionBar,所以自然就没有这个效果
- 这里的每个fragment标签的id一定要跟menu文件夹下my_bottom_navigation.xml文件中item标签中的id一一对应
三、创建BottomNavigationViewActivity和对应的activity_bottom_navigation_view.xml,把这个四个Fragment柔和在一起,并实现点击对应的图标切换到对应的界面的功能。
1.首先activity_bottom_navigation_view.xml的实现 非常重要的一步
<?xml version="1.0" encoding="utf-8"?>
<androidx.constraintlayout.widget.ConstraintLayout xmlns:android="http://schemas.android.com/apk/res/android"xmlns:app="http://schemas.android.com/apk/res-auto"xmlns:tools="http://schemas.android.com/tools"android:layout_width="match_parent"android:layout_height="match_parent"android:orientation="vertical"tools:context=".BottomNavigationViewActivity"><com.google.android.material.bottomnavigation.BottomNavigationViewandroid:id="@+id/bottomNavigationView"android:layout_width="match_parent"android:layout_height="wrap_content"android:background="@color/white"app:itemIconTint="@color/text_color"app:itemTextColor="@color/text_color"app:labelVisibilityMode="labeled"app:layout_constraintBottom_toBottomOf="parent"app:layout_constraintEnd_toEndOf="parent"app:layout_constraintStart_toStartOf="parent"app:menu="@menu/my_bottom_navigation" /><fragmentandroid:id="@+id/fragment8"android:name="androidx.navigation.fragment.NavHostFragment"android:layout_width="match_parent"android:layout_height="0dp"app:defaultNavHost="true"app:layout_constraintBottom_toTopOf="@+id/bottomNavigationView"app:layout_constraintEnd_toEndOf="parent"app:layout_constraintHorizontal_bias="0.0"app:layout_constraintStart_toStartOf="parent"app:layout_constraintTop_toTopOf="parent"app:navGraph="@navigation/my_bottom_navigation" />
</androidx.constraintlayout.widget.ConstraintLayout>
分析里面比较重要的属性:
1.fragment标签下的:
- app:layout_constraintBottom_toTopOf=“@+id/bottomNavigationView” 作用:fragment的下边和底部导航的上边对齐,换句话说就是fragment在其底部导航的上边
- app:defaultNavHost=“true” 表示使用默认的导航host,自动覆盖Activity的back按钮
- app:navGraph="@navigation/my_bottom_navigation"指向你的navigation文件夹下的my_bottom_navigation文件
2.BottomNavigationView标签下的
- app:itemIconTint=“@color/text_color” 表示选中和非选中状态下图标的颜色
- app:itemTextColor=“@color/text_color” 表示选中和非选中状态下文字的颜色 所以这两个属性用同一个资源文件就行了
- app:labelVisibilityMode=“labeled” 当底部导航图标为四个或者五个时,最多也只能设置五个,就要设置这个属性,显示图标标记,说白了就是显示图标下面的文字,如果不设置这个属性的话,非选中状态下,图标下面的文字是无法显示的
2、BottomNavigationViewActivity这个文件下的代码就很简单了
public class BottomNavigationViewActivity extends AppCompatActivity {@Overrideprotected void onCreate(Bundle savedInstanceState) {super.onCreate(savedInstanceState);setContentView(R.layout.activity_bottom_navigation_view);//实例化BottomNavigationView BottomNavigationView bottomNavigationView = findViewById(R.id.bottomNavigationView);//获取NavController实例 //NavController:负责操作Navigation框架下的Fragment的跳转与退出、动画、监听当前Fragment信息//这个R.id.fragment8就是Activity布局里fragment控件的idNavController controller = Navigation.findNavController(this, R.id.fragment8);//在选择菜单时调用,当目的地更改时,BottomNavigationView中的选定项将自动更新 NavigationUI.setupWithNavController(bottomNavigationView, controller);}
}
这样就使用BottomNavigationView完成了一个基本的底部导航功能,在这个模板上面,就可以加自己需要的功能了,当然,有不当之处可以在评论区指正,不敢误人子弟~
这篇关于Android 使用BottomNavigationView和Novigation组件实现底部导航功能的文章就介绍到这儿,希望我们推荐的文章对编程师们有所帮助!


