本文主要是介绍牛股项目流程(三),希望对大家解决编程问题提供一定的参考价值,需要的开发者们随着小编来一起学习吧!
牛股项目流程(三)
- 用户名修改页面的建立
- 页面布局设计
- script逻辑方面
- 效果图
- 用户名修改页面的后端部分
- 后端Controller层中的修改用户名的方法
- Service层中的修改用户名的方法
- Dao层中修改用户名的方法
- 用户名修改页面的前后端测试
- 密码修改页面的建立
- 页面布局设计
- script逻辑部分
- 效果图
- 更新问题
在完成分时图的设计后,下一步的负责部分是用户的用户名修改页面和密码修改页面的设计。
用户名修改页面的建立
在vue项目的src文件夹里,在components文件夹里创建一个vue文件,命名为changeuser.vue。
页面布局设计
用户名修改的页面布局比较简洁,因为前端向后端发送请求时要发送两个参数:用户的id(在这里面为邮箱),用户需要输入修改的昵称内容。由于在用户登录的时候,在vue的store文件夹里(vue仓库)自动存入了登录的用户id,所以用户的id可以通过调用store来提取,在前端页面中只需要拿到用户想要修改的昵称内容即可。所以只需要一个输入框以及一个修改按钮。
//template部分
<template>
<div style="left: 500px;position: absolute;top: 200px;width: 600px;height:300px;background: #ffffff;border-radius: 10px"><el-form label-width="0px" style="margin: 0;padding: 0"><div class="login-title" >scow修改用户名</div><!--div style="margin-top:5px"></div--><div class="input" ><el-form-item  prop="newuser"><el-input class="textarea" v-model="newuser"  placeholder="请输入新用户名"></el-input></el-form-item></div><div class="button-my"><el-form-item><el-button  class="el-button–primary" type="success" @click="confirm"  style="width:500px;position: absolute;left: 45px;top: 50px" >确定</el-button></el-form-item></div>
</el-form>
</div>
</template>
//style部分
<style scoped>.input{}.button-my{margin: 0 0px 40px 5px;}.el-button–primary{color: #ffffff;font-size: 20px;font-weight: bold;font-family: “Microsoft YaHei”;}.textarea>>>.el-input__inner{border-left-color: #ffffff;border-right-color: #ffffff;border-top-color: #ffffff;border-bottom-color: #DDDDDD;border-bottom-width: 2px;border-radius: 0;width: 500px;height: 60px;left: 50px;position: absolute;top: 0;font-family: Microsoft YaHei;}.login-title {margin: 0 0px 40px 90px;color: #000000;font-size: 32px;text-align: center;font-weight: normal;margin: 0 0 18px 0;margin-top: 0px;margin-right: 0px;margin-bottom: 18px;margin-left: 0px;color:#666666;font-family: Microsoft YaHei;}
</style>
script逻辑方面
如果用户没有输入内容就点击了修改按钮,则会返回一个警告提醒用户输入的内容不能为空;如果用户输入了新昵称并修改成功会返回一个提示来提醒用户修改成功;最后用户点击修改按钮后前端会将数据传递给后端并对数据库进行修改。
<script>
import axios from 'axios'
export default {data() {return{username: '',newuser: ''}},methods:{usernull() {this.$message.error('用户名不能为空');},sucessuser() {this.$message({message: '用户名修改成功',type: 'success'});},confirm(){//数据传输const newusername = this.newuser.toString()if(newusername==''){this.usernull()}else{axios.get('api/user/ChangeNickname', {params: {userid: this.$store.state.accout,name: this.newuser}}).then(res=>{console.log(res.data)if(res.data.code === '200'){this.$store.commit("logname",newusername);this.sucessuser()}this.newuser=''
//        console.log(res.data)}).catch(err=>{console.log(err)})}}}
}
</script>
效果图

用户名修改页面的后端部分
后端Controller层中的修改用户名的方法
@RequestMapping(value = "/ChangeNickname",method = RequestMethod.GET )@ResponseBodypublic CommonResult ChangeNickname(@NotNull(message = "userid 不允许为空") String userid,String name){return umsAdminService.ChangeNickname(userid,name);}
Service层中的修改用户名的方法
@Overridepublic CommonResult ChangeNickname(String userid, String nemNickname) {userDao.upDataForNicknameById(userid,nemNickname);return CommonResult.success(userid);}
Dao层中修改用户名的方法
<update id="upDataForNicknameById" parameterType="java.util.Map">UPDATE users SET nickname = #{nickname,jdbcType=VARCHAR} where userid=#{userid}
</update>
用户名修改页面的前后端测试
在修改用户的昵称之前,先在数据库里查看用户id为2的用户的昵称:

可以看到此时用户id为2的用户昵称为777。
在浏览器中输入后端对应的接口地址:http://localhost:9000/user/ChangeNickname?userid=2&name=555,然后得到的返回信息如下:
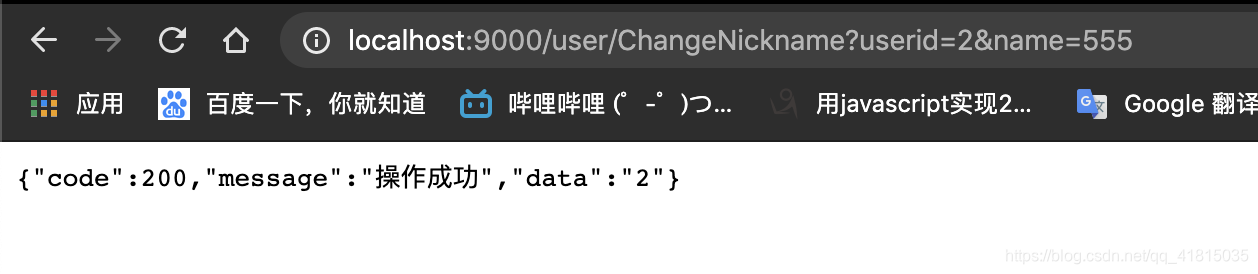
可以得到的修改成功的返回数据有三个,我们以code的内容为标准,如果返回的code的值为200,则修改用户名成功。此时数据库中用户id为2的昵称为:

可以看到修改成功了。
随后我们再从前端开始测试,我们选择将用户id为2的用户昵称从777改为888:

可以看到修改成功的返回提示:

再从数据库中查看id为2的用户的昵称是否改变:

可以看到id为2的用户的昵称从555变为了888,测试成功!
密码修改页面的建立
与用户名修改页面的建立相同,在vue项目的src文件夹里,在components文件夹里创建一个vue文件,命名为changepass.vue。
页面布局设计
密码修改页面初步设定的内容是两个输入框,分别是输入原密码和输入要修改的密码。另外在vue的store文件夹中拿到当前登录的用户的id,所以一共向后端传三个参数。
//template部分
<template>
<div style="left: 500px;position: absolute;top: 200px;width: 600px;height: 320px;background: #ffffff;border-radius: 10px"><el-form  label-width="0px" style="margin: 0;padding: 0"><div class="login-title" >scow修改密码</div><!--div style="margin-top:5px"></div--><div class="input" >
<el-form-item  prop="password" style="border: none"><el-input class="textarea"  v-model="pass" placeholder="请输入原密码" ></el-input></el-form-item><el-form-item  prop="Password"><el-input class="textarea" v-model="newpass"  placeholder="请输入新密码"  ></el-input></el-form-item></div><div class="button-my"><el-form-item><el-button  class="el-button–primary" type="success" @click="confirm"  style="width:500px;position: absolute;left: 40px;top: 70px" >确定</el-button></el-form-item></div>
</el-form>
</div>
</template>
//style部分
<style scoped>.input{}.button-my{margin: 0 0px 40px 5px;}.el-button–primary{color: #ffffff;font-size: 20px;font-weight: bold;font-family: “Microsoft YaHei”;}.textarea>>>.el-input__inner{border-left-color: #ffffff;border-right-color: #ffffff;border-top-color: #ffffff;border-bottom-color: #DDDDDD;border-bottom-width: 2px;border-radius: 0;width: 500px;height: 60px;font-family: Microsoft YaHei;position: absolute;left: 40px;}.login-title {margin: 0 0px 40px 90px;color: #000000;font-size: 32px;text-align: center;font-weight: normal;margin: 0 0 18px 0;margin-top: 0px;margin-right: 0px;margin-bottom: 18px;margin-left: 0px;color:#666666;font-family: Microsoft YaHei;}
</style>
script逻辑部分
与用户名修改页面一样,密码修改页面对输入框也有判空的警告提示以及修改成功的消息提示,但是密码修改还多了一个要求就是输入的原密码内容要与此时用户的密码相同,如果不同的话还是会判定成密码修改失败。这个功能的实现放在后端,在后端提取用户数据库当前的密码与输入的原密码进行相等的判断,如果不相等则返回false,相等则进行修改,然后返回true。
<script>
import axios from 'axios'
export default {data() {return{pass: '',newpass: ''}},methods:{passnull() {this.$message.error('原始密码不能为空');},newpassnull() {this.$message.error('新密码不能为空');},sucesspass() {this.$message({message: '密码修改成功',type: 'success'});},confirm(){//数据传输const password = this.pass.toString()const newpassword = this.newpass.toString()if (password == ''){this.passnull()}else if(newpassword == ''){this.newpassnull()}else{axios.get('api/changepass', {params: {account: this.$store.state.accout,password: this.pass,newpassword: this.newpass}}).then(res=>{if(res.data === true){this.$alert('修改成功', '提示', {confirmButtonText: '确定'});}else if(res.data === false){this.sucesspass()}}).catch(err=>{console.log(err)})}}}
}
</script>
效果图

更新问题
在项目后期对后端进行了大整改,最后决定在密码修改部分加入邮箱验证码,密码修改页面的前端修改及测试就交给了组长来处理。
这篇关于牛股项目流程(三)的文章就介绍到这儿,希望我们推荐的文章对编程师们有所帮助!


