本文主要是介绍PICO-NEO2实现瞬移,希望对大家解决编程问题提供一定的参考价值,需要的开发者们随着小编来一起学习吧!
1、实现图片:
![]()
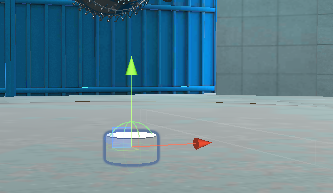
父物体的point上面挂在脚本。如图所示赋值

子物体的point添加collider

2、运行脚本:
using Pvr_UnitySDKAPI;
using System.Collections;
using UnityEngine;public class Teleport : MonoBehaviour
{//public static Pvr_KeyCode TOUCHPAD = Pvr_KeyCode.TOUCHPAD;public static Pvr_KeyCode TRIGGER = Pvr_KeyCode.TRIGGER;public float fadeTime = 0.2f;public bool IsBezierCurve = false;public bool IsScreenFade = false;public Material LineMat;public GameObject PointGo;public Material PointGoMat;private GameObject cube;//private GameObject currentController;public GameObject currentController;private Vector3 currentHitPoint = Vector3.zero;private Color fadeColor = new Color(0.9f, 0.9f, 0.9f, 0f);private Material fademat;private LineRenderer line;private Ray ray;private GameObject sdkManagerGo;public GameObject CurrentController{get{//if (currentController == null)//    currentController = FindObjectOfType<Pvr_ControllerDemo>().currentController1;return currentController;}}public static Vector3[] GetBeizerPathPointList(Vector3 startPoint, Vector3 controlPoint, Vector3 endPoint, int pointNum){Vector3[] BeizerPathPointList = new Vector3[pointNum];for (int i = 1; i <= pointNum; i++){float t = i / (float)pointNum;Vector3 point = GetBeizerPathPoint(t, startPoint,controlPoint, endPoint);BeizerPathPointList[i - 1] = point;}return BeizerPathPointList;}private static Vector3 GetBeizerPathPoint(float t, Vector3 p0, Vector3 p1, Vector3 p2){return (1 - t) * (1 - t) * p0 + 2 * t * (1 - t) * p1 + t * t * p2;}private static bool GetTeleportKey(){return Controller.UPvr_GetKey(0, TRIGGER) ||Input.GetMouseButton(0);}private static bool GetTeleportKeyUp(){return  Controller.UPvr_GetKeyUp(0, TRIGGER) ||Input.GetMouseButtonUp(0);}private void DrawLine(){Vector3 startPoint = CurrentController.transform.Find("start").position;//Vector3 endPoint = CurrentController.transform.Find("dot").position;Vector3 endPoint = new Vector3(currentHitPoint.x, currentHitPoint.y, currentHitPoint.z);   Vector3 controllerPoint = CurrentController.transform.Find("controller").position;if (!IsBezierCurve){line.positionCount = 2;line.SetPosition(0, startPoint);line.SetPosition(1, endPoint);}else{float distance = Vector3.Distance(startPoint, endPoint);Vector3 controlPoint = startPoint + (startPoint - controllerPoint).normalized * distance / 1.6f;Vector3[] bcList = GetBeizerPathPointList(startPoint, controlPoint, endPoint, 30);line.positionCount = bcList.Length + 1;line.SetPosition(0, startPoint);for (int i = 0; i < bcList.Length; i++){Vector3 v = bcList[i];line.SetPosition(i + 1, v);}}}private bool HitFloor(ref RaycastHit hit){return 1 << hit.transform.gameObject.layer == LayerMask.GetMask("TransparentFX");}private void LineInit(){if (GetComponent<LineRenderer>())line = GetComponent<LineRenderer>();elseline = gameObject.AddComponent<LineRenderer>();line.material = LineMat;line.startWidth = 0.02f;line.numCapVertices = 5;}private void MoveCameraPrefab(Vector3 target){if (GetTeleportKeyUp()){if (IsScreenFade)StartCoroutine(ScreenFade(target));elsesdkManagerGo.transform.position = new Vector3(target.x, 1.68f, target.z);}}private IEnumerator ScreenFade(Vector3 target){float ShowTimer = 0.0f;float HideTimer = 0.0f;fademat.color = fadeColor;cube.SetActive(true);Color color = fadeColor;while (ShowTimer < fadeTime){yield return new WaitForEndOfFrame();ShowTimer += Time.deltaTime;color.a = Mathf.Clamp01(ShowTimer / fadeTime);if (color.a > 0.8f)break;fademat.color = color;}sdkManagerGo.transform.position = new Vector3(target.x, target.y + 1.67f, target.z);while (HideTimer < fadeTime){yield return new WaitForEndOfFrame();HideTimer += Time.deltaTime;color.a = 0.8f - Mathf.Clamp01(HideTimer / fadeTime);if (color.a < 0.01f)break;fademat.color = color;}cube.SetActive(false);}private void Start(){LineInit();sdkManagerGo = FindObjectOfType<Pvr_UnitySDKManager>().gameObject;fademat = new Material(Shader.Find("Sprites/Default"));cube = GameObject.CreatePrimitive(PrimitiveType.Cube);cube.GetComponent<MeshRenderer>().material = fademat;cube.transform.position = sdkManagerGo.transform.position;cube.transform.parent = sdkManagerGo.transform;cube.SetActive(false);if (PointGoMat != null)PointGo.GetComponent<MeshRenderer>().material = PointGoMat;PointGo.SetActive(false);ray = new Ray();}// Update is called once per frameprivate void Update(){if (CurrentController!= null && GetTeleportKey()){line.enabled = true;//sdkManagerGo = currentController.transform.parent.gameObject;ray.direction = CurrentController.transform.Find("dot").position - CurrentController.transform.Find("start").position;ray.origin = CurrentController.transform.Find("start").position;RaycastHit hit;if (Physics.Raycast(ray, out hit)){currentHitPoint = hit.point;if (HitFloor(ref hit) && hit.point != null){PointGo.transform.position = hit.point;PointGo.SetActive(true);//CurrentController.transform.Find("dot").position = hit.point;}}else { PointGo.SetActive(false); }DrawLine();}else{if (currentHitPoint != Vector3.zero){if (PointGo.activeInHierarchy){MoveCameraPrefab(currentHitPoint);currentHitPoint = Vector3.zero;PointGo.SetActive(false);}}if (line.enabled == false)return;line.enabled = false;}}
}
终于结束了!
这篇关于PICO-NEO2实现瞬移的文章就介绍到这儿,希望我们推荐的文章对编程师们有所帮助!


