本文主要是介绍Android 二维码生成,扫描,近距离识别优化,从相册选择二维码识别,希望对大家解决编程问题提供一定的参考价值,需要的开发者们随着小编来一起学习吧!
做了一个二维码扫描图片,主要是扫描不出来,看到一篇博客,其中的第二种方法可以扫描到,在此做笔记,以备后用,前面的进入相册,返回,到获取图片路径方法都一样;
(1):二维码生成的方法顺便贴上:
private Bitmap createQRImage(String url, final int width, final int height) {try {// 判断URL合法性if (url == null || "".equals(url) || url.length() < 1) {return null;}Hashtable<EncodeHintType, String> hints = new Hashtable<EncodeHintType, String>();hints.put(EncodeHintType.CHARACTER_SET, "utf-8");// 图像数据转换,使用了矩阵转换BitMatrix bitMatrix = new QRCodeWriter().encode(url,BarcodeFormat.QR_CODE, width, height, hints);int[] pixels = new int[width * height];// 下面这里按照二维码的算法,逐个生成二维码的图片,// 两个for循环是图片横列扫描的结果for (int y = 0; y < height; y++) {for (int x = 0; x < width; x++) {if (bitMatrix.get(x, y)) {pixels[y * width + x] = 0xff000000;} else {pixels[y * width + x] = 0xffffffff;}}}// 生成二维码图片的格式,使用ARGB_8888Bitmap bitmap = Bitmap.createBitmap(width, height,Bitmap.Config.ARGB_8888);bitmap.setPixels(pixels, 0, width, 0, 0, width, height);return bitmap;} catch (WriterException e) {e.printStackTrace();}return null;}(2)二维码扫描的方法:https://blog.csdn.net/qq_25815655/article/details/79927786
(3)下面从相册选择二维码
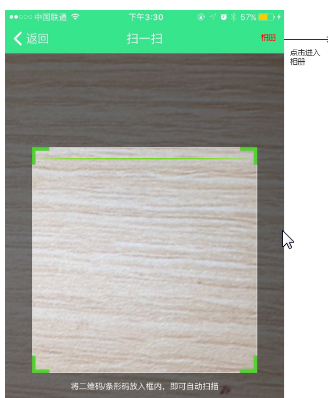
1.项目需求:知道项目需求,才知道先从哪里入手,见图一。(点击相册,打开图库)
2.代码:
1.打开图库代码:
mBtnOpenPicture.setOnClickListener(new View.OnClickListener() {@Overridepublic void onClick(View v) {//打开相册openGallery();}});/**打开相册*/
private void openGallery() {Intent picture = new Intent(Intent.ACTION_PICK,   android.provider.MediaStore.Images.Media.EXTERNAL_CONTENT_URI);startActivityForResult(picture, PICTURE);}
2.获取图片路径和解析。
(1). 获取图片路径:getPath(uri);由于Android版本不同,返回的uri会有所不同,需要做特殊处理。
@SuppressLint("NewApi")private String getPath(Uri uri) {int sdkVersion = Build.VERSION.SDK_INT;if (sdkVersion >= 19) {//Log.e("hxy", "uri auth: " + uri.getAuthority());if (isExternalStorageDocument(uri)) {String docId = DocumentsContract.getDocumentId(uri);String[] split = docId.split(":");String type = split[0];if ("primary".equalsIgnoreCase(type)) {return Environment.getExternalStorageDirectory() + "/" + split[1];}} else if (isDownloadsDocument(uri)) {final String id = DocumentsContract.getDocumentId(uri);final Uri contentUri = ContentUris.withAppendedId(Uri.parse("content://downloads/public_downloads"),Long.valueOf(id));return getDataColumn(this, contentUri, null, null);} else if (isMediaDocument(uri)) {final String docId = DocumentsContract.getDocumentId(uri);final String[] split = docId.split(":");final String type = split[0];Uri contentUri = null;if ("image".equals(type)) {contentUri = MediaStore.Images.Media.EXTERNAL_CONTENT_URI;} else if ("video".equals(type)) {contentUri = MediaStore.Video.Media.EXTERNAL_CONTENT_URI;} else if ("audio".equals(type)) {contentUri = MediaStore.Audio.Media.EXTERNAL_CONTENT_URI;}final String selection = "_id=?";final String[] selectionArgs = new String[]{split[1]};return getDataColumn(this, contentUri, selection, selectionArgs);} else if (isMedia(uri)) {String[] proj = {MediaStore.Images.Media.DATA};Cursor actualimagecursor = this.managedQuery(uri, proj, null, null, null);int actual_image_column_index = actualimagecursor.getColumnIndexOrThrow(MediaStore.Images.Media.DATA);actualimagecursor.moveToFirst();return actualimagecursor.getString(actual_image_column_index);}} else if ("content".equalsIgnoreCase(uri.getScheme())) {if (isGooglePhotosUri(uri))return uri.getLastPathSegment();return getDataColumn(this, uri, null, null);}// Fileelse if ("file".equalsIgnoreCase(uri.getScheme())) {return uri.getPath();}return null;}public static String getDataColumn(Context context, Uri uri,String selection, String[] selectionArgs) {Cursor cursor = null;final String column = "_data";final String[] projection = { column };try {cursor = context.getContentResolver().query(uri, projection,selection, selectionArgs, null);if (cursor != null && cursor.moveToFirst()) {final int column_index = cursor.getColumnIndexOrThrow(column);return cursor.getString(column_index);}} finally {if (cursor != null)cursor.close();}return null;}private static boolean isExternalStorageDocument(Uri uri) {return "com.android.externalstorage.documents".equals(uri.getAuthority());}public static boolean isDownloadsDocument(Uri uri) {return "com.android.providers.downloads.documents".equals(uri.getAuthority());}public static boolean isMediaDocument(Uri uri) {return "com.android.providers.media.documents".equals(uri.getAuthority());}public static boolean isMedia(Uri uri) {return "media".equals(uri.getAuthority());}public static boolean isGooglePhotosUri(Uri uri) {return "com.google.android.apps.photos.content".equals(uri.getAuthority());}
(2).开辟线程,解析图片,封装到Result中:我看了网上的demo,大致上有2种方法。如下是第一种,稍后会把第二种方法也贴出来。
/*** 解析二维码图片* @param path* @return*/protected Result scanningImage(String path) {if (TextUtils.isEmpty(path)) {return null;}Hashtable<DecodeHintType, String> hints = new Hashtable();hints.put(DecodeHintType.CHARACTER_SET, "UTF-8"); // 设置二维码内容的编码BitmapFactory.Options options = new BitmapFactory.Options();options.inJustDecodeBounds = true; // 先获取原大小scanBitmap = BitmapFactory.decodeFile(path,options);options.inJustDecodeBounds = false;int sampleSize = (int) (options.outHeight / (float) 200);if (sampleSize <= 0)sampleSize = 1;options.inSampleSize = sampleSize;scanBitmap = BitmapFactory.decodeFile(path, options);int[] data = new int[scanBitmap.getWidth() * scanBitmap.getHeight()];scanBitmap.getPixels(data, 0, scanBitmap.getWidth(), 0, 0, scanBitmap.getWidth(), scanBitmap.getHeight());RGBLuminanceSource rgbLuminanceSource = new RGBLuminanceSource(scanBitmap.getWidth(),scanBitmap.getHeight(),data);BinaryBitmap binaryBitmap = new BinaryBitmap(new HybridBinarizer(rgbLuminanceSource));QRCodeReader reader = new QRCodeReader();Result result = null;try {result = reader.decode(binaryBitmap, hints);} catch (NotFoundException e) {Log.e("hxy","NotFoundException");}catch (ChecksumException e){Log.e("hxy","ChecksumException");}catch(FormatException e){Log.e("hxy","FormatException");}return result;}注意:上面方法中有个关键的类,RGBLuminanceSource。 我把这个类的构造方法贴出来,因为我做的时候,发现网上demo 这个类中构造传递的都是Bitmap, 而我这个类却不是。分析传递的参数之后,我做了个转化:见如下,然后会发现报:NotFoundException. 这个异常是在QRCodeReader类:private static BitMatrix extractPureBits(BitMatrix image) throws NotFoundException 。(到这里我已经不是很懂了,然后又去网上搜索了下,最后自己探索出加scanBitmap.getPixels(data, 0, scanBitmap.getWidth(), 0, 0, scanBitmap.getWidth(), scanBitmap.getHeight());),运行正常,能解析出来。
int[] data = new int[scanBitmap.getWidth() * scanBitmap.getHeight()];
//一定要加以下这个代码:
//scanBitmap.getPixels(data, 0, scanBitmap.getWidth(), 0, 0, scanBitmap.getWidth(), //scanBitmap.getHeight());
RGBLuminanceSource rgbLuminanceSource = new RGBLuminanceSource(scanBitmap.getWidth(),scanBitmap.getHeight(),data);
public RGBLuminanceSource(int width, int height, int[] pixels) {super(width, height);this.dataWidth = width;this.dataHeight = height;this.left = 0;this.top = 0;this.luminances = new byte[width * height];for(int y = 0; y < height; ++y) {int offset = y * width;for(int x = 0; x < width; ++x) {int pixel = pixels[offset + x];int r = pixel >> 16 & 255;int g = pixel >> 8 & 255;int b = pixel & 255;if(r == g && g == b) {this.luminances[offset + x] = (byte)r;} else {this.luminances[offset + x] = (byte)((r + 2 * g + b) / 4);}}}}
现在来看第二种解析方法:
protected Result scanningImage(String path) {if (TextUtils.isEmpty(path)) {return null;}BitmapFactory.Options options = new BitmapFactory.Options();options.inJustDecodeBounds = true; // 先获取原大小scanBitmap = BitmapFactory.decodeFile(path,options);options.inJustDecodeBounds = false;int sampleSize = (int) (options.outHeight / (float) 200);if (sampleSize <= 0)sampleSize = 1;options.inSampleSize = sampleSize;scanBitmap = BitmapFactory.decodeFile(path, options);byte[] data = getYUV420sp(scanBitmap.getWidth(), scanBitmap.getHeight(), scanBitmap);Hashtable<DecodeHintType, Object> hints = new Hashtable();hints.put(DecodeHintType.CHARACTER_SET, "UTF-8"); // 设置二维码内容的编码hints.put(DecodeHintType.TRY_HARDER,Boolean.TRUE);hints.put(DecodeHintType.POSSIBLE_FORMATS, BarcodeFormat.QR_CODE);PlanarYUVLuminanceSource source = new PlanarYUVLuminanceSource(data,scanBitmap.getWidth(),scanBitmap.getHeight(),0, 0,scanBitmap.getWidth(),scanBitmap.getHeight(),false);BinaryBitmap bitmap1 = new BinaryBitmap(new HybridBinarizer(source));QRCodeReader reader2= new QRCodeReader();Result result = null;try {result = reader2.decode(bitmap1, hints);Log.e("hxy",result.getText());} catch (NotFoundException e) {Log.e("hxy","NotFoundException");}catch (ChecksumException e){Log.e("hxy","ChecksumException");}catch(FormatException e){Log.e("hxy","FormatException");}return result;}public  byte[] getYUV420sp(int inputWidth, int inputHeight,Bitmap scaled) {int[] argb = new int[inputWidth * inputHeight];scaled.getPixels(argb, 0, inputWidth, 0, 0, inputWidth, inputHeight);byte[] yuv = new byte[inputWidth * inputHeight * 3 / 2];encodeYUV420SP(yuv, argb, inputWidth, inputHeight);scaled.recycle();return yuv;}private void encodeYUV420SP(byte[] yuv420sp, int[] argb, int width,int height) {// 帧图片的像素大小final int frameSize = width * height;// ---YUV数据---int Y, U, V;// Y的index从0开始int yIndex = 0;// UV的index从frameSize开始int uvIndex = frameSize;// ---颜色数据---
//      int a, R, G, B;int R, G, B;//int argbIndex = 0;//// ---循环所有像素点,RGB转YUV---for (int j = 0; j < height; j++) {for (int i = 0; i < width; i++) {// a is not used obviously
//              a = (argb[argbIndex] & 0xff000000) >> 24;R = (argb[argbIndex] & 0xff0000) >> 16;G = (argb[argbIndex] & 0xff00) >> 8;B = (argb[argbIndex] & 0xff);//argbIndex++;// well known RGB to YUV algorithmY = ((66 * R + 129 * G + 25 * B + 128) >> 8) + 16;U = ((-38 * R - 74 * G + 112 * B + 128) >> 8) + 128;V = ((112 * R - 94 * G - 18 * B + 128) >> 8) + 128;//Y = Math.max(0, Math.min(Y, 255));U = Math.max(0, Math.min(U, 255));V = Math.max(0, Math.min(V, 255));// NV21 has a plane of Y and interleaved planes of VU each// sampled by a factor of 2// meaning for every 4 Y pixels there are 1 V and 1 U. Note the// sampling is every other// pixel AND every other scanline.// ---Y---yuv420sp[yIndex++] = (byte) Y;// ---UV---
//              if ((j % 2 == 0) && (i % 2 == 0)) {
//
//
//
//                  yuv420sp[uvIndex++] = (byte) V;
//
//                  yuv420sp[uvIndex++] = (byte) U;
//              }}}}
最后2行代码在实际运行的时候,如果是拿一个二维码图片,能正常解析,但是如果不是二维码图片,数组越界。然后我将其注释掉之后,一切正常了。在这里的转化,我没有看懂,只是提供一种解析方案,期待对这方面了解之人能我和探讨。
3.将解析结果回调给调用Activity.:
@Overrideprotected void onActivityResult(int requestCode, int resultCode, Intent data) {if(resultCode==RESULT_OK&&data != null&&requestCode == PICTURE){Uri selectedImage = data.getData();final String pathResult = getPath(selectedImage);Log.e("hxy","pathResult:"+pathResult);new Thread(new Runnable() {@Overridepublic void run() {Result result = scanningImage(pathResult);if(result==null){Looper.prepare();Toast.makeText(CaptureActivity.this, "未识别到二维码",Toast.LENGTH_LONG).show();Looper.loop();}else{handleDecode(result,new Bundle());
//                      String recode = recode(result.toString());
//                      Log.e("hxy","recode:"+recode);
//                      Intent data = new Intent();
//                      data.putExtra("result", recode);
//                      setResult(300, data);//finish();}}}).start();}}
在这里调用handleDecode。是由于CaptureActivity中,将结果就是通过handleDecode回调的
/*** A valid barcode has been found, so give an indication of success and show* the results.* * @param rawResult*            The contents of the barcode.* * @param bundle*            The extras*/public void handleDecode(Result rawResult, Bundle bundle) {inactivityTimer.onActivity();beepManager.playBeepSoundAndVibrate();bundle.putInt("width", mCropRect.width());bundle.putInt("height", mCropRect.height());bundle.putString("result", rawResult.getText());//      startActivity(new Intent(CaptureActivity.this, ResultActivity.class).putExtras(bundle));setResult(RESULT_OK, new Intent().putExtras(bundle));
//      Toast.makeText(this, rawResult.getText(), Toast.LENGTH_LONG);finish();}
以上就是解析二维码图片的两种方法,借鉴的博客如下:
http://blog.csdn.net/a102111/article/details/48377537
http://blog.csdn.net/aaawqqq/article/details/24880209
这篇关于Android 二维码生成,扫描,近距离识别优化,从相册选择二维码识别的文章就介绍到这儿,希望我们推荐的文章对编程师们有所帮助!


