本文主要是介绍java word表格_Java 在Word中创建表格,希望对大家解决编程问题提供一定的参考价值,需要的开发者们随着小编来一起学习吧!
表格作为一种可视化交流模式及组织整理数据的手段,在各种场合及文档中应用广泛。常见的表格可包含文字、图片等元素,我们操作表格时可以插入图片、写入文字及格式化表格样式等。下面,将通过Java编程在Word文档中创建表格并实现格式化操作,包括设置字体、字号、字体颜色、字体粗细等,设置单元格对齐方式、单元格背景色、单元格合并、设置表格边框样式、插入图片等。
使用工具:Free Spire.Doc for Java 2.0.0 (免费版)
Jar文件导入
方法1:首先通过
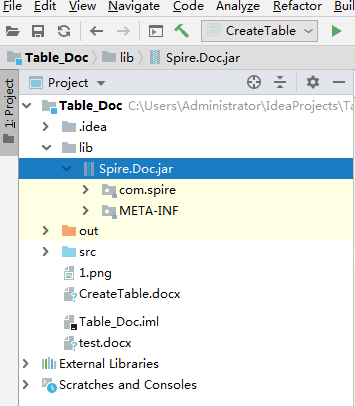
导入步骤:在程序中新建一个directory目录,并命名(本示例中命名为lib);将控件包lib文件夹下的Spire.Doc.jar文件(如下图1)复制到程序中新建的目录下。复制jar文件后,鼠标右键点击jar文件,选择”Add as Library”。完成导入(如下图2)。
图1:
图2:
方法2:通过maven导入。参考
Java代码示例(供参考)
Step 1: 创建文档
Document doc = newDocument();
Section sec= doc.addSection();
Step 2:声明数组内容
//声明数组内容
String[] header = {"班级","姓名","性别", "学号", "专业成绩"};
String[][] data={new String[]{"一班","王丽", "女", "Y1256486", "138"},new String[]{"一班","洪菲菲", "女", "Y5425875", "134"},new String[]{"二班","刘洋", "男", "B1546258", "141"},new String[]{"三班","冯刚", "男", "B1542367", "136"},new String[]{"三班","刘思源", "男", "Z1263547", "133"},
};
Step 3:添加表格并写入数据
//添加表格
Table table = sec.addTable(true);
table.resetCells(data.length+ 1, header.length);//设置表格第一行作为表头,写入表头数组内容,并格式化表头数据
TableRow row = table.getRows().get(0);
row.isHeader(true);
row.setHeight(20);
row.setHeightType(TableRowHeightType.Exactly);
row.getRowFormat().setBackColor(Color.ORANGE);for (int i = 0; i < header.length; i++) {
row.getCells().get(i).getCellFormat().setVerticalAlignment(VerticalAlignment.Middle);
Paragraph p=row.getCells().get(i).addParagraph();
p.getFormat().setHorizontalAlignment(HorizontalAlignment.Center);
TextRange range1=p.appendText(header[i]);
range1.getCharacterFormat().setFontName("Arial");
range1.getCharacterFormat().setFontSize(12f);
range1.getCharacterFormat().setBold(true);
range1.getCharacterFormat().setTextColor(Color.white);
}//写入剩余组内容到表格,并格式化数据
for (int r = 0; r < data.length; r++) {
TableRow dataRow= table.getRows().get(r + 1);
dataRow.setHeight(25);
dataRow.setHeightType(TableRowHeightType.Exactly);
dataRow.getRowFormat().setBackColor(Color.white);for (int c = 0; c < data[r].length; c++) {
dataRow.getCells().get(c).getCellFormat().setVerticalAlignment(VerticalAlignment.Middle);
TextRange range2=dataRow.getCells().get(c).addParagraph().appendText(data[r][c]);
range2.getOwnerParagraph().getFormat().setHorizontalAlignment(HorizontalAlignment.Center);
range2.getCharacterFormat().setFontName("Arial");
range2.getCharacterFormat().setFontSize(10f);
}
}
Step 4:合并单元格
table.applyVerticalMerge(0,1,2);
table.applyVerticalMerge(0,4,5);
Step 5:插入图片到单元格
DocPicture dp = table.getRows().get(1).getCells().get(0).addParagraph().appendPicture("1.png");
dp.getOwnerParagraph().getFormat().setHorizontalAlignment(HorizontalAlignment.Center);
Step 6:设置单元格背景色
for (int j = 1; j < table.getRows().getCount(); j++) {if (j % 2 == 0) {
TableRow row2=table.getRows().get(j);for (int f = 1; f < row2.getCells().getCount(); f++) {
row2.getCells().get(f).getCellFormat().setBackColor(new Color(144,238,144));
}
}
}
Step 7:设置表格边框样式
table.getTableFormat().getBorders().setBorderType(BorderStyle.Thick_Thin_Large_Gap);
Step 8: 保存文档
doc.saveToFile("CreateTable.docx", FileFormat.Docx_2013);
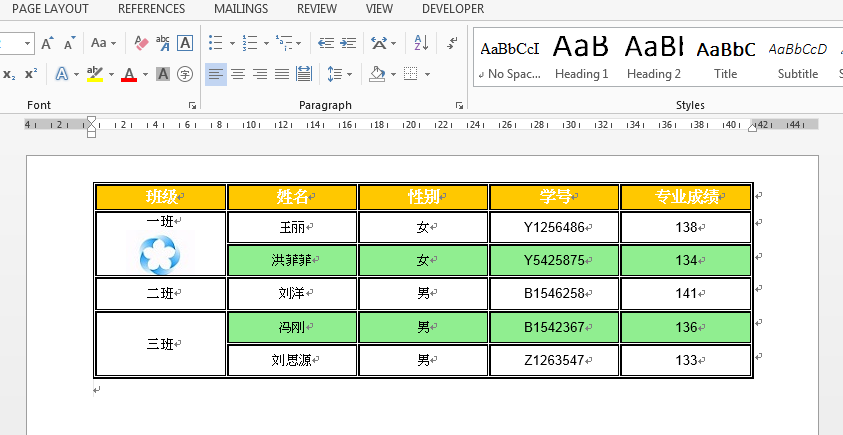
表格创建效果:
全部代码:


import com.spire.doc.*;import com.spire.doc.documents.*;importcom.spire.doc.fields.DocPicture;importcom.spire.doc.fields.TextRange;import java.awt.*;public classCreateTable {public static voidmain(String[] args){//创建Document对象
Document doc = newDocument();
Section sec=doc.addSection();//声明数组内容
String[] header = {"班级","姓名","性别", "学号", "专业成绩"};
String[][] data={new String[]{"一班","王丽", "女", "Y1256486", "138"},new String[]{"一班","洪菲菲", "女", "Y5425875", "134"},new String[]{"二班","刘洋", "男", "B1546258", "141"},new String[]{"三班","冯刚", "男", "B1542367", "136"},new String[]{"三班","刘思源", "男", "Z1263547", "133"},
};//添加表格
Table table = sec.addTable(true);
table.resetCells(data.length+ 1, header.length);//设置表格第一行作为表头,写入表头数组内容,并格式化表头数据
TableRow row = table.getRows().get(0);
row.isHeader(true);
row.setHeight(20);
row.setHeightType(TableRowHeightType.Exactly);
row.getRowFormat().setBackColor(Color.ORANGE);for (int i = 0; i < header.length; i++) {
row.getCells().get(i).getCellFormat().setVerticalAlignment(VerticalAlignment.Middle);
Paragraph p=row.getCells().get(i).addParagraph();
p.getFormat().setHorizontalAlignment(HorizontalAlignment.Center);
TextRange range1=p.appendText(header[i]);
range1.getCharacterFormat().setFontName("Arial");
range1.getCharacterFormat().setFontSize(12f);
range1.getCharacterFormat().setBold(true);
range1.getCharacterFormat().setTextColor(Color.white);
}//写入剩余组内容到表格,并格式化数据
for (int r = 0; r < data.length; r++) {
TableRow dataRow= table.getRows().get(r + 1);
dataRow.setHeight(25);
dataRow.setHeightType(TableRowHeightType.Exactly);
dataRow.getRowFormat().setBackColor(Color.white);for (int c = 0; c < data[r].length; c++) {
dataRow.getCells().get(c).getCellFormat().setVerticalAlignment(VerticalAlignment.Middle);
TextRange range2=dataRow.getCells().get(c).addParagraph().appendText(data[r][c]);
range2.getOwnerParagraph().getFormat().setHorizontalAlignment(HorizontalAlignment.Center);
range2.getCharacterFormat().setFontName("Arial");
range2.getCharacterFormat().setFontSize(10f);
}
}//纵向合并指定单元格
table.applyVerticalMerge(0,1,2);
table.applyVerticalMerge(0,4,5);//插入图片到指定单元格
DocPicture dp = table.getRows().get(1).getCells().get(0).addParagraph().appendPicture("1.png");
dp.getOwnerParagraph().getFormat().setHorizontalAlignment(HorizontalAlignment.Center);//设置单元格背景颜色
for (int j = 1; j < table.getRows().getCount(); j++) {if (j % 2 == 0) {
TableRow row2=table.getRows().get(j);for (int f = 1; f < row2.getCells().getCount(); f++) {
row2.getCells().get(f).getCellFormat().setBackColor(new Color(144,238,144));
}
}
}//设置表格边框样式
table.getTableFormat().getBorders().setBorderType(BorderStyle.Thick_Thin_Large_Gap);//保存文档
doc.saveToFile("CreateTable.docx", FileFormat.Docx_2013);
}
}
View Code
(本文完)
转载请注明出处!
这篇关于java word表格_Java 在Word中创建表格的文章就介绍到这儿,希望我们推荐的文章对编程师们有所帮助!


