本文主要是介绍星期二 2021年2月23日 spring 12-19,希望对大家解决编程问题提供一定的参考价值,需要的开发者们随着小编来一起学习吧!


7、Bean的自动装配
- 自动装配是Spring满足bean依赖的一种方式
- Spring会在上下文中自动寻找,并自动给bean装配属性
在Spring中有三种装配的方式
- 在xml中显示的配置
- 在java中显示的配置
- 隐式的自动装配bean 【重要】
7.1 测试
-
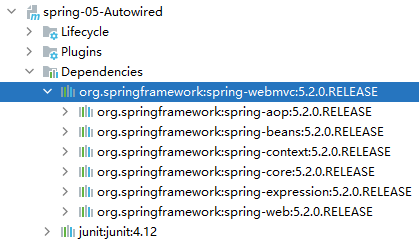
新建一个maven项目,spring-05-Autowired 的项目。
-
src/main/java中,新建包com.kuang.pojo,在其中新建3份class文件:Dog,Cat,People。
// Cat
package com.kuang.pojo;public class Cat {public void shout() {System.out.println("miao~");}
}
// Dog
package com.kuang.pojo;public class Dog {public void shout() {System.out.println("wang~");}
}
// People
package com.kuang.pojo;public class People {private Cat cat;private Dog dog;private String name;public Cat getCat() {return cat;}public void setCat(Cat cat) {this.cat = cat;}public Dog getDog() {return dog;}public void setDog(Dog dog) {this.dog = dog;}public String getName() {return name;}public void setName(String name) {this.name = name;}@Overridepublic String toString() {return "People{" +"cat=" + cat +", dog=" + dog +", name='" + name + '\'' +'}';}
}
- resources中新建beans.xml文件
<?xml version="1.0" encoding="UTF-8"?>
<beans xmlns="http://www.springframework.org/schema/beans"xmlns:xsi="http://www.w3.org/2001/XMLSchema-instance"xsi:schemaLocation="http://www.springframework.org/schema/beanshttps://www.springframework.org/schema/beans/spring-beans.xsd"></beans>
环境搭建:一个人有两个宠物
7.2 byName自定装配
1.不使用byName
- beans.xml文件添加下面的内容:
<bean id="cat" class="com.kuang.pojo.Cat"/><bean id="dog" class="com.kuang.pojo.Dog"/><bean id="people" class="com.kuang.pojo.People"><property name="name" value="狂神"/><property name="dog" ref="dog"/><property name="cat" ref="cat"/></bean>
-
- beans.xml完整内容
<?xml version="1.0" encoding="UTF-8"?>
<beans xmlns="http://www.springframework.org/schema/beans"xmlns:xsi="http://www.w3.org/2001/XMLSchema-instance"xsi:schemaLocation="http://www.springframework.org/schema/beanshttps://www.springframework.org/schema/beans/spring-beans.xsd"><bean id="cat" class="com.kuang.pojo.Cat"/><bean id="dog" class="com.kuang.pojo.Dog"/><bean id="people" class="com.kuang.pojo.People"><property name="name" value="狂神"/><property name="dog" ref="dog"/><property name="cat" ref="cat"/></bean>
</beans>
test.java中新建MyTest的class文件。
import com.kuang.pojo.People;
import org.junit.Test;
import org.springframework.context.ApplicationContext;
import org.springframework.context.support.ClassPathXmlApplicationContext;public class MyTest {@Testpublic void test1() {ApplicationContext context = new ClassPathXmlApplicationContext("beans.xml");People people = context.getBean("people", People.class);people.getDog().shout();people.getCat().shout();}
}- pom.xml加上下面代码:
<dependencies><dependency><groupId>junit</groupId><artifactId>junit</artifactId><version>4.12</version><scope>test</scope></dependency></dependencies>
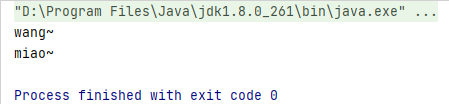
- 结果
[外链图片转存失败,源站可能有防盗链机制,建议将图片保存下来直接上传(img-P4jzvRnL-1614090199491)(C:/Users/Administrator/AppData/Roaming/Typora/typora-user-images/image-20210223094312885.png)]
[13、注解实现自动装配]
2.使用autowire实现自动装配。byName
beans.xml文件修改内容:
    <bean id="people" class="com.kuang.pojo.People" autowire="byName"><property name="name" value="狂神"/></bean>加上了autowire="byName"
删除了<property name="dog" ref="dog"/>
删除了<property name="cat" ref="cat"/>
beans.xml文件完整内容:
<?xml version="1.0" encoding="UTF-8"?>
<beans xmlns="http://www.springframework.org/schema/beans"xmlns:xsi="http://www.w3.org/2001/XMLSchema-instance"xsi:schemaLocation="http://www.springframework.org/schema/beanshttps://www.springframework.org/schema/beans/spring-beans.xsd"><bean id="cat" class="com.kuang.pojo.Cat"/><bean id="dog" class="com.kuang.pojo.Dog"/><bean id="people" class="com.kuang.pojo.People" autowire="byName"><property name="name" value="狂神"/></bean>
</beans>
- 运行程序,结果和上次一样。
byName : 会自动在容器上下文中查找,和自己对象set方法后面的值对应的bean_id
7.3 byTpye自动装配
byName : 会自动在容器上下文中查找,和自己对象set方法后面的值对应的bean_id
byType : 会自动在容器上下文中查找,和自己对象属性类型相同的bean
beans.xml文件修改内容:
<bean id="people" class="com.kuang.pojo.People" autowire="byName"><property name="name" value="狂神"/></bean>修改autowire="byType"<bean id="people" class="com.kuang.pojo.People" autowire="byType"><property name="name" value="狂神"/></bean>
并将beans.xml文件修改内容:
<bean id="dog" class="com.kuang.pojo.Dog"/>
修改为:
<bean id="dog1111" class="com.kuang.pojo.Dog"/>
beans.xml文件完整内容:
<?xml version="1.0" encoding="UTF-8"?>
<beans xmlns="http://www.springframework.org/schema/beans"xmlns:xsi="http://www.w3.org/2001/XMLSchema-instance"xsi:schemaLocation="http://www.springframework.org/schema/beanshttps://www.springframework.org/schema/beans/spring-beans.xsd"><bean id="cat" class="com.kuang.pojo.Cat"/><bean id="dog1111" class="com.kuang.pojo.Dog"/><bean id="people" class="com.kuang.pojo.People" autowire="byType"><property name="name" value="狂神"/></bean>
</beans>
- 运行程序,结果和上次一样。
小结:
- byName的时候,需要保证所有bean的id唯一,并且这个bean需要和自动注入的属性的set方法的值一致
- byType的时候,需要保证所有bean的class唯一,并且这个bean需要和自动注入的属性的类型一致

7.4 使用注解实现自动装配
jdk1.5支持的注解,Spring2.5就支持注解了!
要使用注解须知:
1.导入约束
xmlns:context="http://www.springframework.org/schema/context"
2.配置注解的支持 context:annotation-config/
<context:annotation-config/>
beans.xml文件完整内容:
<?xml version="1.0" encoding="UTF-8"?>
<beans xmlns="http://www.springframework.org/schema/beans"xmlns:xsi="http://www.w3.org/2001/XMLSchema-instance"xmlns:context="http://www.springframework.org/schema/context"xmlns:aop="http://www.springframework.org/schema/aop"xsi:schemaLocation="http://www.springframework.org/schema/beanshttps://www.springframework.org/schema/beans/spring-beans.xsdhttps://www.springframework.org/schema/contexthttps://www.springframework.org/schema/context/spring-context.xsdhttps://www.springframework.org/schema/aop/spring-aophttps://www.springframework.org/schema/aop/spring-aop.xsd"><context:annotation-config/><bean id="cat" class="com.kuang.pojo.Cat"/><bean id="dog" class="com.kuang.pojo.Dog"/><bean id="people" class="com.kuang.pojo.People"/></beans>
@Autowired
- 在people中加上@Autowired
这里的程序没有运行成功啊。
原因是因为http和https,在这两处写错了。
直接在属性上使用即可,也可以在set方法上使用
使用Autowired我们可以不用编写set方法了,前提是你这个自动装配的属性在 IOC(Spring)容器中存在,且符合名字byName
科普:
@Nullable	字段标记了这个注解,说明这个字段可以为null;
1
public @interface Autowired {boolean required() default true;
}
测试代码:
public class People {//如果显示定义了Autowired的required属性为false,说明这个对象可以为Null,否则不允许为空@Autowired(required = false)private Cat cat;@Autowiredprivate Dog dog;private String name;
}
如果@Autowired自动装配的环境比较复杂,自动装配无法通过一个注解【@Autowired】完成的时候,我们可以使用==@Qualifier(value = “xxx”)==去配合@Autowire的使用,指定一个唯一的bean对象注入!
public class People {@Autowired@Qualifier(value = "cat2")private Cat cat;@Autowiredprivate Dog dog;private String name;
}
@Resource
public class People {@Resource( name = "cat3")private Cat cat;@Resourceprivate Dog dog;private String name;
}
12345678
小结:
@Resource和@Autowired的区别:
- 都是用来自动转配的,都可以放在属性字段上
- @Autowired 是通过byType的方式实现,而且必须要求这个对象存在!【常用】
- @Resource 默认通过byName的方式实现,如果找不到名字,则通过byType实现!如果两个都找不到的情况下,就报错!【常用】
- 执行顺序不同: @Autowired 通过byType的方式实现。@Resource默认通过byName的方式实现。
入!
public class People {@Autowired@Qualifier(value = "cat2")private Cat cat;@Autowiredprivate Dog dog;private String name;
}
123456789
@Resource
public class People {@Resource( name = "cat3")private Cat cat;@Resourceprivate Dog dog;private String name;
}
12345678
小结:
@Resource和@Autowired的区别:
- 都是用来自动转配的,都可以放在属性字段上
- @Autowired 是通过byType的方式实现,而且必须要求这个对象存在!【常用】
- @Resource 默认通过byName的方式实现,如果找不到名字,则通过byType实现!如果两个都找不到的情况下,就报错!【常用】
- 执行顺序不同: @Autowired 通过byType的方式实现。@Resource默认通过byName的方式实现。
8、使用注解开发
在spring4之后,想要使用注解形式,必须得要引入aop的包
- 自己的和狂神的一样啊。不知道为啥上面的不对。http和https这两点出错。
-
新建一个spring-06-anno的maven项目。
-
resources中新建 applicationContext.xml文件。
<?xml version="1.0" encoding="UTF-8"?>
<beans xmlns="http://www.springframework.org/schema/beans"xmlns:xsi="http://www.w3.org/2001/XMLSchema-instance"xmlns:context="http://www.springframework.org/schema/context"xsi:schemaLocation="http://www.springframework.org/schema/beanshttps://www.springframework.org/schema/beans/spring-beans.xsdhttp://www.springframework.org/schema/contexthttps://www.springframework.org/schema/context/spring-context.xsd"><context:annotation-config/></beans>
- src/main/java中新建包com.kuang.pojo,在其中新建User.java的文件,并在applicationContext.xml增加内容:
<!----><context:component-scan base-package="com.kuang.pojo"/><context:annotation-config/>
<?xml version="1.0" encoding="UTF-8"?>
<beans xmlns="http://www.springframework.org/schema/beans"xmlns:xsi="http://www.w3.org/2001/XMLSchema-instance"xmlns:context="http://www.springframework.org/schema/context"xsi:schemaLocation="http://www.springframework.org/schema/beanshttps://www.springframework.org/schema/beans/spring-beans.xsdhttp://www.springframework.org/schema/contexthttps://www.springframework.org/schema/context/spring-context.xsd"><!----><context:component-scan base-package="com.kuang.pojo"/><context:annotation-config/></beans>
- src/main/java中新建包com.kuang.controller,com.kuang.dao,com.kuang.service。
- User.java添加内容:
package com.kuang.pojo;import org.springframework.stereotype.Component;@Component
public class User {public String name = "琴江";
}
- test/java中新建MyTest.java文件。
import com.kuang.pojo.User;
import org.springframework.context.ApplicationContext;
import org.springframework.context.support.ClassPathXmlApplicationContext;public class MyTest {public static void main(String[] args) {ApplicationContext context = new ClassPathXmlApplicationContext("applicationContext.xml");User user = (User) context.getBean("user");System.out.println(user.name);}
}
- 结果

- User修改内容
package com.kuang.pojo;import org.springframework.stereotype.Component;@Component
public class User {public String name;
}
- 结果:

1.属性注入
使用注解注入属性
- User修改内容。可以不用提供set方法,直接在直接名上添加@value(“值”)
// 加上了注解:@Value("kuangshen")package com.kuang.pojo;import org.springframework.beans.factory.annotation.Value;
import org.springframework.stereotype.Component;@Component
public class User {@Value("kuangshen")public String name;
}
- 结果:

-
注射在set方法上。如果提供了set方法,在set方法上添加@value(“值”);
-
User修改内容
// 修改了@Value("kuangshen")的位置,增加了set方法。package com.kuang.pojo;import org.springframework.beans.factory.annotation.Value;
import org.springframework.stereotype.Component;@Component
public class User {public String name;@Value("kuangshen222")public void setName(String name) {this.name = name;}
}
- 结果:

2.衍生注解
我们这些注解,就是替代了在配置文件当中配置步骤而已!更加的方便快捷!
@Component三个衍生注解
为了更好的进行分层,Spring可以使用其它三个注解,功能一样,目前使用哪一个功能都一样。
- @Controller:web层
- @Service:service层
- @Repository:dao层
写上这些注解,就相当于将这个类交给Spring管理装配了!
- com.kuang.dao中新建UserDao的class文件
package com.kuang.dao;import org.springframework.stereotype.Repository;@Repository
public class UserDao {}
- com.kuang.service中新建UserService的class文件
package com.kuang.service;import org.springframework.stereotype.Service;@Service
public class UserService {
}
- com.kuang.controller中新建UserController的class文件
package com.kuang.controller;import org.springframework.stereotype.Controller;@Controller
public class UserController {
}
- applicationContext.xml文件修改内容
<context:component-scan base-package="com.kuang"/><context:annotation-config/>
<?xml version="1.0" encoding="UTF-8"?>
<beans xmlns="http://www.springframework.org/schema/beans"xmlns:xsi="http://www.w3.org/2001/XMLSchema-instance"xmlns:context="http://www.springframework.org/schema/context"xsi:schemaLocation="http://www.springframework.org/schema/beanshttps://www.springframework.org/schema/beans/spring-beans.xsdhttp://www.springframework.org/schema/contexthttps://www.springframework.org/schema/context/spring-context.xsd"><!----><context:component-scan base-package="com.kuang"/><context:annotation-config/></beans>
3.自动装配注解
在Bean的自动装配已经讲过了,可以回顾!
4.作用域
@scope
- singleton:默认的,Spring会采用单例模式创建这个对象。关闭工厂 ,所有的对象都会销毁。
- prototype:多例模式。关闭工厂 ,所有的对象不会销毁。内部的垃圾回收机制会回收
@Controller("user")
@Scope("prototype")
public class User {@Value("秦疆")public String name;
}
小结
XML与注解比较
- XML可以适用任何场景 ,结构清晰,维护方便
- 注解不是自己提供的类使用不了,开发简单方便
xml与注解整合开发 :推荐最佳实践
- xml管理Bean
- 注解完成属性注入
- 使用过程中, 可以不用扫描,扫描是为了类上的注解
<context:annotation-config/>
作用:
- 进行注解驱动注册,从而使注解生效
- 用于激活那些已经在spring容器里注册过的bean上面的注解,也就是显示的向Spring注册
- 如果不扫描包,就需要手动配置bean
- 如果不加注解驱动,则注入的值为null!
[15、使用JavaConfig实现配置]
5.基于Java类进行配置Spring
使用这种方式可以完全替换掉xml文件的配置。全权交给java来做。
JavaConfig 原来是 Spring 的一个子项目,它通过 Java 类的方式提供 Bean 的定义信息,在 Spring4 的版本, JavaConfig 已正式成为 Spring4 的核心功能 。
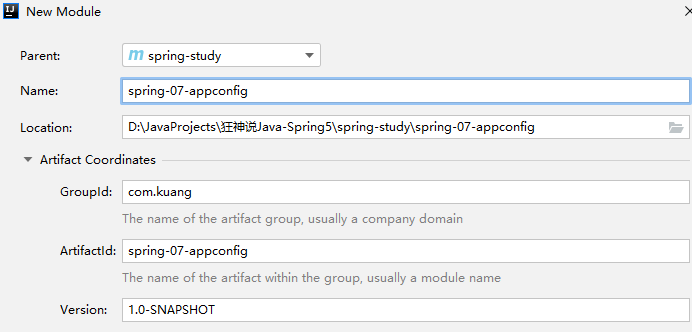
- 新建一个maven项目 spring-07-appconfig
- 新建com.kuang.pojo包,在其中新建User的class文件。
package com.kuang.pojo;public class User {private String name;public String getName() {return name;}public void setName(String name) {this.name = name;}@Overridepublic String toString() {return "User{" +"name='" + name + '\'' +'}';}
}
- 新建一个com.kuang.config包,在其中新建KuangConfig文件
package com.kuang.config;import com.kuang.pojo.User;
import org.springframework.context.annotation.Bean;
import org.springframework.context.annotation.Configuration;@Configuration
public class KuangConfig {@Beanpublic User getUser() {return new User();}
}
- com.kuang.pojo包中的User文件增加内容:
@Component@Value("QINJIANG")
package com.kuang.pojo;import org.springframework.beans.factory.annotation.Value;
import org.springframework.stereotype.Component;@Component
public class User {private String name;public String getName() {return name;}@Value("QINJIANG")public void setName(String name) {this.name = name;}@Overridepublic String toString() {return "User{" +"name='" + name + '\'' +'}';}
}
- test/java中新建MyTest
import com.kuang.config.KuangConfig;
import com.kuang.pojo.User;
import org.springframework.context.ApplicationContext;
import org.springframework.context.annotation.AnnotationConfigApplicationContext;public class MyTest {public static void main(String[] args) {ApplicationContext context = new AnnotationConfigApplicationContext(KuangConfig.class);User getUser = (User) context.getBean("getUser");System.out.println(getUser.getName());}
}
- 结果:


- 下图中的两份内容的名字必须相同。

- KuangConfig代码,增加了注释。
package com.kuang.config;import com.kuang.pojo.User;
import org.springframework.context.annotation.Bean;
import org.springframework.context.annotation.ComponentScan;
import org.springframework.context.annotation.Configuration;@Configuration // 因为他本身就是一个@Component,他也会被spring容器托管,注册到容器中,@Configuration代表这是一个配置类,就和我们之前看的beans.xml是一样的。
@ComponentScan("com.kuang.pojo")
public class KuangConfig {// 注册一个bean,就相当于我们之前写的一个bean标签。// 这个方法的名字,就相当于bean标签中的id属性// 这个方法的返回值,就相当于bean标签中的class属性。@Beanpublic User getUser() {return new User();}
}
- User增加注释。实体类代码
package com.kuang.pojo;import org.springframework.beans.factory.annotation.Value;
import org.springframework.stereotype.Component;// 这里的注解的意思是,这个类被spring接管了,注册到了容器中。
@Component
public class User {private String name;public String getName() {return name;}@Value("QINJIANG") // 属性注入值public void setName(String name) {this.name = name;}@Overridepublic String toString() {return "User{" +"name='" + name + '\'' +'}';}
}
- com.kuang.config中新建一个KuangConfig2的class文件。
- KuangConfig中增加内容:配置文件代码:
@Import(KuangConfig2.class)
package com.kuang.config;import com.kuang.pojo.User;
import org.springframework.context.annotation.Bean;
import org.springframework.context.annotation.ComponentScan;
import org.springframework.context.annotation.Configuration;
import org.springframework.context.annotation.Import;@Configuration // 因为他本身就是一个@Component,他也会被spring容器托管,注册到容器中,@Configuration代表这是一个配置类,就和我们之前看的beans.xml是一样的。
@ComponentScan("com.kuang.pojo")
@Import(KuangConfig2.class)
public class KuangConfig {// 注册一个bean,就相当于我们之前写的一个bean标签。// 这个方法的名字,就相当于bean标签中的id属性// 这个方法的返回值,就相当于bean标签中的class属性。@Beanpublic User getUser() {return new User();}
}
- 测试类:
import com.kuang.config.KuangConfig;
import com.kuang.pojo.User;
import org.springframework.context.ApplicationContext;
import org.springframework.context.annotation.AnnotationConfigApplicationContext;public class MyTest {public static void main(String[] args) {ApplicationContext context = new AnnotationConfigApplicationContext(KuangConfig.class);User getUser = (User) context.getBean("getUser");System.out.println(getUser.getName());}
}
这种纯java的配置方式,在springboot中随处可见。
关于这种Java类的配置方式,我们在之后的SpringBoot 和 SpringCloud中还会大量看到,我们需要知道这些注解的作用即可!
- 新建springboot项目

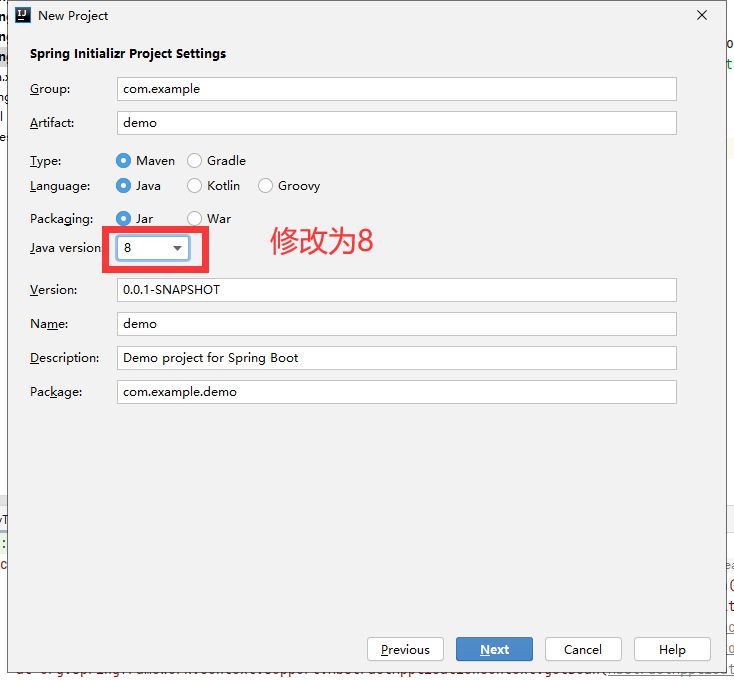
-
他会自动下载很多的东西。
-
删掉阴影部分内容

[17、静态代理模式]
10 代理模式
代理模式是AOP的底层
【Spring AOP Spring MVC】面试必问
代理模式的分类:
- 静态代理
- 动态代理
代理模式的图形表示:

10.1 静态代理
角色分析:
- 抽象角色:一般会使用接口或者抽象类来实现
- 真实角色:被代理的角色
- 代理角色:代理真实角色,代理真实角色后,一般会做一些附属操作
- 客户:访问代理对象的人。
- 新建maven项目 spring-08-proxy
- 在src/main/java中新建包com.kuang.demo01。在其中新建一个rent接口文件
package com.kuang.demo01;// 租房
public interface Rent {public void rent();
}
- 包com.kuang.demo01中新建一个Host的class文件。
package com.kuang.demo01;// 房东
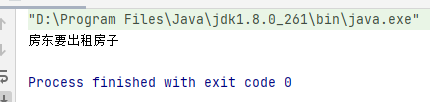
public class Host implements Rent {@Overridepublic void rent() {System.out.println("房东要出租房子");}
}
- 包com.kuang.demo01中新建一个Client的class文件。
package com.kuang.demo01;public class Client {public static void main(String[] args) {Host host = new Host();host.rent();}
}
- 运行Client,结果为:
- 新建一个代理角色,Proxy的class文件。
package com.kuang.demo01;public class Proxy {private Host host;public Proxy() {}public Proxy(Host host) {this.host = host;}
}
package com.kuang.demo01;public class Proxy implements Rent {private Host host;public Proxy() {}public Proxy(Host host) {this.host = host;}@Overridepublic void rent() {host.rent();}
}- client代码:
package com.kuang.demo01;public class Client {public static void main(String[] args) {Host host = new Host();// 代理Proxy proxy = new Proxy(host);proxy.rent();}
}- 运行client代码

- Proxy.java的代码
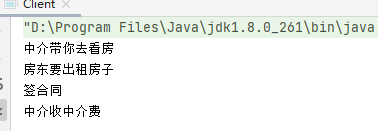
package com.kuang.demo01;public class Proxy implements Rent {private Host host;public Proxy() {}public Proxy(Host host) {this.host = host;}public void rent() {seeHouse();host.rent();hetong();fare();}// 看房public void seeHouse() {System.out.println("中介带你去看房");}// 收中介费public void fare() {System.out.println("中介收中介费");}// 收中介费public void hetong() {System.out.println("签合同");}
}
- 运行Client文件,结果为:
代码步骤:
1、接口。Rent接口程序
package com.kuang.demo01;// 租房
public interface Rent {public void rent();
}
2、真实角色。Host。房东。
package com.kuang.demo01;// 房东
public class Host implements Rent {@Overridepublic void rent() {System.out.println("房东要出租房子");}
}
3、代理角色。Proxy
package com.kuang.demo01;public class Proxy implements Rent {private Host host;public Proxy() {}public Proxy(Host host) {this.host = host;}public void rent() {seeHouse();host.rent();hetong();fare();}// 看房public void seeHouse() {System.out.println("中介带你去看房");}// 收中介费public void fare() {System.out.println("中介收中介费");}// 收中介费public void hetong() {System.out.println("签合同");}
}
4、客户端访问代理角色
package com.kuang.demo01;public class Client {public static void main(String[] args) {Host host = new Host();// 代理Proxy proxy = new Proxy(host);proxy.rent();}
}
10.1 静态代理
代理模式的好处:
- 可以使真实角色的操作更加纯粹,不用去关注一些公共的业务
- 公共业务交给代理角色,实现了业务的分工。
- 公共业务发生扩展的时候,方便集中管理。
缺点:
- 一个真实角色会产生一个代理类,代码量会翻倍
[P18 静态代理再理解]
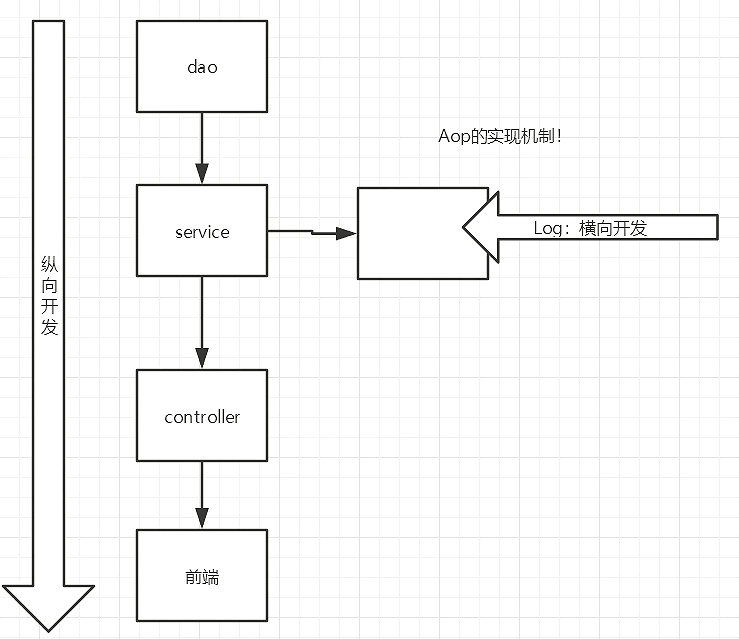
10.2 加深理解
聊聊AOP
- 在src/main/java中新建包com.kuang.demo02。在其中新建接口文件UserService
package com.kuang.demo02;public interface UserService {public void add();public void delete();public void update();public void query();
}
- 包com.kuang.demo02中新建class文件UserServiceImpl
package com.kuang.demo02;// 真实对象
public class UserServiceImpl implements UserService {public void add() {System.out.println("add");}public void delete() {System.out.println("delete");}public void update() {System.out.println("update");}public void query() {System.out.println("query");}
}- client修改内容:
package com.kuang.demo02;public class Client {public static void main(String[] args) {UserServiceImpl userService = new UserServiceImpl();userService.add();}
}- 新建一个UserServiceProxy.java的文件
package com.kuang.demo02;public class UserServiceProxy implements UserService {private UserServiceImpl userService;public void setUserService(UserServiceImpl userService) {this.userService = userService;}public void add() {log("add");userService.add();}public void delete() {log("delete");userService.add();}public void update() {log("update");userService.add();}public void query() {log("query");userService.add();}// 日志方法public void log(String msg) {System.out.println("【Debug】使用了" + msg + "方法");}
}
- client修改代码
package com.kuang.demo02;public class Client {public static void main(String[] args) {UserServiceImpl userService = new UserServiceImpl();UserServiceProxy proxy = new UserServiceProxy();proxy.setUserService(userService);proxy.add();}
}- 运行client的结果
- client修改代码
package com.kuang.demo02;public class Client {public static void main(String[] args) {UserServiceImpl userService = new UserServiceImpl();UserServiceProxy proxy = new UserServiceProxy();proxy.setUserService(userService);proxy.delete();}
}- 运行client的结果

代理模式的优点,不改变原有代码,增加业务功能。
聊聊AOP
[19、动态代理详解] 前10min没听懂是啥。走神了。
10.3 动态代理
动态代理和静态代理角色一样
动态代理是动态生成的,不是我们直接写好的。
动态代理分为两大类:基于接口的动态代理,基于类的动态代理
基于接口–jdk动态代理 【我们在这里使用】
基于类:cglib
java字节码实现:javasis
需要了解两个类:Proxy 代理, InvocationHandler 调用处理程序
jdk api 1.8_google 文档
InvocationHandler
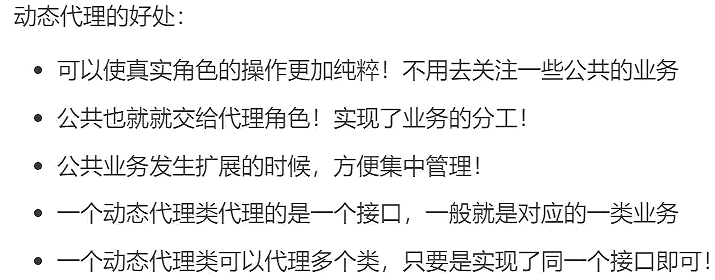
动态代理的好处:
一个动态代理类代理的是一个接口,一般就是对应的一类业务
一个动态代理类可以代理多个类,
-
在com.kuang中新建一个包demo03,拷贝demo01的Host和Rent文件。
-
在com.kuang.demo03中新建一个ProxyInvocationHandler的class文件。
package com.kuang.demo03;import java.lang.reflect.InvocationHandler;
import java.lang.reflect.Method;
import java.lang.reflect.Proxy;// 可以用这个类,自动生成代理类。
public class ProxyInvocationHandler implements InvocationHandler {// 被代理的接口private Rent rent;public void setRent(Rent rent) {this.rent = rent;}// 生成得到代理类public Object getProxy() {return Proxy.newProxyInstance(this.getClass().getClassLoader(), rent.getClass().getInterfaces(), this);}// 此处的作用是处理代理实例,并返回结果public Object invoke(Object proxy, Method method, Object[] args) throws Throwable {// 动态代理的本质是使用反射机制实现Object result = method.invoke(rent, args);return result;}
}- 在com.kuang.demo03中新建一个Client文件。
package com.kuang.demo03;public class Client {public static void main(String[] args) {// 真实角色Host host = new Host();// 代理角色ProxyInvocationHandler pih = new ProxyInvocationHandler();// 通过调用程序处理角色来处理我们要调用的接口对象pih.setRent(host);Rent proxy = (Rent) pih.getProxy();// 这里的proxy就是动态生成。我们并没有写。proxy.rent();}
}
- 运行Client结果
- ProxyInvocationHandler的class文件修改内容如下:
package com.kuang.demo03;import java.lang.reflect.InvocationHandler;
import java.lang.reflect.Method;
import java.lang.reflect.Proxy;// 可以用这个类,自动生成代理类。
public class ProxyInvocationHandler implements InvocationHandler {// 被代理的接口private Rent rent;public void setRent(Rent rent) {this.rent = rent;}// 生成得到代理类public Object getProxy() {return Proxy.newProxyInstance(this.getClass().getClassLoader(), rent.getClass().getInterfaces(), this);}// 此处的作用是处理代理实例,并返回结果public Object invoke(Object proxy, Method method, Object[] args) throws Throwable {// 动态代理的本质是使用反射机制实现seeHouse();Object result = method.invoke(rent, args);fare();return result;}public void seeHouse() {System.out.println("中介去看房子");}public void fare() {System.out.println("中介收中介费");}
}- 运行Client结果

- 新建一个com.kuang.demo04的包,拷贝ProxyInvocationHandler文件。
package com.kuang.demo04;import com.kuang.demo03.Rent;import java.lang.reflect.InvocationHandler;
import java.lang.reflect.Method;
import java.lang.reflect.Proxy;// 可以用这个类,自动生成代理类。
public class ProxyInvocationHandler implements InvocationHandler {// 被代理的接口private Object target;public void setTarget(Object target) {this.target = target;}// 生成得到代理类public Object getProxy() {return Proxy.newProxyInstance(this.getClass().getClassLoader(), target.getClass().getInterfaces(), this);}// 此处的作用是处理代理实例,并返回结果public Object invoke(Object proxy, Method method, Object[] args) throws Throwable {// 动态代理的本质是使用反射机制实现Object result = method.invoke(target, args);return result;}
}- 新建一个Client的class文件
package com.kuang.demo04;import com.kuang.demo02.UserService;
import com.kuang.demo02.UserServiceImpl;public class Client {public static void main(String[] args) {// 真实角色UserServiceImpl userService = new UserServiceImpl();// 代理角色,不存在ProxyInvocationHandler pih = new ProxyInvocationHandler();// 通过调用程序处理角色来处理我们要调用的接口对象;设置要代理的对象。pih.setTarget(userService);UserService proxy = (UserService) pih.getProxy();// 这roxy就是动态生成。我们并没有写。proxy.delete();}
}- Client运行结果:
- 增加一个日志功能。ProxyInvocationHandler添加内容:
//日志功能public void log(String msg) {System.out.println("执行了" + msg + "方法");}
package com.kuang.demo04;import com.kuang.demo03.Rent;import java.lang.reflect.InvocationHandler;
import java.lang.reflect.Method;
import java.lang.reflect.Proxy;// 可以用这个类,自动生成代理类。
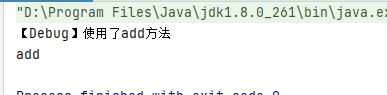
public class ProxyInvocationHandler implements InvocationHandler {// 被代理的接口private Object target;public void setTarget(Object target) {this.target = target;}// 生成得到代理类public Object getProxy() {return Proxy.newProxyInstance(this.getClass().getClassLoader(), target.getClass().getInterfaces(), this);}// 此处的作用是处理代理实例,并返回结果public Object invoke(Object proxy, Method method, Object[] args) throws Throwable {//日志功能//通过反射来获得名字log(method.getName());// 动态代理的本质是使用反射机制实现Object result = method.invoke(target, args);return result;}//日志功能public void log(String msg) {System.out.println("执行了" + msg + "方法");}
}- 运行Client程序

动态代理的好处:
一个动态代理类代理的是一个接口,一般就是对应的一类业务
一个动态代理类可以代理多个类。代码量减少了很多。
这篇关于星期二 2021年2月23日 spring 12-19的文章就介绍到这儿,希望我们推荐的文章对编程师们有所帮助!


