本文主要是介绍【3维视觉】mesh采样成sdf代码分析,sample_SDF_points,希望对大家解决编程问题提供一定的参考价值,需要的开发者们随着小编来一起学习吧!
sample_SDF_points的完整代码
gpu_id = '5'
source_dir = 'demo_data/input'
target_dir = 'demo_data/output'
all_classes = ["02691156","04090263"
]
num_samples_and_method = [(100000, 'uniformly'), (100000, 'near')]
################################################import os
os.environ['CUDA_VISIBLE_DEVICES'] = gpu_id
from datetime import datetime
import numpy as np
import torch
from utils import *for c in all_classes:input_dir = os.path.join(source_dir, c)output_dir = os.path.join(target_dir, c)os.makedirs(output_dir, exist_ok=True)all_shapes = os.listdir(input_dir)all_shapes = [f.split('.')[0] for f in all_shapes]for i, shape_id in enumerate(all_shapes):print(datetime.now().strftime('%Y-%m-%d %H:%M:%S'), c, 'processing: %d/%d'%(i,len(all_shapes)))in_path = os.path.join(input_dir, shape_id+'.obj')out_path = os.path.join(output_dir, shape_id+'.npy')vertices, faces = load_obj(in_path)mesh = obj2nvc(vertices, faces).cuda()mesh_normals = face_normals(mesh)distrib = area_weighted_distribution(mesh, mesh_normals)xyz = sample_points(mesh, num_samples_and_method, mesh_normals, distrib)sd = points_mesh_signed_distance(xyz, mesh)xyz_sd = torch.cat([xyz, sd.unsqueeze(1)], dim=1)rand_idx = torch.randperm(xyz_sd.shape[0])xyz_sd = xyz_sd[rand_idx].cpu().numpy()np.save(out_path, xyz_sd)
导入obj读点面:vertices, faces = load_obj(in_path)
def load_obj(filename):"""Args:filename: str, path to .obj fileReturns:vertices: tensor(float), shape (num_vertices, 3)faces: tensor(long), shape (num_faces, 3)"""assert os.path.exists(filename), 'File \''+filename+'\' does not exist.'reader = tinyobjloader.ObjReader() # 构造tinyobjloader的ObjReader类config = tinyobjloader.ObjReaderConfig()config.triangulate = Truereader.ParseFromFile(filename, config) # 从文件filename中按配置config读objattrib = reader.GetAttrib() # 得到逐点的属性vertices = torch.FloatTensor(attrib.vertices).reshape(-1, 3) # 得到n*3维的张量shapes = reader.GetShapes()faces = []for shape in shapes:faces += [idx.vertex_index for idx in shape.mesh.indices]faces = torch.LongTensor(faces).reshape(-1, 3)return vertices, faces
attrib = reader.GetAttrib()
返回的是attrib_t类型
其中attrib.vertices是将每个点的3个坐标依次排放在一个list中
比如有n个点,得到的attrib.vertices的维度就是3n

class attrib_t(__pybind11_builtins.pybind11_object):# no docdef numpy_vertices(self): # real signature unknown; restored from __doc__""" numpy_vertices(self: tinyobjloader.attrib_t) -> numpy.ndarray[float64] """passdef __init__(self): # real signature unknown; restored from __doc__""" __init__(self: tinyobjloader.attrib_t) -> None """passcolors = property(lambda self: object(), lambda self, v: None, lambda self: None) # defaultnormals = property(lambda self: object(), lambda self, v: None, lambda self: None) # defaulttexcoords = property(lambda self: object(), lambda self, v: None, lambda self: None) # defaultvertices = property(lambda self: object(), lambda self, v: None, lambda self: None) # default
vertices = torch.FloatTensor(attrib.vertices).reshape(-1, 3)
torch.FloatTensor()
类型转换, 将list ,numpy转化为tensor,其中的每个数据是float类型
reshape(-1,3)
维度转换,将tensor转换3列的维度,(-1)表示转换后行的维度需要计算得到。

shapes = reader.GetShapes()
shapes的数据结构

shape.mesh.indices的数据结构
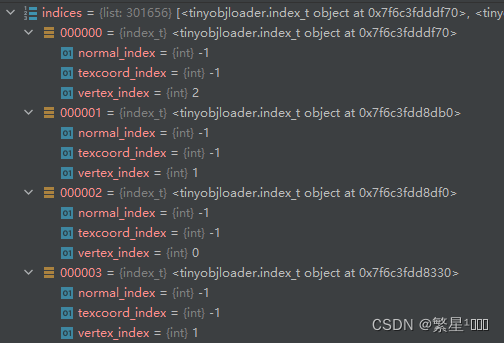
class shape_t(__pybind11_builtins.pybind11_object):# no docdef __init__(self): # real signature unknown; restored from __doc__""" __init__(self: tinyobjloader.shape_t) -> None """passlines = property(lambda self: object(), lambda self, v: None, lambda self: None) # defaultmesh = property(lambda self: object(), lambda self, v: None, lambda self: None) # defaultname = property(lambda self: object(), lambda self, v: None, lambda self: None) # defaultpoints = property(lambda self: object(), lambda self, v: None, lambda self: None) # default
faces += [idx.vertex_index for idx in shape.mesh.indices]
得到的faces的维度为:301,656, 把每个面的三个点索引依次排放到list中

faces = torch.LongTensor(faces).reshape(-1, 3)
得到的faces的维度为:100,552x3,表示的就是有100552个面,每行代表组成这个面的三个顶点的索引
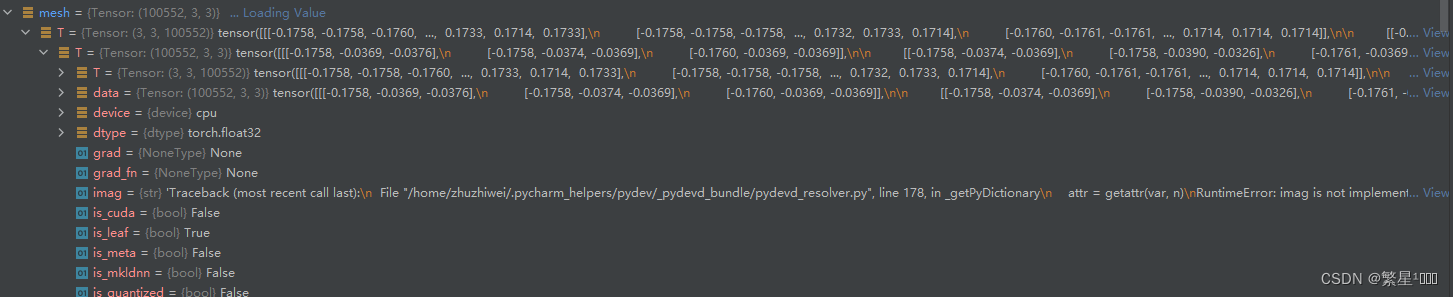
转换数据格式为N面-3点-xyz: mesh = obj2nvc(vertices, faces).cuda()
def obj2nvc(vertices, faces):"""Args:vertices: tensor(float), shape (num_vertices, 3)faces: tensor(long), shape (num_faces, 3)Returns:mesh: tensor(float), shape (num_faces, 3, 3), (num_faces, 3 vertices, xyz coordinates)"""mesh = vertices[faces.flatten()].reshape(faces.size()[0], 3, 3)return mesh.contiguous()
mesh = vertices[faces.flatten()].reshape(faces.size()[0], 3, 3)
得到的mesh的维度是100,552x3x3,即每个面对应的3个点,每一个点对应的3个坐标值
求每个面的法线:mesh_normals = face_normals(mesh)
def face_normals(mesh):"""Args:mesh: tensor(float), shape (num_faces, 3, 3)Returns:normals: tensor(float), shape (num_faces, 3)"""vec_a = mesh[:, 0] - mesh[:, 1] # 每个三角形面的第0个顶点坐标-第1个顶点坐标=矢量10vec_b = mesh[:, 1] - mesh[:, 2] # 每个三角形面的第1个顶点坐标-第2个顶点坐标=矢量21normals = torch.cross(vec_a, vec_b) # 计算两个矢量的叉乘得到法线return normals
分析面的分布:distrib = area_weighted_distribution(mesh, mesh_normals)
def area_weighted_distribution(mesh, normals=None):"""Args:mesh: tensor(float), shape (num_faces, 3, 3)normals: tensor(float), shape (num_faces, 3)Returns:distrib: distribution"""if normals is None:normals = face_normals(mesh)areas = torch.norm(normals, p=2, dim=1) * 0.5areas /= torch.sum(areas) + 1e-10distrib = torch.distributions.Categorical(areas.view(-1))return distrib
torch.norm()
对输入张量input在给定维度dim上求p范数
def norm(input, p="fro", dim=None, keepdim=False, out=None, dtype=None)
参考:
torch.norm()函数的用法
范数理解
重头戏1:xyz = sample_points(mesh, num_samples_and_method, mesh_normals, distrib)
num_samples_and_method = [(100000, 'uniformly'), (100000, 'near')]
从mesh模型上采样点
def sample_points(mesh, num_samples_and_method, normals=None, distrib=None):"""Args:mesh: tensor(float), shape (num_faces, 3, 3)num_samples_and_method: [tuple(int, str)]normals: tensor(float), shape (num_faces, 3)distrib: distributionReturns:samples: tensor(float), shape (num_samples, 3)"""if normals is None:normals = face_normals(mesh)if distrib is None:distrib = area_weighted_distribution(mesh, normals)samples = []for num_samples, method in num_samples_and_method:if method == 'uniformly':samples.append(sample_uniformly(mesh, num_samples))elif method == 'surface':samples.append(sample_on_surface(mesh, num_samples, normals, distrib)[0])elif method == 'near':samples.append(sample_near_surface(mesh, num_samples, normals, distrib))samples = torch.cat(samples, dim=0)return samples
均匀采样:sample_uniformly(mesh, num_samples)
def sample_uniformly(mesh, num_samples):"""sample uniformly in [-1,1] bounding volume.Args:mesh: tensor(float), shape (num_faces, 3, 3)num_samples: intReturns:samples: tensor(float), shape (num_samples, 3)"""samples = (torch.rand(num_samples, 3) - 0.5) * 1.1samples = samples.to(mesh.device)return samples
每个面上采样:sample_on_surface(mesh, num_samples, normals, distrib)
squeeze:压缩维度,
unsqueeze:膨胀维度,unsqueeze(-1)在最后一维增加一个维度
def sample_on_surface(mesh, num_samples, normals=None, distrib=None):"""Args:mesh: tensor(float), shape (num_faces, 3, 3)num_samples: intnormals: tensor(float), shape (num_faces, 3)distrib: distributionReturns:samples: tensor(float), shape (num_samples, 3)normals: tensor(float), shape (num_samples, 3)"""if normals is None:normals = face_normals(mesh)if distrib is None:distrib = area_weighted_distribution(mesh, normals)idx = distrib.sample([num_samples])selected_faces = mesh[idx]selected_normals = normals[idx]u = torch.sqrt(torch.rand(num_samples)).to(mesh.device).unsqueeze(-1)v = torch.rand(num_samples).to(mesh.device).unsqueeze(-1)samples = (1 - u) * selected_faces[:,0,:] + (u * (1 - v)) * selected_faces[:,1,:] + u * v * selected_faces[:,2,:] # 每个面上采样了一个点return samples, selected_normals
sample_near_surface(mesh, num_samples, normals, distrib)
def sample_near_surface(mesh, num_samples, normals=None, distrib=None):"""Args:mesh: tensor(float), shape (num_faces, 3, 3)num_samples: intnormals: tensor(float), shape (num_faces, 3)distrib: distributionReturns:samples: tensor(float), shape (num_samples, 3)"""samples = sample_on_surface(mesh, num_samples, normals, distrib)[0] # 面上采样samples += torch.randn_like(samples) * 0.01 # 面上采样完后再对坐标进行一些偏移return samples
torch.randn为从标准正太分布(均值为0,方差为1)中随机选择的一组数
重头戏2:sd = points_mesh_signed_distance(xyz, mesh)
求采样点到mesh表面的距离
def points_mesh_signed_distance(points, mesh):"""Args:points: tensor(float), shape (num_points, 3)mesh: tensor(float), shape (num_faces, 3, 3)Returns:sd: tensor(float), shape (num_points,)"""sd = mesh2sdf.mesh2sdf_gpu(points, mesh)[0] # nvidia实现的C++,gpu版本的mesh2sdfreturn sd将坐标xyz和到表面距离sd拼接起来: xyz_sd = torch.cat([xyz, sd.unsqueeze(1)], dim=1)
sd.unsqueeze(1),比如原来
sd.shape 为 torch.Size([num_samples])
sd.unsqueeze(1).shape为 torch.Size([num_samples,1])
这篇关于【3维视觉】mesh采样成sdf代码分析,sample_SDF_points的文章就介绍到这儿,希望我们推荐的文章对编程师们有所帮助!


