本文主要是介绍Git系列讲解(四):提交记录之git log与git blame的使用,希望对大家解决编程问题提供一定的参考价值,需要的开发者们随着小编来一起学习吧!
git log命令提供了很多子选项,善于使用这些选项可以加快工程师调查问题的效率,下面以ccache的项目举例讲解。
目录
- 1. git log
- 2. pretty模式 [ git log --pretty= ]
- 2.1 git log --pretty=email
- 2.2 git log --pretty=full
- 2.3 git log --pretty=fuller
- 2.4 git log --pretty=medium
- 2.5 git log --pretty=oneline
- 2.6 git log --pretty=raw
- 2.7 git log --pretty=short
- 2.8 git log --pretty=format:
- 3. 单行输出
- 3.1 git log --oneline
- 3.2 git log --oneline <file\>
- 4. 输出每笔提交内容变更量统计
- 4.1 git log --stat
- 4.2 git log --stat <file\>
- 5. 输出所有提交的变更内容
- 5.1 git log -p
- 5.2 git log -p <file\>
- 6. 显示某笔提交的变更情况 [ git show --stat commitID ]
- 7. 显示某笔提交的变更内容 [ git show commitID ]
- 8. 指定日期格式 [ git log --date= ]
- 9. 依据某条件筛选显示
- 10. 输出文件每行的提交记录
- 10.1 git blame <file\>
- 10.2 git blame -L <开始行数>,<结束行数> <file\>
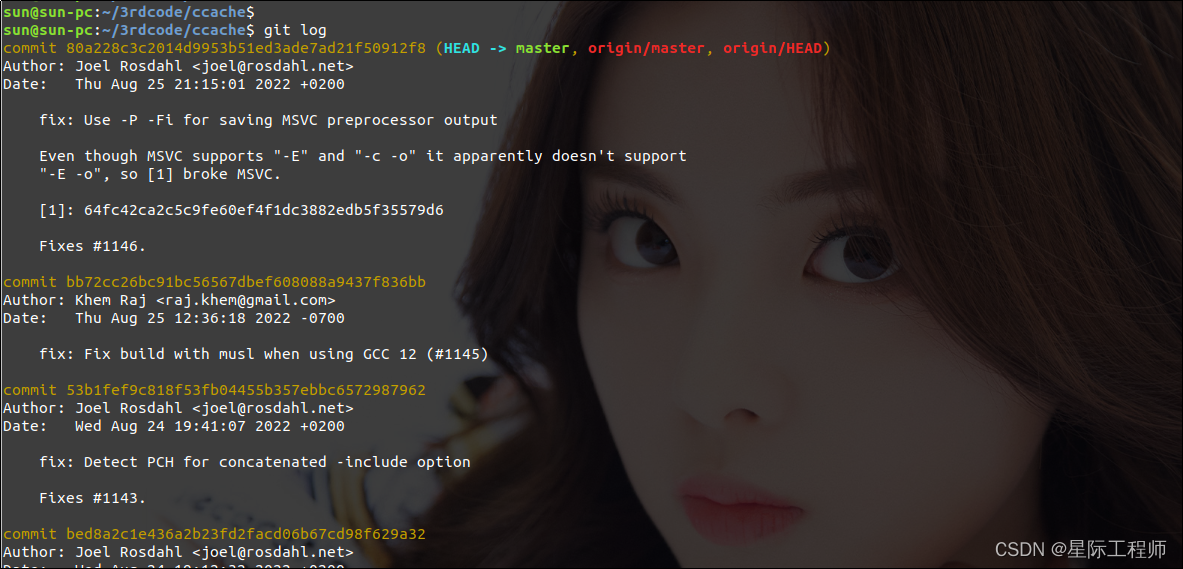
1. git log
完整的commit id,作者,提交日期,注释
2. pretty模式 [ git log --pretty= ]
这个pretty可以理解为对git log默认输出的美化,包含几个子选项,使用者可依据自己的需求选择其一使用。
| 参数 | 说明 |
|---|---|
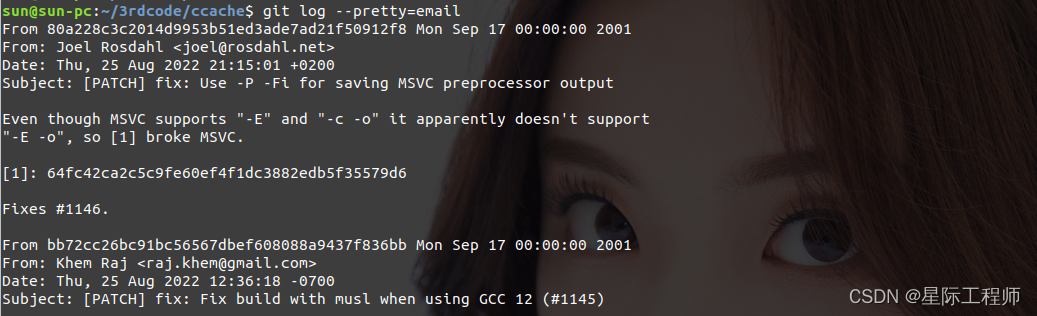
| 以邮件的形式输出日志,方便写邮件的时候用 | |
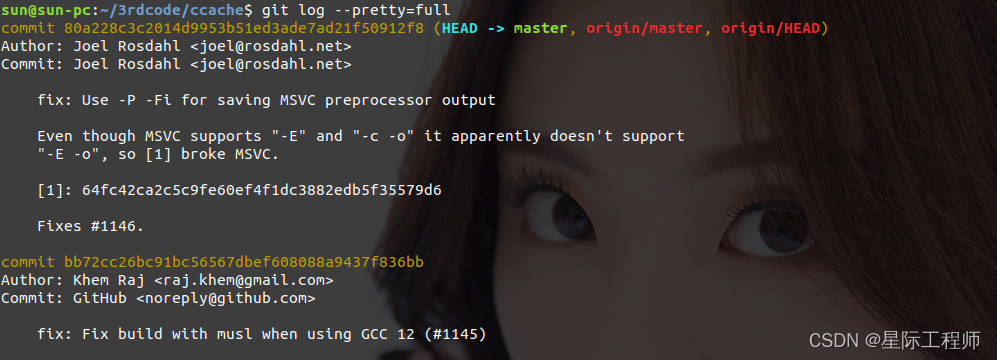
| full | 与默认格式相比,少了日期,多了提交者 |
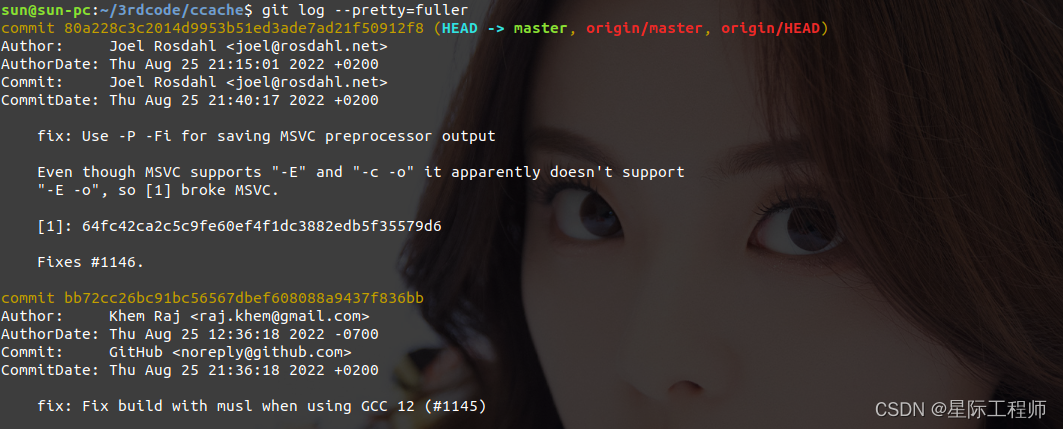
| fuller | 与默认格式相比,多了作者日期,提交者,提交日期 |
| medium | 与默认格式一样 |
| oneline | 每笔提交单行显示,和git log --oneline相比,commit id是全的 |
| raw | 与默认格式相比,少了日期,多了提交者,tree,parent,gpg签名 |
| short | 只有作者和提交注释,且注释是一行显示 |
| format: | 自定义显示输出格式 |
2.1 git log --pretty=email
2.2 git log --pretty=full
2.3 git log --pretty=fuller
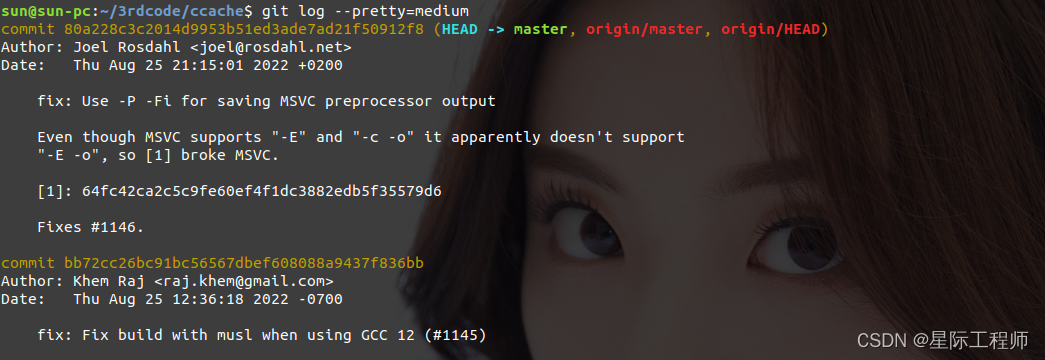
2.4 git log --pretty=medium
2.5 git log --pretty=oneline

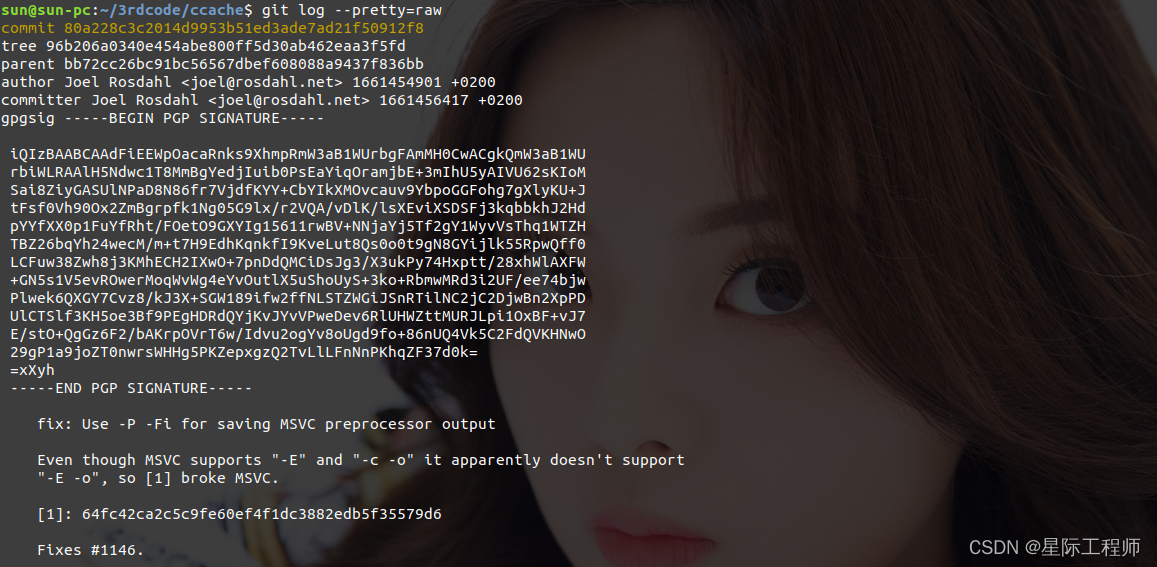
2.6 git log --pretty=raw
2.7 git log --pretty=short

2.8 git log --pretty=format:
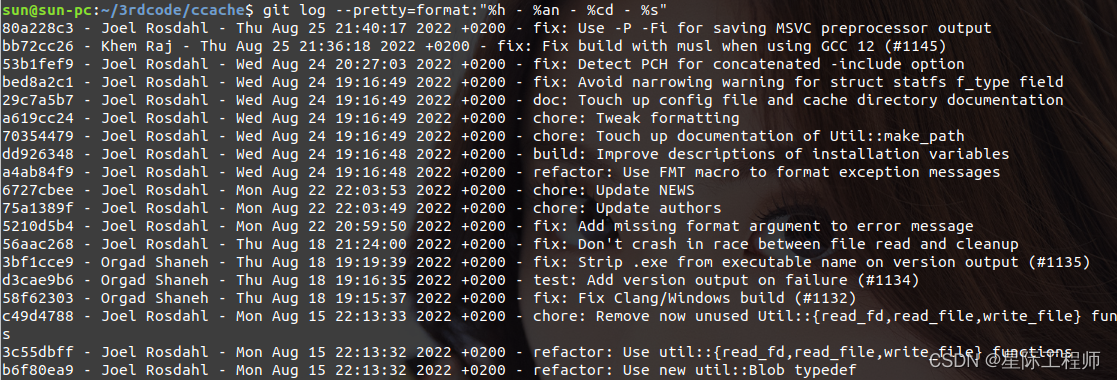
format的选项太多了,这里就不细讲了,下面是从手册中摘抄的说明,读者有时间可以根据自己的需要进行学习。
·   %H: commit hash
·   %h: abbreviated commit hash
·   %T: tree hash
·   %t: abbreviated tree hash
·   %P: parent hashes
·   %p: abbreviated parent hashes
·   %an: author name
·   %aN: author name (respecting .mailmap, see git-shortlog(1) or git-blame(1))
·   %ae: author email
·   %aE: author email (respecting .mailmap, see git-shortlog(1) or git-blame(1))
·   %ad: author date (format respects --date= option)
·   %aD: author date, RFC2822 style
·   %ar: author date, relative
·   %at: author date, UNIX timestamp
·   %ai: author date, ISO 8601-like format
·   %aI: author date, strict ISO 8601 format
·   %cn: committer name
·   %cN: committer name (respecting .mailmap, see git-shortlog(1) or git-blame(1))
·   %ce: committer email
·   %cE: committer email (respecting .mailmap, see git-shortlog(1) or git-blame(1))
·   %cd: committer date (format respects --date= option)
·   %cD: committer date, RFC2822 style
·   %cr: committer date, relative
·   %ct: committer date, UNIX timestamp
·   %ci: committer date, ISO 8601-like format
·   %cI: committer date, strict ISO 8601 format
·   %d: ref names, like the --decorate option of git-log(1)
·   %D: ref names without the " (", ")" wrapping.
·   %e: encoding
·   %s: subject
·   %f: sanitized subject line, suitable for a filename
·   %b: body
·   %B: raw body (unwrapped subject and body)
·   %N: commit notes
·   %GG: raw verification message from GPG for a signed commit
·   %G?: show "G" for a good (valid) signature, "B" for a bad signature, "U" for a good signature with unknown validity, "X" for a good signature that has expired, "Y" for a goodsignature made by an expired key, "R" for a good signature made by a revoked key, "E" if the signature cannot be checked (e.g. missing key) and "N" for no signature
·   %GS: show the name of the signer for a signed commit
·   %GK: show the key used to sign a signed commit
·   %gD: reflog selector, e.g., refs/stash@{1} or refs/stash@{2 minutes ago}; the format follows the rules described for the -g option. The portion before the @ is the refname as given onthe command line (so git log -g refs/heads/master would yield refs/heads/master@{0}).
·   %gd: shortened reflog selector; same as %gD, but the refname portion is shortened for human readability (so refs/heads/master becomes just master).
·   %gn: reflog identity name
·   %gN: reflog identity name (respecting .mailmap, see git-shortlog(1) or git-blame(1))
·   %ge: reflog identity email
·   %gE: reflog identity email (respecting .mailmap, see git-shortlog(1) or git-blame(1))
·   %gs: reflog subject
·   %Cred: switch color to red
·   %Cgreen: switch color to green
·   %Cblue: switch color to blue
·   %Creset: reset color
·   %C(...): color specification, as described under Values in the "CONFIGURATION FILE" section of git-config(1). By default, colors are shown only when enabled for log output (bycolor.diff, color.ui, or --color, and respecting the auto settings of the former if we are going to a terminal).  %C(auto,...)  is accepted as a historical synonym for the default(e.g., %C(auto,red)). Specifying %C(always,...) will show the colors even when color is not otherwise enabled (though consider just using `--color=always to enable color for the wholeoutput, including this format and anything else git might color).  auto alone (i.e.  %C(auto)) will turn on auto coloring on the next placeholders until the color is switched again.
·   %m: left (<), right (>) or boundary (-) mark
·   %n: newline
·   %%: a raw %
·   %x00: print a byte from a hex code
·   %w([<w>[,<i1>[,<i2>]]]): switch line wrapping, like the -w option of git-shortlog(1).
·   %<(<N>[,trunc|ltrunc|mtrunc]): make the next placeholder take at least N columns, padding spaces on the right if necessary. Optionally truncate at the beginning (ltrunc), the middle(mtrunc) or the end (trunc) if the output is longer than N columns. Note that truncating only works correctly with N >= 2.
·   %<|(<N>): make the next placeholder take at least until Nth columns, padding spaces on the right if necessary
·   %>(<N>), %>|(<N>): similar to %<(<N>), %<|(<N>) respectively, but padding spaces on the left
·   %>>(<N>), %>>|(<N>): similar to %>(<N>), %>|(<N>) respectively, except that if the next placeholder takes more spaces than given and there are spaces on its left, use those spaces
·   %><(<N>), %><|(<N>): similar to %<(<N>), %<|(<N>) respectively, but padding both sides (i.e. the text is centered)
·   %(trailers[:options]): display the trailers of the body as interpreted by git-interpret-trailers(1). The trailers string may be followed by a colon and zero or more comma-separatedoptions. If the only option is given, omit non-trailer lines from the trailer block. If the unfold option is given, behave as if interpret-trailer’s --unfold option was given. E.g.,%(trailers:only,unfold) to do both.
3. 单行输出
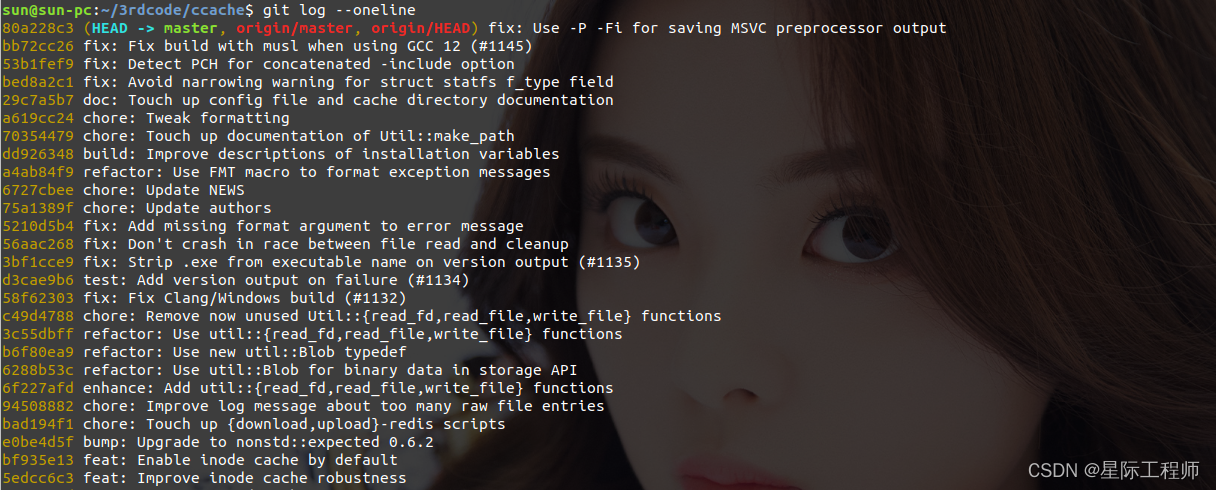
3.1 git log --oneline
和git log --pretty=oneline差不多,都是每笔提交一行输出(commitID comment),不同的是git log --oneline的commit id是缩写的。
当第一行注释和第二行注释之间有空行,就只会显示第一行注释,比如下图的最新提交(80a228c3),对照git log默认输出的就只显示了第一行注释。
3.2 git log --oneline <file>
以单行模式输出某文件的所有提交记录。
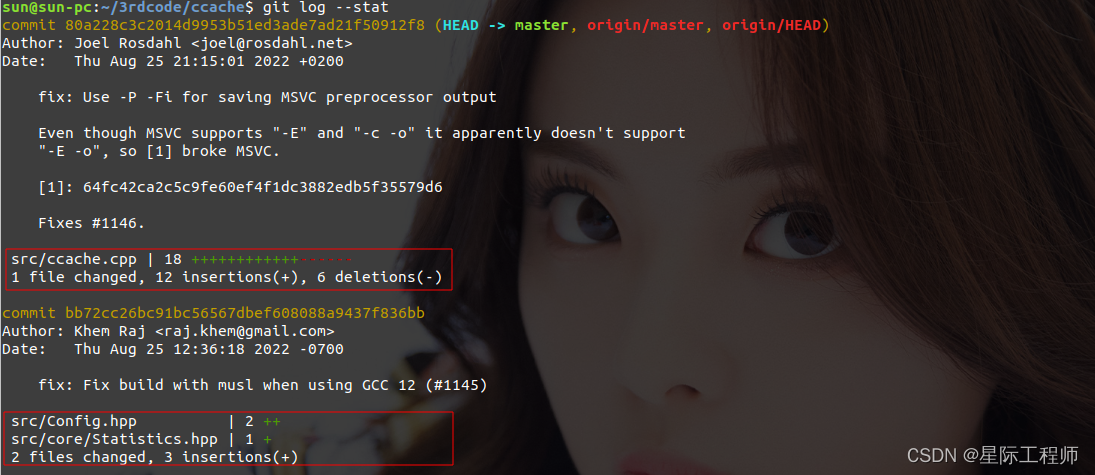
4. 输出每笔提交内容变更量统计
4.1 git log --stat
4.2 git log --stat <file>
输出某文件的所有提交记录及其变更量统计。
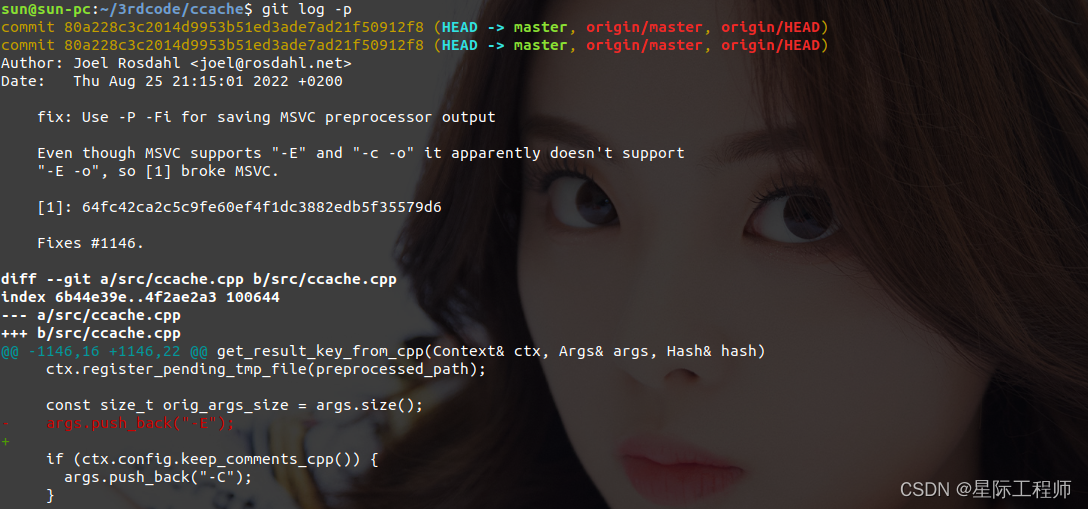
5. 输出所有提交的变更内容
5.1 git log -p
输出每笔提交的记录以及其变更内容
5.2 git log -p <file>
输出某文件的所有提交记录及其变更内容。
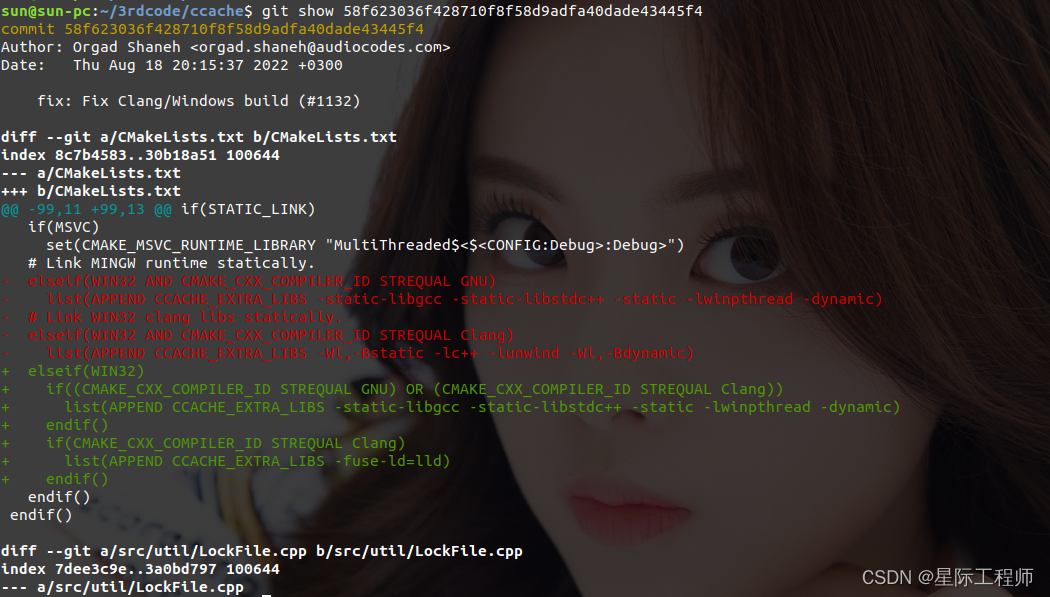
6. 显示某笔提交的变更情况 [ git show --stat commitID ]

7. 显示某笔提交的变更内容 [ git show commitID ]
8. 指定日期格式 [ git log --date= ]
命令后接下面选项:
| 选项 | 举例 |
|---|---|
| default | Thu Aug 25 21:15:01 2022 +0200 |
| iso8601 | 2022-08-25 21:15:01 +0200 |
| local | Fri Aug 26 03:15:01 2022 |
| raw | 1661454901 +0200 |
| relative | 2 个月前 |
| rfc2822 | Thu, 25 Aug 2022 21:15:01 +0200 |
| short | 2022-08-25 |
9. 依据某条件筛选显示
| 选项 | 说明 |
|---|---|
| -n | 显示前n笔提交 |
| --skip=n | 不显示前n笔提交 |
| --author=<字符串> | 筛选出与字符串匹配的作者的提交,比如字符串是"Joel",那么会显示作者是"Joel abc"和"Joel def"等。 |
| --committer=<字符串> | 筛选出与字符串匹配的提交者的提交 |
| --since=<日期>, --after=<日期> | 显示指定时间之后的提交 |
| --until=<日期>, --before=<日期> | 显示指定时间之前的提交 |
| --grep=<字符串> | 显示提交说明中包含指定字符串的提交,见下面案例 |
| -S <字符串> | 显示添加或删除内容匹配指定字符串的提交,见下面案例 |
| -i | 忽略大小写进行匹配,可以搭配其他选项一起使用 |
案例:
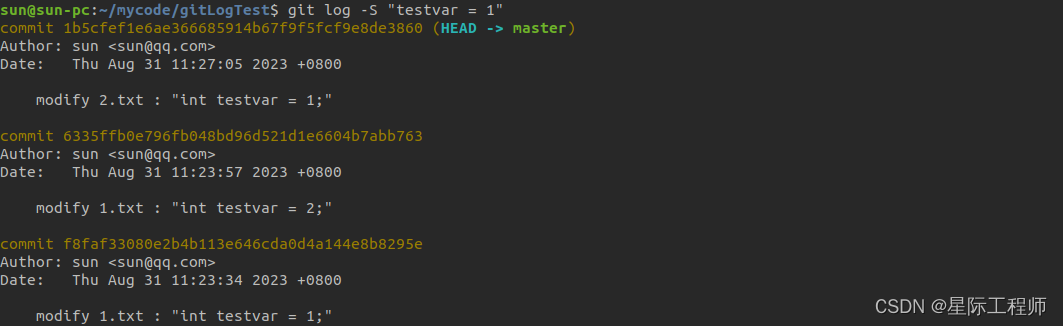
现有一个git仓库,master分支包含了笔提交,管理两个文件(1.txt,2.txt)。
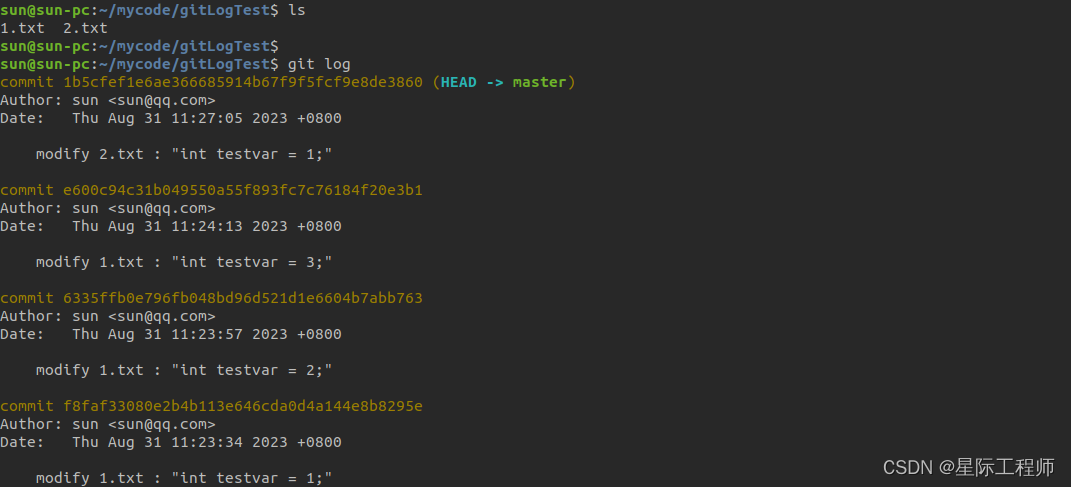
查找commit message中包含"modify 1.txt"的提交。
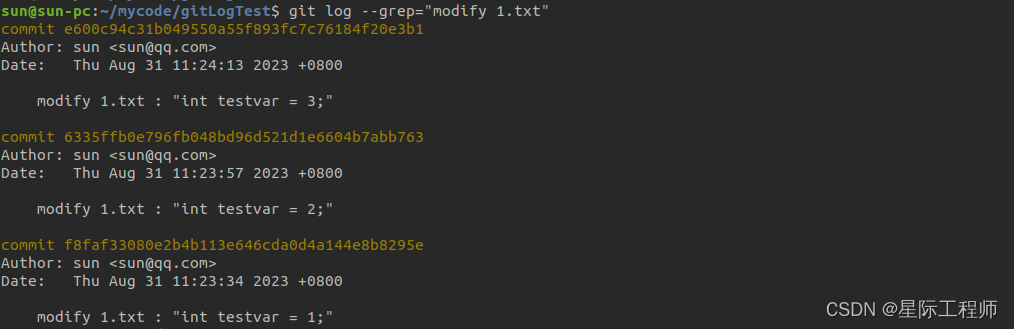
我们知道每笔提交都包含文件内容的变更(增加和删除),-S的作用就是从这些变更内容中找到要查找的内容(testvar = 1),并将其git日志输出来。注意要和--grep区分开来,--grep搜索的是提交信息,而-S是搜索提交中的变更内容(git管理的文件,代码等)
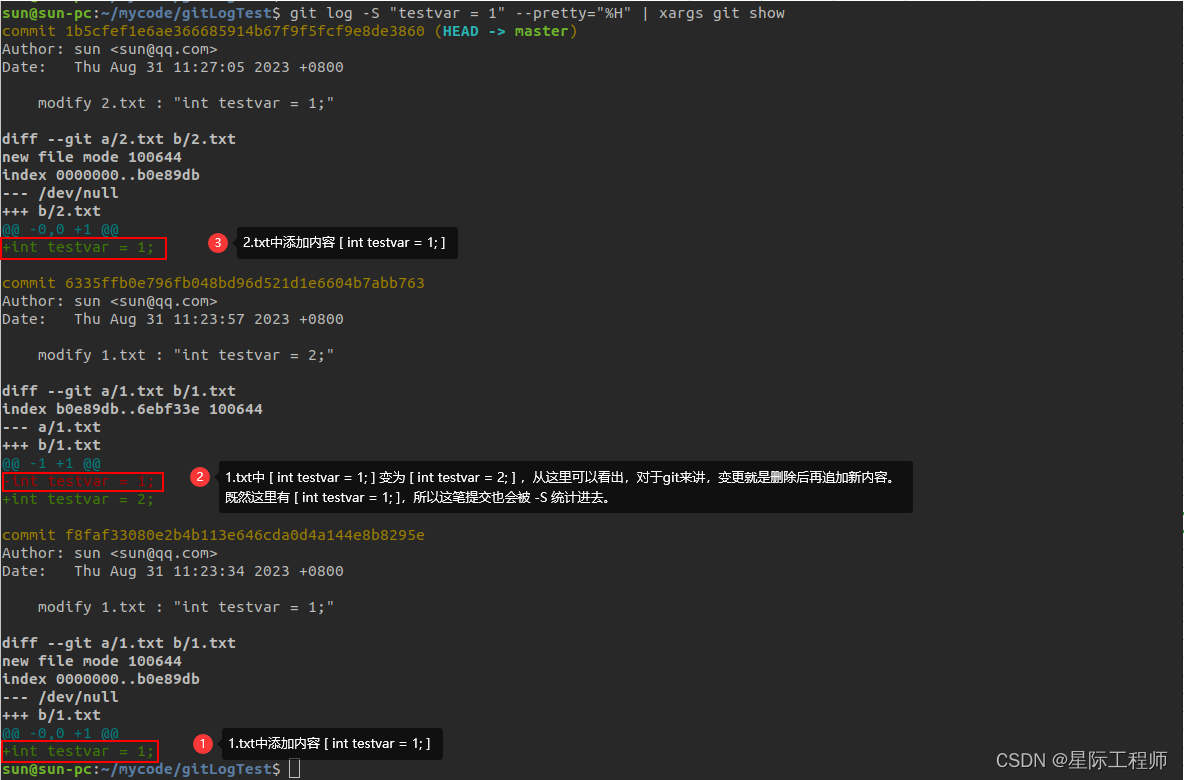
git log -S "testvar = 1" --pretty="%H" | xargs git show,这样就可以看到-S筛选出来的三笔提交,其变更内容都是包含了指定内容(testvar = 1)
10. 输出文件每行的提交记录
10.1 git blame <file>
输出指定文件中每行内容的最近一笔提交信息。

10.2 git blame -L <开始行数>,<结束行数> <file>
输出某文件从第几行到第几行的最近一笔提交记录

git blame -L 5,5 <file>              代表第5行的提交记录
git blame <file> | tail -n <行数>     搭配tail命令还可以显示最后多少行的提交记录
这篇关于Git系列讲解(四):提交记录之git log与git blame的使用的文章就介绍到这儿,希望我们推荐的文章对编程师们有所帮助!


