本文主要是介绍linux环境下使用lighthouse与selenium,希望对大家解决编程问题提供一定的参考价值,需要的开发者们随着小编来一起学习吧!
一、安装谷歌浏览器、谷歌浏览器驱动、lighthouse
shell脚本
apt update && apt -y upgrade
apt install -y curl
curl -fsSL https://deb.nodesource.com/setup_18.x | bash
apt install -y nodejs
apt install -y npm
npm install -g lighthouse
apt-get install -y libxss1 libappindicator1 libindicator7 xvfb unzip vim
wget -q -O - https://dl-ssl.google.com/linux/linux_signing_key.pub | sudo apt-key add -
sh -c 'echo "deb http://dl.google.com/linux/chrome/deb/ stable main" >> /etc/apt/sources.list.d/google.list'
apt-get install -y apt-transport-https
#apt-get install -y google-chrome-stable=114.0.5735.90
wget http://dl.google.com/linux/deb/pool/main/g/google-chrome-unstable/google-chrome-unstable_114.0.5735.6-1_amd64.deb
apt-get install -f -y ./google-chrome-unstable_114.0.5735.6-1_amd64.deb
wget -N http://chromedriver.storage.googleapis.com/114.0.5735.90/chromedriver_linux64.zip
unzip chromedriver_linux64.zip
mv -f chromedriver /usr/local/share/chromedriver
ln -s /usr/local/share/chromedriver /usr/local/bin/chromedriver
ln -s /usr/local/share/chromedriver /usr/bin/chromedriver
sed -i '$s/$/ --no-sandbox/' /opt/google/chrome-unstable/google-chrome
1、安装lighthouse
指定安装node 18以上的版本
curl -fsSL https://deb.nodesource.com/setup_18.x | bash
安装nodejs
apt install -y nodejs
安装npm
apt install -y npm
安装lighthouse
npm install -g lighthouse
lighthouse Git地址:https://github.com/GoogleChrome/lighthouse
需要安装18以上版本的node,所以指定nodejs的版本

2、安装谷歌浏览器
添加 Google Chrome 的存储库
wget -q -O - https://dl-ssl.google.com/linux/linux_signing_key.pub | sudo apt-key add -
sh -c ‘echo “deb http://dl.google.com/linux/chrome/deb/ stable main” >> /etc/apt/sources.list.d/google.list’
安装 apt-transport-https 软件包以允许使用 HTTPS 传输数据
apt-get install -y apt-transport-https
指定安装114.0.5735.6-1版本的谷歌浏览器
wget http://dl.google.com/linux/deb/pool/main/g/google-chrome-unstable/google-chrome-unstable_114.0.5735.6-1_amd64.deb
apt-get install -f -y ./google-chrome-unstable_114.0.5735.6-1_amd64.deb
查看安装的浏览器版本

安装stable版本的谷歌
wget https://dl.google.com/linux/direct/google-chrome-stable_current_amd64.deb --安装最新的
apt-get install google-chrome-stable=91.0.4472.124-1 --指定版本安装
安装unstable版本的谷歌
wget http://dl.google.com/linux/deb/pool/main/g/google-chrome-unstable/google-chrome-unstable_73.0.3679.0-1_amd64.deb
找谷歌浏览器版本的地址
https://www.ubuntuupdates.org/package/google_chrome/stable/main/base/google-chrome-stable
验证下载地址是否可用
wget http://dl.google.com/linux/deb/pool/main/g/google-chrome-unstable/google-chrome-unstable_114.0.5735.6-1_amd64.deb
直接用http://dl.google.com/linux/deb/pool/main/g/google-chrome-unstable/google-chrome-unstable_114.0.5735.6-1_amd64.deb在浏览器打开,可以直接下载就是可用的
3、安装谷歌浏览器驱动
因为谷歌浏览器与谷歌浏览器驱动要版本匹配才能使用,所以指定安装的谷歌浏览器与驱动的版本。浏览器版本小于等于驱动版本。
指定浏览器版本与驱动版本
wget http://dl.google.com/linux/deb/pool/main/g/google-chrome-unstable/google-chrome-unstable_114.0.5735.6-1_amd64.deb
wget -N http://chromedriver.storage.googleapis.com/114.0.5735.90/chromedriver_linux64.zip
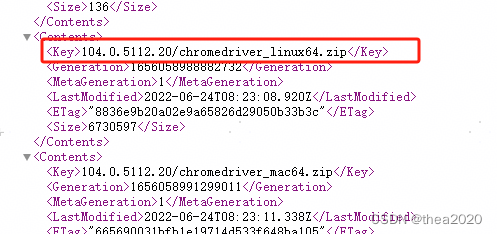
驱动版本查看地址
http://chromedriver.storage.googleapis.com/
下载地址就是http://chromedriver.storage.googleapis.com/ + key;根据自己系统下载想要版本的包
4、禁用沙箱模式
在谷歌浏览器可执行文件的最后一行后面加上–no-sandbox
sed -i ‘$s/$/ --no-sandbox/’ /opt/google/chrome-unstable/google-chrome
禁用沙箱模式的原因是,Lighthouse在某些情况下需要访问操作系统的底层资源或执行特权操作,而沙箱模式会限制这些访问和操作。禁用沙箱模式可以解决一些特定的问题,例如:
-
访问本地文件系统:Lighthouse可能需要读取或写入本地文件系统中的文件,例如加载本地CSS或JavaScript文件,或保存评估结果。沙箱模式会限制对本地文件系统的访问,因此禁用沙箱模式可以解决这个问题。
-
访问网络资源:Lighthouse可能需要访问本地网络资源,例如加载本地服务器上的网页或API。沙箱模式可能会限制对本地网络资源的访问,因此禁用沙箱模式可以解决这个问题。
二、linux环境下使用lighthouse
lighthouse cli
lighthouse “https://www.baidu.com/” --output=json --output-path=./report.json --only-categories=performance --throttling-method=provided --no-emulatedUserAgent --quiet --chrome-flags=“–headless --proxy-server=http://xx.xx.xx.xx:80” --no-enable-error-reporting
禁用错误报告
–no-enable-error-reporting,不然第一次执行的时候会询问你是否要报告
输出json报告与指定报告的保存路径
–output=json --output-path=./report.json
指定只测试性能部分
–only-categories=performance
指定不限制网速
–throttling-method=provided --no-emulatedUserAgent
安静模式运行,只输出最关键的结果信息
–quiet
无头模式,不会自动打开浏览器
–chrome-flags=“–headless”
正向代理,指定代理的地址
–chrome-flags=“–proxy-server=http://xx.xx.xx.xx:80”
在某些环境下,服务器无法直接访问外网需要通过代理去访问,则指定代理服务器
3、linux环境下使用selenium(python)
from selenium import webdriver
from selenium.webdriver.common.desired_capabilities import DesiredCapabilities
from selenium.webdriver.common.action_chains import ActionChains
from selenium.common.exceptions import NoSuchElementException
from selenium.webdriver.common.by import By
chrome_options = webdriver.ChromeOptions()
#指定代理
chrome_options.add_argument("--proxy-server=http://地址:端口号")
#无头模式
chrome_options.add_argument('--headless')
chrome_options.add_experimental_option("excludeSwitches", ['enable-automation'])
d = DesiredCapabilities.CHROME
d['goog:loggingPrefs'] = {'browser': 'ALL'}
driver = webdriver.Chrome(chrome_options=chrome_options,desired_capabilities=d)
driver.get("https://www.baidu.com/")
driver.quit()
这篇关于linux环境下使用lighthouse与selenium的文章就介绍到这儿,希望我们推荐的文章对编程师们有所帮助!


