本文主要是介绍pytoch M2芯片测试,希望对大家解决编程问题提供一定的参考价值,需要的开发者们随着小编来一起学习吧!
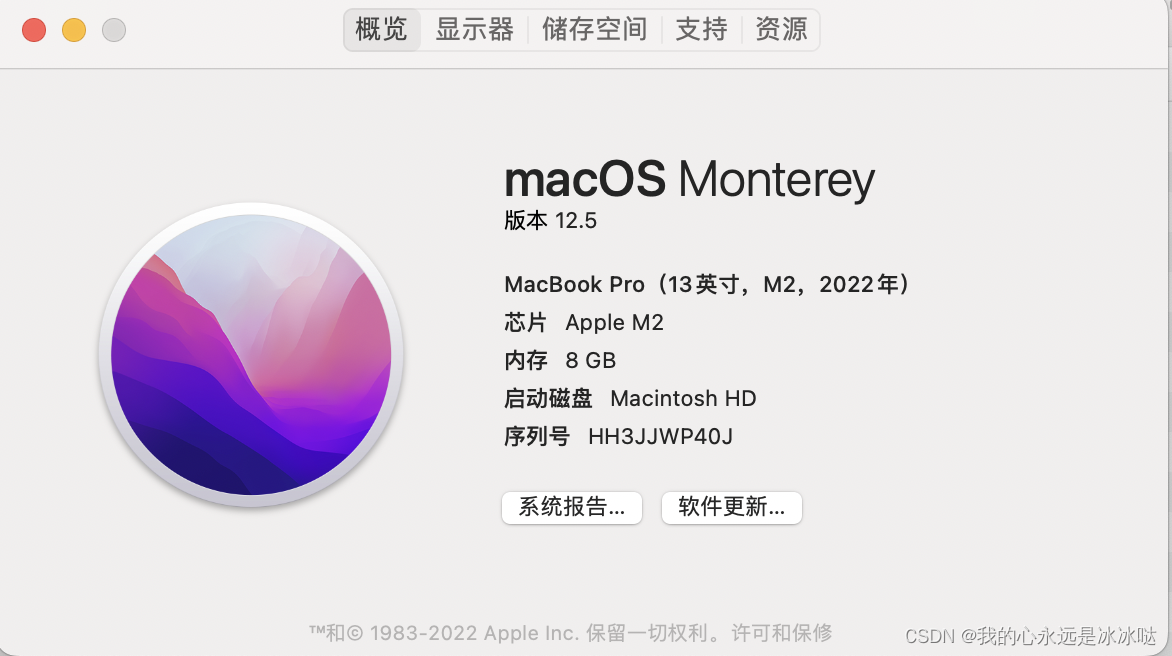
今天才发现我的新片是M2芯片,而不是M1芯片,有点尴尬
参考网址
https://www.oldcai.com/ai/pytorch-train-MNIST-with-gpu-on-mac/
测试结果如下
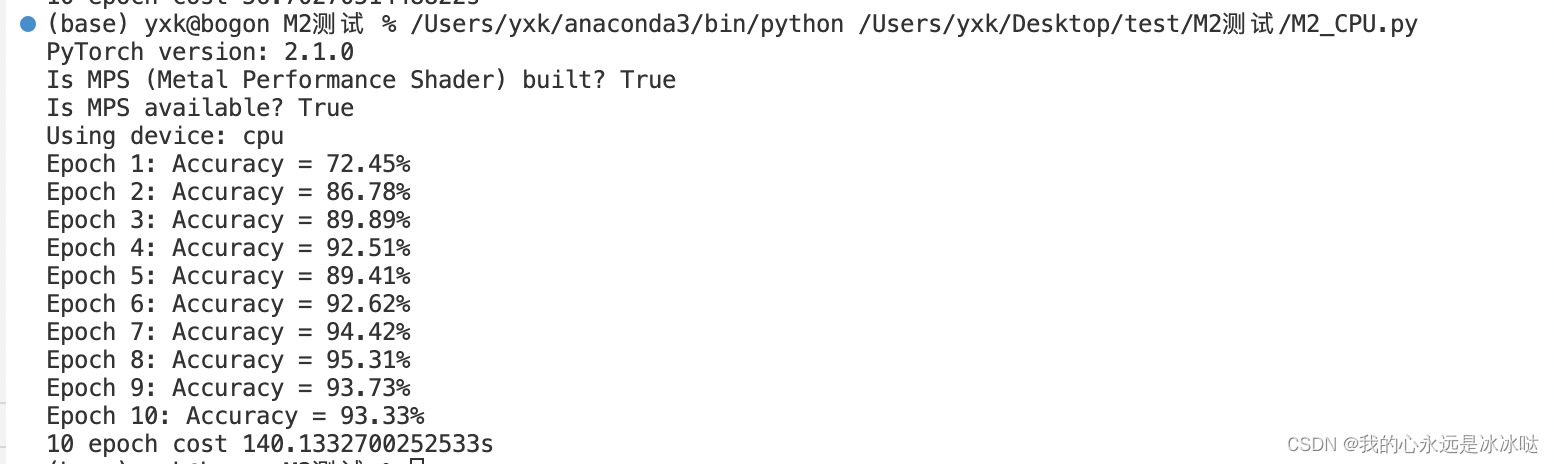
M2_cpu.py
# https://www.oldcai.com/ai/pytorch-train-MNIST-with-gpu-on-mac/
import torch
from torch import nn
from torch.utils.data import DataLoader
from torchvision.datasets import MNIST
from torchvision.transforms import ToTensorprint(f"PyTorch version: {torch.__version__}")# Check PyTorch has access to MPS (Metal Performance Shader, Apple's GPU architecture)
print(f"Is MPS (Metal Performance Shader) built? {torch.backends.mps.is_built()}")
print(f"Is MPS available? {torch.backends.mps.is_available()}")# Set the device
device = "cpu"
device = torch.device(device)
print(f"Using device: {device}")# Define the CNN model
class HandwritingRecognitionModel(nn.Module):def __init__(self):super().__init__()# Define the convolutional layersself.conv1 = nn.Conv2d(1, 16, kernel_size=3, padding=1)self.conv2 = nn.Conv2d(16, 32, kernel_size=3, padding=1)# Define the pooling and dropout layersself.pool = nn.MaxPool2d(2, 2)self.dropout1 = nn.Dropout(0.25)self.dropout2 = nn.Dropout(0.5)# Define the fully connected layersself.fc1 = nn.Linear(32 * 7 * 7, 128)self.fc2 = nn.Linear(128, 10)def forward(self, x):# Pass the input through the convolutional layersx = self.conv1(x)x = self.pool(x)x = self.dropout1(x)x = self.conv2(x)x = self.pool(x)x = self.dropout2(x)# Reshape the output for the fully connected layersx = x.view(-1, 32 * 7 * 7)# Pass the output through the fully connected layersx = self.fc1(x)x = self.fc2(x)# Return the final outputreturn x# Load the MNIST dataset
train_dataset = MNIST("./data", train=True, download=True, transform=ToTensor())
test_dataset = MNIST("./data", train=False, download=True, transform=ToTensor())# Define the data loaders
train_loader = DataLoader(train_dataset, batch_size=64, shuffle=True)
test_loader = DataLoader(test_dataset, batch_size=64, shuffle=False)# Define the model
model = HandwritingRecognitionModel().to(device)# Define the loss function and optimizer
loss_fn = nn.CrossEntropyLoss()
optimizer = torch.optim.Adam(model.parameters(), lr=1e-3)from time import time
t0 = time()
# Train the model for 10 epochs
for epoch in range(10):# Set the model to training modemodel.train()# Iterate over the training datafor images, labels in train_loader:images, labels = images.to(device), labels.to(device)# Pass the input through the modeloutputs = model(images)# Compute the lossloss = loss_fn(outputs, labels)# Backpropagate the errorloss.backward()# Update the model parametersoptimizer.step()# Set the model to evaluation modemodel.eval()# Evaluate the model on the validation setwith torch.no_grad():correct = 0total = 0for images, labels in test_loader:images, labels = images.to(device), labels.to(device)# Pass the input through the modeloutputs = model(images)# Get the predicted labels_, predicted = torch.max(outputs.data, 1)# Update the total and correct countstotal += labels.size(0)correct += (predicted == labels).sum()# Print the accuracyprint(f"Epoch {epoch + 1}: Accuracy = {100 * correct / total:.2f}%")t1 =time()
print("10 epoch cost {}s".format(t1-t0))
结果如下
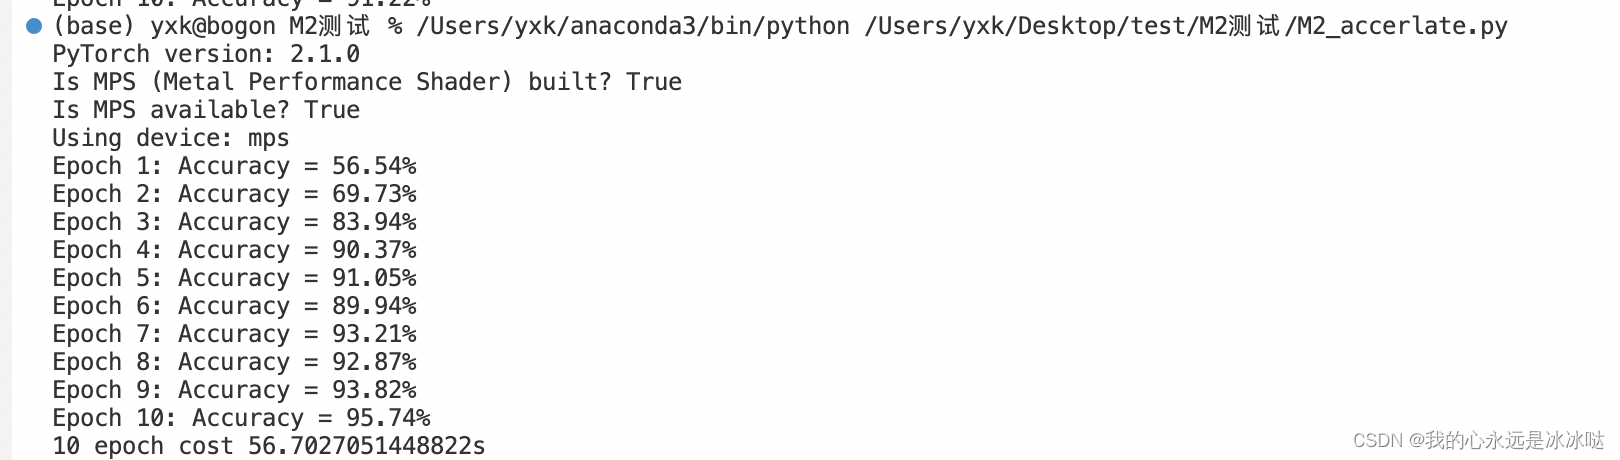
M2_MPS.py
import torch
from torch import nn
from torch.utils.data import DataLoader
from torchvision.datasets import MNIST
from torchvision.transforms import ToTensorprint(f"PyTorch version: {torch.__version__}")# Check PyTorch has access to MPS (Metal Performance Shader, Apple's GPU architecture)
print(f"Is MPS (Metal Performance Shader) built? {torch.backends.mps.is_built()}")
print(f"Is MPS available? {torch.backends.mps.is_available()}")# Set the device
device = "mps" if torch.backends.mps.is_available() else "cpu"
device = torch.device(device)
print(f"Using device: {device}")# Define the CNN model
class HandwritingRecognitionModel(nn.Module):def __init__(self):super().__init__()# Define the convolutional layersself.conv1 = nn.Conv2d(1, 16, kernel_size=3, padding=1)self.conv2 = nn.Conv2d(16, 32, kernel_size=3, padding=1)# Define the pooling and dropout layersself.pool = nn.MaxPool2d(2, 2)self.dropout1 = nn.Dropout(0.25)self.dropout2 = nn.Dropout(0.5)# Define the fully connected layersself.fc1 = nn.Linear(32 * 7 * 7, 128)self.fc2 = nn.Linear(128, 10)def forward(self, x):# Pass the input through the convolutional layersx = self.conv1(x)x = self.pool(x)x = self.dropout1(x)x = self.conv2(x)x = self.pool(x)x = self.dropout2(x)# Reshape the output for the fully connected layersx = x.view(-1, 32 * 7 * 7)# Pass the output through the fully connected layersx = self.fc1(x)x = self.fc2(x)# Return the final outputreturn x# Load the MNIST dataset
train_dataset = MNIST("./data", train=True, download=True, transform=ToTensor())
test_dataset = MNIST("./data", train=False, download=True, transform=ToTensor())# Define the data loaders
train_loader = DataLoader(train_dataset, batch_size=64, shuffle=True)
test_loader = DataLoader(test_dataset, batch_size=64, shuffle=False)# Define the model
model = HandwritingRecognitionModel().to(device)# Define the loss function and optimizer
loss_fn = nn.CrossEntropyLoss()
optimizer = torch.optim.Adam(model.parameters(), lr=1e-3)from time import time
t0 = time()
# Train the model for 10 epochs
for epoch in range(10):# Set the model to training modemodel.train()# Iterate over the training datafor images, labels in train_loader:images, labels = images.to(device), labels.to(device)# Pass the input through the modeloutputs = model(images)# Compute the lossloss = loss_fn(outputs, labels)# Backpropagate the errorloss.backward()# Update the model parametersoptimizer.step()# Set the model to evaluation modemodel.eval()# Evaluate the model on the validation setwith torch.no_grad():correct = 0total = 0for images, labels in test_loader:images, labels = images.to(device), labels.to(device)# Pass the input through the modeloutputs = model(images)# Get the predicted labels_, predicted = torch.max(outputs.data, 1)# Update the total and correct countstotal += labels.size(0)correct += (predicted == labels).sum()# Print the accuracyprint(f"Epoch {epoch + 1}: Accuracy = {100 * correct / total:.2f}%")t1 =time()
print("10 epoch cost {}s".format(t1-t0))
结果如下
这篇关于pytoch M2芯片测试的文章就介绍到这儿,希望我们推荐的文章对编程师们有所帮助!


![业务中14个需要进行A/B测试的时刻[信息图]](https://img-blog.csdnimg.cn/img_convert/aeacc959fb75322bef30fd1a9e2e80b0.jpeg)