本文主要是介绍AI项目十五:PP-Humanseg训练及onnxruntime部署,希望对大家解决编程问题提供一定的参考价值,需要的开发者们随着小编来一起学习吧!
若该文为原创文章,转载请注明原文出处。
关于PP-Humanseg是在正点原子的3568开发板AI测试例子里看到的,目的也是想自己训练并部署,这里记录一下训练和在onnxruntime部署运行的全过程,会转成ONNX,至于部署到rk3568上,会在另一篇文章説明ONNX转成RKNN并部署到RK3568.
一、训练模型
一、介绍
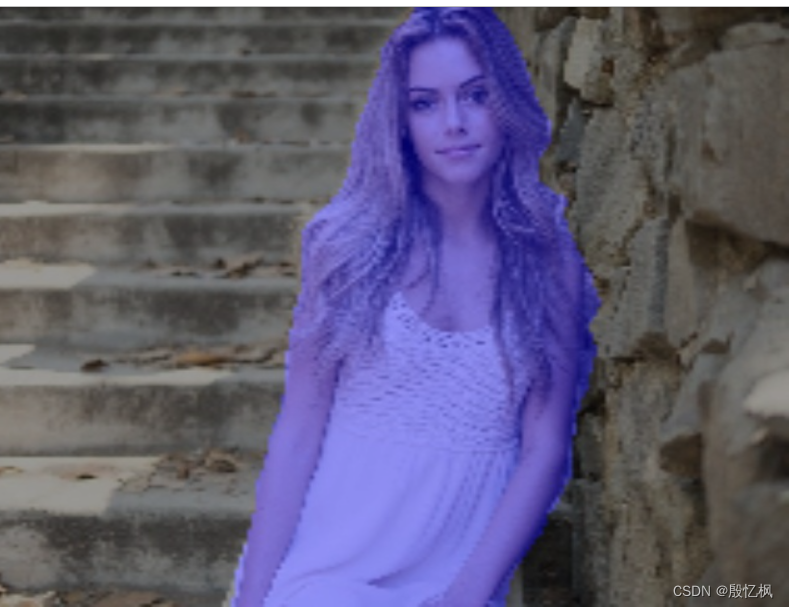
本文将PaddleSeg的人像分割(PP-HumanSeg)模型导出为onnx,并使用onnxruntime部署,实现人像分割,效果如下图所示。
二、环境搭建
使用的是AutoDL服务器,配置如下:

创建虚拟环境
conda create -n ppseg_env python=3.8 -y激活环境
conda activate ppseg_env![]()
三、安装PaddlePaddle
直接安装
python -m pip install paddlepaddle-gpu==2.4.2 -i https://pypi.tuna.tsinghua.edu.cn/simple也可以源码其他的,参考
开始使用_飞桨-源于产业实践的开源深度学习平台
四、安装PaddleSeg
git clone https://github.com/PaddlePaddle/PaddleSeg
cd PaddleSeg
pip install -r requirements.txt
pip install -v -e .
五、下载数据
PP-Humanseg位于contrib/PP-HumanSeg目录下,在目录下有个 readme.md文件,根据文件,下载数据及模型
进入PP-HumanSeg目录下
cd PaddleSeg/contrib/PP-HumanSeg1、下载Inference Model
python src/download_inference_models.py2、下载测试数据
python src/download_data.py六、测试
测试的数据可以是视频也可以是图片,这里测试图片
执行下面指令:
# Use PP-HumanSegV2-Lite
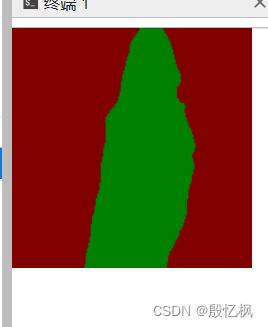
python src/seg_demo.py \--config inference_models/portrait_pp_humansegv2_lite_256x144_inference_model_with_softmax/deploy.yaml \--img_path data/images/portrait_heng.jpg \--save_dir data/images_result/portrait_heng_v2.jpg结果会保存到data/images_result目录下,结果如下:

视频可以自我测试,不在演示,使用如下 命令:
python src/seg_demo.py \--config inference_models/portrait_pp_humansegv2_lite_256x144_inference_model_with_softmax/deploy.yaml \--video_path data/videos/video_heng.mp4 \--save_dir data/videos_result/video_heng_v2.avi七、训练
配置文件保存在`./configs`目录下,如下。配置文件中,已经通过`pretrained`设置好预训练权重的路径。

执行如下命令,进行模型微调,模型训练的详细文档,请参考[链接](../../docs/train/train_cn.md)
export CUDA_VISIBLE_DEVICES=0 # Linux下设置1张可用的卡
# set CUDA_VISIBLE_DEVICES=0  # Windows下设置1张可用的卡
python ../../tools/train.py --config configs/human_pp_humansegv2_lite.yml --save_dir output/human_pp_humansegv2_lite --save_interval 100 --do_eval --use_vdl
训练完成后,模型会保存在output目录下
![]()
八、评估模型
python ../../tools/val.py --config configs/human_pp_humansegv2_lite.yml --model_path output/human_pp_humansegv2_lite/best_model/model.pdparams
看起来评估的结果还是可以的。
九、预测
python ../../tools/predict.py --config configs/human_pp_humansegv2_lite.yml --model_path output/human_pp_humansegv2_lite/best_model/model.pdparams --image_path data/images/human.jpg --save_dir ./data/images_result
接下来是重头戏,需要导出模型
十、导出静态模型
输入图片大小是192x192
python ../../tools/export.py --config configs/human_pp_humansegv2_lite.yml --model_path output/human_pp_humansegv2_lite/best_model/model.pdparams --save_dir output/human_pp_humansegv2_lite --input_shape 1 3 192 192 
十一、预测导出静态模型
参考deploy下的测试
python ../../deploy/python/infer.py --config output/human_pp_humansegv2_lite/deploy.yaml --image_path ./human.jpg --save_dir ./data/images_result3至此,导出的静态模型测试完成
二、ONNX模型转换
一、安装paddle2onnx
pip install paddle2onnx二、导出ONNX模型
paddle2onnx --model_dir output/human_pp_humansegv2_lite/ \--model_filename model.pdmodel \--params_filename model.pdiparams \--opset_version 12 \--save_file output.onnx三、测试
测试使用的是onnxruntime环境测试,所以需要先安装onnxruntime
pip install onnxruntime测试代码是自己编写的,文件为predict.py
import cv2
import numpy as np
import onnxruntime as rtdef normalize(im, mean=[0.5, 0.5, 0.5], std=[0.5, 0.5, 0.5]):im = im.astype(np.float32, copy=False) / 255.0im -= meanim /= stdreturn imdef resize(im, target_size=608, interp=cv2.INTER_LINEAR):if isinstance(target_size, list) or isinstance(target_size, tuple):w = target_size[0]h = target_size[1]else:w = target_sizeh = target_sizeim = cv2.resize(im, (w, h), interpolation=interp)return imdef preprocess(image, target_size=(192, 192)):image = normalize(image)image = resize(image, target_size=target_size)image = np.transpose(image, [2, 0, 1])image = image[None, :, :, :]return imagedef display_masked_image(mask, image, color_map=[255, 0, 0], weight=0.6):mask = mask > 0c1 = np.zeros(shape=mask.shape, dtype='uint8')c2 = np.zeros(shape=mask.shape, dtype='uint8')c3 = np.zeros(shape=mask.shape, dtype='uint8')pseudo_img = np.dstack((c1, c2, c3))for i in range(3):pseudo_img[:, :, i][mask] = color_map[i]vis_result = cv2.addWeighted(image, weight, pseudo_img, 1 - weight, 0)return vis_resultonnx_model_path = './output.onnx'
sess = rt.InferenceSession(onnx_model_path,providers=['AzureExecutionProvider', 'CPUExecutionProvider'])
input_name = sess.get_inputs()[0].name
label_name = sess.get_outputs()[0].nametarget_size = (192, 192)#cap_video = cv2.VideoCapture('./human.jpg')
#if not cap_video.isOpened():
# raise IOError("Error opening video stream or file.")
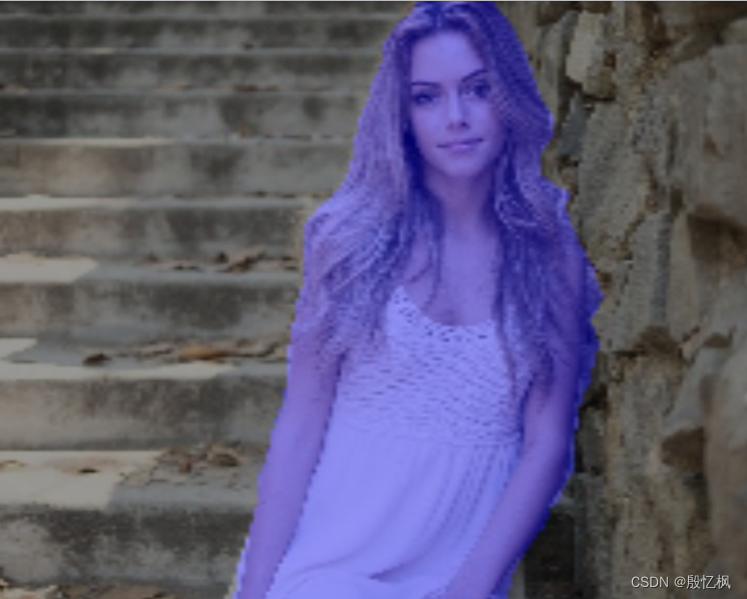
path = "./human.jpg"while 1:#ret, raw_frame = cap_video.read()ret = 1raw_frame = cv2.imread(path)pre_shape = raw_frame.shape[0:2][::-1]if ret:frame = cv2.cvtColor(raw_frame, cv2.COLOR_BGRA2RGB)frame = preprocess(frame, target_size)pred = sess.run([label_name],{input_name: frame.astype(np.float32)})[0]pred = pred[0]raw_frame = resize(raw_frame, target_size)image = display_masked_image(pred, raw_frame)image = resize(image, target_size=pre_shape)#cv2.imshow('HumanSegmentation', image)cv2.imwrite('result.jpg',image)print("finish! result save result.jpg")breakif cv2.waitKey(1) & 0xFF == ord('q'):breakelse:break
#cap_video.release()执行python predict.py
![]()
运行正常
以上是完整的一个过程 ,在onnxruntime上部署成功
如有侵权,或需要完整代码,请及时联系博主。
这篇关于AI项目十五:PP-Humanseg训练及onnxruntime部署的文章就介绍到这儿,希望我们推荐的文章对编程师们有所帮助!


