本文主要是介绍对接OKTA 使用SAML2.0协议,希望对大家解决编程问题提供一定的参考价值,需要的开发者们随着小编来一起学习吧!
对接OKTA 使用SAML2.0协议
缘起
给客户做项目,客户要求内部使用okta登陆,使用SAML2.0协议,需要对接。
okta初探
OKTA是SSO,有个网站可以让我们测试,地址:okta developer,SAML协议的交互流程大致如下
-
浏览器打开需要登录系统登陆界面,系统登陆界面只有一个登陆按钮,没有输入用户名密码的地方(原因是OKTA使用域账户登陆的时候,能直接获取域账户名,除了这个还有好多客户端都支持,比如Apple账户)
-
点击按钮,跳转到OKTA页面,这个页面只有一个loading动画,个人猜测里面有获取当前域账户名的代码
-
然后再次一个跳转,这个跳转跳到一个回调url,这个url官方名称为
Single Sign On URL,记住它,后面会用到。跳转到这个页面后,浏览器会发送一个POST请求,content-type是application/x-www-form-urlencoded,参数包含一个SAMLResponse和RelayState(这个是在OKTA控制台配置的回传参数)大概的样子是
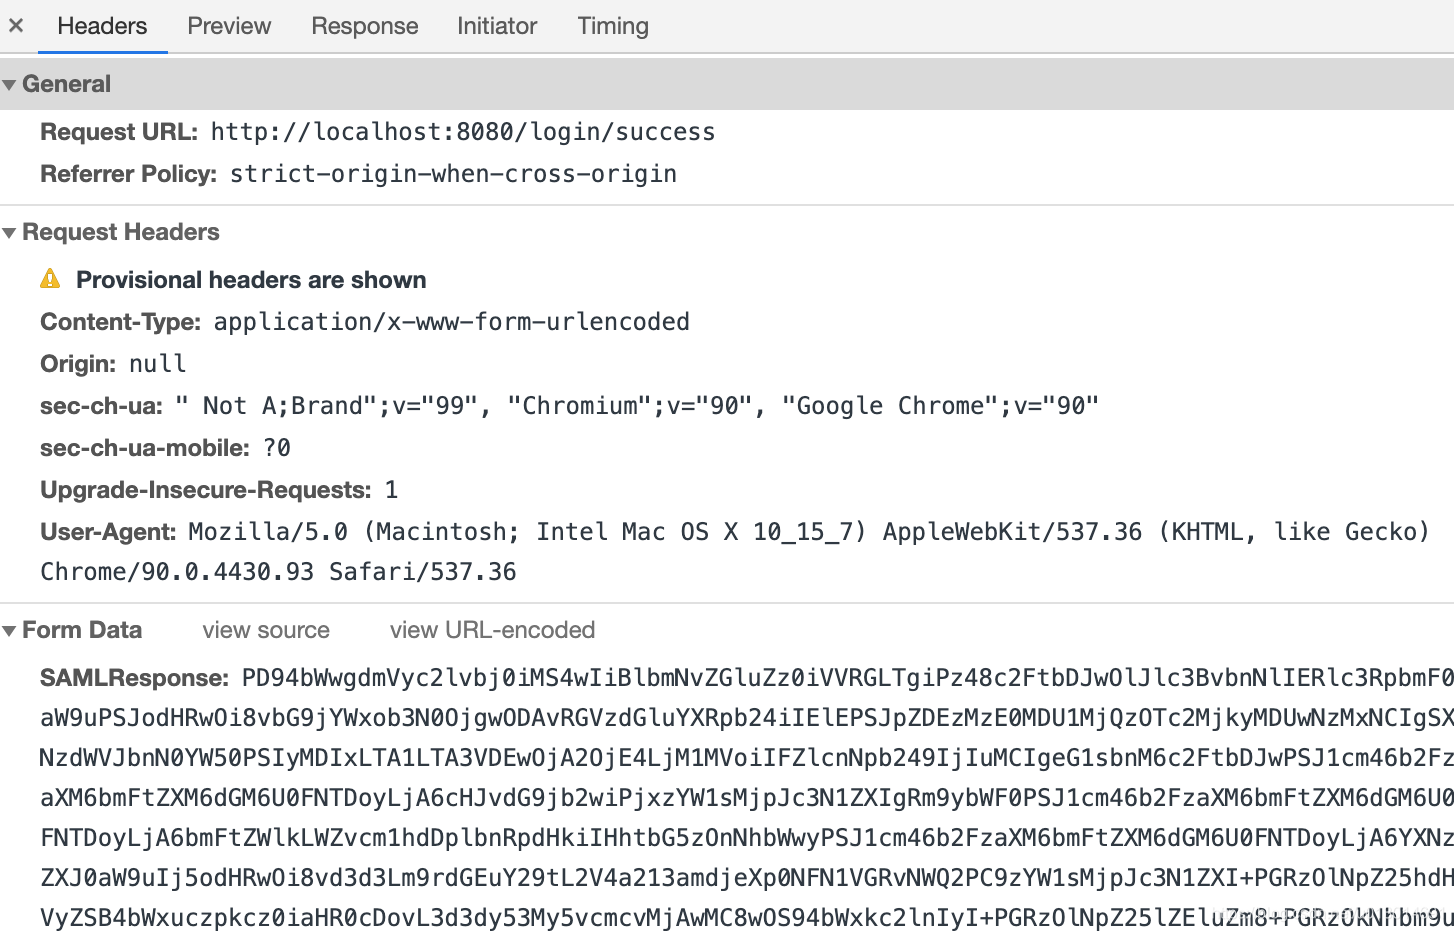
-
第3步中的
SAMLResponse就是一个xml文档的base64编码后的数据,回调地址接收到SAMLResponse进行校验,并获取登陆名
OKTA的配置
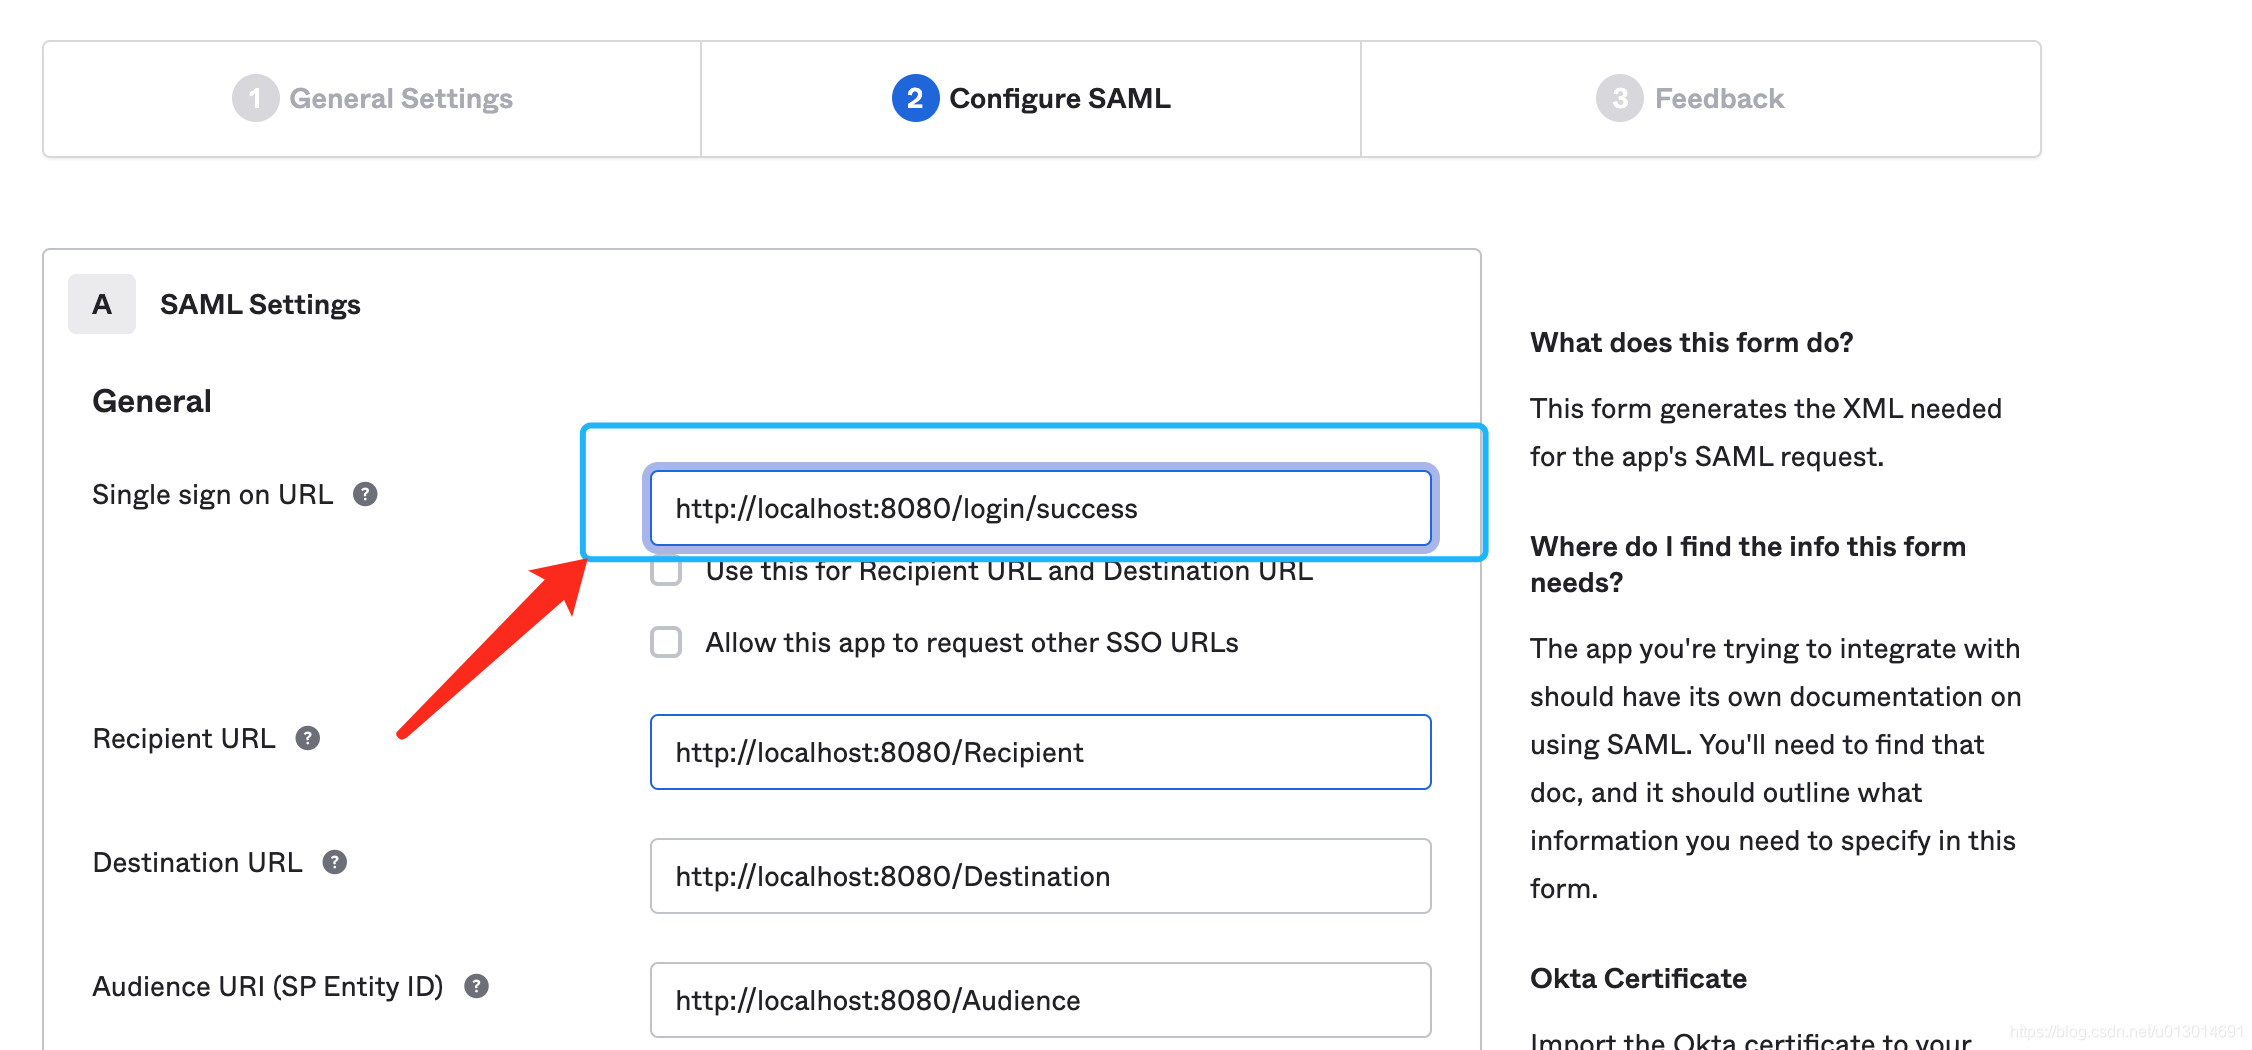
Single Sign On URL配置我们的系统的地址,是OKTA将认证完成后告诉我们结果的一个接口,接收参数是SAMLResponse和RelayState,格式是application/x-www-form-urlencoded,java中方法签名大概是:
@RequestMapping(value = "/login/success",method = {RequestMethod.POST})public String loginSuccess(String SAMLResponse, String RelayState){System.out.println("sAMLResponse:"+SAMLResponse);System.out.println("RelayState:" + RelayState);return "success";}
配置的地方如下:
2. 全部配置完后会得到一个页面大致如下
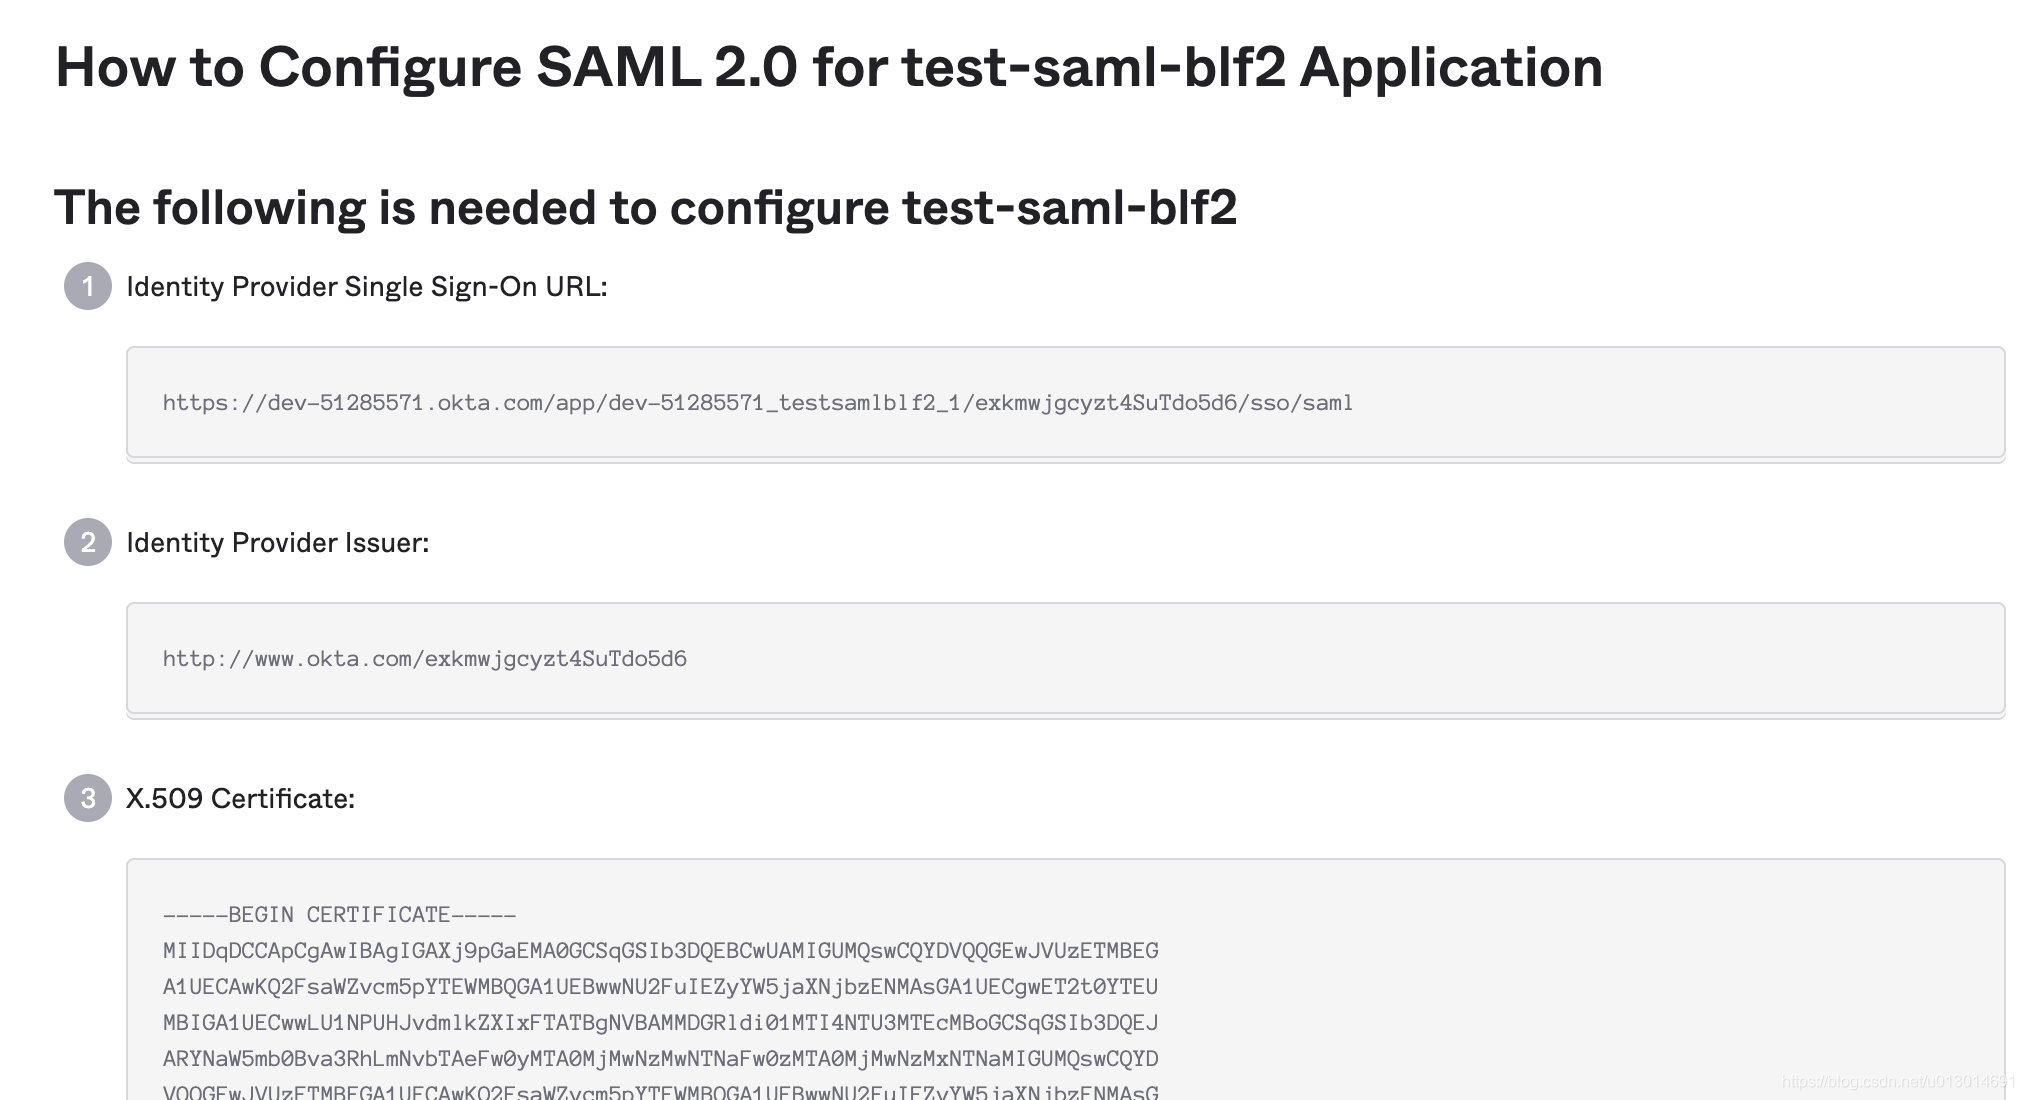
注意:Identity Provider Single Sign-On URL这个就是上面第一步中点击按钮跳转到的链接X.509 Certificate这部分是公钥,用来验证SAMLResponse中签名的公钥
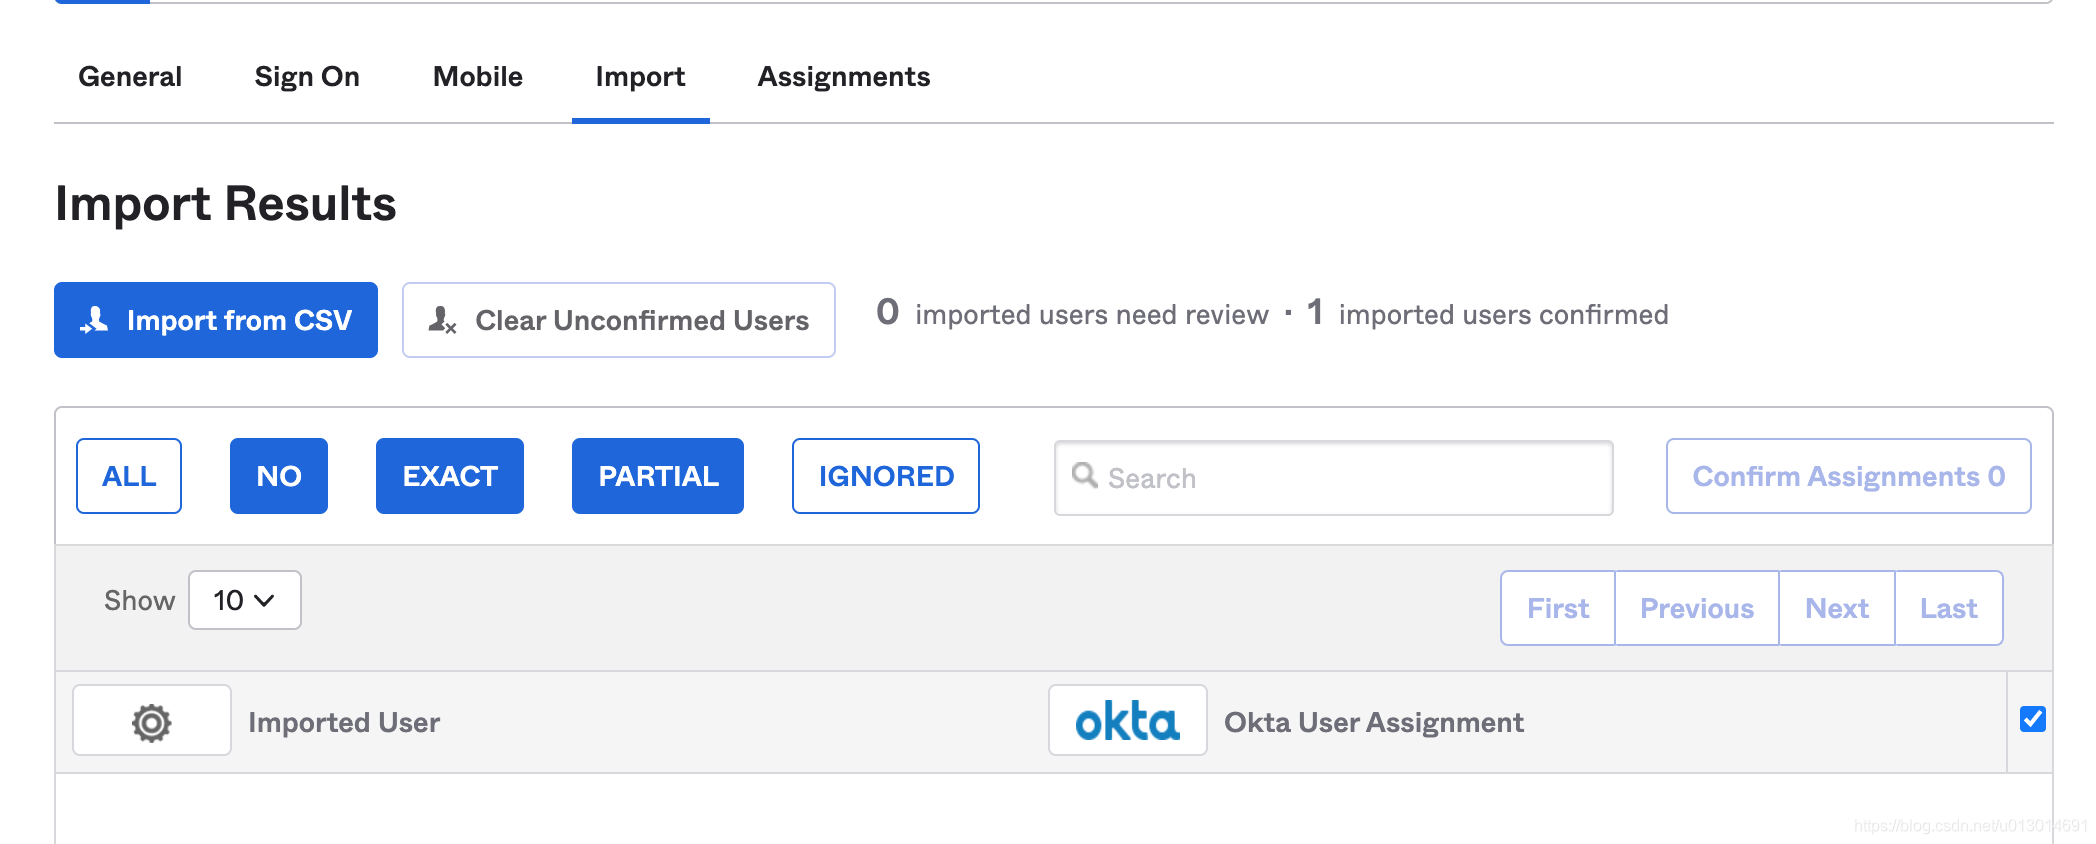
3. 这个页面可以让你上传一个csv文件(包含登陆名信息)加入到你的group里面,登陆是否能成功,就是取你的域账户名,查询是否在你的group里面,当然你可以配置更复杂的规则
验证逻辑
- 引入jar包:
<dependency><groupId>org.opensaml</groupId><artifactId>opensaml</artifactId><version>2.6.4</version></dependency>
- 验证逻辑:
import org.joda.time.DateTime;
import org.joda.time.DateTimeZone;
import org.opensaml.Configuration;
import org.opensaml.DefaultBootstrap;
import org.opensaml.saml2.core.Assertion;
import org.opensaml.saml2.core.Response;
import org.opensaml.xml.ConfigurationException;
import org.opensaml.xml.XMLObject;
import org.opensaml.xml.io.Unmarshaller;
import org.opensaml.xml.io.UnmarshallerFactory;
import org.opensaml.xml.io.UnmarshallingException;
import org.opensaml.xml.security.x509.BasicX509Credential;
import org.opensaml.xml.signature.Signature;
import org.opensaml.xml.signature.SignatureValidator;
import org.opensaml.xml.util.Base64;
import org.opensaml.xml.validation.ValidationException;
import org.slf4j.Logger;
import org.slf4j.LoggerFactory;
import org.w3c.dom.Document;
import org.w3c.dom.Element;
import org.xml.sax.SAXException;import javax.xml.parsers.DocumentBuilder;
import javax.xml.parsers.DocumentBuilderFactory;
import javax.xml.parsers.ParserConfigurationException;
import java.io.ByteArrayInputStream;
import java.io.IOException;
import java.security.KeyFactory;
import java.security.NoSuchAlgorithmException;
import java.security.PublicKey;
import java.security.cert.CertificateException;
import java.security.cert.CertificateFactory;
import java.security.cert.X509Certificate;
import java.security.spec.InvalidKeySpecException;
import java.security.spec.X509EncodedKeySpec;public class Test {private static final Logger logger = LoggerFactory.getLogger(Test.class);private static final String pattern = "yyyy-MM-dd HH:mm:ss";private static final BasicX509Credential credential = new BasicX509Credential();//X.509 Certificatepublic static final String publicKeyStr = "xxxxxxx";//responseMsg就是SAMLResponsepublic String validate(String responseMsg) {ByteArrayInputStream byteArrayInputStream = null;try {CertificateFactory certificateFactory = CertificateFactory.getInstance("X.509");byteArrayInputStream = new ByteArrayInputStream(Base64.decode(publicKeyStr));X509Certificate certificate = (X509Certificate) certificateFactory.generateCertificate(byteArrayInputStream);KeyFactory keyFactory = KeyFactory.getInstance("RSA");X509EncodedKeySpec publicKeySpec = new X509EncodedKeySpec(certificate.getPublicKey().getEncoded());PublicKey publicKey = keyFactory.generatePublic(publicKeySpec);credential.setPublicKey(publicKey);} catch (CertificateException e) {logger.error("加载okta PublicKey失败", e);} catch (NoSuchAlgorithmException e) {logger.error("加载okta PublicKey失败", e);} catch (InvalidKeySpecException e) {logger.error("加载okta PublicKey失败", e);}finally {if(byteArrayInputStream != null){try {byteArrayInputStream.close();} catch (IOException e) {e.printStackTrace();}}}try (ByteArrayInputStream inputStream = new ByteArrayInputStream(Base64.decode(responseMsg))) {DefaultBootstrap.bootstrap();DocumentBuilderFactory documentBuilderFactory = DocumentBuilderFactory.newInstance();documentBuilderFactory.setNamespaceAware(true);DocumentBuilder documentBuilder = documentBuilderFactory.newDocumentBuilder();Document document = documentBuilder.parse(inputStream);Element documentElement = document.getDocumentElement();UnmarshallerFactory unmarshallerFactory = Configuration.getUnmarshallerFactory();Unmarshaller unmarshaller = unmarshallerFactory.getUnmarshaller(documentElement);XMLObject xmlObject = unmarshaller.unmarshall(documentElement);Response response = (Response) xmlObject;Assertion assertion = response.getAssertions().get(0);//验证签名Signature signature = assertion.getSignature();SignatureValidator signatureValidator = new SignatureValidator(credential);//签名验证失败会抛错signatureValidator.validate(signature);//校验是否登录成功String successStr = response.getStatus().getStatusCode().getValue();if (!successStr.contains("Success")) {logger.error("登录成功标志校验失败,successStr={}", response.getStatus().getStatusCode().getValue());return null;}//检验登录时间DateTime notBefore = assertion.getConditions().getNotBefore();DateTime notOnOrAfter = assertion.getConditions().getNotOnOrAfter();DateTime now = new DateTime(DateTimeZone.UTC);logger.error("验证okta返回的时间,notBefore={},notOnOrAfter={},now={}",notBefore.toString(pattern), notOnOrAfter.toString(pattern), now.toString(pattern));if (now.isBefore(notBefore) || now.isAfter(notOnOrAfter)) {logger.error("登录成功时间校验失败,notBefore={},notOnOrAfter={},now={}",notBefore.toString(pattern), notOnOrAfter.toString(pattern), now.toString(pattern));return null;}//返回登录用户名return assertion.getSubject().getNameID().getValue();} catch (IOException e) {logger.error("验证SAMLResponse失败", e);} catch (ParserConfigurationException e) {logger.error("验证SAMLResponse失败", e);} catch (SAXException e) {logger.error("验证SAMLResponse失败", e);} catch (UnmarshallingException e) {logger.error("验证SAMLResponse失败", e);} catch (ValidationException e) {logger.error("验证SAMLResponse失败", e);} catch (ConfigurationException e) {logger.error("验证SAMLResponse失败", e);} catch (Exception ex) {logger.error("验证SAMLResponse失败", ex);}return null;}
}
这篇关于对接OKTA 使用SAML2.0协议的文章就介绍到这儿,希望我们推荐的文章对编程师们有所帮助!


