本文主要是介绍【javaweb】学习日记Day11 - tlias智能管理系统 - 文件上传 新增 修改员工 配置文件,希望对大家解决编程问题提供一定的参考价值,需要的开发者们随着小编来一起学习吧!
目录
一、员工管理功能开发
1、新增员工
postman报错500的原因
(1)Controller类
(2)Service类
(3)Mapper类
2、根据ID查询
(1)Controller类
(2)Service类
(3)Mapper类
3、修改员工
(1)Controller类
(2)Service类
(3)Mapper类
(4)配置动态sql - xml文件
4、员工管理代码综合展示
(1)EmpController类
(2)EmpService 接口
(3)EmpServiceImpl 实现类
(4)EmpMapper类
(5)动态sql xml 文件
二、文件上传
(1)引入前端页面
1、本地存储方式
(1)Controller类
(2)配置properties文件
2、阿里云OSS对象存储
(1)准备工作
(2)前期配置
(3)配置Java访问凭证
(4)上传文件官方示例代码
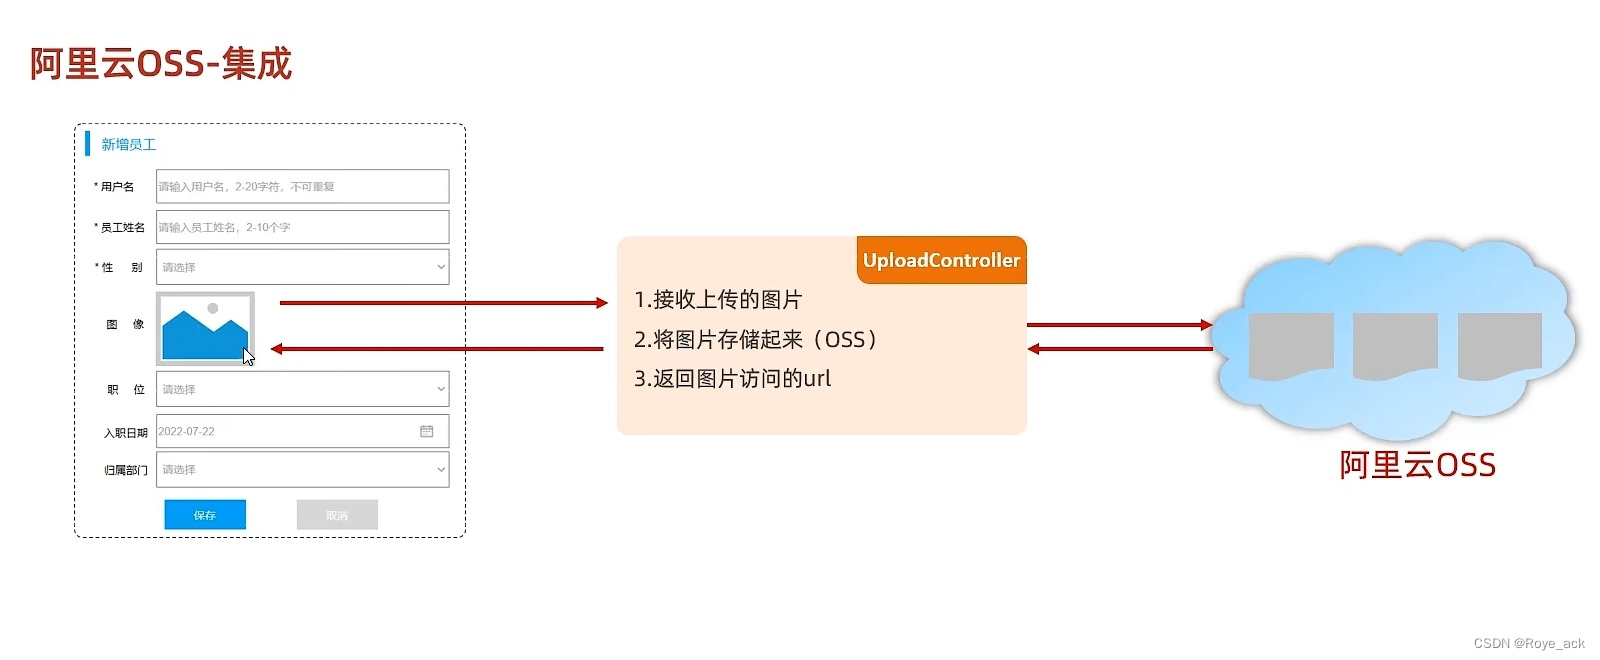
3、阿里云OSS集成
(1)引入阿里云OSS上传文件工具类
(2)Controller类
4、文件上传代码综合展示
(1)UploadController类
(2)AliyunOSSUtils上传文件工具类
(3)AliyunOSSProperties属性类
三、配置文件
1、properties配置文件
(1)文件上传工具类
① @Value注解
(2)application.properties配置文件
2、yml配置文件
(1)用yml替换properties文件
3、@ConfigurationProperties
(1)定义存参数的实体类
(2)修改文件上传工具类
一、员工管理功能开发
1、新增员工
接口信息:
- 请求方式:POST —— @PostMapping
- 请求路径:("/emps")
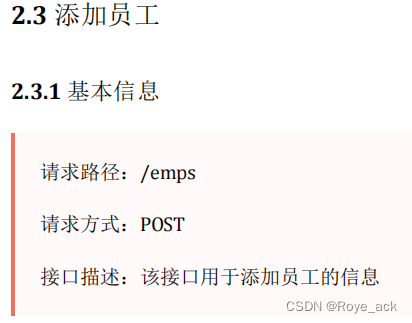
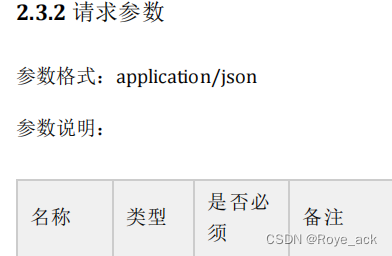
请求参数:
响应数据:直接Result.success()
postman报错500的原因
大概率是mapper中sql语句写错了(把createtime写成了creatime,找了半天bug)
(1)Controller类
//添加员工@PostMappingpublic Result save(@RequestBody Emp emp){log.info("新增员工:{}",emp);empService.save(emp);return Result.success();}(2)Service类
//新增员工void save(Emp emp); //新增员工@Overridepublic void save(Emp emp) {emp.setCreateTime(LocalDateTime.now());emp.setUpdateTime(LocalDateTime.now());empmapper.insert(emp);}(3)Mapper类
//新增员工@Insert("insert into emp (username,name,gender,image,job,entrydate,dept_id,create_time,update_time) " +"values(#{username},#{name},#{gender},#{image},#{job},#{entrydate},#{deptId},#{createTime},#{updateTime})")void insert(Emp emp);
2、根据ID查询
接口信息:
- 请求方式:GET —— @GetMapping
- 请求路径:("/emps/{id}")
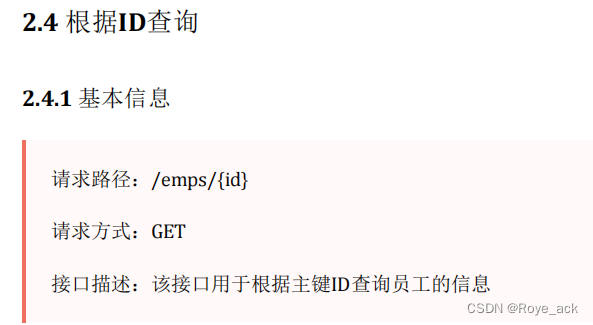
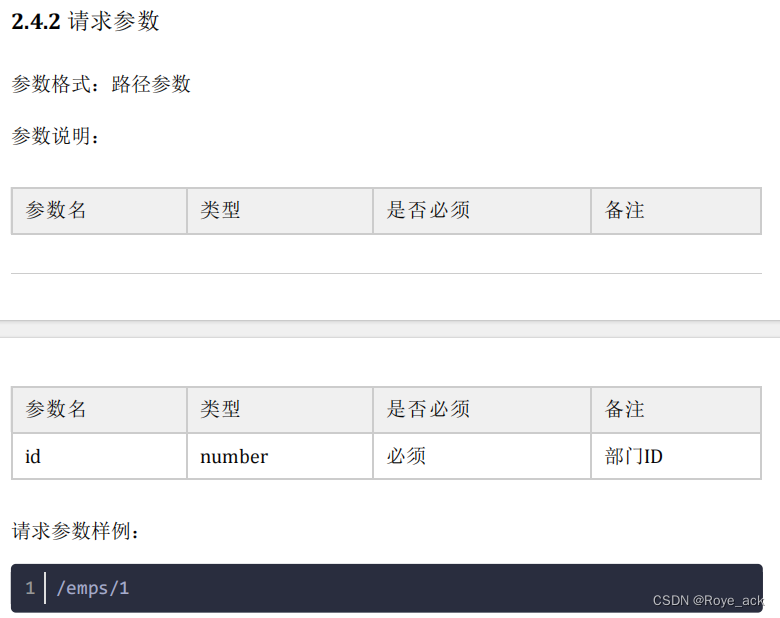
请求参数:
响应数据:

(1)Controller类
//根据id查询@GetMapping("/{id}")public Result getById(@PathVariable Integer id){log.info("根据ID查询员工信息,ID:{}",id);Emp emp = empService.getById(id);return Result.success(emp);}(2)Service类
//根据id查找员工Emp getById(Integer id); //根据id查找员工@Overridepublic Emp getById(Integer id) {return empmapper.getById(id);}(3)Mapper类
//根据id查找员工@Select("select * from emp where id = #{id}")Emp getById(Integer id);3、修改员工
接口信息:
- 请求方式:PUT—— @PutMapping
- 请求路径:("/emps")
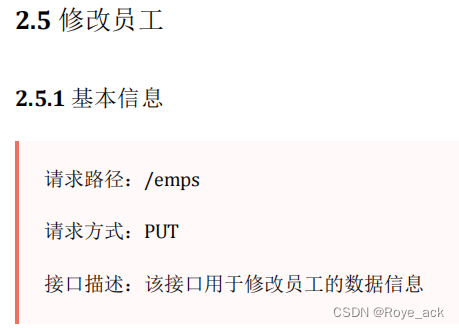
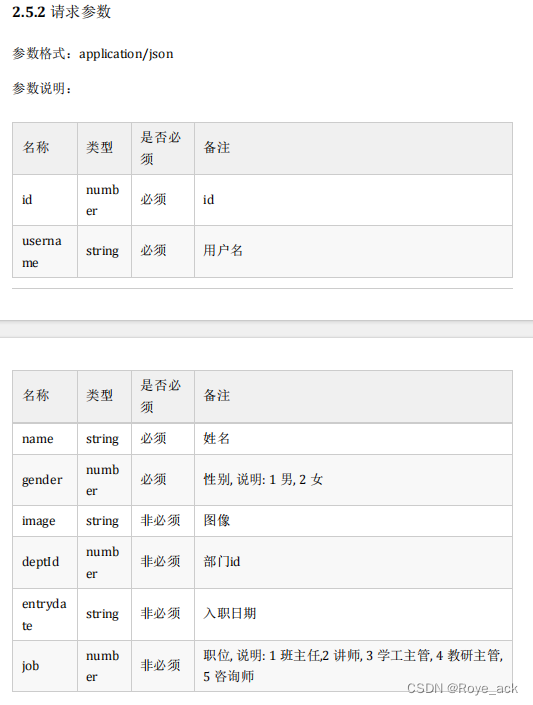
请求参数:
响应数据: 直接Result.success()
(1)Controller类
//修改员工@PutMappingpublic Result modify(@RequestBody Emp emp){log.info("修改员工信息:{}",emp.getId());empService.modify(emp);return Result.success();}(2)Service类
//修改员工void modify(Emp emp); //修改员工@Overridepublic void modify(Emp emp) {emp.setUpdateTime(LocalDateTime.now());empmapper.modify(emp);}(3)Mapper类
//修改员工void modify(Emp emp);(4)配置动态sql - xml文件
<!--更新员工--><update id="modify">update emp<set><if test="username != null and username != ''">username = #{username},</if><if test="password != null and password != ''">password = #{password},</if><if test="name != null and name != ''">name = #{name},</if><if test="gender != null">gender = #{gender},</if><if test="image != null and image != ''">image = #{image},</if><if test="job != null">job = #{job},</if><if test="entrydate != null">entrydate = #{entrydate},</if><if test="deptId != null">dept_id = #{deptId},</if><if test="updateTime != null">update_time = #{updateTime}</if></set>where id = #{id}</update>4、员工管理代码综合展示
(1)EmpController类
//员工管理controller
@Slf4j
@RestController
@RequestMapping("/emps")
public class EmpController {@Autowiredprivate EmpService empService;//分页查询@GetMappingpublic Result selectByPage(@RequestParam(defaultValue = "1") Integer page,@RequestParam(defaultValue = "10") Integer pageSize,String name, Short gender,@DateTimeFormat(pattern = "yyyy-MM-dd") LocalDate begin,@DateTimeFormat(pattern = "yyyy-MM-dd") LocalDate end){log.info("分页查询,参数:{},{},{},{},{},{}",page,pageSize,name,gender,begin,end);PageBean pageBean = empService.selectByPage(page,pageSize,name,gender,begin,end);return Result.success(pageBean);}//删除员工@DeleteMapping("/{ids}")public Result delete(@PathVariable List<Integer> ids){log.info("删除员工id:{}",ids);empService.delete(ids);return Result.success();}//添加员工@PostMappingpublic Result save(@RequestBody Emp emp){log.info("新增员工:{}",emp);empService.save(emp);return Result.success();}//根据id查询@GetMapping("/{id}")public Result getById(@PathVariable Integer id){log.info("根据ID查询员工信息,ID:{}",id);Emp emp = empService.getById(id);return Result.success(emp);}//修改员工@PutMappingpublic Result modify(@RequestBody Emp emp){log.info("修改员工信息:{}",emp.getId());empService.modify(emp);return Result.success();}
}
(2)EmpService 接口
public interface EmpService {//分页查询PageBean selectByPage(Integer page, Integer pageSize,String name, Short gender,LocalDate begin,LocalDate end);//批量删除void delete(List<Integer> ids);//新增员工void save(Emp emp);//根据id查找员工Emp getById(Integer id);//修改员工void modify(Emp emp);
}
(3)EmpServiceImpl 实现类
@Service
public class EmpServiceImpl implements EmpService {@Autowiredprivate EmpMapper empmapper;//分页查询@Overridepublic PageBean selectByPage(Integer page, Integer pageSize, String name,Short gender, LocalDate begin, LocalDate end) {//1.设置分页参数PageHelper.startPage(page,pageSize);//2.执行查询List<Emp> empList = empmapper.list(name, gender, begin, end); //获取的是分页结果查询的封装类Page<Emp> p = (Page<Emp>) empList; //进行强制转换//3.封装PageBean对象PageBean pageBean = new PageBean(p.getTotal(),p.getResult());return pageBean;}//批量删除@Overridepublic void delete(List<Integer> ids) {empmapper.delete(ids);}//新增员工@Overridepublic void save(Emp emp) {emp.setCreateTime(LocalDateTime.now());emp.setUpdateTime(LocalDateTime.now());empmapper.insert(emp);}//根据id查找员工@Overridepublic Emp getById(Integer id) {return empmapper.getById(id);}//修改员工@Overridepublic void modify(Emp emp) {emp.setUpdateTime(LocalDateTime.now());empmapper.modify(emp);}
}
(4)EmpMapper类
@Mapper
public interface EmpMapper {//用pagehelper插件 - 分页查询获取列表数据public List<Emp> list(String name, Short gender, LocalDate begin, LocalDate end);//新增员工@Insert("insert into emp (username,name,gender,image,job,entrydate,dept_id,create_time,update_time) " +"values(#{username},#{name},#{gender},#{image},#{job},#{entrydate},#{deptId},#{createTime},#{updateTime})")void insert(Emp emp);//删除员工void delete(List<Integer> ids);//根据id查找员工@Select("select * from emp where id = #{id}")Emp getById(Integer id);//修改员工void modify(Emp emp);
}
(5)动态sql xml 文件
<?xml version="1.0" encoding="UTF-8" ?>
<!DOCTYPE mapperPUBLIC "-//mybatis.org//DTD Mapper 3.0//EN""http://mybatis.org/dtd/mybatis-3-mapper.dtd">
<mapper namespace="com.itroye.mapper.EmpMapper"><!--更新员工--><update id="modify">update emp<set><if test="username != null and username != ''">username = #{username},</if><if test="password != null and password != ''">password = #{password},</if><if test="name != null and name != ''">name = #{name},</if><if test="gender != null">gender = #{gender},</if><if test="image != null and image != ''">image = #{image},</if><if test="job != null">job = #{job},</if><if test="entrydate != null">entrydate = #{entrydate},</if><if test="deptId != null">dept_id = #{deptId},</if><if test="updateTime != null">update_time = #{updateTime}</if></set>where id = #{id}</update><!--批量删除--><delete id="delete">deletefrom empwhere id in<foreach collection="ids" item="x" separator="," open="(" close=")">#{x}</foreach></delete><!--条件查询--><select id="list" resultType="com.itroye.pojo.Emp">select *from emp<where><if test="name !=null and name != ''">name like concat('%',#{name},'%')</if><if test="gender != null">and gender = #{gender}</if><if test="begin != null and end != null">and entrydate between #{begin} and #{end}</if></where>order by update_time desc</select></mapper>
二、文件上传
接口信息:
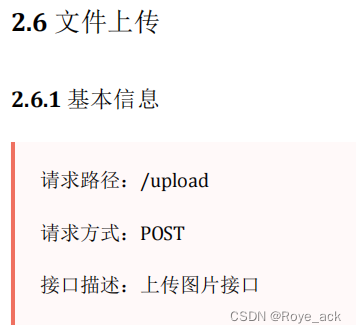
请求参数:

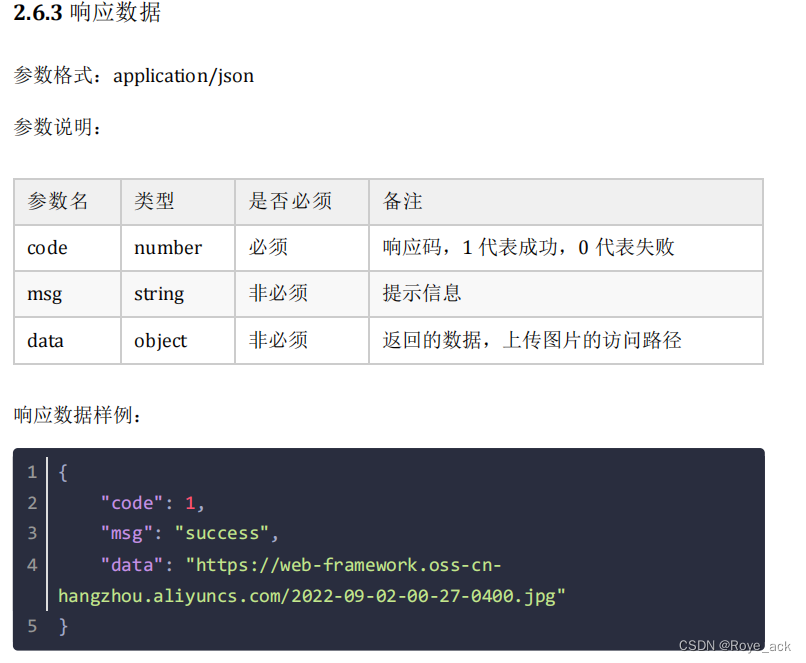
响应数据:
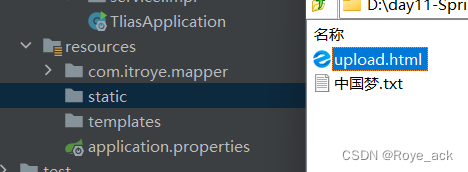
(1)引入前端页面
将前端页面放resources文件的static目录下
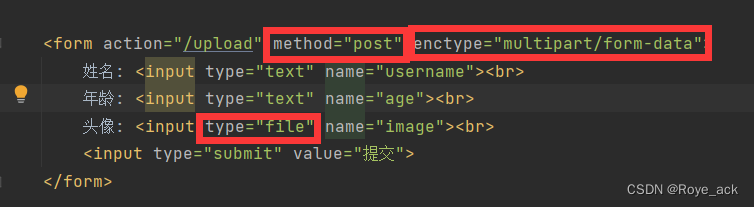
上传文件三要素
1、本地存储方式
(1)Controller类
形参名要和前端传参名保持一致!
@PostMapping("/upload")public Result upload(String username , Integer age, MultipartFile image) throws IOException //形参名要和前端传参名保持一致{log.info("文件上传:{},{},{}",username,age,image);//获取原始文件名String originalFilename = image.getOriginalFilename();//构造唯一文件名(不能重复) uuid(通用唯一识别码)int idx = originalFilename.lastIndexOf("."); //获取原始文件名最后一个点所在位置 也就是截取到".jpg"String extraname = originalFilename.substring(idx); //截取拓展名String newFileName = UUID.randomUUID().toString() + extraname;log.info("新的文件名:{}",newFileName);//将接受到的文件存在服务器磁盘目录中image.transferTo(new File("D:\\tlias.image\\"+newFileName));return Result.success();}(2)配置properties文件
有的图片太大,无法上传,此时需要规定上传文件大小
#配置单个文件上传大小限制
spring.servlet.multipart.max-file-size=10MB#配置单个请求最大大小的限制(一次请求可以上传多个文件)
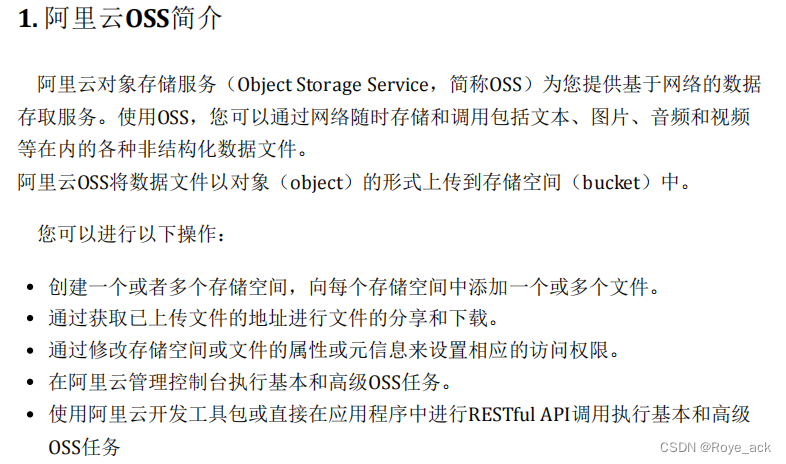
spring.servlet.multipart.max-request-size=100MB2、阿里云OSS对象存储
阿里云-计算,为了无法计算的价值
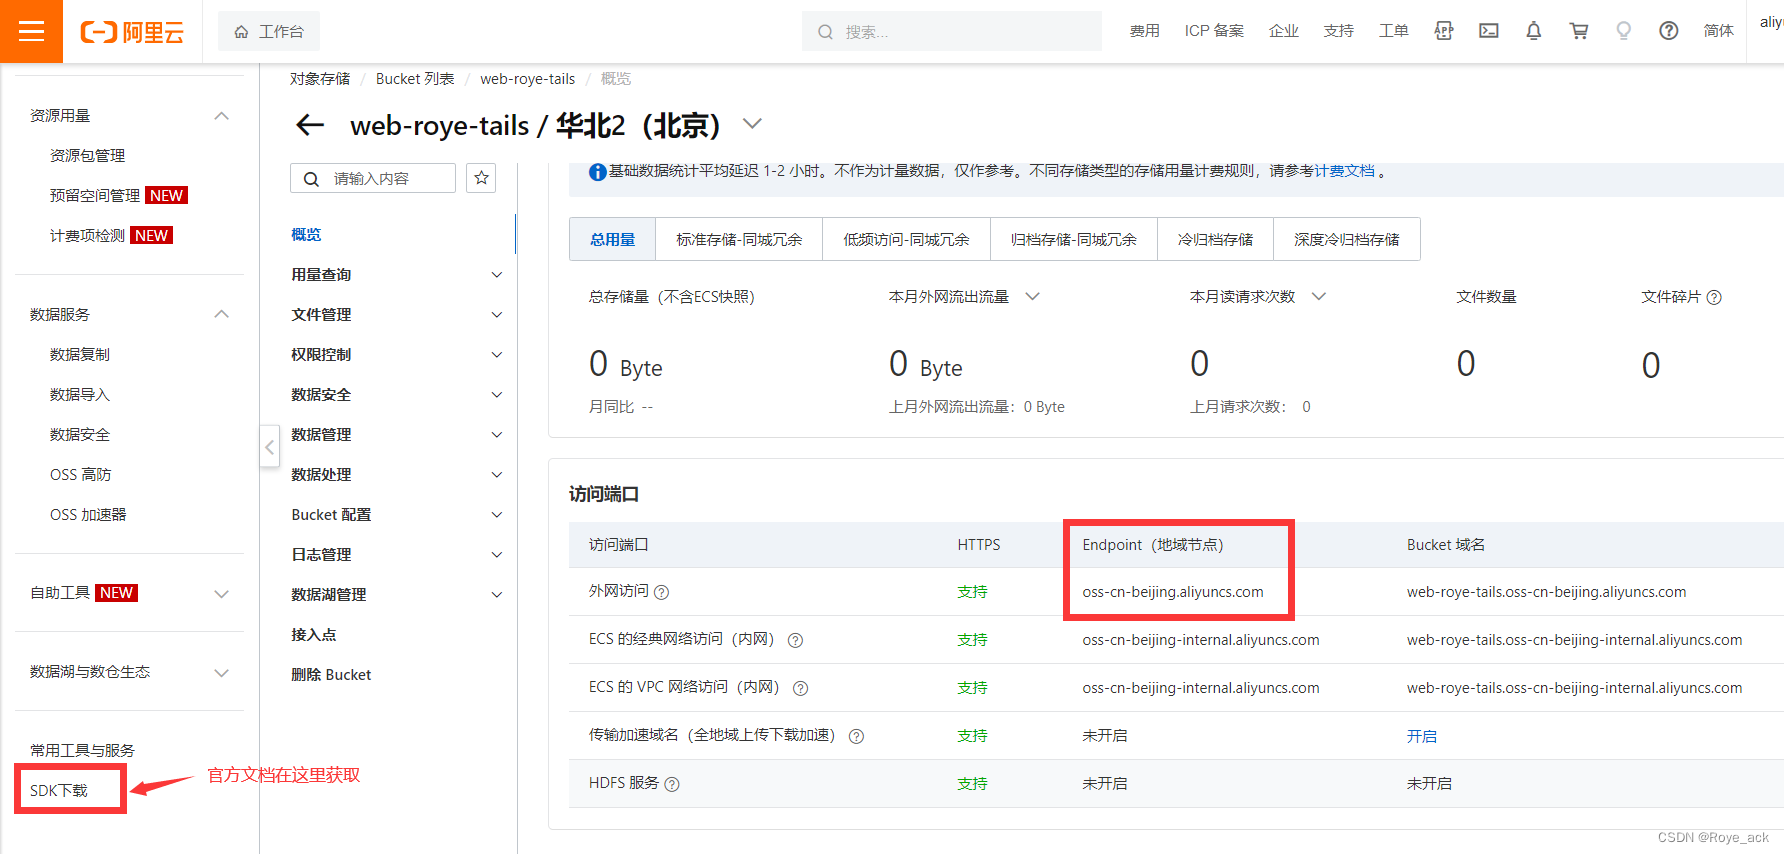
(1)准备工作
各语言SDK参考文档_对象存储 OSS-阿里云帮助中心
Day11-04. 案例-文件上传-阿里云OSS-准备_哔哩哔哩_bilibili
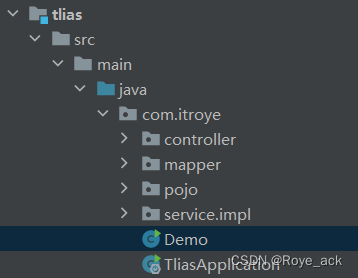
(2)前期配置
将代码与启动类放一块
(3)配置Java访问凭证
如何为Java SDK配置访问凭证_对象存储 OSS-阿里云帮助中心
(4)上传文件官方示例代码
package com.itroye;import com.aliyun.oss.ClientException;
import com.aliyun.oss.OSS;
import com.aliyun.oss.common.auth.*;
import com.aliyun.oss.OSSClientBuilder;
import com.aliyun.oss.OSSException;
import com.aliyun.oss.model.PutObjectRequest;
import com.aliyun.oss.model.PutObjectResult;
import java.io.FileInputStream;
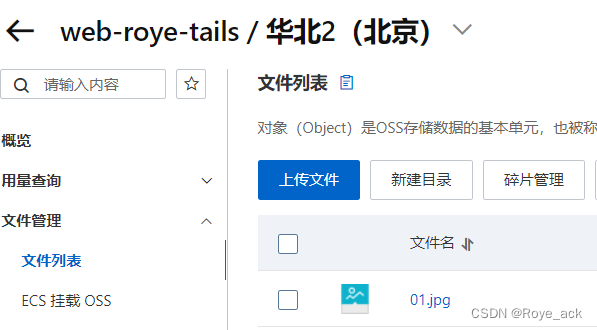
import java.io.InputStream;public class Demo {public static void main(String[] args) throws Exception {// Endpoint以华东1(杭州)为例,其它Region请按实际情况填写。String endpoint = "https://oss-cn-beijing.aliyuncs.com";// 从环境变量中获取访问凭证。运行本代码示例之前,请确保已设置环境变量OSS_ACCESS_KEY_ID和OSS_ACCESS_KEY_SECRET。EnvironmentVariableCredentialsProvider credentialsProvider = CredentialsProviderFactory.newEnvironmentVariableCredentialsProvider();// 填写Bucket名称,例如examplebucket。String bucketName = "web-roye-tails";// 填写Object完整路径,完整路径中不能包含Bucket名称,例如exampledir/exampleobject.txt。// 也就是放在阿里云OSS中的名称String objectName = "01.jpg";// 填写本地文件的完整路径,例如D:\\localpath\\examplefile.txt。// 如果未指定本地路径,则默认从示例程序所属项目对应本地路径中上传文件流。String filePath= "D:\\tlias.image\\MTXX_MH20231002_222415502.jpg";// 创建OSSClient实例。OSS ossClient = new OSSClientBuilder().build(endpoint, credentialsProvider);try {InputStream inputStream = new FileInputStream(filePath);// 创建PutObjectRequest对象。PutObjectRequest putObjectRequest = new PutObjectRequest(bucketName, objectName, inputStream);// 创建PutObject请求。PutObjectResult result = ossClient.putObject(putObjectRequest);} catch (OSSException oe) {System.out.println("Caught an OSSException, which means your request made it to OSS, "+ "but was rejected with an error response for some reason.");System.out.println("Error Message:" + oe.getErrorMessage());System.out.println("Error Code:" + oe.getErrorCode());System.out.println("Request ID:" + oe.getRequestId());System.out.println("Host ID:" + oe.getHostId());} catch (ClientException ce) {System.out.println("Caught an ClientException, which means the client encountered "+ "a serious internal problem while trying to communicate with OSS, "+ "such as not being able to access the network.");System.out.println("Error Message:" + ce.getMessage());} finally {if (ossClient != null) {ossClient.shutdown();}}}
} 运行后,在阿里云oss管理控制后台的文件管理处能看到我们上传的图片
3、阿里云OSS集成
(1)引入阿里云OSS上传文件工具类
由官方示例代码改造而来
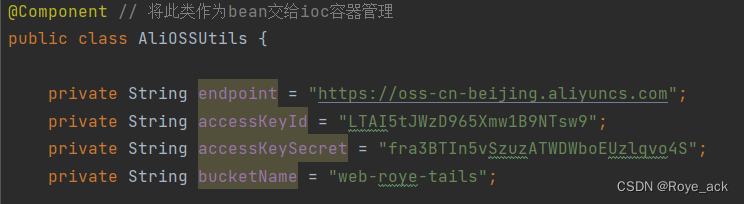
/*** 阿里云 OSS 工具类*/
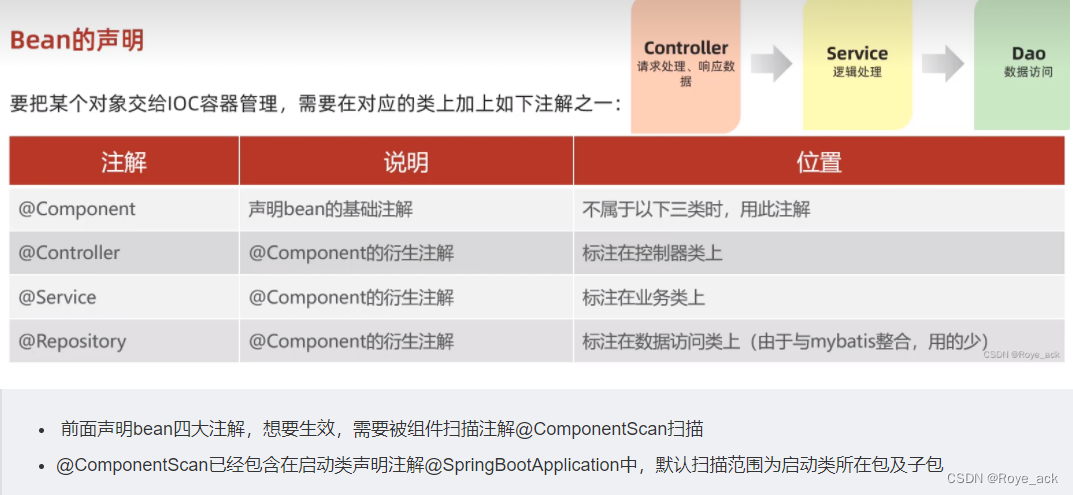
@Component // 将此类作为bean交给ioc容器管理
public class AliOSSUtils {private String endpoint = "https://oss-cn-beijing.aliyuncs.com";private String accessKeyId = "LTAI5tJWzD965Xmw1B9NTsw9";private String accessKeySecret = "fra3BTIn5vSzuzATWDWboEUzlqvo4S";private String bucketName = "web-roye-tails";/*** 实现上传图片到OSS*/public String upload(MultipartFile file) throws IOException {// 获取上传的文件的输入流InputStream inputStream = file.getInputStream();// 避免文件覆盖 生成随机uuid.jpgString originalFilename = file.getOriginalFilename();String fileName = UUID.randomUUID().toString() + originalFilename.substring(originalFilename.lastIndexOf("."));//上传文件到 OSSOSS ossClient = new OSSClientBuilder().build(endpoint, accessKeyId, accessKeySecret);ossClient.putObject(bucketName, fileName, inputStream);//生成新的文件访问路径url 即:https://web-roye-tails.oss-cn-beijing.aliyuncs.com/01.jpgString url = endpoint.split("//")[0] + "//" + bucketName + "." + endpoint.split("//")[1] + "/" + fileName;// 关闭ossClientossClient.shutdown();return url;// 把上传到oss的路径返回}}(2)Controller类
@Slf4j
@RestController
public class UploadController {@Autowiredprivate AliOSSUtils aliOSSUtils;@PostMapping("/upload")public Result upload(MultipartFile image) throws IOException {log.info("文件上传,文件名:{}",image.getOriginalFilename());//调用阿里云OSS工具类进行文件上传String url = aliOSSUtils.upload(image);log.info("文件上传完成,文件访问url:{}",url);return Result.success(url);}
}
4、文件上传代码综合展示
(1)UploadController类
@Slf4j
@RestController
public class UploadController {@Autowiredprivate AliOSSUtils aliOSSUtils;@PostMapping("/upload")public Result upload(MultipartFile image) throws IOException {log.info("文件上传,文件名:{}",image.getOriginalFilename());//调用阿里云OSS工具类进行文件上传String url = aliOSSUtils.upload(image);log.info("文件上传完成,文件访问url:{}",url);return Result.success(url);}// 本地上传
//    @PostMapping("/upload")
//    public Result upload(String username , Integer age, MultipartFile image) throws IOException //形参名要和前端传参名保持一致
//    {
//        log.info("文件上传:{},{},{}",username,age,image);
//
//        //获取原始文件名
//        String originalFilename = image.getOriginalFilename();
//
//        //构造唯一文件名(不能重复) uuid(通用唯一识别码)
//        int idx = originalFilename.lastIndexOf("."); //获取原始文件名最后一个点所在位置 也就是截取到".jpg"
//        String extraname = originalFilename.substring(idx); //截取拓展名
//        String newFileName = UUID.randomUUID().toString() + extraname;
//        log.info("新的文件名:{}",newFileName);
//
//        //将接受到的文件存在服务器磁盘目录中
//        image.transferTo(new File("D:\\tlias.image\\"+newFileName));
//
//        return Result.success();
//    }
}
(2)AliyunOSSUtils上传文件工具类
/*** 阿里云 OSS 工具类*/
@Component // 将此类作为bean交给ioc容器管理
public class AliOSSUtils {@Autowired // 获取一系列属性值的bean对象注入private AliOSSProperties aliOSSProperties;/*** 实现上传图片到OSS*/public String upload(MultipartFile file) throws IOException {//获取阿里云oss参数String endpoint = aliOSSProperties.getEndpoint();String accessKeyId = aliOSSProperties.getAccessKeyId();String accessKeySecret = aliOSSProperties.getAccessKeySecret();String bucketName = aliOSSProperties.getBucketName();// 获取上传的文件的输入流InputStream inputStream = file.getInputStream();// 避免文件覆盖 生成随机uuid.jpgString originalFilename = file.getOriginalFilename();String fileName = UUID.randomUUID().toString() + originalFilename.substring(originalFilename.lastIndexOf("."));//上传文件到 OSSOSS ossClient = new OSSClientBuilder().build(endpoint, accessKeyId, accessKeySecret);ossClient.putObject(bucketName, fileName, inputStream);//生成新的文件访问路径url  即:https://web-roye-tails.oss-cn-beijing.aliyuncs.com/01.jpgString url = endpoint.split("//")[0] + "//" + bucketName + "." + endpoint.split("//")[1] + "/" + fileName;// 关闭ossClientossClient.shutdown();return url;// 把上传到oss的路径返回}}
(3)AliyunOSSProperties属性类
@Data
@Component
@ConfigurationProperties(prefix = "aliyun.oss")
public class AliOSSProperties {private String endpoint;private String accessKeyId;private String accessKeySecret;private String bucketName;
}
三、配置文件
1、properties配置文件
配置信息在类内写死,不方便于项目后期维护,我们可以将该内容写在springboot的properties配置文件中
 (1)文件上传工具类
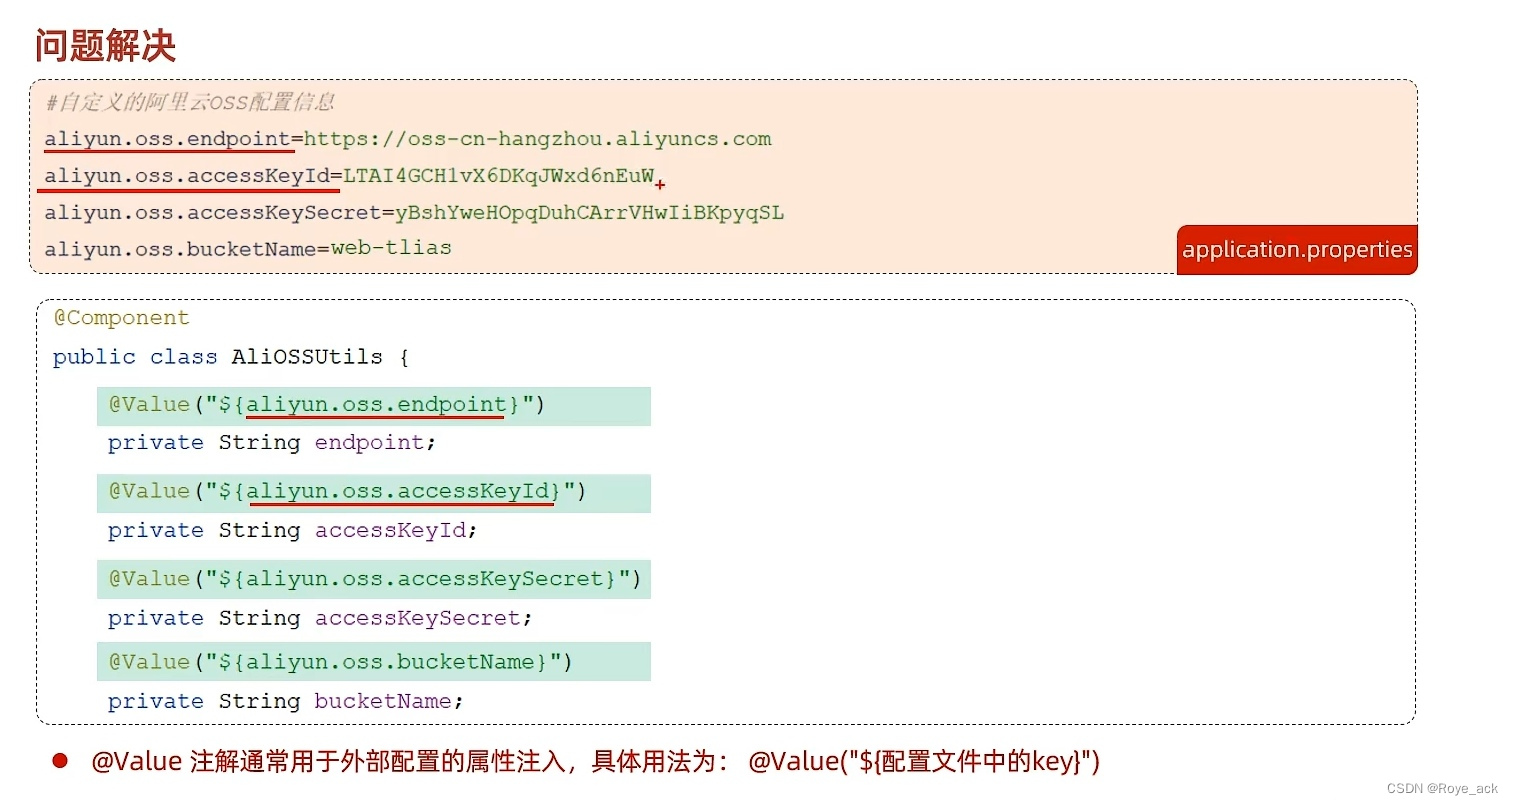
① @Value注解
通常用于外部配置属性一个一个地注入,@Value("${配置文件中的key}")
@Component // 将此类作为bean交给ioc容器管理
public class AliOSSUtils {@Value("${aliyun.oss.endpoint}")private String endpoint;@Value("${aliyun.oss.accessKeyId}")private String accessKeyId;@Value("${aliyun.oss.accessKeySecret}")private String accessKeySecret;@Value("${aliyun.oss.bucketName}")private String bucketName;
(2)application.properties配置文件
#阿里云oss配置
aliyun.oss.endpoint=https://oss-cn-beijing.aliyuncs.com
aliyun.oss.accessKeyId=LTAI5tJWzD965Xmw1B9NTsw9
aliyun.oss.accessKeySecret=fra3BTIn5vSzuzATWDWboEUzlqvo4S
aliyun.oss.bucketName=web-roye-tails
2、yml配置文件
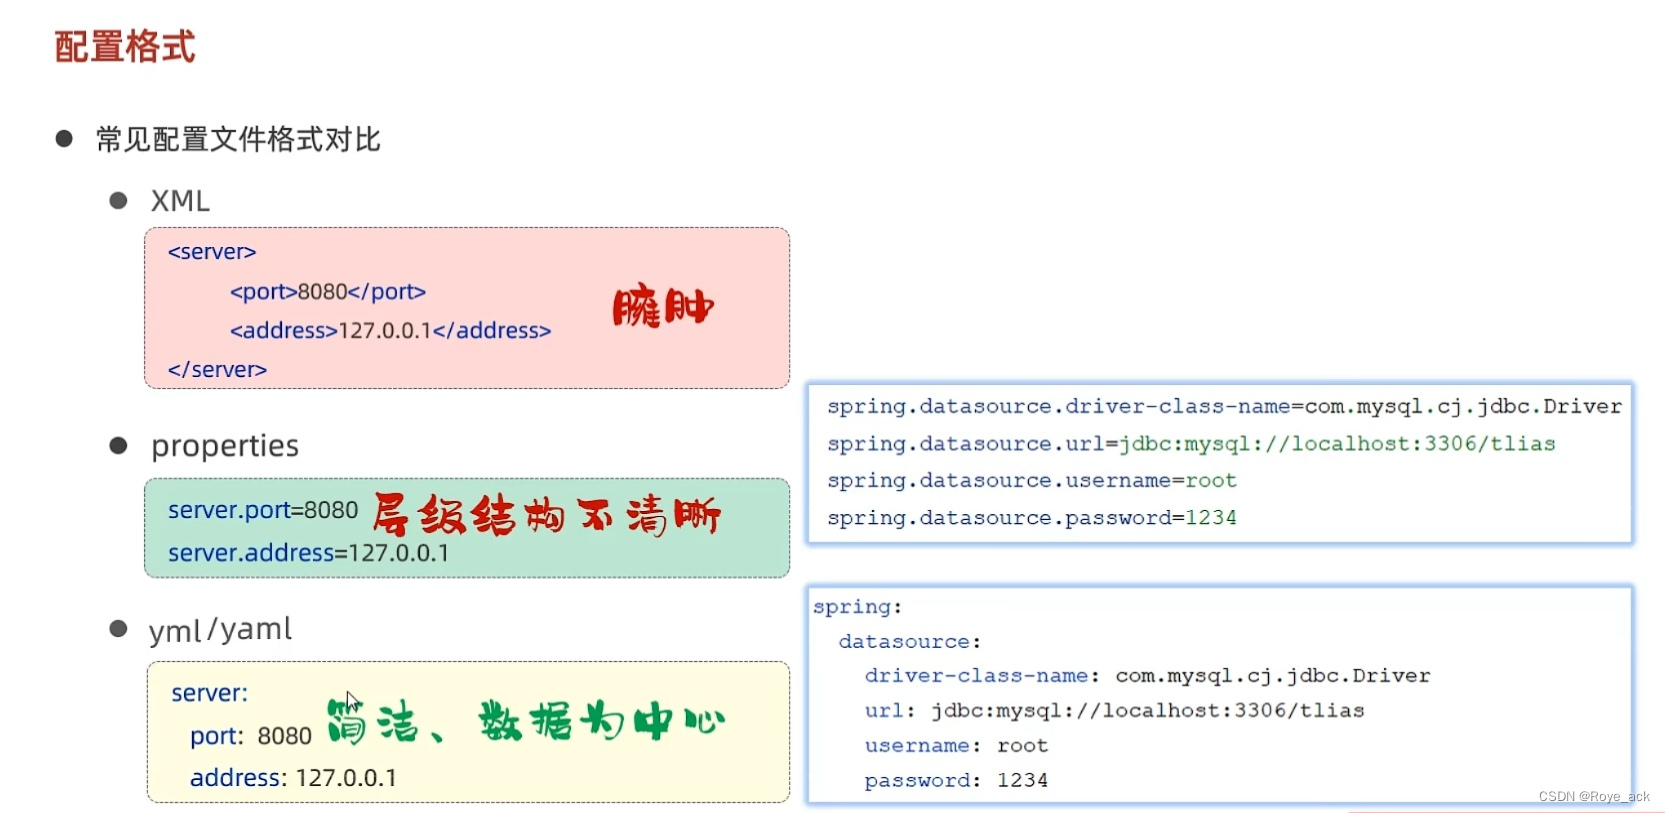
yml配置文件基本语法:
- 数值前必须有空格!
- 使用缩进表示层级关系
yml配置文件数据格式:
- 对象 / Map集合
user:name:royeage:18password:1234- 数组 / List / Set集合
hobby:-java-game-sport
(1)用yml替换properties文件
备份一下properties文件!
# properties文件
spring.datasource.driver-class-name=com.mysql.cj.jdbc.Driverspring.datasource.url=jdbc:mysql://localhost:3306/tliasspring.datasource.username=rootspring.datasource.password=1234mybatis.configuration.log-impl=org.apache.ibatis.logging.stdout.StdOutImplmybatis.configuration.map-underscore-to-camel-case=truespring.servlet.multipart.max-file-size=10MBspring.servlet.multipart.max-request-size=100MBaliyun.oss.endpoint=https://oss-cn-beijing.aliyuncs.com
aliyun.oss.accessKeyId=LTAI5tJWzD965Xmw1B9NTsw9
aliyun.oss.accessKeySecret=fra3BTIn5vSzuzATWDWboEUzlqvo4S
aliyun.oss.bucketName=web-roye-tails
下面这个是yml文件
spring:# 数据库连接信息datasource:driver-class-name: com.mysql.jdbc.Driverurl: jdbc:mysql://localhost:3306/tliasusername: rootpassword: 1234# 文件上传配置servlet:multipart:max-file-size: 10MBmax-request-size: 100MB# Mybatis配置
mybatis:configuration:log-impl: org.apache.ibatis.logging.stdout.StdOutImplmap-underscore-to-camel-case: true# 阿里云oss配置
aliyun:oss:endpoint: https://oss-cn-beijing.aliyuncs.comaccessKeyId: LTAI5tJWzD965Xmw1B9NTsw9accessKeySecret: fra3BTIn5vSzuzATWDWboEUzlqvo4SbucketName: web-roye-tails
3、@ConfigurationProperties
可以批量地将外部属性配置注入到bean对象的属性中
- 运用@Value注解一个一个注入属性值十分繁琐,因此我们单独生成一个实体类存放属性
- 然后利用@Component将其作为bean文件交给IOC容器管理
- 并用@ConfigurationProperties("前缀")将yml配置文件中的参数值与其联系起来
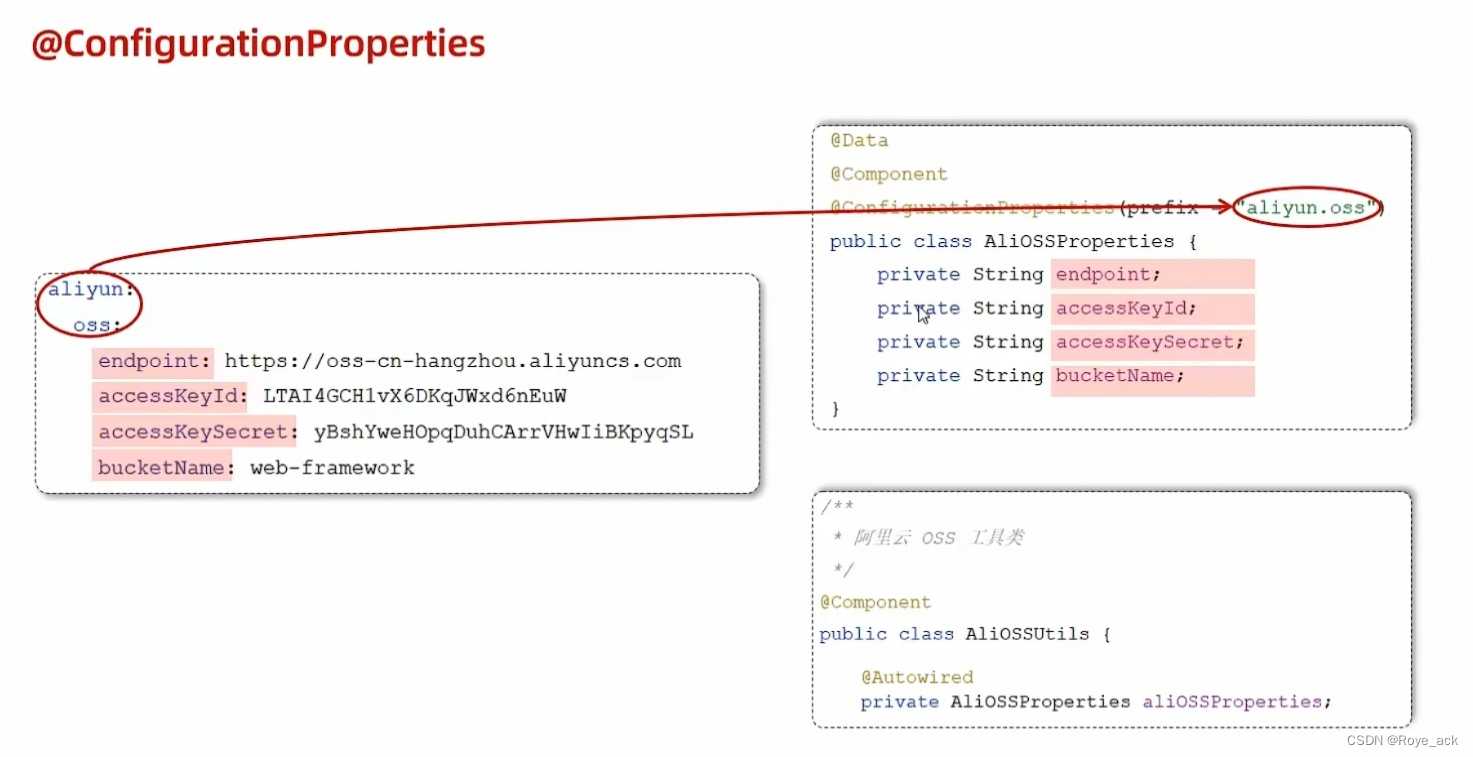
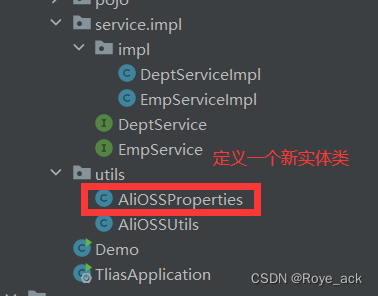
(1)定义存参数的实体类
@Data
@Component
@ConfigurationProperties(prefix = "aliyun.oss")
public class AliOSSProperties {private String endpoint;private String accessKeyId;private String accessKeySecret;private String bucketName;
}
(2)修改文件上传工具类
/*** 阿里云 OSS 工具类*/
@Component // 将此类作为bean交给ioc容器管理
public class AliOSSUtils {@Autowired // 获取一系列属性值的bean对象注入private AliOSSProperties aliOSSProperties;/*** 实现上传图片到OSS*/public String upload(MultipartFile file) throws IOException {//获取阿里云oss参数String endpoint = aliOSSProperties.getEndpoint();String accessKeyId = aliOSSProperties.getAccessKeyId();String accessKeySecret = aliOSSProperties.getAccessKeySecret();String bucketName = aliOSSProperties.getBucketName();// 获取上传的文件的输入流InputStream inputStream = file.getInputStream();// 避免文件覆盖 生成随机uuid.jpgString originalFilename = file.getOriginalFilename();String fileName = UUID.randomUUID().toString() + originalFilename.substring(originalFilename.lastIndexOf("."));//上传文件到 OSSOSS ossClient = new OSSClientBuilder().build(endpoint, accessKeyId, accessKeySecret);ossClient.putObject(bucketName, fileName, inputStream);//生成新的文件访问路径url  即:https://web-roye-tails.oss-cn-beijing.aliyuncs.com/01.jpgString url = endpoint.split("//")[0] + "//" + bucketName + "." + endpoint.split("//")[1] + "/" + fileName;// 关闭ossClientossClient.shutdown();return url;// 把上传到oss的路径返回}}
这篇关于【javaweb】学习日记Day11 - tlias智能管理系统 - 文件上传 新增 修改员工 配置文件的文章就介绍到这儿,希望我们推荐的文章对编程师们有所帮助!


