本文主要是介绍ActiveMQ—安装配置及使用,希望对大家解决编程问题提供一定的参考价值,需要的开发者们随着小编来一起学习吧!
安装配置及使用
转自:http://blog.csdn.net/qq_21033663/article/details/52461543
(一)ActiveMQ介绍
ActiveMQ 是Apache出品,最流行的,能力强劲的开源消息总线。ActiveMQ 是一个完全支持JMS1.1和J2EE 1.4规范的 JMS Provider实现,尽管JMS规范出台已经是很久的事情了,但是JMS在当今的J2EE应用中间仍然扮演着特殊的地位。
特性列表:
⒈ 多种语言和协议编写客户端。语言: Java,C,C++,C#,Ruby,Perl,Python,PHP。应用协议: OpenWire,Stomp REST,WS Notification,XMPP,AMQP
⒉ 完全支持JMS1.1和J2EE 1.4规范 (持久化,XA消息,事务)
⒊ 对spring的支持,ActiveMQ可以很容易内嵌到使用Spring的系统里面去,而且也支持Spring2.0的特性
⒋ 通过了常见J2EE服务器(如 Geronimo,JBoss 4,GlassFish,WebLogic)的测试,其中通过JCA 1.5 resource adaptors的配置,可以让ActiveMQ可以自动的部署到任何兼容J2EE 1.4 商业服务器上
⒌ 支持多种传送协议:in-VM,TCP,SSL,NIO,UDP,JGroups,JXTA
⒍ 支持通过JDBC和journal提供高速的消息持久化
⒎ 从设计上保证了高性能的集群,客户端-服务器,点对点
⒏ 支持Ajax
⒐ 支持与Axis的整合
⒑ 可以很容易的调用内嵌JMS provider,进行测试
(二)ActiveMQ安装、配置、启动、可视化界面
1、安装
下载地址:http://activemq.apache.org/download.html
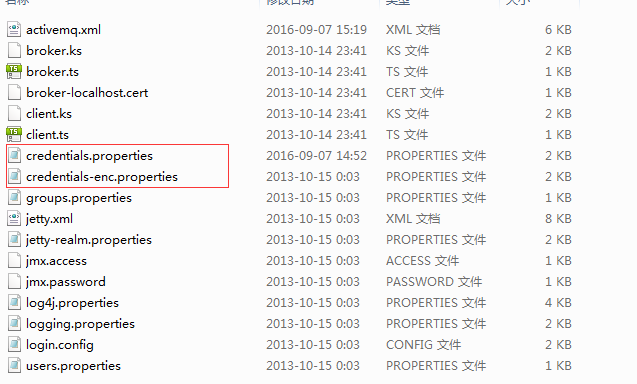
2、配置(conf目录下)
1)用户名密码设置
2)开启jmx监控
activemq.xml中进行如下修改
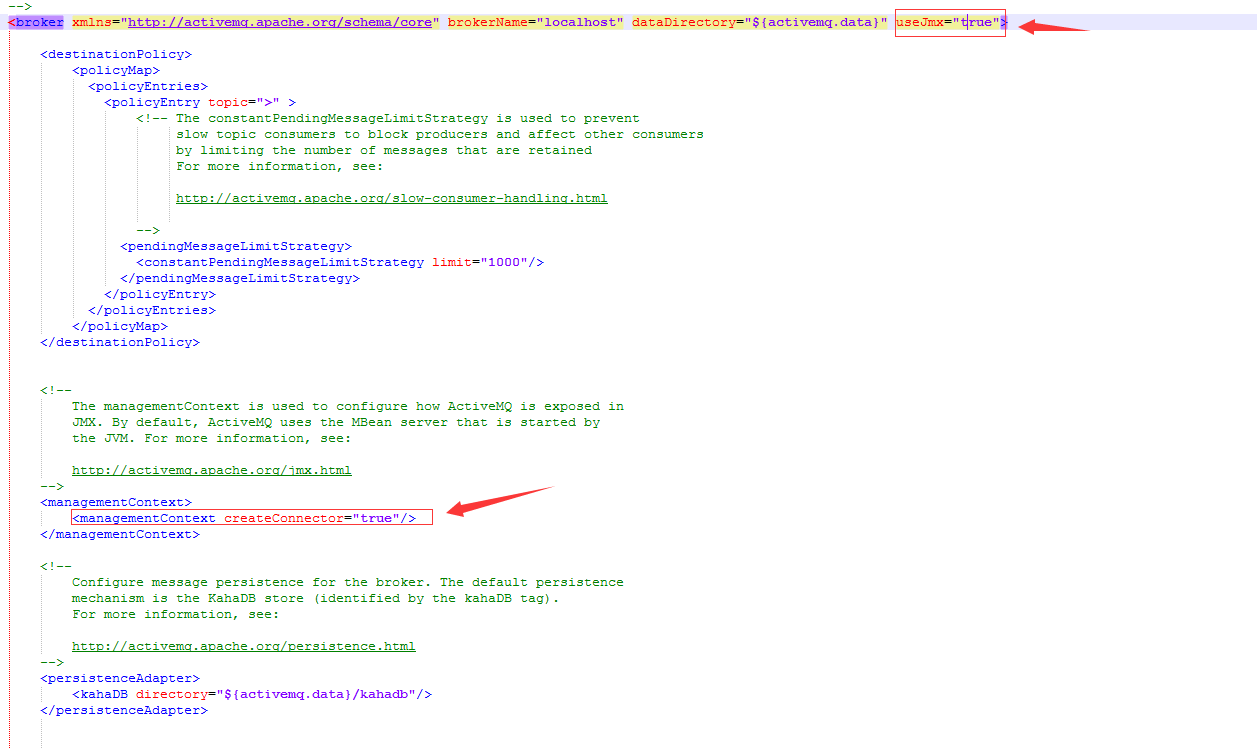
注:这里的配置不是必须,根据需要自行配置
3、启动
直接运行bin目录下:activemq.bat
4、可视化界面
浏览器中:http://localhost:8161/admin/index.jsp
用户名,密码在:jetty-realm.properties中设置
(三)点对点式消息队列(Queue)
消息生产者
import javax.jms.Connection;
import javax.jms.ConnectionFactory;
import javax.jms.Destination;
import javax.jms.JMSException;
import javax.jms.MessageProducer;
import javax.jms.Session;
import javax.jms.TextMessage;import org.apache.activemq.ActiveMQConnectionFactory;public class QueueProducer {public static void main(String[] args) {String username = "system";String password = "manager";String brokerURL = "failover://tcp://localhost:61616";ConnectionFactory connectionFactory = null;Connection connection = null;Session session = null;Destination destination = null;MessageProducer messageProducer = null;connectionFactory = new ActiveMQConnectionFactory(username, password, brokerURL);try {connection = connectionFactory.createConnection();connection.start();session = connection.createSession(true, Session.AUTO_ACKNOWLEDGE);destination = session.createQueue("QueueTest");messageProducer = session.createProducer(destination);TextMessage message = null;for (int i=0; i<10; i++) {message = session.createTextMessage("Queue消息测试" +(i+1));messageProducer.send(message);System.out.println("发送成功:" + message.getText());}session.commit();} catch (Exception e) {e.printStackTrace();}finally{if(null != connection){try {connection.close();} catch (JMSException e) {e.printStackTrace();}}}}}
- 1
- 2
- 3
- 4
- 5
- 6
- 7
- 8
- 9
- 10
- 11
- 12
- 13
- 14
- 15
- 16
- 17
- 18
- 19
- 20
- 21
- 22
- 23
- 24
- 25
- 26
- 27
- 28
- 29
- 30
- 31
- 32
- 33
- 34
- 35
- 36
- 37
- 38
- 39
- 40
- 41
- 42
- 43
- 44
- 45
- 46
- 47
- 48
- 49
- 50
- 51
- 52
- 53
- 54
- 55
- 56
- 57
- 58
- 59
- 60
- 61
- 62
- 63
- 64
- 65
- 66
- 67
消息消费者
import javax.jms.Connection;
import javax.jms.ConnectionFactory;
import javax.jms.Destination;
import javax.jms.JMSException;
import javax.jms.MessageConsumer;
import javax.jms.Session;
import javax.jms.TextMessage;import org.apache.activemq.ActiveMQConnectionFactory;public class QueueConsumer {public static void main(String[] args) {String username = "system";String password = "manager";String brokerURL = "failover://tcp://localhost:61616";ConnectionFactory connectionFactory = null;Connection connection = null;Session session = null;Destination destination = null;MessageConsumer messageConsumer = null;connectionFactory = new ActiveMQConnectionFactory(username, password, brokerURL);try {connection = connectionFactory.createConnection();connection.start();session = connection.createSession(false, Session.AUTO_ACKNOWLEDGE);destination = session.createQueue("QueueTest");messageConsumer = session.createConsumer(destination);while (true) {TextMessage textMessage = (TextMessage) messageConsumer.receive(100000);if(textMessage != null){System.out.println("成功接收消息:" + textMessage.getText());}else {break;}}} catch (JMSException e) {e.printStackTrace();}}
- 1
- 2
- 3
- 4
- 5
- 6
- 7
- 8
- 9
- 10
- 11
- 12
- 13
- 14
- 15
- 16
- 17
- 18
- 19
- 20
- 21
- 22
- 23
- 24
- 25
- 26
- 27
- 28
- 29
- 30
- 31
- 32
- 33
- 34
- 35
- 36
- 37
- 38
- 39
- 40
- 41
- 42
- 43
- 44
- 45
- 46
- 47
- 48
- 49
- 50
- 51
- 52
- 53
- 54
- 1
- 2
- 3
- 4
- 5
- 6
- 7
- 8
- 9
- 10
- 11
- 12
- 13
- 14
- 15
- 16
- 17
- 18
- 19
- 20
- 21
- 22
- 23
- 24
- 25
- 26
- 27
- 28
- 29
- 30
- 31
- 32
- 33
- 34
- 35
- 36
- 37
- 38
- 39
- 40
- 41
- 42
- 43
- 44
- 45
- 46
- 47
- 48
- 49
- 50
- 51
- 52
- 53
- 54
(四)主题发布订阅式(Topic)
主题发布者
import javax.jms.Connection;
import javax.jms.ConnectionFactory;
import javax.jms.DeliveryMode;
import javax.jms.JMSException;
import javax.jms.MessageProducer;
import javax.jms.Session;
import javax.jms.TextMessage;
import javax.jms.Topic;import org.apache.activemq.ActiveMQConnectionFactory;public class TopicProducer {public static void main(String[] args) {String username = "system";String password = "manager";String brokerURL = "failover://tcp://localhost:61616";ConnectionFactory connectionFactory = null;Connection connection = null;Session session = null;Topic topic = null;MessageProducer messageProducer = null;connectionFactory = new ActiveMQConnectionFactory(username, password, brokerURL);try {connection = connectionFactory.createConnection();connection.start();session = connection.createSession(true, Session.AUTO_ACKNOWLEDGE);topic = session.createTopic("TopicTest"); messageProducer = session.createProducer(topic);messageProducer.setDeliveryMode(DeliveryMode.NON_PERSISTENT);TextMessage message = null;for (int i=0; i<10; i++) {message = session.createTextMessage("Topic主题测试" +(i+1));messageProducer.send(message);System.out.println("发送成功:" + message.getText());}session.commit();} catch (Exception e) {e.printStackTrace();}finally{if(null != connection){try {connection.close();} catch (JMSException e) {e.printStackTrace();}}} }}
- 1
- 2
- 3
- 4
- 5
- 6
- 7
- 8
- 9
- 10
- 11
- 12
- 13
- 14
- 15
- 16
- 17
- 18
- 19
- 20
- 21
- 22
- 23
- 24
- 25
- 26
- 27
- 28
- 29
- 30
- 31
- 32
- 33
- 34
- 35
- 36
- 37
- 38
- 39
- 40
- 41
- 42
- 43
- 44
- 45
- 46
- 47
- 48
- 49
- 50
- 51
- 52
- 53
- 54
- 55
- 56
- 57
- 58
- 59
- 60
- 61
- 62
- 63
- 64
- 65
- 66
主题订阅者
import javax.jms.Connection;
import javax.jms.ConnectionFactory;
import javax.jms.JMSException;
import javax.jms.Message;
import javax.jms.MessageConsumer;
import javax.jms.MessageListener;
import javax.jms.Session;
import javax.jms.TextMessage;
import javax.jms.Topic;import org.apache.activemq.ActiveMQConnectionFactory;public class TopicConsumer {public static void main(String[] args) {String username = "system";String password = "manager";String brokerURL = "failover://tcp://localhost:61616";ConnectionFactory connectionFactory = null;Connection connection = null;Session session = null;Topic topic = null;MessageConsumer messageConsumer = null;connectionFactory = new ActiveMQConnectionFactory(username, password, brokerURL);try {connection = connectionFactory.createConnection();connection.start();session = connection.createSession(false, Session.AUTO_ACKNOWLEDGE);topic = session.createTopic("TopicTest"); messageConsumer = session.createConsumer(topic);messageConsumer.setMessageListener(new MyMessageListener());} catch (JMSException e) {e.printStackTrace();}}}class MyMessageListener implements MessageListener {@Overridepublic void onMessage(Message message) { TextMessage textMessage = (TextMessage) message; try { System.out.println("接收订阅主题:" + textMessage.getText()); } catch (JMSException e) { e.printStackTrace(); } } }
- 1
- 2
- 3
- 4
- 5
- 6
- 7
- 8
- 9
- 10
- 11
- 12
- 13
- 14
- 15
- 16
- 17
- 18
- 19
- 20
- 21
- 22
- 23
- 24
- 25
- 26
- 27
- 28
- 29
- 30
- 31
- 32
- 33
- 34
- 35
- 36
- 37
- 38
- 39
- 40
- 41
- 42
- 43
- 44
- 45
- 46
- 47
- 48
- 49
- 50
- 51
- 52
- 53
- 54
- 55
- 56
- 57
- 58
- 59
- 60
- 61
- 62
- 63
- 64
- 65
- 66
注:
1、代码中所需额外jar包在下载的mq文件夹中,例如我使用的:activemq-all-5.9.0.jar
2、对于消息队列,异步生产和消费;对于主题发布订阅要先启动订阅者进行监听,然后在发布方可接收到订阅主题
3、关于Queue与Topic的具体区别,详见http://blog.csdn.net/u013490585/article/details/76083196
这篇关于ActiveMQ—安装配置及使用的文章就介绍到这儿,希望我们推荐的文章对编程师们有所帮助!


