本文主要是介绍ViewPager+fragment实现切换页面(一),希望对大家解决编程问题提供一定的参考价值,需要的开发者们随着小编来一起学习吧!
如今的很多应用中都是下面有一排按钮,点击可以切换页面,滑动也可以切换页面。下面就来简单的实现这个功能。
思路
- 首先肯定是会用到viewpager这个控件,为了能够向下兼容,最好用v4包下的viewpager,Activity要继承FragmentActivity
- 其次用一个集合来存储所有的fragment页面
- 在设置viewpager的适配器时,把存储fragment页面的list集合传入adapter中,adapter继承的是FragmentPagerAdapter
- 给viewpager设置监听事件,这样滑动换页的时候做相应的逻辑处理
点击按钮想要得到对应的fragment页面,只需要设置viewpager.setCurrentItem(item);
遗忘的一个概念 object[] obj = new object[]任何对象都可以创建数组
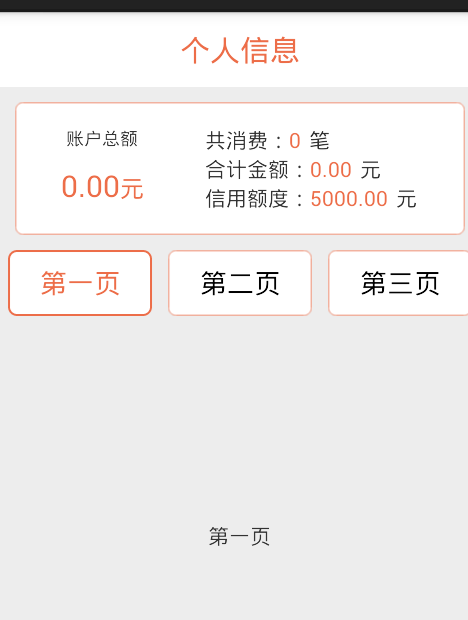
效果图

下面上代码
主界面布局代码
<LinearLayout xmlns:android="http://schemas.android.com/apk/res/android"xmlns:tools="http://schemas.android.com/tools"android:layout_width="match_parent"android:layout_height="match_parent"android:orientation="vertical"android:background="#ededed"><RelativeLayout android:layout_width="match_parent"android:layout_height="50dp"android:background="#ffffff"><TextView android:layout_width="wrap_content"android:layout_height="wrap_content"android:textSize="20sp"android:text="个人信息"android:textColor="#ed6d48"android:layout_marginTop="10dp"android:layout_marginBottom="10dp"android:layout_centerInParent="true"/></RelativeLayout><LinearLayout
        android:layout_width="match_parent"android:layout_height="wrap_content"android:layout_margin="10dp"android:background="@drawable/linearlayout01"android:orientation="horizontal"android:weightSum="5" ><LinearLayout
            android:layout_width="wrap_content"android:layout_height="wrap_content"android:layout_marginBottom="15dp"android:layout_marginLeft="20dp"android:layout_marginTop="15dp"android:layout_weight="2"android:gravity="center"android:orientation="vertical" ><TextView
                android:layout_width="wrap_content"android:layout_height="wrap_content"android:text="账户总额"android:textSize="12sp" /><LinearLayout
                android:layout_width="wrap_content"android:layout_height="wrap_content"android:layout_marginTop="10dp"android:orientation="horizontal" ><TextView
                    android:id="@+id/tv_shouldmoney"android:layout_width="wrap_content"android:layout_height="wrap_content"android:text="0.00"android:textColor="#ed6d48"android:textSize="20sp" /><TextView
                    android:layout_width="wrap_content"android:layout_height="wrap_content"android:text="元"android:textColor="#ed6d48"android:textSize="16sp" /></LinearLayout></LinearLayout><LinearLayout
            android:layout_width="wrap_content"android:layout_height="wrap_content"android:layout_marginBottom="15dp"android:layout_marginLeft="30dp"android:layout_marginTop="15dp"android:layout_weight="3"android:gravity="center_vertical"android:orientation="vertical" ><LinearLayout
                android:layout_width="wrap_content"android:layout_height="wrap_content"android:orientation="horizontal" ><TextView
                    android:layout_width="wrap_content"android:layout_height="wrap_content"android:text="共消费:" /><TextView
                    android:id="@+id/tv_totalMoneyNum"android:layout_width="wrap_content"android:layout_height="wrap_content"android:text="0"android:textColor="#ed6d48" /><TextView
                    android:layout_width="wrap_content"android:layout_height="wrap_content"android:layout_marginLeft="5dp"android:text="笔" /></LinearLayout><LinearLayout
                android:layout_width="wrap_content"android:layout_height="wrap_content"android:orientation="horizontal" ><TextView
                    android:layout_width="wrap_content"android:layout_height="wrap_content"android:text="合计金额:" /><TextView
                    android:id="@+id/tv_totalMoney"android:layout_width="wrap_content"android:layout_height="wrap_content"android:text="0.00"android:textColor="#ed6d48" /><TextView
                    android:layout_width="wrap_content"android:layout_height="wrap_content"android:layout_marginLeft="5dp"android:text="元" /></LinearLayout><LinearLayout
                android:layout_width="wrap_content"android:layout_height="wrap_content"android:orientation="horizontal" ><TextView
                    android:layout_width="wrap_content"android:layout_height="wrap_content"android:text="信用额度:" /><TextView
                    android:id="@+id/tv_credit"android:layout_width="wrap_content"android:layout_height="wrap_content"android:text="5000.00"android:textColor="#ed6d48" /><TextView
                    android:layout_width="wrap_content"android:layout_height="wrap_content"android:layout_marginLeft="5dp"android:text="元" /></LinearLayout></LinearLayout></LinearLayout><include layout="@layout/tab"/><android.support.v4.view.ViewPager
        android:id="@+id/viewPager"android:layout_width="match_parent"android:layout_height="match_parent" /></LinearLayout>
tab布局代码
<?xml version="1.0" encoding="utf-8"?>
<LinearLayout xmlns:android="http://schemas.android.com/apk/res/android"android:layout_width="match_parent"android:layout_height="44dp"android:orientation="horizontal" android:background="#ededed"><Button android:id="@+id/btn_one"android:layout_width="0dp"android:layout_weight="1"android:layout_height="wrap_content"android:text="第一页"android:background="@drawable/linearlayout01"android:layout_marginLeft="5dp"android:layout_marginRight="5dp"/><Button android:id="@+id/btn_two"android:layout_width="0dp"android:layout_marginLeft="5dp"android:layout_marginRight="5dp"android:layout_weight="1"android:layout_height="wrap_content"android:background="@drawable/linearlayout01"android:text="第二页"/><Button android:id="@+id/btn_three"android:layout_marginLeft="5dp"android:layout_marginRight="5dp"android:background="@drawable/linearlayout01"android:layout_width="0dp"android:layout_weight="1"android:layout_height="wrap_content"android:text="第三页"/></LinearLayout>
一些资源的xml代码,比如linearLayout01.xml,linearLayout01s.xml,color.xml
linearLayout01.xml代码
<?xml version="1.0" encoding="utf-8"?>
<shape xmlns:android="http://schemas.android.com/apk/res/android" ><solid android:color="#ffffff" /> <stroke android:width="0.1dip" android:color="#ed6d48" />  <corners android:radius="5dp"/></shape>
linearLayout01s.xml代码
<?xml version="1.0" encoding="utf-8"?>
<shape xmlns:android="http://schemas.android.com/apk/res/android" ><solid android:color="#ffffff" /> <stroke android:width="1dip" android:color="#ed6d48" />  <corners android:radius="5dp"/></shape>
color.xml代码
<?xml version="1.0" encoding="utf-8"?>
<resources><color name="textcolor">#ed6d48</color><color name="loan_title">#ed6d48</color><color name="main_color_white">#ffffff</color><color name="background">#ededed</color><color name="loan_butBackground">#ed6d48</color><color name="black">#000000</color></resources>
MainActivity代码
 package com.example.myviewpager;import java.util.ArrayList;
import java.util.List;import com.example.adapter.MyAdapter;
import com.example.fragment.Fragment1;
import com.example.fragment.Fragment2;
import com.example.fragment.Fragment3;import android.os.Bundle;
import android.support.v4.app.Fragment;
import android.support.v4.app.FragmentActivity;
import android.support.v4.view.ViewPager;
import android.support.v4.view.ViewPager.OnPageChangeListener;
import android.view.View;
import android.view.View.OnClickListener;
import android.widget.Button;public class MainActivity extends FragmentActivity implements OnClickListener{private ViewPager mViewPager;private Button btnOne;private Button btnTwo;private Button btnThree;private Button[] btns = new Button[3];//存放fragment的集合private List<Fragment> fragmentList = new ArrayList<Fragment>();@Overrideprotected void onCreate(Bundle savedInstanceState) {super.onCreate(savedInstanceState);setContentView(R.layout.activity_main);initData();initView();}private void initData() {//把fragment添加进集合fragmentList.add(new Fragment1());fragmentList.add(new Fragment2());fragmentList.add(new Fragment3());}private void initView() {btnOne = (Button) this.findViewById(R.id.btn_one);btnTwo = (Button) this.findViewById(R.id.btn_two);btnThree = (Button) this.findViewById(R.id.btn_three);//默认第一个按钮为选中状态btnOne.setBackgroundResource(R.drawable.linearlayout01s);btnOne.setTextColor(getResources().getColor(R.color.textcolor));//创建一个数组来存btn,object[] obj = new object[]这个概念才有btns[0] = btnOne;btns[1] = btnTwo;btns[2] = btnThree;btnOne.setOnClickListener(this);btnTwo.setOnClickListener(this);btnThree.setOnClickListener(this);mViewPager = (ViewPager) this.findViewById(R.id.viewPager);//设置viewpager的数据适配器mViewPager.setAdapter(new MyAdapter(getSupportFragmentManager(), fragmentList));//监听viewpager的滑动事件,来控制按钮的变换mViewPager.setOnPageChangeListener(new OnPageChangeListener() {@Overridepublic void onPageSelected(int position) {//把3个按钮全部设置成原始状态resetButton();btns[position].setBackgroundResource(R.drawable.linearlayout01s);btns[position].setTextColor(getResources().getColor(R.color.textcolor));}@Overridepublic void onPageScrolled(int arg0, float arg1, int arg2) {}@Overridepublic void onPageScrollStateChanged(int arg0) {}});}//重置button的背景和字体颜色protected void resetButton() {for(int i=0;i<btns.length;i++){btns[i].setBackgroundResource(R.drawable.linearlayout01);btns[i].setTextColor(getResources().getColor(R.color.black));}}@Overridepublic void onClick(View v) {switch (v.getId()) {case R.id.btn_one:resetButton();mViewPager.setCurrentItem(0);btns[0].setBackgroundResource(R.drawable.linearlayout01s);btns[0].setTextColor(getResources().getColor(R.color.textcolor));break;case R.id.btn_two:resetButton();mViewPager.setCurrentItem(1);btns[1].setBackgroundResource(R.drawable.linearlayout01s);btns[1].setTextColor(getResources().getColor(R.color.textcolor));break;case R.id.btn_three:resetButton();mViewPager.setCurrentItem(2);btns[2].setBackgroundResource(R.drawable.linearlayout01s);btns[2].setTextColor(getResources().getColor(R.color.textcolor));break;default:break;}}}
MyAdapter中的代码
package com.example.adapter;import java.util.List;import android.support.v4.app.Fragment;
import android.support.v4.app.FragmentManager;
import android.support.v4.app.FragmentPagerAdapter;public class MyAdapter extends FragmentPagerAdapter {//接受fragment页的集合数据private List<Fragment> list;public MyAdapter(FragmentManager fm,List<Fragment> list) {super(fm);this.list = list;}@Overridepublic Fragment getItem(int position) {return list.get(position);}@Overridepublic int getCount() {return list.size();}}
其中的一个Fragment页面的代码,其余的都一样
package com.example.fragment;import com.example.myviewpager.R;import android.os.Bundle;
import android.support.v4.app.Fragment;
import android.view.LayoutInflater;
import android.view.View;
import android.view.ViewGroup;public class Fragment1 extends Fragment{@Overridepublic View onCreateView(LayoutInflater inflater, ViewGroup container,Bundle savedInstanceState) {View view = inflater.inflate(R.layout.fragment01, null);return view;}}
下面附上完整demo的链接,里面有很详细的注释。
完整代码下载地址: http://download.csdn.net/detail/u013467495/8494827
这篇关于ViewPager+fragment实现切换页面(一)的文章就介绍到这儿,希望我们推荐的文章对编程师们有所帮助!


