本文主要是介绍OkHttp学习(3)--同步、异步之上传文件至服务器(重写RequestBody方法,实现上传进度接口回调),希望对大家解决编程问题提供一定的参考价值,需要的开发者们随着小编来一起学习吧!
Volley学习篇,实例代码均成功
Volley学习(一)Android Volley源码解析
Volley学习(二)简封Volley、为Volley请求头体添加Json参数、Gson和JsonObject生成Json数据、Gson解析返回的Json
Volley学习(三)ImageRequest、ImageLoader、NetworkImageView源码简读
Volley学习(四)NetworkImageView+LruCache(源码简读)图片请求小例子
Volley学习(五)HttpUrlConnection、Volley 2种方式实现头像上传
OkHttp学习篇,实例代码均成功
OkHttp学习(1)–>>同步和异步(get、post键值对、post带map、请求头体封装json)
OkHttp学习(2)–>>异步下载图片、文件(拦截器重写Response方法实现下载进度获取)
OkHttp学习(3)–>>同步、异步之上传文件至服务器(重写RequestBody方法,实现上传进度接口回调)
此篇博客,我们通过2种方式来了解下okhttp的文件上传至服务器
ps一下,还有一种就是添加params参数,生成post提交时的分块request(这里就不列出实例效果了,但是封装代码博文后附加)
同步上传
异步上传
还有一种就是添加params参数,生成post提交时的分块request
在说明同步、异步上传代码前,我们先来了解下上传图片文件的大概思路:
我这里贴出一个截图,就很简单明了了,截图如下:
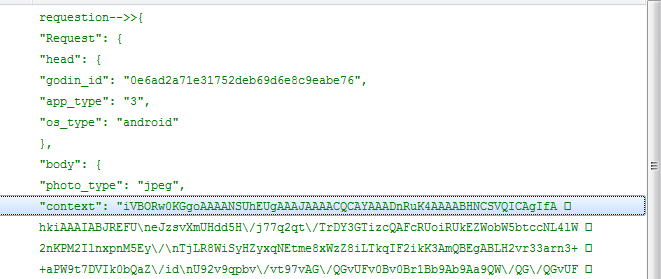
截图的意思就是将图片压缩成byte[]字节数组,然后通过Base64.encodeToString(bitmap2Bytes, Base64.DEFAULT)将字节数组,转为64位的字符串,然后在封装请求体,传给服务器即可
了解完上传图片文件的大概思路后, 我们来看下我们代码是如何实现的?
我公司请求是用的https,我这个例子,就没有去https认证证书,我就直接https 不验证证书方式(信任所有证书)
在SaflyApplication中进行如下代码设置:
public static OkHttpClient getUnsafeOkHttpClient() {try {final TrustManager[] trustAllCerts = new TrustManager[]{new X509TrustManager() {@Overridepublic void checkClientTrusted(java.security.cert.X509Certificate[] chain, String authType) {}@Overridepublic void checkServerTrusted(java.security.cert.X509Certificate[] chain, String authType) {}@Overridepublic java.security.cert.X509Certificate[] getAcceptedIssuers() {return new java.security.cert.X509Certificate[]{};}}};final SSLContext sslContext = SSLContext.getInstance("SSL");sslContext.init(null, trustAllCerts, new java.security.SecureRandom());final javax.net.ssl.SSLSocketFactory sslSocketFactory = sslContext.getSocketFactory();OkHttpClient.Builder builder = new OkHttpClient.Builder();builder.sslSocketFactory(sslSocketFactory);builder.hostnameVerifier(new HostnameVerifier() {@Overridepublic boolean verify(String hostname, SSLSession session) {return true;}});OkHttpClient okHttpClient = builder.connectTimeout(60, TimeUnit.SECONDS).writeTimeout(60, TimeUnit.SECONDS).readTimeout(60, TimeUnit.SECONDS).build();return okHttpClient;} catch (Exception e) {throw new RuntimeException(e);}}楼上的代码,也是我找的度娘搜索的,下面这段代码就初始化了一个OkHttpClient对象,设置了连接时间,读取时间等信息
OkHttpClient okHttpClient = builder.connectTimeout(60, TimeUnit.SECONDS).writeTimeout(60, TimeUnit.SECONDS).readTimeout(60, TimeUnit.SECONDS).build();我们在OkHttpManger进行
private Handler okHttpHandler;private OkHttpClient mOkHttpClient;private OkHttpManger(){this.mOkHttpClient = SaflyApplication.getInstance().getUnsafeOkHttpClient();this.okHttpHandler = new Handler(Looper.getMainLooper());}public static final OkHttpManger getInstance(){return SingleFactory.manger;}private static final class SingleFactory{private static final OkHttpManger manger = new OkHttpManger();}构造一个单利模式,然后为了线程之间通讯,我们还初始化了一个handler,用来进行ui线程的页面更新操作
我们先来看看同步上传头像代码
Response response = OkHttpManger.getInstance().postSyncJson("https://10.0.5.48:7771/SetVPHUserInfo", Json);public Response postSyncJson(String url, String json) throws IOException {final RequestBody requestBody = RequestBody.create(JSON_TYPE, json);final Request request = new Request.Builder().url(url).post(requestBody).build();return mOkHttpClient.newCall(request).execute();}本例中我构造json字符串是用的JSONObject的方式,
如果对如何构建Json字符串还不是很明白的,可以看我如下的博客文章:
fastjson–Gson生成Json字符串,并且解析Json字符串生成对象
JsonObject生成Json字符串,并且解析为对象—–JsonReader解析Json字符串
另外还有一种方式,就是自定义拼接的方式(我公司就是用的这样的方法,这里就不赘述了)
针对本例的上传服务端的json格式,我们用JSONObject如下方法即可生成所需要的json字符串
private String createJson() throws JSONException {JSONObject jsonObject = new JSONObject();JSONObject body = new JSONObject();body.put("photo_type", "jpeg");body.put("nickname", "hehe");body.put("context", Base64.encodeToString(bitmap2Bytes, Base64.DEFAULT));JSONObject head = new JSONObject();head.put("godin_id", "0e6ad2a71e31752deb69d6e8c9eabe76");head.put("app_type", "3");head.put("os_type", "android");JSONObject Request = new JSONObject();Request.put("body", body);Request.put("head", head);jsonObject.put("Request", Request);return jsonObject.toString();}然后在response.isSuccessful()进行判断返回结果就可以了

由于我是直接访问的公司上传头像的接口,godin_id字段是写死的,服务端没有注册的记录,所以就返回auth error的错误,不过我问了服务端的同事,已经收到该请求,通讯成功
我们在来看看异步上传头像代码
OkHttpManger.getInstance().postAsyncJsonn("https://10.0.5.48:7771/SetVPHUserInfo", Json, new OkHttpManger.MyCallback() public void postAsyncJsonn(String url, String json, MyCallback mCallback) throws IOException {final RequestBody requestBody = RequestBody.create(JSON_TYPE, json);final Request request = new Request.Builder().url(url).post(requestBody).build();deliveryResult(mOkHttpClient.newCall(request),mCallback);}然后进行接口回调
private void deliveryResult(final Call call, final MyCallback mCallback) {call.enqueue(new Callback() {@Overridepublic void onFailure(final Call call, final IOException e) {okHttpHandler.post(new Runnable() {@Overridepublic void run() {if (mCallback != null) {mCallback.onFailture();}}});}@Overridepublic void onResponse(Call call, final Response response) throws IOException {final String responseStr = response.body().string();okHttpHandler.post(new Runnable() {@Overridepublic void run() {if (mCallback != null) {mCallback.onSuccess(responseStr);}}});}});}然后截图是一样的,也是可以通讯成功的。
以上就是同步、异步2种方式,上传头像至服务器
接下来我们看看另外一个方式,不过这个方法我没有去实践代码,不过有代码封装,以下就是代码
/*** 同步基于post的文件上传* @param url 地址* @param files 提交的文件数组* @param fileKeys 提交的文件数组key* @param params 提交的键值对* @return Response*/public Response uploadSync(String url, File[] files, String[] fileKeys, Param[] params) throws IOException {final RequestBody requestBody = buildMultipartFormRequestBody(files, fileKeys, params);final Request request = new Request.Builder().url(url).post(requestBody).build();return mOkHttpClient.newCall(request).execute();}/*** 异步基于post的文件上传,回传上传进度* @param url 地址* @param files 提交的文件数组* @param fileKeys 提交的文件数组key* @param params 提交的键值对*/public void uploadAsync(String url, File[] files, String[] fileKeys,final OKHttpUICallback.ProgressCallback uploadListener, Param[] params) throws IOException {final RequestBody requestBody = buildMultipartFormRequestBody(files, fileKeys, params);final Request request = new Request.Builder().url(url).post(new ProgressBody.ProgressRequestBody(requestBody, uploadListener, okHttpHandler)).build();mOkHttpClient.newCall(request).enqueue(new OKHttpThreadCallback(okHttpHandler, uploadListener, false));}
生成post提交时的分块request
private RequestBody buildMultipartFormRequestBody(File[] files, String[] fileKeys, Param[] params){if(params == null){params = new Param[0];}MultipartBody.Builder builder = new MultipartBody.Builder();for(Param param:params){builder.addPart(Headers.of("Content-Disposition", "form-data; name=\"" + param.key + "\""),RequestBody.create(null, param.value));}if(files == null){files = new File[0];}if(fileKeys == null){fileKeys = new String[0];}if(fileKeys.length != files.length){throw new ArrayStoreException("fileKeys.length != files.length");}RequestBody fileBody = null;int length = files.length;for(int i = 0;i<length;i++){File file = files[i];String fileName = file.getName();fileBody = RequestBody.create(MediaType.parse(guessMimeType(fileName)),file);//TODO 根据文件名设置contentTypebuilder.addPart(Headers.of("Content-Disposition","form-data; name=\"" + fileKeys[i] + "\"; fileName=\"" + fileName + "\""),fileBody);}return builder.build();}private String guessMimeType(String path){FileNameMap fileNameMap = URLConnection.getFileNameMap();String type = fileNameMap.getContentTypeFor(path);if(type == null){type = "application/octet-stream";}return type;}我们重点来看看ProgressBody.ProgressRequestBody的代码
Okio中有两个关键的接口,Sink和Source,这两个接口都继承了Closeable接口;而Sink可以简单的看做OutputStream,Source可以简单的看做InputStream。而这两个接口都是支持读写超时设置的。
它们各自有一个支持缓冲区的子类接口,BufferedSink和BufferedSource,而BufferedSink有一个实现类RealBufferedSink,BufferedSource有一个实现类RealBufferedSource
if(bufferedSink == null){//开始包装bufferedSink = Okio.buffer(sink(sink));}//写入requestBody.writeTo(bufferedSink);bufferedSink.flush();然后在发布进度
private Sink sink(Sink sink){return new ForwardingSink(sink) {//当前写入字节数long byteWriteed = 0L;//总得字节数long contentBytes = 0L;@Overridepublic void write(Buffer source, long byteCount) throws IOException {super.write(source, byteCount);if(mHandler != null && mListener != null){if(contentBytes == 0L){contentBytes = contentLength();}byteWriteed += byteCount;mListener.onProgress(byteWriteed, contentBytes, byteWriteed == contentBytes);}}};然后在
mOkHttpClient.newCall(request).enqueue(new OKHttpThreadCallback(okHttpHandler, uploadListener, false));在成功回调的接口中,进行如下操作
@Overridepublic void onResponse(Call call, Response response) throws IOException {if(isDownload){download(call,response);}else{postSuccess(call,response);}}
private void postSuccess(final Call call, final Response response){if(UICallback != null && UIHandler != null){UIHandler.post(new Runnable() {@Overridepublic void run() {UICallback.onSuccess(call, response,downFile == null?null:downFile.getAbsolutePath());}});}}然后在主界面在进行接口回调,去实现其他一些操作
///以下是代码以下是代码/以下是代码/
MainActivity
package com.example.administrator.myapplication;import android.app.Activity;
import android.content.res.Resources;
import android.graphics.Bitmap;
import android.graphics.BitmapFactory;
import android.os.Bundle;
import android.util.Base64;
import android.util.Log;
import android.view.View;
import android.widget.Button;
import android.widget.ImageView;import org.json.JSONException;
import org.json.JSONObject;import java.io.ByteArrayOutputStream;
import java.io.IOException;import okhttp3.Response;public class MainActivity extends Activity implements View.OnClickListener {Button uploadSync,uploadAsync;private String responseStr;private byte[] bitmap2Bytes;@Overrideprotected void onCreate(Bundle savedInstanceState) {super.onCreate(savedInstanceState);setContentView(R.layout.activity_main);uploadSync = (Button) findViewById(R.id.uploadSync);uploadAsync = (Button) findViewById(R.id.uploadAsync);uploadSync.setOnClickListener(this);uploadAsync.setOnClickListener(this);Resources res = getResources();Bitmap bmp = BitmapFactory.decodeResource(res, R.mipmap.ic_launcher);bitmap2Bytes = Bitmap2Bytes(bmp);}public byte[] Bitmap2Bytes(Bitmap bm) {ByteArrayOutputStream baos = new ByteArrayOutputStream();bm.compress(Bitmap.CompressFormat.PNG, 100, baos);return baos.toByteArray();}@Overridepublic void onClick(View v) {switch (v.getId()){case R.id.uploadSync:try {Json = createJson();Log.i("MainActivity","postSyncByParams2 Json:"+Json);} catch (JSONException e) {e.printStackTrace();}new Thread() {@Overridepublic void run() {try {Response response =  OkHttpManger.getInstance().postSyncJson("https://10.0.5.48:7771/SetVPHUserInfo", Json);if (response.isSuccessful()){responseStr = response.body().string();Log.i("MainActivity","postSyncByParams2:"+responseStr);}else{Log.i("MainActivity","postSyncByParams2 error");}} catch (IOException e) {e.printStackTrace();}}}.start();break;case R.id.uploadAsync:try {Json = createJson();Log.i("MainActivity","postSyncByParams2 Json:"+Json);} catch (JSONException e) {e.printStackTrace();}try {OkHttpManger.getInstance().postAsyncJsonn("https://10.0.5.48:7771/SetVPHUserInfo", Json, new OkHttpManger.MyCallback() {@Overridepublic void onSuccess(String result) {Log.i("MainActivity","result----"+result);}@Overridepublic void onFailture() {}});} catch (IOException e) {e.printStackTrace();}break;}}String Json = null;private String createJson() throws JSONException {JSONObject jsonObject = new JSONObject();JSONObject body = new JSONObject();body.put("photo_type", "jpeg");body.put("nickname", "hehe");body.put("context", Base64.encodeToString(bitmap2Bytes, Base64.DEFAULT));JSONObject head = new JSONObject();head.put("godin_id", "0e6ad2a71e31752deb69d6e8c9eabe76");head.put("app_type", "3");head.put("os_type", "android");JSONObject Request = new JSONObject();Request.put("body", body);Request.put("head", head);jsonObject.put("Request", Request);return jsonObject.toString();}
}
SaflyApplication
package com.example.administrator.myapplication;import android.app.Application;import java.util.concurrent.TimeUnit;import javax.net.ssl.HostnameVerifier;
import javax.net.ssl.SSLContext;
import javax.net.ssl.SSLSession;
import javax.net.ssl.TrustManager;
import javax.net.ssl.X509TrustManager;import okhttp3.OkHttpClient;public class SaflyApplication extends Application {private static SaflyApplication instance;@Overridepublic void onCreate() {super.onCreate();this.instance = this;}public static SaflyApplication getInstance() {return instance;}public static OkHttpClient getUnsafeOkHttpClient() {try {final TrustManager[] trustAllCerts = new TrustManager[]{new X509TrustManager() {@Overridepublic void checkClientTrusted(java.security.cert.X509Certificate[] chain, String authType) {}@Overridepublic void checkServerTrusted(java.security.cert.X509Certificate[] chain, String authType) {}@Overridepublic java.security.cert.X509Certificate[] getAcceptedIssuers() {return new java.security.cert.X509Certificate[]{};}}};final SSLContext sslContext = SSLContext.getInstance("SSL");sslContext.init(null, trustAllCerts, new java.security.SecureRandom());final javax.net.ssl.SSLSocketFactory sslSocketFactory = sslContext.getSocketFactory();OkHttpClient.Builder builder = new OkHttpClient.Builder();builder.sslSocketFactory(sslSocketFactory);builder.hostnameVerifier(new HostnameVerifier() {@Overridepublic boolean verify(String hostname, SSLSession session) {return true;}});OkHttpClient okHttpClient = builder.connectTimeout(60, TimeUnit.SECONDS).writeTimeout(60, TimeUnit.SECONDS).readTimeout(60, TimeUnit.SECONDS).build();return okHttpClient;} catch (Exception e) {throw new RuntimeException(e);}}
}
OkHttpManger
package com.example.administrator.myapplication;import android.os.Handler;
import android.os.Looper;
import android.util.Log;import com.alibaba.fastjson.JSON;import java.io.File;
import java.io.IOException;
import java.net.FileNameMap;
import java.net.URLConnection;
import java.util.HashMap;
import java.util.Map;
import java.util.Set;
import java.util.concurrent.TimeUnit;
import okhttp3.Call;
import okhttp3.Callback;
import okhttp3.FormBody;
import okhttp3.Headers;
import okhttp3.Interceptor;
import okhttp3.MediaType;
import okhttp3.MultipartBody;
import okhttp3.OkHttpClient;
import okhttp3.Request;
import okhttp3.RequestBody;
import okhttp3.Response;/*** OkHttp 工具类,* get的同步异步请求* post的json字符串同步异步上传* post的键值对同步异步上传* post文件异步上传,回调结果以及进度* 异步下载文件,回调结果以及进度** Created by Seeker on 2016/6/24.*/
public final class OkHttpManger {private static final String TAG = "OkHttpManger";private static final MediaType JSON_TYPE = MediaType.parse("application/json; charset=utf-8");private Handler okHttpHandler;private OkHttpClient mOkHttpClient;private OkHttpManger(){this.mOkHttpClient = SaflyApplication.getInstance().getUnsafeOkHttpClient();this.okHttpHandler = new Handler(Looper.getMainLooper());}public static final OkHttpManger getInstance(){return SingleFactory.manger;}private static final class SingleFactory{private static final OkHttpManger manger = new OkHttpManger();}/同步异步上传头像//interface MyCallback{void onSuccess(String result);void onFailture();}public Response postSyncJson(String url, String json) throws IOException {final RequestBody requestBody = RequestBody.create(JSON_TYPE, json);final Request request = new Request.Builder().url(url).post(requestBody).build();return mOkHttpClient.newCall(request).execute();}public void postAsyncJsonn(String url, String json, MyCallback mCallback) throws IOException {final RequestBody requestBody = RequestBody.create(JSON_TYPE, json);final Request request = new Request.Builder().url(url).post(requestBody).build();deliveryResult(mOkHttpClient.newCall(request),mCallback);}private void deliveryResult(final Call call, final MyCallback mCallback) {call.enqueue(new Callback() {@Overridepublic void onFailure(final Call call, final IOException e) {okHttpHandler.post(new Runnable() {@Overridepublic void run() {if (mCallback != null) {mCallback.onFailture();}}});}@Overridepublic void onResponse(Call call, final Response response) throws IOException {final String responseStr = response.body().string();okHttpHandler.post(new Runnable() {@Overridepublic void run() {if (mCallback != null) {mCallback.onSuccess(responseStr);}}});}});}同步异步上传头像///*** 同步基于post的文件上传* @param url 地址* @param file 提交的文件* @param fileKey 提交的文件key* @return Response*/public Response uploadSync(String url, File file, String fileKey) throws IOException {return uploadSync(url, new File[]{file}, new String[]{fileKey}, new Param[0]);}/*** 同步基于post的文件上传* @param url 地址* @param files 提交的文件数组* @param fileKeys 提交的文件数组key* @param params 提交的键值对* @return Response*/public Response uploadSync(String url, File[] files, String[] fileKeys, Param[] params) throws IOException {final RequestBody requestBody = buildMultipartFormRequestBody(files, fileKeys, params);final Request request = new Request.Builder().url(url).post(requestBody).build();return mOkHttpClient.newCall(request).execute();}/*** 异步基于post的文件上传,回传上传进度* @param url 地址* @param file 提交的文件* @param fileKey 提交的文件key*/public void uploadAsync(String url, File file, String fileKey, OKHttpUICallback.ProgressCallback listener)throws IOException {uploadAsync(url, new File[]{file}, new String[]{fileKey}, listener, new Param[0]);}/*** 异步基于post的文件上传,回传上传进度* @param url 地址* @param files 提交的文件数组* @param fileKeys 提交的文件数组key* @param params 提交的键值对*/public void uploadAsync(String url, File[] files, String[] fileKeys,final OKHttpUICallback.ProgressCallback uploadListener, Param[] params) throws IOException {final RequestBody requestBody = buildMultipartFormRequestBody(files, fileKeys, params);final Request request = new Request.Builder().url(url).post(new ProgressBody.ProgressRequestBody(requestBody, uploadListener, okHttpHandler)).build();mOkHttpClient.newCall(request).enqueue(new OKHttpThreadCallback(okHttpHandler, uploadListener, false));}/*** 生成post提交时的分块request* @param files* @param fileKeys* @param params* @return*/private RequestBody buildMultipartFormRequestBody(File[] files, String[] fileKeys, Param[] params){if(params == null){params = new Param[0];}MultipartBody.Builder builder = new MultipartBody.Builder();for(Param param:params){builder.addPart(Headers.of("Content-Disposition", "form-data; name=\"" + param.key + "\""),RequestBody.create(null, param.value));}if(files == null){files = new File[0];}if(fileKeys == null){fileKeys = new String[0];}if(fileKeys.length != files.length){throw new ArrayStoreException("fileKeys.length != files.length");}RequestBody fileBody = null;int length = files.length;for(int i = 0;i<length;i++){File file = files[i];String fileName = file.getName();fileBody = RequestBody.create(MediaType.parse(guessMimeType(fileName)),file);//TODO 根据文件名设置contentTypebuilder.addPart(Headers.of("Content-Disposition","form-data; name=\"" + fileKeys[i] + "\"; fileName=\"" + fileName + "\""),fileBody);}return builder.build();}private String guessMimeType(String path){FileNameMap fileNameMap = URLConnection.getFileNameMap();String type = fileNameMap.getContentTypeFor(path);if(type == null){type = "application/octet-stream";}return type;}public static final class Param{private String key;private String value;public Param(String key, String value){this.key = key;this.value = value;}}
}
ProgressBody 上传的进度接口
package com.example.administrator.myapplication;import android.os.Handler;
import java.io.IOException;
import okhttp3.MediaType;
import okhttp3.RequestBody;
import okhttp3.ResponseBody;
import okio.Buffer;
import okio.BufferedSink;
import okio.BufferedSource;
import okio.ForwardingSink;
import okio.ForwardingSource;
import okio.Okio;
import okio.Sink;
import okio.Source;/*** Created by Seeker on 2016/7/27.*/
public final class ProgressBody {/*** 包装响应体,用于处理提示上传进度** Created by Seeker on 2016/6/29.*/public static final class ProgressRequestBody extends RequestBody {//实际待包装的请求体private final RequestBody requestBody;//上传进度回调接口private OKHttpUICallback.ProgressCallback mListener;//包装完成的BufferedSinkprivate BufferedSink bufferedSink;//传递下载进度到主线程private Handler mHandler;public ProgressRequestBody(RequestBody requestBody, OKHttpUICallback.ProgressCallback listener, Handler handler){this.requestBody = requestBody;this.mListener = listener;this.mHandler = handler;}@Overridepublic long contentLength() throws IOException {return requestBody.contentLength();}@Overridepublic MediaType contentType() {return requestBody.contentType();}@Overridepublic void writeTo(BufferedSink sink) throws IOException {if(bufferedSink == null){//开始包装bufferedSink = Okio.buffer(sink(sink));}//写入requestBody.writeTo(bufferedSink);bufferedSink.flush();}/*** 写入,回调进度接口*/private Sink sink(Sink sink){return new ForwardingSink(sink) {//当前写入字节数long byteWriteed = 0L;//总得字节数long contentBytes = 0L;@Overridepublic void write(Buffer source, long byteCount) throws IOException {super.write(source, byteCount);if(mHandler != null && mListener != null){if(contentBytes == 0L){contentBytes = contentLength();}byteWriteed += byteCount;mListener.onProgress(byteWriteed, contentBytes, byteWriteed == contentBytes);}}};}}
}
OKHttpThreadCallback上传完毕后的接口方法
package com.example.administrator.myapplication;import android.os.Handler;
import java.io.File;
import java.io.FileOutputStream;
import java.io.IOException;
import java.io.InputStream;
import okhttp3.Call;
import okhttp3.Callback;
import okhttp3.Response;public final class OKHttpThreadCallback implements Callback {private Handler UIHandler;private OKHttpUICallback.ProgressCallback UICallback;private boolean isDownload;private File downFile;public OKHttpThreadCallback(Handler handler, OKHttpUICallback.ProgressCallback callback, boolean isDownload){this.UIHandler = handler;this.UICallback = callback;this.isDownload = isDownload;}@Overridepublic void onFailure(final Call call, final IOException e) {if(UICallback != null && UIHandler != null){UIHandler.post(new Runnable() {@Overridepublic void run() {UICallback.onError(call,e);}});}}@Overridepublic void onResponse(Call call, Response response) throws IOException {if(isDownload){download(call,response);}else{postSuccess(call,response);}}/*** 设置保存file* @param file*/public OKHttpThreadCallback setFile(File file){this.downFile = file;return this;}/*** 获取下载数据并写入文件* @param response*/private void download(Call call, Response response) throws IOException {if(downFile == null){throw new NullPointerException("downFile == null");}byte[] buffer = new byte[2048];InputStream is = response.body().byteStream();int len;FileOutputStream fos = new FileOutputStream(downFile);while ((len = is.read(buffer)) != -1){fos.write(buffer,0,len);}fos.flush();if(is != null){is.close();}if (fos != null){fos.close();}postSuccess(call,null);}/*** 回调成功信息* @param call* @param response*/private void postSuccess(final Call call, final Response response){if(UICallback != null && UIHandler != null){UIHandler.post(new Runnable() {@Overridepublic void run() {UICallback.onSuccess(call, response,downFile == null?null:downFile.getAbsolutePath());}});}}
}
OKHttpUICallback成功后需要实现的接口定义类
package com.example.administrator.myapplication;import java.io.IOException;
import java.lang.reflect.ParameterizedType;
import java.lang.reflect.Type;import okhttp3.Call;
import okhttp3.Response;/*** Created by safly on 2016/9/1.** 回调主线程的接口*/
public class OKHttpUICallback {/*** 异步回调接口*//*** 带有进度的上传、下载回调接口*/public interface ProgressCallback{void onSuccess(Call call, Response response, String path);void onProgress(long byteReadOrWrite, long contentLength, boolean done);void onError(Call call, IOException e);}
}
这篇关于OkHttp学习(3)--同步、异步之上传文件至服务器(重写RequestBody方法,实现上传进度接口回调)的文章就介绍到这儿,希望我们推荐的文章对编程师们有所帮助!


