本文主要是介绍线程间通信方式(互斥(互斥锁)与同步(无名信号量、条件变量)),希望对大家解决编程问题提供一定的参考价值,需要的开发者们随着小编来一起学习吧!
1通信机制:互斥与同步
线程的互斥通过线程的互斥锁完成;
线程的同步通过无名信号量或者条件变量完成。
2 互斥
2.1 何为互斥?
互斥是在多个线程在访问同一个全局变量的时候,先让这个线程争抢锁的资源,那个线程争抢到资源,它可以访问这个变量,没有争抢到资源的线程不能够访问这个变量。那这种只有一个线程能够访问到这个变量的现象称之为线程间互斥。
2.2互斥锁API
1.定义互斥锁pthread_mutex_t mutex;
2.初始化线程互斥锁pthread_mutex_t mutex = PTHREAD_MUTEX_INITIALIZER;//静态初始化int pthread_mutex_init(pthread_mutex_t * mutex,const pthread_mutexattr_t * attr);//动态初始化功能:初始化互斥锁参数:@mutex:被初始化的锁@attr:锁的属性,一般填写为NULL(默认属性)返回值:成功返回0,失败返回错误码
3.上锁int pthread_mutex_trylock(pthread_mutex_t *mutex);//尝试获取锁,如果锁资源存在那就占用锁,如果锁资源不可利用,立即返回。int pthread_mutex_lock(pthread_mutex_t *mutex);功能:上锁(如果线程获取不到锁的资源,线程阻塞,直到其他的线程将锁释放)参数:@mutex:执行锁的指针返回值:成功返回0,失败返回错误码
4.解锁int pthread_mutex_unlock(pthread_mutex_t *mutex);功能:解锁参数:@mutex:执行锁的指针返回值:成功返回0,失败返回错误码
5.销毁锁int pthread_mutex_destroy(pthread_mutex_t *mutex);功能:销毁互斥锁参数:@mutex:执行锁的指针返回值:成功返回0,失败返回错误码
实例
#include <head.h>
volatile int money = 1000;
pthread_mutex_t lock; // 定义线程互斥锁
void *thread1(void *arg)
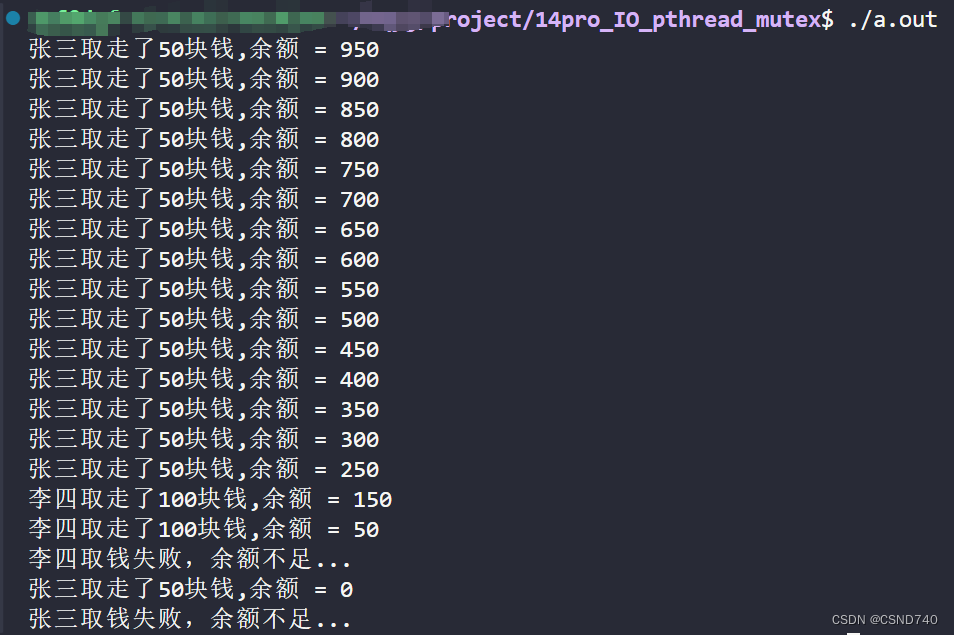
{while (1){pthread_mutex_lock(&lock); // 上锁money -= 50;if (money >= 0){printf("张三取走了50块钱,余额 = %d\n", money);}else{money += 50;printf("张三取钱失败,余额不足...\n");pthread_mutex_unlock(&lock); // 解锁pthread_exit(NULL);}// sleep(1);pthread_mutex_unlock(&lock); // 解锁}
}
void *thread2(void *arg)
{while (1){pthread_mutex_lock(&lock); // 上锁money -= 100;if (money >= 0){printf("李四取走了100块钱,余额 = %d\n", money);}else{money += 100;printf("李四取钱失败,余额不足...\n");pthread_mutex_unlock(&lock); // 解锁pthread_exit(NULL);}// sleep(1);pthread_mutex_unlock(&lock); // 解锁}
}
int main(int argc, const char *argv[])
{pthread_t tid1, tid2; // typedef unsigned long int pthread_t;if ((errno = pthread_mutex_init(&lock, NULL)) != 0){ // 线程互斥锁初始化perror("pthread_mutex_init error");exit(-1);}if ((errno = pthread_create(&tid1, NULL, thread1, NULL)) != 0){perror("pthread_create error");exit(-1);}if ((errno = pthread_create(&tid2, NULL, thread2, NULL)) != 0){perror("pthread_create error");exit(-1);}pthread_join(tid1, NULL);pthread_join(tid2, NULL);pthread_mutex_destroy(&lock);return 0;
}运行结果
注:使用锁不当可能会产生死锁,死锁规避方法
1.指定线程获取锁的状态
2.尽量避免锁的嵌套使用
3.给线程上锁指定超时时间
4.在全局位置指定锁是否被使用的状态,如果被使用,就不在获取锁(使用volatile int flag=0或1)
3.同步
3.1 何为同步
线程同步机制是指线程的顺序执行,在线程执行前已经编排好了线程的执行顺序。就不会出现同一时间有多个现在在争抢临界资源了。线程的同步机制一般使用在生成者和消费者模型上(本身也是强调顺序)。
3.2 无名信号量API
注:无名信号量适合线程数比较少的情况的线程同步
#include <semaphore.h>
1.定义无名信号量sem_t sem;
2.初始化无名信号量int sem_init(sem_t *sem, int pshared, unsigned int value);功能:初始化无名信号量参数:@sem:指向无名信号量的指针@pshared:0 线程的同步1 进程的同步(亲缘关系进程)@value:信号的初值  1 0返回值:成功返回0,失败返回-1置位错误码
3.获取信号量(P操作)int sem_wait(sem_t *sem);功能:申请资源(让信号量的值减去1,然后和0比较如果结果为0,表示获取锁成功了)    如果在调用sem_wait的时候获取不到资源,sem_wait会阻塞参数:@sem:指向无名信号量的指针返回值:成功返回0,失败返回-1置位错误码
4.释放信号量(V操作)int sem_post(sem_t *sem);功能:释放资源参数:@sem:指向无名信号量的指针返回值:成功返回0,失败返回-1置位错误码
5.销毁无名信号量int sem_destroy(sem_t *sem);功能:销毁无名信号量参数:@sem:指向无名信号量的指针返回值:成功返回0,失败返回-1置位错误码
实例
要求:有三个线程A,B,C它们分别打印B、G、M三个字符,请使用无名信号量让这三个线程依次打印 BGM
BGM
BGM....
03_pthread_wumingxinhaoliang_lizi.c
#include <head.h>
sem_t sem1, sem2, sem3; // 定义无名信号量
void *thread1(void *arg)
{while (1){sem_wait(&sem1);printf("E");sem_post(&sem2);}
}
void *thread2(void *arg)
{while (1){sem_wait(&sem2);printf("G");sem_post(&sem3);}
}
void *thread3(void *arg)
{while (1){sem_wait(&sem3);printf("M\n");sleep(1);sem_post(&sem1);}
}
int main(int argc, const char *argv[])
{pthread_t tid1, tid2, tid3;sem_init(&sem1, 0, 1); // 无名信号量初始化sem_init(&sem2, 0, 0);sem_init(&sem3, 0, 0);if ((errno = pthread_create(&tid1, NULL, thread1, NULL)) != 0){perror("pthread create1 error");exit(-1);}if ((errno = pthread_create(&tid2, NULL, thread2,NULL)) != 0){perror("pthread create2 error");exit(-1);}if ((errno = pthread_create(&tid3, NULL, thread3, NULL)) != 0){perror("pthread create3 error");exit(-1);}pthread_join(tid1, NULL);pthread_join(tid2, NULL);pthread_join(tid3, NULL);sem_destroy(&sem1); // 销毁无名信号量sem_destroy(&sem2);sem_destroy(&sem3);return 0;
}
执行gcc 03_pthread_wumingxinhaoliang_lizi.c -lpthread 编译
运行结果

3.3 条件变量API
条件变量和无名信号量都是用于线程同步,用哪一个?
无名信号量适合线程数比较少的情况的线程同步,而条件变量适合大量线程的同步工作。
1.定义条件变量pthread_cond_t cond;2.初始化条件变量pthread_cond_t cond = PTHREAD_COND_INITIALIZER;//静态初始化 int pthread_cond_init(pthread_cond_t * cond,const pthread_condattr_t * attr);功能:动态初始化一个条件变量参数:@cond:条件变量的指针@attr:NULL使用默认属性返回值:成功返回0,失败返回非03.阻塞等待条件变量int pthread_cond_wait(pthread_cond_t * cond,pthread_mutex_t * mutex);功能:阻塞等待条件变量,在条件变量中维护了一个队列,这里的互斥锁就是为了解决在往队列中放线程的时候出现竞态问题的。使用的步骤:1.使用pthread_mutex_lock上锁2.调用pthread_cond_wait2.1将当前线程放入队列2.2解锁2.3休眠2.4获取锁(PS:此时是为了防止出入队列冲突 假设就剩一个元素,是先进还是先出 要争抢一个锁才行) 2.5休眠状态退出3.你的程序4.使用pthread_mutex_unlock解锁参数:@cond:条件变量的地址@mutex:互斥锁返回值:成功返回0,失败返回非零4.给休眠的线程发信号或者广播int pthread_cond_signal(pthread_cond_t *cond);功能:唤醒(至少)一个休眠的线程参数:@cond:条件变量的地址返回值:成功返回0,失败返回非零int pthread_cond_broadcast(pthread_cond_t *cond);功能:唤醒所有休眠的线程参数:@cond:条件变量的地址返回值:成功返回0,失败返回非零 5.销毁条件变量 int pthread_cond_destroy(pthread_cond_t *cond);功能:销毁条件变量参数:@cond:条件变量的地址返回值:成功返回0,失败返回非零 ,实例:
一个生产者线程多个消费者线程(同步)
#include <head.h>
pthread_mutex_t lock; // 定义互斥锁
pthread_cond_t cond; // 定义条件变量
void *thread1(void *arg)
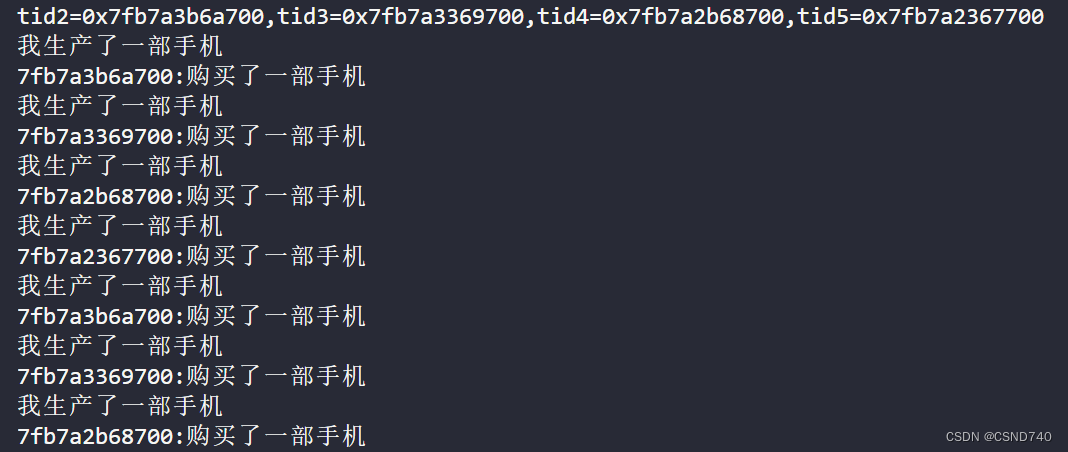
{while(1){sleep(1);//sleep(1)一下 调用thread2的线程全部进入休眠了 printf("我生产了一部手机..\n");pthread_cond_signal(&cond);// pthread_cond_broadcast(&cond);}
}
void *thread2(void *arg)
{while(1){pthread_mutex_lock(&lock);pthread_cond_wait(&cond,&lock);printf("%#lx:购买了一部手机\n",pthread_self());pthread_mutex_unlock(&lock);}
}int main(int argc, const char *argv[])
{pthread_t tid1, tid2, tid3, tid4, tid5;pthread_mutex_init(&lock, NULL); // 初始化锁pthread_cond_init(&cond, NULL); // 初始化条件变量if ((errno = pthread_create(&tid1, NULL, thread1, NULL)) != 0){perror("pthread create1 error");exit(-1);}if ((errno = pthread_create(&tid2, NULL, thread2, NULL)) != 0){perror("pthread create2 error");exit(-1);}if ((errno = pthread_create(&tid3, NULL, thread2, NULL)) != 0){perror("pthread create3 error");exit(-1);}if ((errno = pthread_create(&tid4, NULL, thread2, NULL)) != 0){perror("pthread create4 error");exit(-1);}if ((errno = pthread_create(&tid5, NULL, thread2, NULL)) != 0){perror("pthread create5 error");exit(-1);}printf("tid1 = %#lx,tid2 = %#lx,tid3 = %#lx,tid4 = %#lx,tid5 = %#lx\n", tid1, tid2, tid3, tid4, tid5);pthread_join(tid1, NULL);pthread_join(tid2, NULL);pthread_join(tid3, NULL);pthread_join(tid4, NULL);pthread_join(tid5, NULL);return 0;
}运行结果
这篇关于线程间通信方式(互斥(互斥锁)与同步(无名信号量、条件变量))的文章就介绍到这儿,希望我们推荐的文章对编程师们有所帮助!


