本文主要是介绍建造器模式(builder),希望对大家解决编程问题提供一定的参考价值,需要的开发者们随着小编来一起学习吧!
1帅气的 Builder 链式调用?
1.1普通对象的创建
1.1.1重叠构造器
1.1.2javabeans模式
- 1.2builder链式调用的好处
- 2应用的场景
- 3感悟
帅气的 Builder 链式调用?
1.1普通对象的创建
再说正题之前。先看一下
在日常开发中,经常可以看到这样的代码:
Retrofit retrofit = new Retrofit.Builder().baseUrl("https://api.github.com/").build();以及
new AlertDialog.Builder(this).setTitle("hello").setMessage("张三").setIcon(R.drawable.bg_search_corner).setCancelable(true).setOnCancelListener(new DialogInterface.OnCancelListener() {@Overridepublic void onCancel(DialogInterface dialog) {//...}}).show();看到这样链式调用看起来好整齐啊,这既是Builder 模式,今天就来详细了解一下。
镜头切回来,先问大家普通对象的创建 有几种?
常见的有两种方式:重叠构造器,javabeans模式
1.1.1重叠构造器
在我们开发中我们可能经常写这种代码
Person person = new Person("jiangnan","25","school","sh");这种方式创建对象在属性不是很多的时候没感觉有什么别扭,假如现在随着业务的扩大,属性增加到几十个, 那我们每次创建对象的时候是不是有头重脚轻的感觉呢
Person person = new Person("jiangnan","25","school","sh","","","","","","","","","","","");public class Person {private String name;private String age;private String school;private String adress;public Person(String name, String age, String school, String adress) {this.name = name;this.age = age;this.school = school;this.adress = adress;}
}1.1.2javabeans模式
遇到多种构造器参数的时候,我们还有第二个替代方法,即javaBeans模式,调用一个无参的构造器创建对象,然后调用setter()方法来设置每一个必要的参数,以及每一个可选的参数。
public class Person {private final String name;private String age;private String school;private String adress;public Person() {}public String getName() {return name;}public void setName(String name) {this.name = name;}public String getAge() {return age;}public void setAge(String age) {this.age = age;}public String getSchool() {return school;}public void setSchool(String school) {this.school = school;}public String getAdress() {return adress;}public void setAdress(String adress) {this.adress = adress;}
}
这种方式弥补了上面重叠构造器模式的不足,创建对象也很容易,读起来也很简单
Person person = new Person();person.setName("jiangnan");person.setAge("25");person.setSchool("school");person.setAdress("sh");但javabeans模式还有缺点
1:不优雅,
2:拿到的不是完整的对象
1.2builder链式调用的好处
幸运的是我们第三者替代方法,既能保证重叠构造器模式的安全性,还能保证javabeans模式那么好的可读性,这就是builder模式,不直接创建对象,而是先利用所有必要的参数调用构造器,得到一个builder对象,然后我们调用builder的类似于sertter方法来设置每一个可选的参数,最后,我们用户可以调用无参的build方法生成一个不可变的对象,这个builder是他构造的类的静态成员类。
public class Person {private String name;private String age;private String school;private String adress;/*** 构造参数是它的内部静态类,为了对静态内部类的变量进行赋值操作* @param builder*/public Person(Builder builder) {name=builder.mName;age=builder.mAge;school=builder.mSchool;adress=builder.mAdress;}public static class Builder{private final String mName; //必选参数 final 类型需要在 构造器中初始化,不允许不初始化它的构造器存在private String mAge;private String mSchool;private String mAdress;public Builder(String name){mName=name;}public Builder setAge(String age) {mAge = age;return this;}public Builder setSchool(String school) {mSchool = school;return this;}public Builder setAdress(String adress) {mAdress = adress;return this;}public Person build(){return new Person(this);}}
2应用的场景
譬如我们弹出对话框就是用到了builder设计模式
new AlertDialog.Builder(this).setMessage("加载对话框").setTitle("");看goodle工程师对AlertDialog的源码你会发现构造是这样的
public class AlertDialog extends Dialog implements DialogInterface {protected AlertDialog(Context context) {this(context, 0);}protected AlertDialog(Context context, boolean cancelable, OnCancelListener cancelListener) {this(context, 0);setCancelable(cancelable);setOnCancelListener(cancelListener);}public static class Builder {private final AlertController.AlertParams P;/*** Creates a builder for an alert dialog that uses the default alert* dialog theme.* <p>* The default alert dialog theme is defined by* {@link android.R.attr#alertDialogTheme} within the parent* {@code context}'s theme.** @param context the parent context*/public Builder(Context context) {this(context, resolveDialogTheme(context, 0));}public Builder setTitle(@StringRes int titleId) {P.mTitle = P.mContext.getText(titleId);return this;}/*** Set the title displayed in the {@link Dialog}.** @return This Builder object to allow for chaining of calls to set methods*/public Builder setTitle(CharSequence title) {P.mTitle = title;return this;}/*** Set the title using the custom view {@code customTitleView}.* <p>* The methods {@link #setTitle(int)} and {@link #setIcon(int)} should* be sufficient for most titles, but this is provided if the title* needs more customization. Using this will replace the title and icon* set via the other methods.* <p>* <strong>Note:</strong> To ensure consistent styling, the custom view* should be inflated or constructed using the alert dialog's themed* context obtained via {@link #getContext()}.** @param customTitleView the custom view to use as the title* @return this Builder object to allow for chaining of calls to set*         methods*/public Builder setCustomTitle(View customTitleView) {P.mCustomTitleView = customTitleView;return this;}/*** Set the message to display using the given resource id.** @return This Builder object to allow for chaining of calls to set methods*/public Builder setMessage(@StringRes int messageId) {P.mMessage = P.mContext.getText(messageId);return this;}/*** Set the message to display.** @return This Builder object to allow for chaining of calls to set methods*/public Builder setMessage(CharSequence message) {P.mMessage = message;return this;}/*** Set the resource id of the {@link Drawable} to be used in the title.* <p>* Takes precedence over values set using {@link #setIcon(Drawable)}.** @return This Builder object to allow for chaining of calls to set methods*/public Builder setIcon(@DrawableRes int iconId) {P.mIconId = iconId;return this;}/*** Set the {@link Drawable} to be used in the title.* <p>* <strong>Note:</strong> To ensure consistent styling, the drawable* should be inflated or constructed using the alert dialog's themed* context obtained via {@link #getContext()}.** @return this Builder object to allow for chaining of calls to set*         methods*/public Builder setIcon(Drawable icon) {P.mIcon = icon;return this;}}public AlertDialog create() {// Context has already been wrapped with the appropriate theme.final AlertDialog dialog = new AlertDialog(P.mContext, 0, false);P.apply(dialog.mAlert);dialog.setCancelable(P.mCancelable);if (P.mCancelable) {dialog.setCanceledOnTouchOutside(true);}dialog.setOnCancelListener(P.mOnCancelListener);dialog.setOnDismissListener(P.mOnDismissListener);if (P.mOnKeyListener != null) {dialog.setOnKeyListener(P.mOnKeyListener);}return dialog;}
}
这么长的代码如果我们自己写的话是不是疯了,庆幸有大牛帮我们开发出了插件,可以直接用
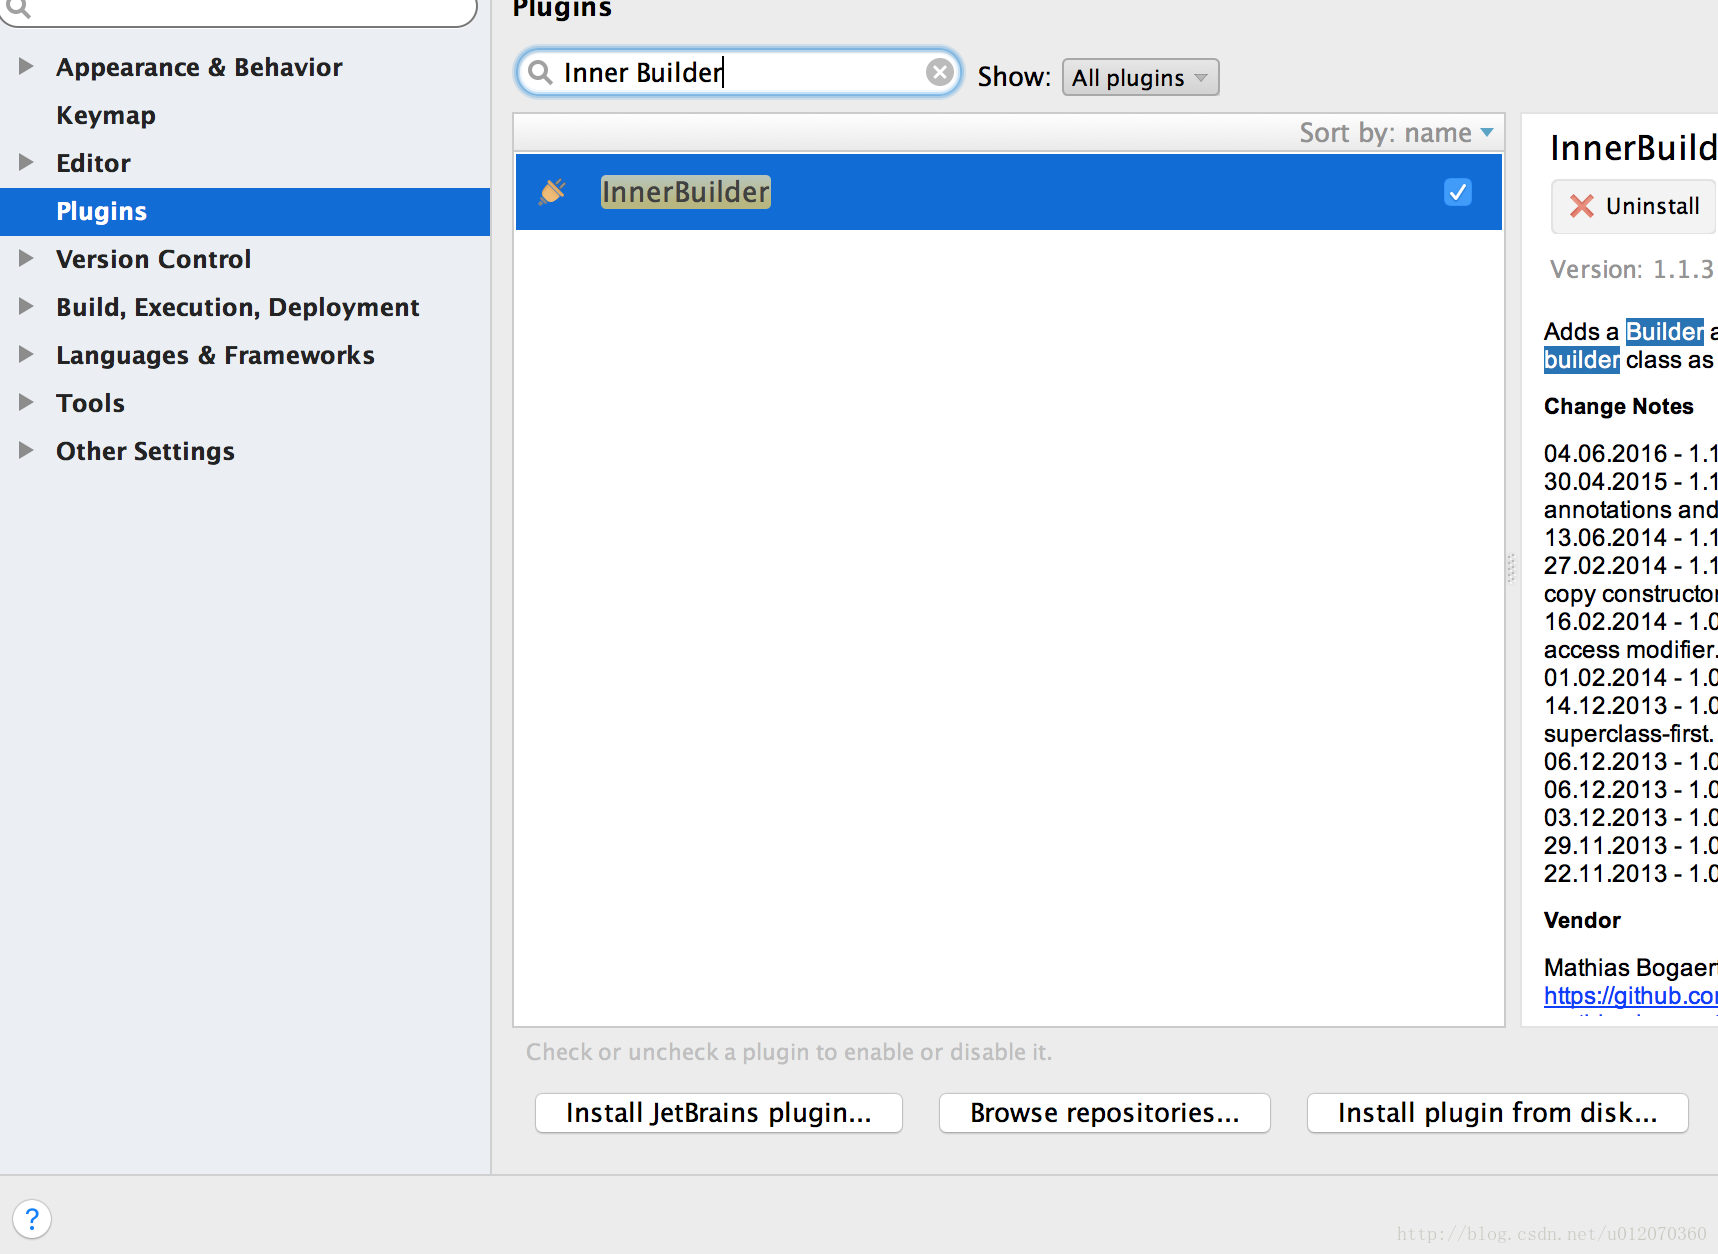
Android Studio 中使用插件自动生成 变种 Builder 模式代码
在Plugins中搜索Inner Builder
然后Generate
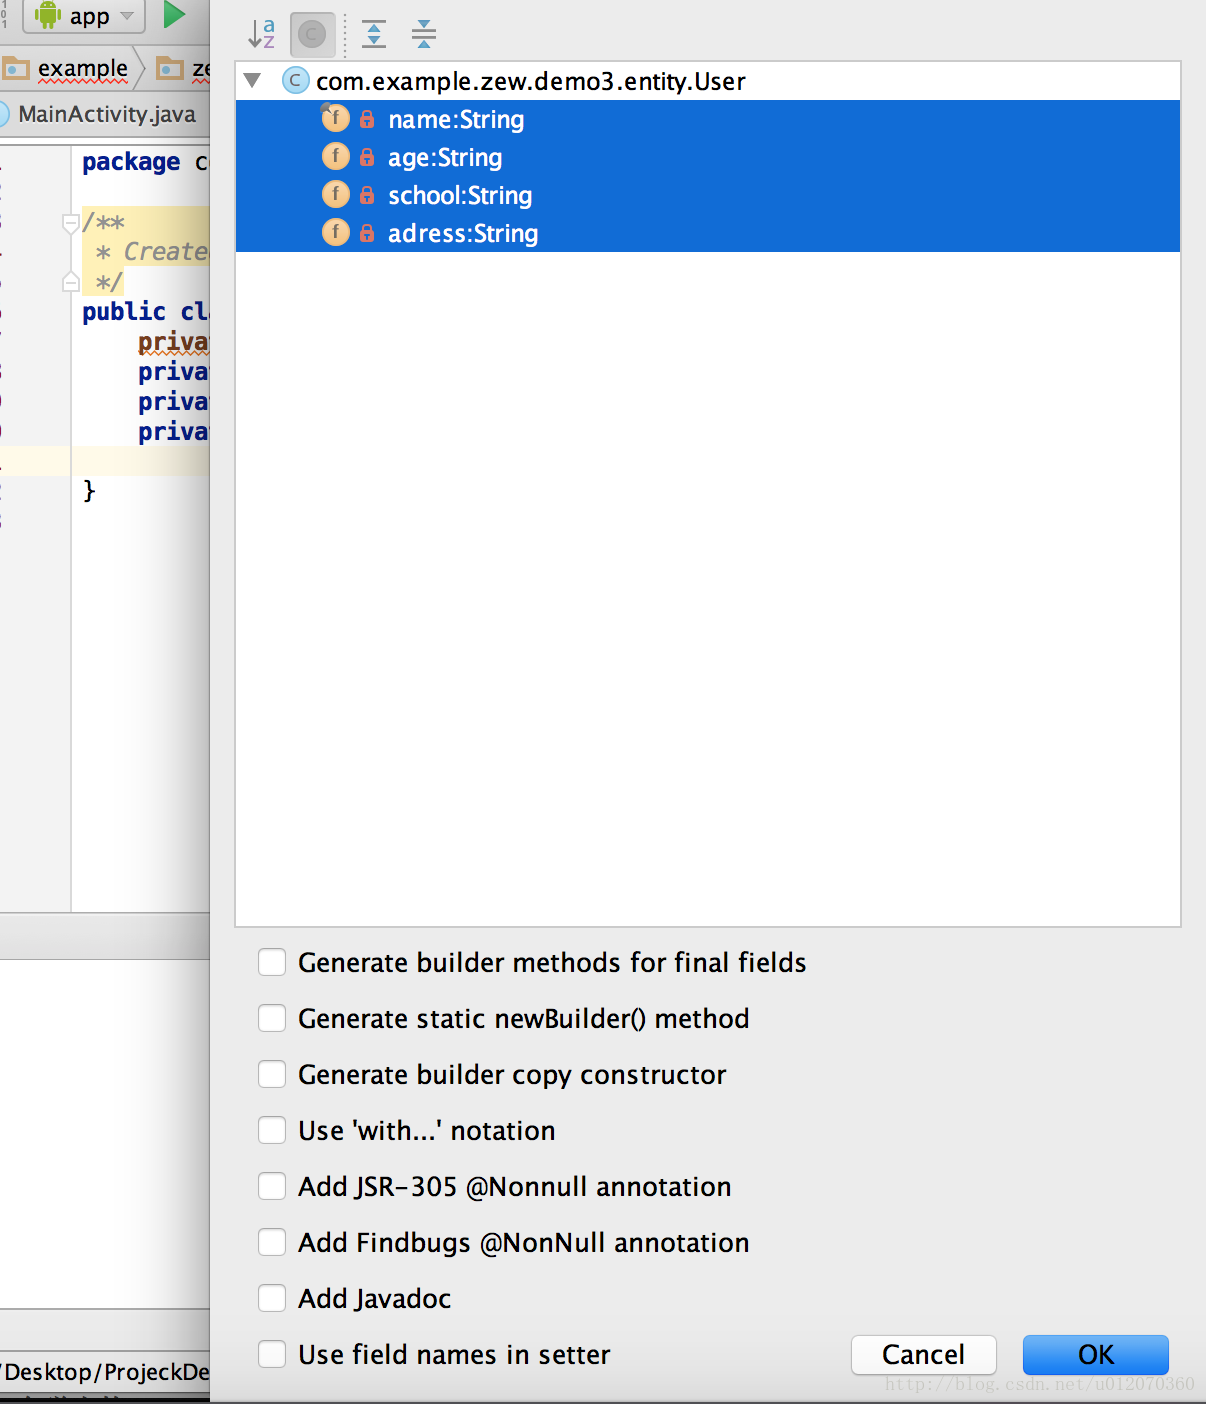
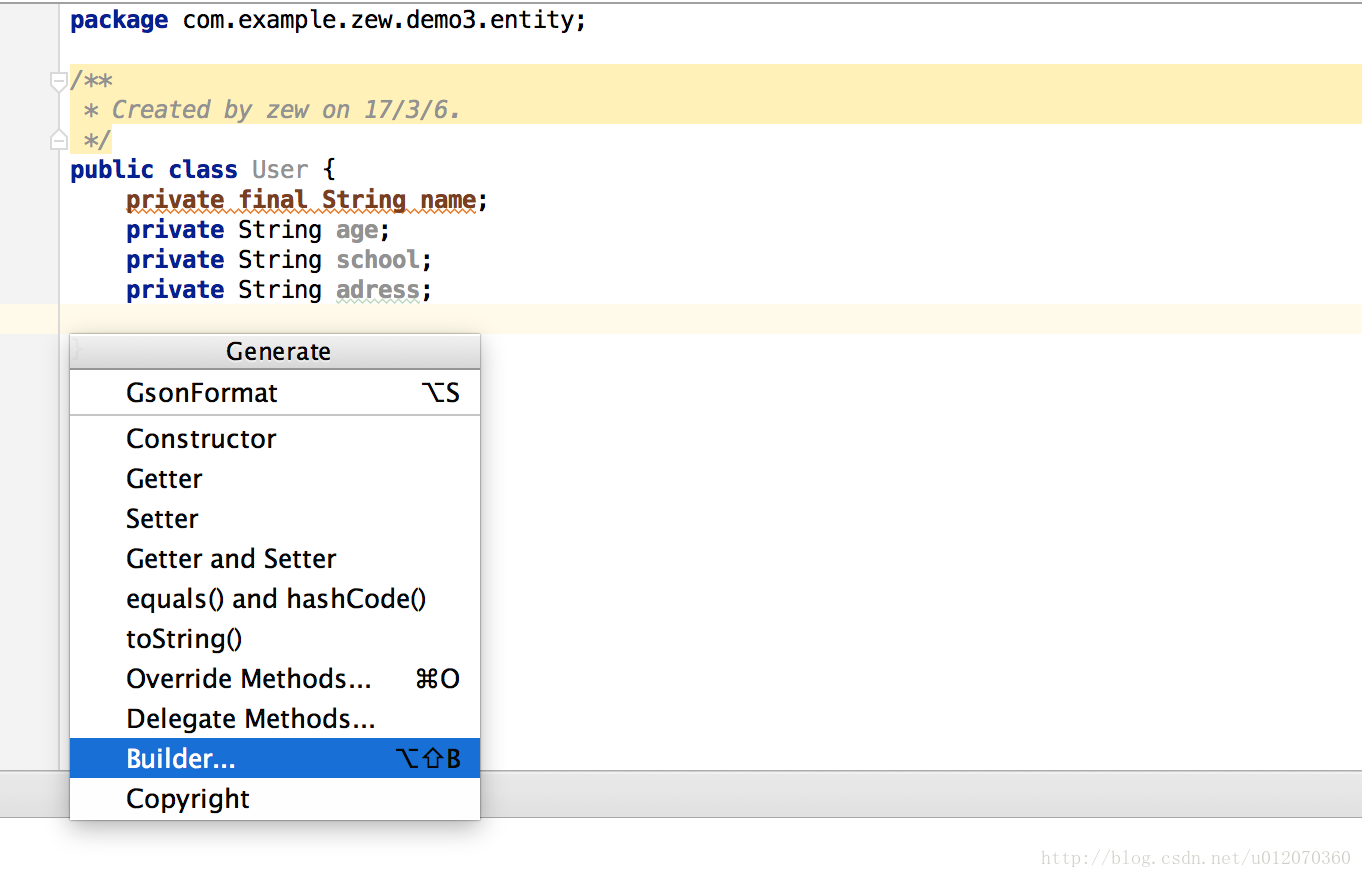
然后生成
public class User {private final String name;private String age;private String school;private String adress;private User(Builder builder) {name = builder.name;age = builder.age;school = builder.school;adress = builder.adress;}public static final class Builder {private final String name;private String age;private String school;private String adress;public Builder(String name) {this.name = name;}public Builder age(String val) {age = val;return this;}public Builder school(String val) {school = val;return this;}public Builder adress(String val) {adress = val;return this;}public User build() {return new User(this);}}
}
3感悟
我们后辈在学习过程中切勿想当然觉得这些都很简单,都是先人在实际开发中遇到的坑,不断总结被整理成设计模式,学习的路还很长,沉淀自己,
这篇关于建造器模式(builder)的文章就介绍到这儿,希望我们推荐的文章对编程师们有所帮助!


