本文主要是介绍SpringBoot【3】集成 Swagger,希望对大家解决编程问题提供一定的参考价值,需要的开发者们随着小编来一起学习吧!
SpringBoot 集成 Swagger
- 前言
- pom.xml 配置文件
- application.yml 配置文件
- config 包
- Swagger2Config
- entity 包
- UserEntity
- service 包
- impl 包
- SwaggerServiceImpl
- SwaggerService
- controller 包
- SwaggerController
- SwaggerApplication
- 验证
前言
创建项目步骤、及版本选择等,在《SpringBoot【1】集成 Druid》章节中有详细介绍,此处不再重复概述。
当前先说明下,为什么需要集成 Swagger ??
- 如下一个控制层(Controller)代码:
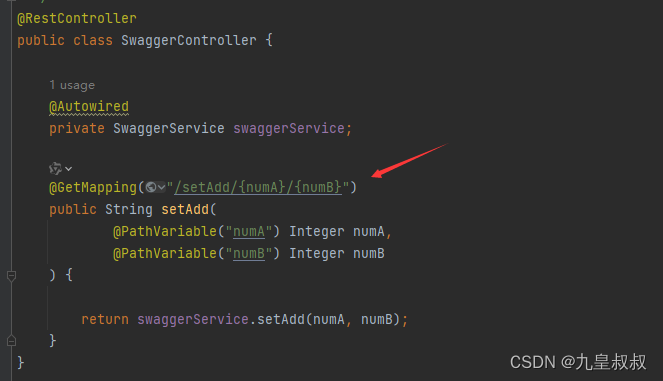
若不集成 Swagger,则 在页面进行测试时,将是如下这样:
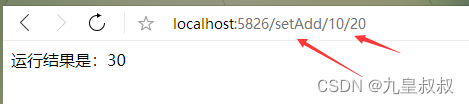
每次调用测试,都需要在浏览器访问。
测试多个方法时、甚是繁琐。
于是乎, 你就开始了“奇思幻想”:有没有一种办法可以不这么繁琐,而又能测试?
- 答案呢,肯定是有的。比如呢? 集成 junit 写单元测试、或者浏览器安装插件等等。此处:我们集成
Swagger来解决此问题,注意 此处的版本是Swagger2(第2代)
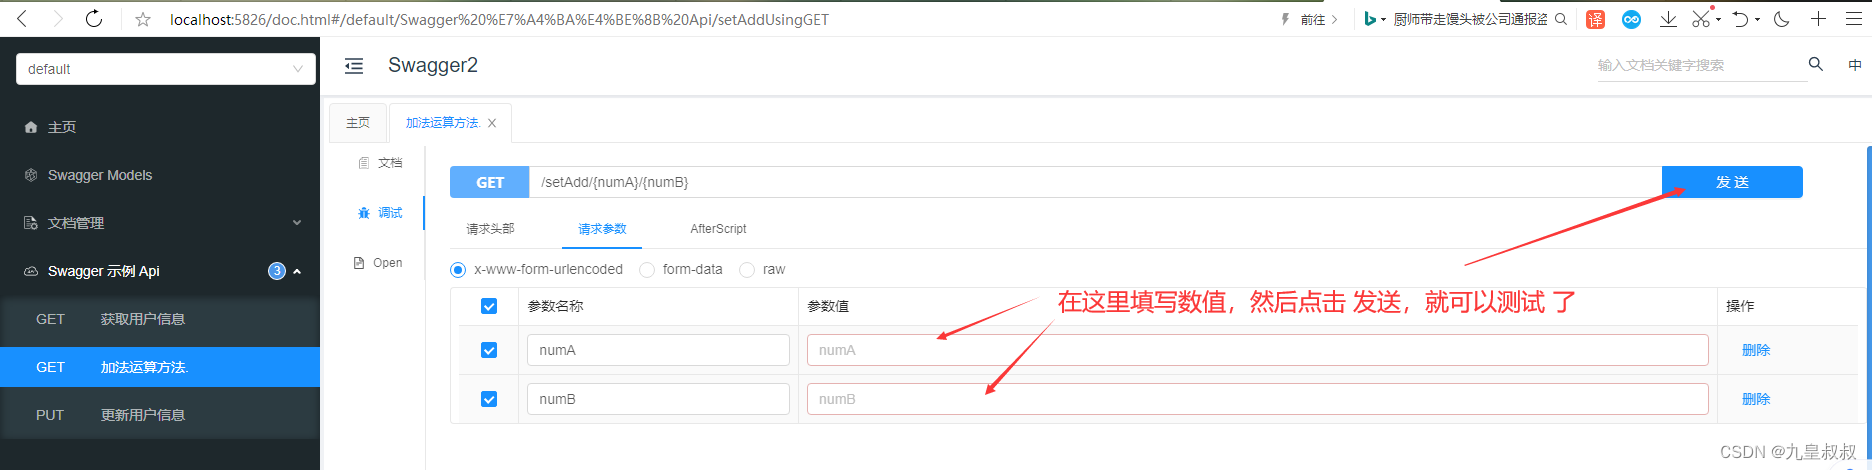
集成之后,在进行测试,是长这样子的:
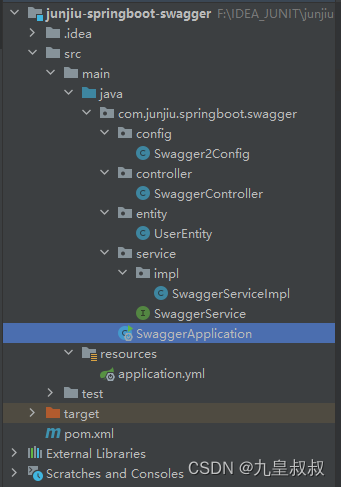
SpringBoot 集成 Swagger2 完成之后,项目截图如下 :
pom.xml 配置文件
<?xml version="1.0" encoding="UTF-8"?>
<project xmlns="http://maven.apache.org/POM/4.0.0"xmlns:xsi="http://www.w3.org/2001/XMLSchema-instance"xsi:schemaLocation="http://maven.apache.org/POM/4.0.0 http://maven.apache.org/xsd/maven-4.0.0.xsd"><modelVersion>4.0.0</modelVersion><parent><groupId>org.springframework.boot</groupId><artifactId>spring-boot-starter-parent</artifactId><version>2.3.12.RELEASE</version><relativePath /></parent><groupId>com.junjiu.springboot.swagger</groupId><artifactId>junjiu-springboot-swagger</artifactId><version>1.0-SNAPSHOT</version><properties><maven.compiler.source>8</maven.compiler.source><maven.compiler.target>8</maven.compiler.target><project.build.sourceEncoding>UTF-8</project.build.sourceEncoding></properties><dependencies><dependency><groupId>org.springframework.boot</groupId><artifactId>spring-boot-starter-web</artifactId></dependency><!--以下 3个依赖是集成 Swagger2 所需--><dependency><groupId>io.springfox</groupId><artifactId>springfox-swagger2</artifactId><version>3.0.0</version></dependency><dependency><groupId>io.springfox</groupId><artifactId>springfox-swagger-ui</artifactId><version>3.0.0</version></dependency><dependency><groupId>com.github.xiaoymin</groupId><artifactId>knife4j-spring-boot-starter</artifactId><version>3.0.3</version></dependency><!--UserEntity 中为了使用 @data 注解,当前添加 lombok--><dependency><groupId>org.projectlombok</groupId><artifactId>lombok</artifactId></dependency></dependencies></project>
application.yml 配置文件
server:port: 5826spring:application:name: Junjiu-Springboot-Swaggerversion: 1.0.0
config 包
Swagger2Config
package com.junjiu.springboot.swagger.config;import org.springframework.context.annotation.Bean;
import org.springframework.context.annotation.Configuration;
import springfox.documentation.builders.ApiInfoBuilder;
import springfox.documentation.builders.PathSelectors;
import springfox.documentation.builders.RequestHandlerSelectors;
import springfox.documentation.service.ApiInfo;
import springfox.documentation.service.Contact;
import springfox.documentation.spi.DocumentationType;
import springfox.documentation.spring.web.plugins.Docket;
import springfox.documentation.swagger2.annotations.EnableSwagger2;/*** program: junjiu-springboot-swagger* ClassName: Swagger2Config* description:** @author: 九尊* @create: 2024-06-20 23:00* @version: 1.0**/
@EnableSwagger2
@Configuration
public class Swagger2Config {@Beanpublic Docket createRestApi() {return new Docket(DocumentationType.SWAGGER_2).apiInfo(apiInfo()).select().apis(RequestHandlerSelectors.basePackage("com.junjiu.springboot.swagger")).paths(PathSelectors.any()).build();}private ApiInfo apiInfo() {return new ApiInfoBuilder().title("Swagger2").description("SpringBoot 集成 Swagger2").contact(new Contact("君九", "https://blog.csdn.net/charlesyuangc", "123456@email.com")).termsOfServiceUrl("https://blog.csdn.net/charlesyuangc").version("version 1.0").build();}}
entity 包
UserEntity
package com.junjiu.springboot.swagger.entity;import io.swagger.annotations.ApiModel;
import io.swagger.annotations.ApiModelProperty;
import lombok.Data;/*** program: junjiu-springboot-swagger* ClassName: UserEntity* description: 实体类. 对接 数据库中的表,例如:tb_user,*              此处为了演示 Swagger2 在实体类中的注解使用,暂不再创建表了。** @author: 九尊* @create: 2024-06-20 23:07* @version: 1.0**/
@Data
@ApiModel(value = "用户实体类", description = "用户实体类")
public class UserEntity {/*** 以下 3种 写法均可以的。*/// @ApiModelProperty(value = "用户ID", name = "id", required = true)// @ApiModelProperty(value = "用户ID", name = "id")@ApiModelProperty(value = "用户ID")private Long id;@ApiModelProperty(value = "用户名", name = "userName")private String userName;@ApiModelProperty(value = "昵称", name = "nickName", required = true)private String nickName;}
service 包
impl 包
SwaggerServiceImpl
package com.junjiu.springboot.swagger.service.impl;import com.junjiu.springboot.swagger.entity.UserEntity;
import com.junjiu.springboot.swagger.service.SwaggerService;
import org.springframework.stereotype.Service;/*** program: junjiu-springboot-swagger* ClassName: SwaggerServiceImpl* description:** @author: 九尊* @create: 2024-06-20 22:47* @version: 1.0**/
@Service
public class SwaggerServiceImpl implements SwaggerService {@Overridepublic String setAdd(Integer numA, Integer numB) {Integer total = numA + numB;return "运行结果是:" + String.valueOf(total);}@Overridepublic UserEntity getUser(Long id) {System.out.println("id:" + id);// 从数据库中查询到数据后,返回对象。UserEntity userEntity = new UserEntity();userEntity.setId(id);userEntity.setUserName("君九");userEntity.setNickName("九皇叔叔");return userEntity;}@Overridepublic String setUpdate(UserEntity userEntity) {return "用户信息更新成功.";}
}
SwaggerService
package com.junjiu.springboot.swagger.service;import com.junjiu.springboot.swagger.entity.UserEntity;/*** program: junjiu-springboot-swagger* ClassName: SwaggerService* description:** @author: 九尊* @create: 2024-06-20 22:46* @version: 1.0**/
public interface SwaggerService {/*** 测试接口 | 加法运算.* @param numA* @param numB* @return*/String setAdd(Integer numA, Integer numB);/*** 根据用户ID编号查询用户信息.* @param id* @return*/UserEntity getUser(Long id);/*** 更新用户信息.* @param userEntity* @return*/String setUpdate(UserEntity userEntity);
}
controller 包
SwaggerController
package com.junjiu.springboot.swagger.controller;import com.junjiu.springboot.swagger.entity.UserEntity;
import com.junjiu.springboot.swagger.service.SwaggerService;
import io.swagger.annotations.Api;
import io.swagger.annotations.ApiImplicitParam;
import io.swagger.annotations.ApiImplicitParams;
import io.swagger.annotations.ApiOperation;
import org.springframework.beans.factory.annotation.Autowired;
import org.springframework.web.bind.annotation.GetMapping;
import org.springframework.web.bind.annotation.PathVariable;
import org.springframework.web.bind.annotation.PutMapping;
import org.springframework.web.bind.annotation.RestController;/*** program: junjiu-springboot-swagger* ClassName: SwaggerController* description:** @author: 九尊* @create: 2024-06-20 22:46* @version: 1.0**/
@Api(value = "Swagger 示例", tags = "Swagger 示例 Api")
@RestController
public class SwaggerController {@Autowiredprivate SwaggerService swaggerService;/*** 测试方法 | 加法运算,需要注意此处有 2个参数* @param numA* @param numB* @return*/@ApiOperation("加法运算方法.")@ApiImplicitParams({@ApiImplicitParam(name = "numA", value = "第一个参数", required = true, dataType = "Integer", paramType = "path", example = "10"),@ApiImplicitParam(name = "numB", value = "第二个参数", required = true, dataType = "Integer", paramType = "path", example = "20")})@GetMapping("/setAdd/{numA}/{numB}")public String setAdd(@PathVariable("numA") Integer numA,@PathVariable("numB") Integer numB) {return swaggerService.setAdd(numA, numB);}/*** 测试方法 | 根据 id编号 查询用户信息,注意:这里只有 1个参数.* @param id* @return*/@ApiOperation("获取用户信息")@ApiImplicitParam(name = "id", value = "用户id", required = true, dataType = "Long", paramType = "path", example = "1")@GetMapping("/getUser/{id}")public UserEntity getUser(@PathVariable("id") Long id){return swaggerService.getUser(id);}/*** 更新用户信息 .* @param userEntity* @return*/@ApiOperation("更新用户信息")@ApiImplicitParam(name = "userEntity", value = "用户实体类", required = true, dataType = "UserEntity", paramType = "body")@PutMapping("/setUpdate")public String setUpdate(UserEntity userEntity) {return swaggerService.setUpdate(userEntity);}}
SwaggerApplication
package com.junjiu.springboot.swagger;import org.springframework.boot.SpringApplication;
import org.springframework.boot.autoconfigure.SpringBootApplication;/*** program: junjiu-springboot-swagger* ClassName: SwaggerApplication* description:** @author: 九尊* @create: 2024-06-20 22:45* @version: 1.0**/
@SpringBootApplication
public class SwaggerApplication {public static void main(String[] args) {SpringApplication.run(SwaggerApplication.class, args);}
}
验证
启动之后,
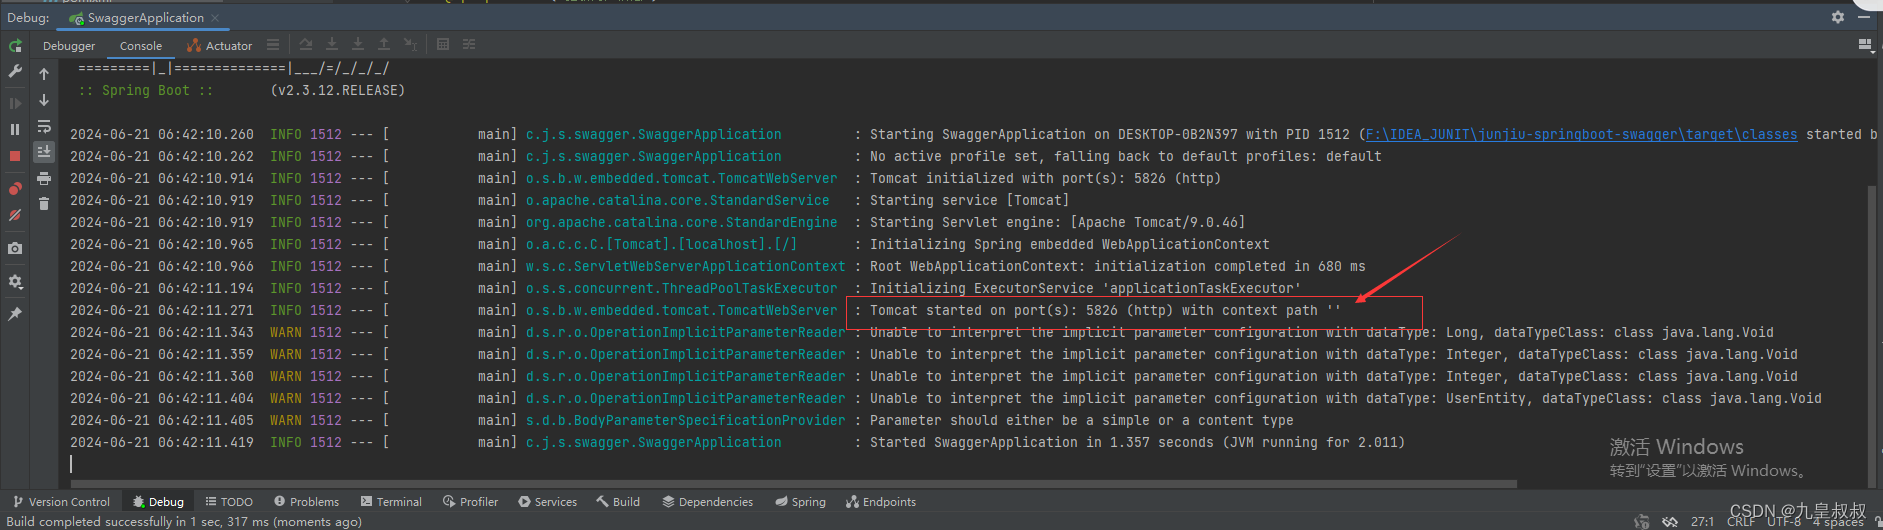
在浏览器地址栏访问:
http://localhost:5826/doc.html
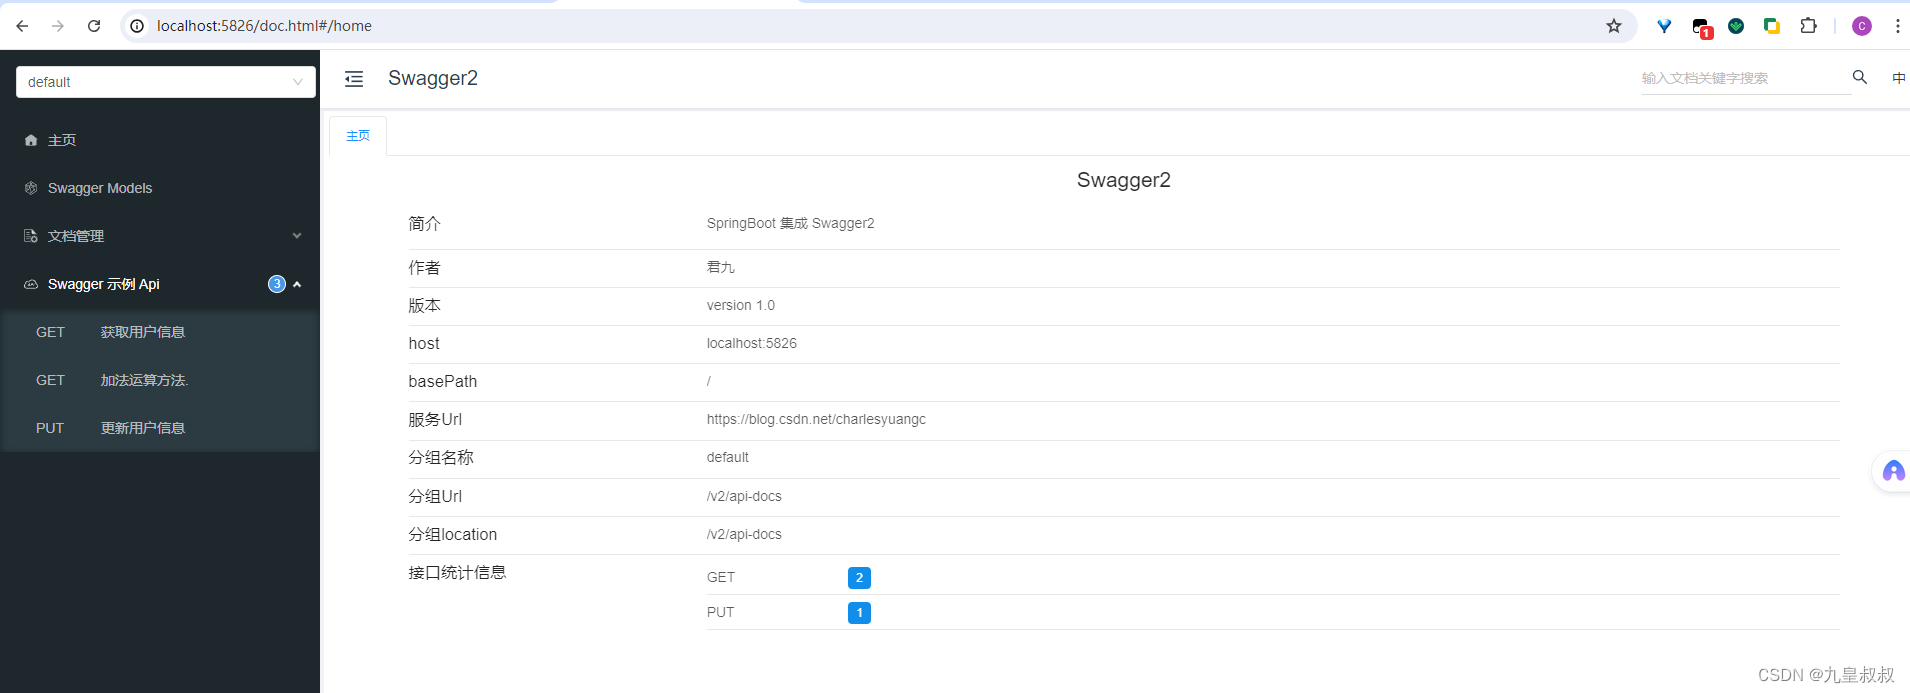
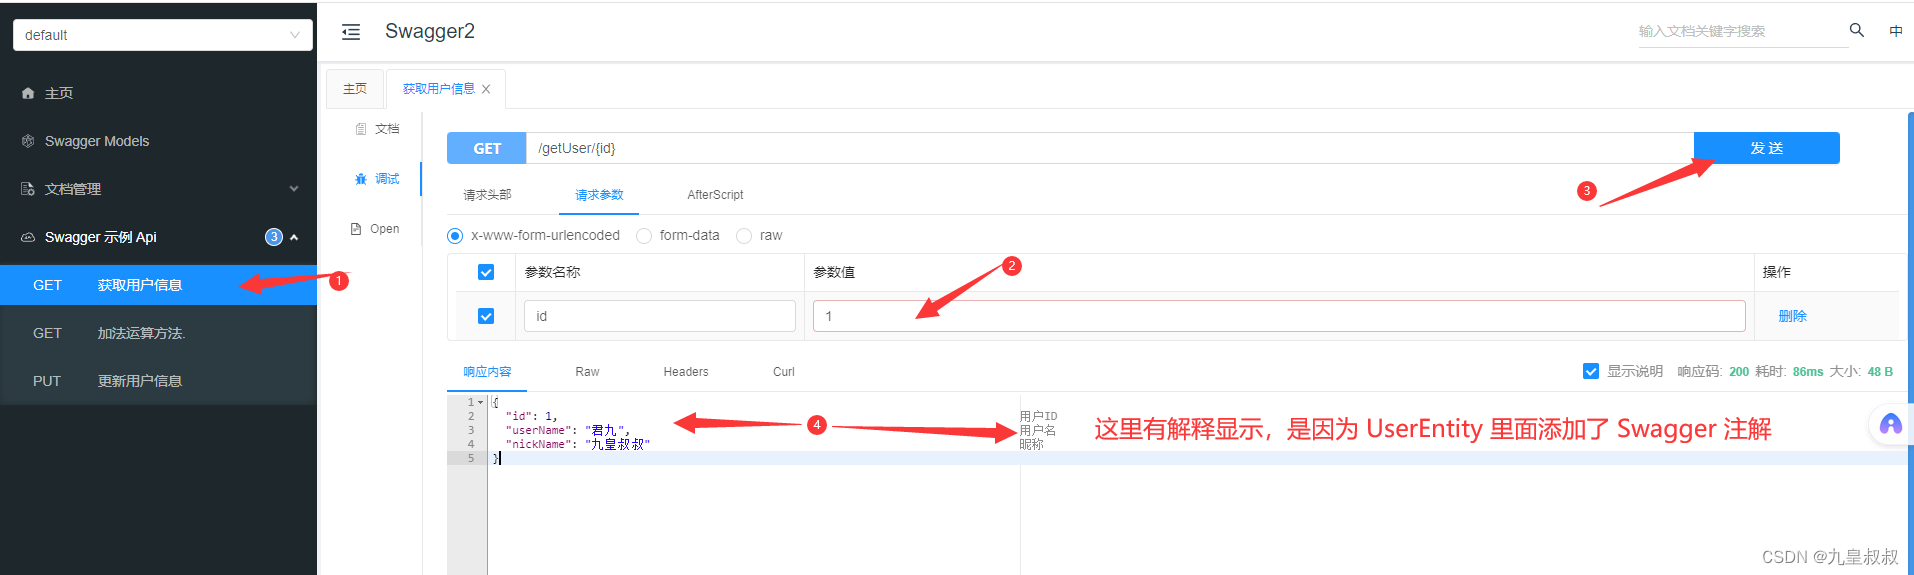
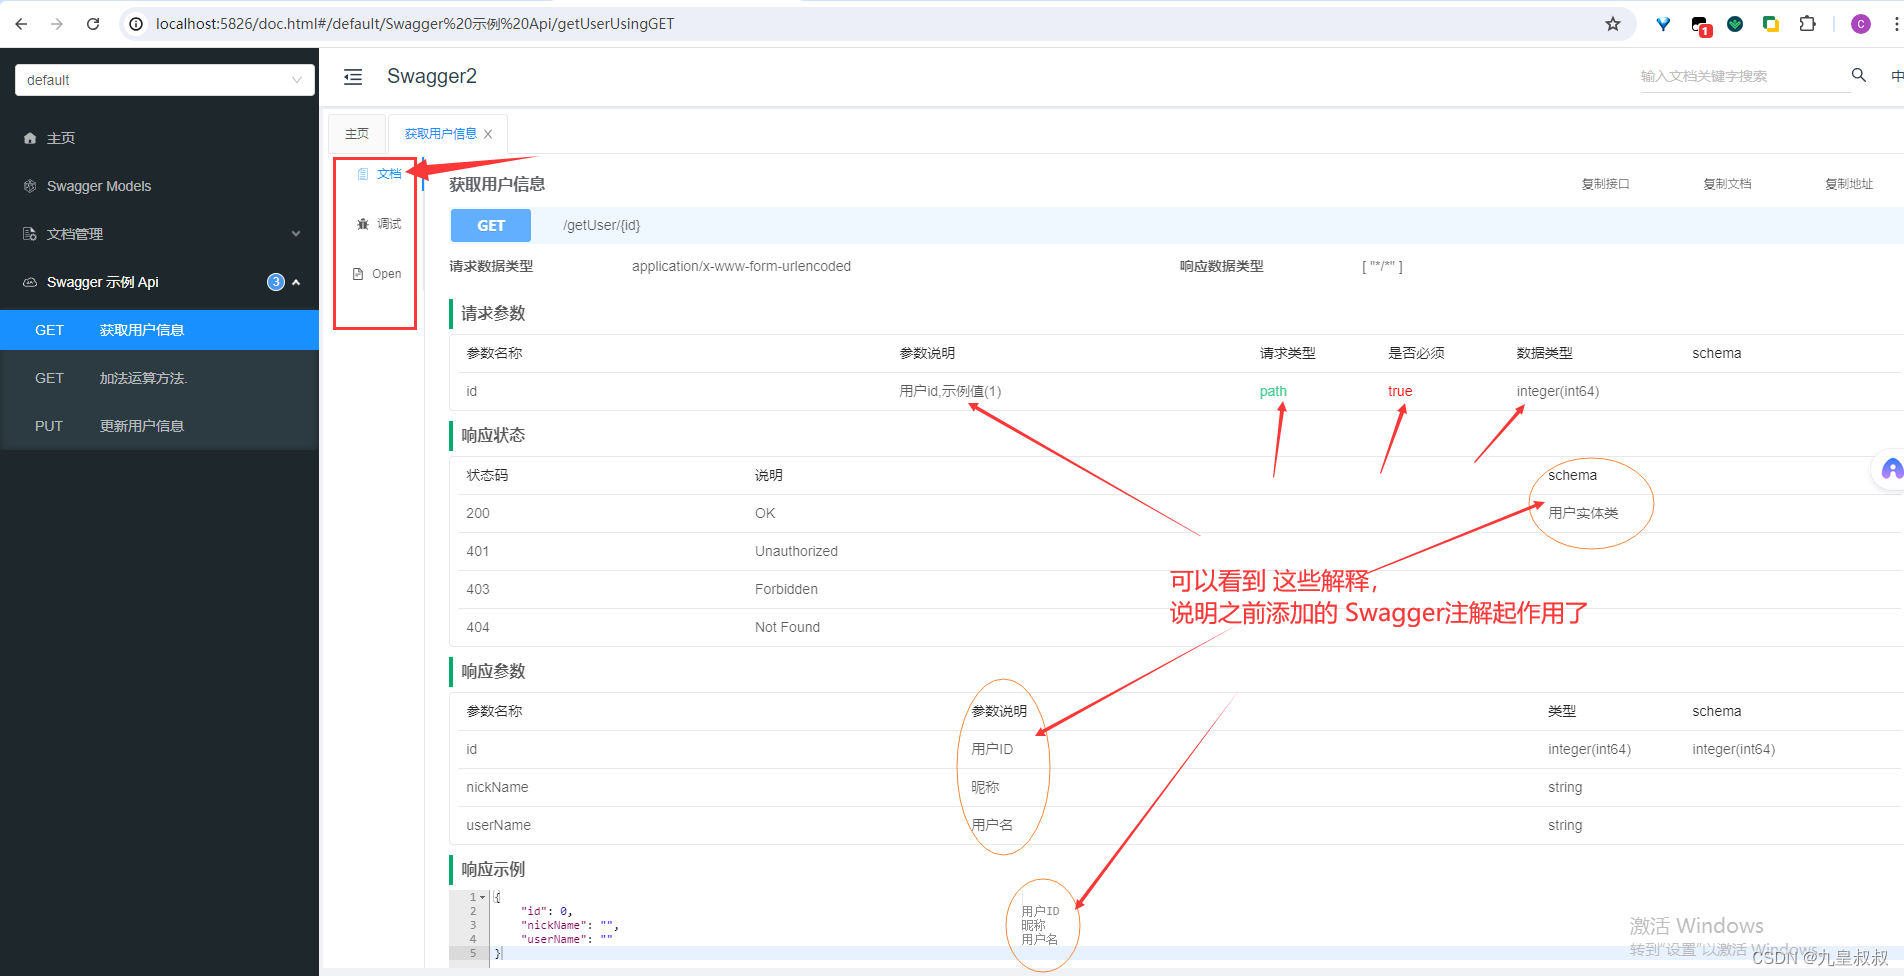
示例说明
以 获取用户信息 API 为例:
这篇关于SpringBoot【3】集成 Swagger的文章就介绍到这儿,希望我们推荐的文章对编程师们有所帮助!


