本文主要是介绍C# OCCT Winform 界面搭建,希望对大家解决编程问题提供一定的参考价值,需要的开发者们随着小编来一起学习吧!

目录
1.创建一个WInform项目
2.代码总览
代码解析
3.添加模型到场景
4.鼠标交互
1.创建一个WInform项目

2.代码总览
using Macad.Occt.Helper;
using Macad.Occt;
using System;
using System.Collections.Generic;
using System.Linq;
using System.Runtime.Remoting.Contexts;
using System.Text;
using System.Threading.Tasks;
using System.Windows.Forms;
using Kitware.VTK;
using static System.Net.Mime.MediaTypeNames;namespace OCCTTestProject
{public class OCCTView : Form{private V3d_Viewer _viewer;private AIS_InteractiveContext _context;private WNT_Window _window;private V3d_View _view;protected int myXmin;protected int myYmin;protected int myXmax;protected int myYmax;public OCCTView( ){//InitWindow();}public void InitWindow(){// 创建 OpenGL 驱动var ocGraphicDriver = Graphic3d.CreateOpenGlDriver();// 初始化 Viewer_viewer = new V3d_Viewer(ocGraphicDriver);_viewer.SetDefaultViewSize(1000.0);_viewer.SetDefaultLights();_viewer.SetDefaultViewProj(V3d_TypeOfOrientation.XnegYposZpos);_viewer.SetDefaultBackgroundColor(new Quantity_Color(Quantity_NameOfColor.BLACK));_viewer.SetDefaultVisualization(V3d_TypeOfVisualization.ZBUFFER);_viewer.SetLightOn();// 创建 WNT_Window 并绑定到 Panel 控件_window = new WNT_Window(this.Handle);_window.SetBackground(new Quantity_Color(Quantity_NameOfColor.BLACK));_window.Map();// 创建 View_view = _viewer.CreateView();_view.SetWindow(_window);//AIS_AnimationCamera AisAnimationCamera = new AIS_AnimationCamera(new TCollection_AsciiString("ViewCamera"), _view);// 设置视图属性// 设置小坐标轴 1.位置左下角 2.xyz 字体颜色 3.大小 4.箭头粗细_view.TriedronDisplay(Aspect_TypeOfTriedronPosition.LEFT_LOWER, new Quantity_Color(Quantity_NameOfColor.RED), 0.2, V3d_TypeOfVisualization.WIREFRAME);_view.SetBackgroundColor(new Quantity_Color(Quantity_NameOfColor.RED4));_view.SetBgGradientColors(new Quantity_Color(Quantity_NameOfColor.SKYBLUE), new Quantity_Color(Quantity_NameOfColor.WHEAT), Aspect_GradientFillMethod.Vertical, false);// 配置渲染参数var renderParams = _view.ChangeRenderingParams();renderParams.NbMsaaSamples = 4;renderParams.IsAntialiasingEnabled = true;renderParams.TransparencyMethod = Graphic3d_RenderTransparentMethod.BLEND_OIT;renderParams.Method = Graphic3d_RenderingMode.RASTERIZATION;renderParams.RaytracingDepth = 3;renderParams.IsShadowEnabled = true;renderParams.IsReflectionEnabled = true;renderParams.IsTransparentShadowEnabled = true;// 关闭计算模式并更新视图_view.SetComputedMode(false);_view.Update();_view.MustBeResized();_view.SetImmediateUpdate(false);_view.Redraw();// 创建交互上下文_context = new AIS_InteractiveContext(_viewer);_context.UpdateCurrentViewer();_view.MustBeResized();_view.Redraw();}private void RenderShape(){// 创建一个简单的立方体var box = new BRepPrimAPI_MakeBox(100.0, 100.0, 100.0).Shape();var aisShape = new AIS_Shape(box);// 显示形状_context.Display(aisShape, 1, 1, true); // 实体// _context.Display(aisShape, true); // 线框var sphere = new BRepPrimAPI_MakeSphere(new Pnt(100,100,150),30).Shape();var aissphere = new AIS_Shape(sphere);// 显示形状_context.Display(aissphere,1, 1,true); // 实体// _context.Display(aissphere, true); // 线框// 调整视图_view.FitAll();_view.MustBeResized();_view.Redraw();}protected override void OnResize(EventArgs e){base.OnResize(e);if (_view != null){_view.MustBeResized();_view.Redraw();}}protected override void OnMouseDown(MouseEventArgs e){if(e.Button ==MouseButtons.Left){}else if(e.Button == MouseButtons.Right){SetDegenerateModeOn();StartRotation(e.X, e.Y);}myXmin = e.X; myYmin = e.Y;myXmax = e.X; myYmax = e.Y;}protected override void OnMouseUp(MouseEventArgs e){}protected override void OnMouseMove(MouseEventArgs e){if(e.Button == MouseButtons.Left){Zoom(myXmax, myYmax, e.X, e.Y);myXmax = e.X; myYmax = e.Y;}else if(e.Button == MouseButtons.Right){Rotation(e.X, e.Y);}else if(e.Button == MouseButtons.Middle){Pan(e.X - myXmax, myYmax - e.Y);myXmax = e.X; myYmax = e.Y;}else{Move(e.X, e.Y);}_view.Redraw();}protected void Move(int x, int y){_context.MoveTo(x, y, _view, true);}protected void Zoom(int x1, int y1, int x2, int y2){_view.Zoom(x1, y1, x2,y2);}protected void Rotation(int x, int y){_view.Rotation(x, y);}protected void StartRotation(int x, int y){_view.StartRotation(x, y);}protected void SetDegenerateModeOn(){_view.SetComputedMode(false);_view.Redraw();}protected void Pan(int x, int y){_view.Pan(x,y);}}
}
代码解析
1.OCCT 与 Winform控件建立联系 是通过 WNT_Window
_window = new WNT_Window(this.Handle);因为this 是继承了 Form 所以相当于把Form 做为显示界面,和vtk 使用panel 的方式不同。Form 想要作为子控件使用需要通过MDI 方式嵌入到主Form中。
public Form1(){InitializeComponent();oCCTView = new OCCTView();oCCTView.MdiParent = this;oCCTView.Show();this.WindowState = FormWindowState.Maximized;oCCTView.WindowState = FormWindowState.Maximized;}private void Form1_Load(object sender, EventArgs e){oCCTView.InitWindow();}oCCTView.InitWindow(); 这里不放在Load 会报错,原因未知。
2.V3d_Viewer
①SetDefaultViewProj 当前视角
SetDefaultViewProj(V3d_TypeOfOrientation.XnegZpos)
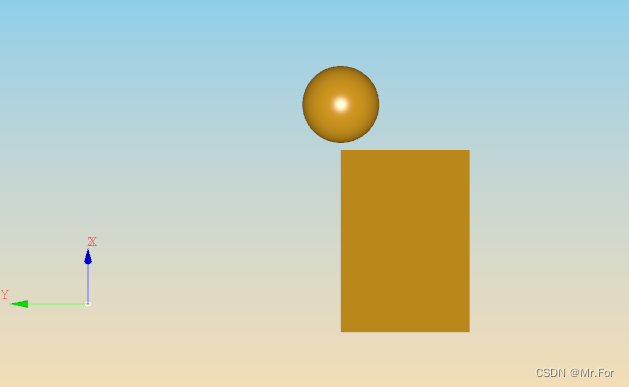
SetDefaultViewProj(V3d_TypeOfOrientation.XnegYposZpos)
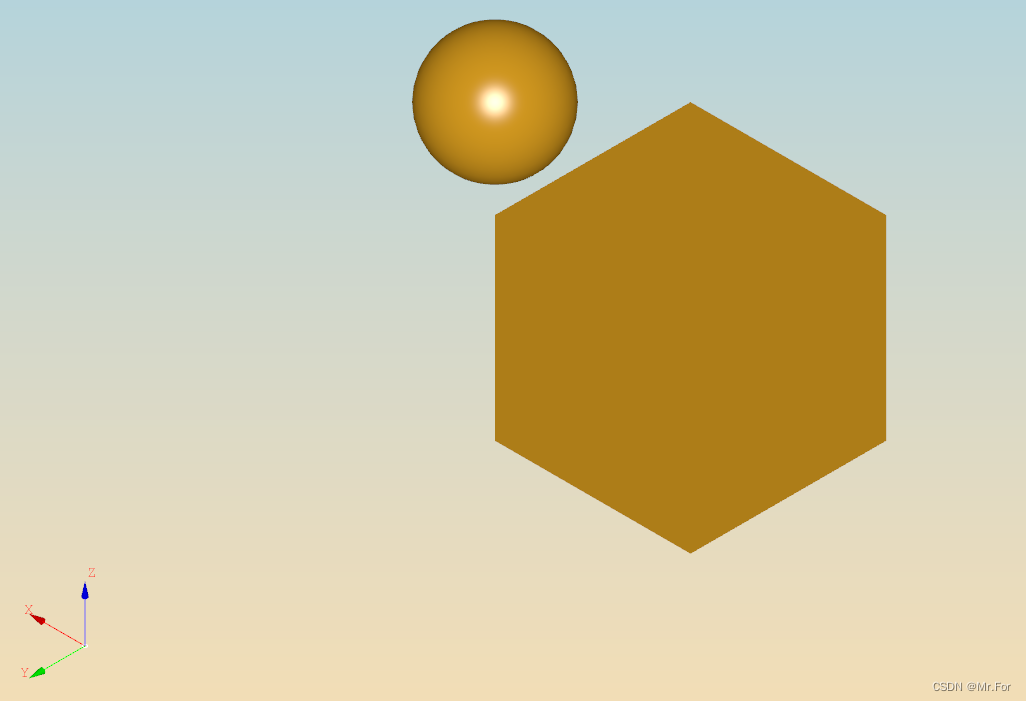
②SetLightOn 设置平行光、点光源或聚光灯

关闭光源时
_viewer.SetLightOff();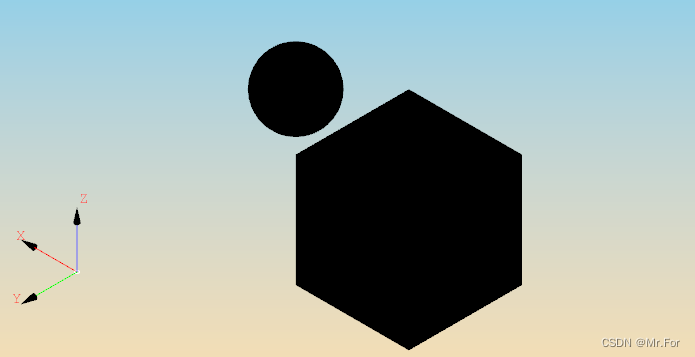
③V3d_View
TriedronDisplay:小坐标轴设置
参数:1.坐标轴位置 2.xyz 字体颜色 3.坐标轴大小 4.箭头粗细
SetBackgroundColor:在不使用SetBgGradientColors情况下设置单一背景色
_view.SetBackgroundColor(new Quantity_Color(Quantity_NameOfColor.YELLOW));
SetBgGradientColors:创建渐变色背景。
1.渐变起点色
2.渐变终点色
3.渐变方向:水平,垂直,对角线,中心扩散
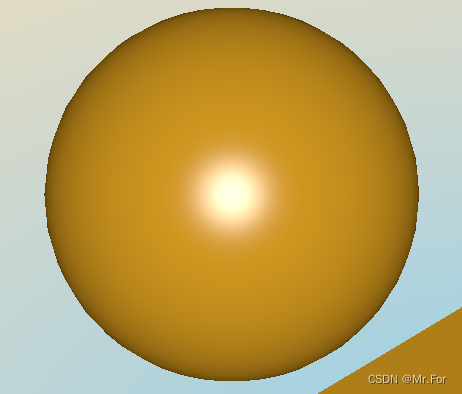
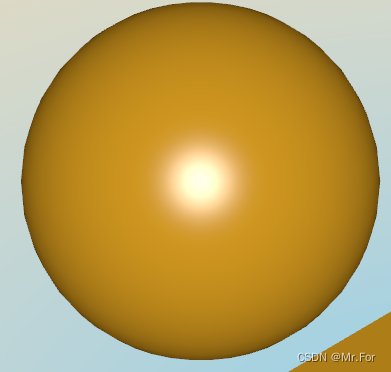
中心渐变

renderParams.NbMsaaSamples 抗锯齿 MSAA 是一种抗锯齿技术,用于减少图像中的锯齿边缘。较高的采样数会提供更好的图像质量,但也会增加计算负担。
renderParams.NbMsaaSamples = 0; renderParams.NbMsaaSamples = 4;
RaytracingDepth:光线追踪的递归深度。光线追踪是一种渲染技术,通过模拟光线的传播路径来生成图像。较高的深度可以生成更真实的图像,但会增加计算复杂度。
Redraw:更新场景。
MustBeResized:标记视图需要调整大小,并在下次更新时重新计算视图的投影矩阵和其他尺寸相关的参数
3.添加模型到场景
// 创建一个简单的立方体var box = new BRepPrimAPI_MakeBox(100.0, 100.0, 100.0).Shape();var aisShape = new AIS_Shape(box);// 显示形状_context.Display(aisShape, 1, 1, true); // 实体// _context.Display(aisShape, true); // 线框var sphere = new BRepPrimAPI_MakeSphere(new Pnt(100,100,150),30).Shape();var aissphere = new AIS_Shape(sphere);// 显示形状_context.Display(aissphere,1, 1,true); // 实体// _context.Display(aissphere, true); // 线框// 调整视图_view.FitAll();_view.MustBeResized();_view.Redraw();线框:

_view.FitAll(); 调整模型在场景合适位置。
4.鼠标交互
因为 OCCTView 是一个Form 因此直接使用Form的鼠标交互
protected override void OnResize(EventArgs e){base.OnResize(e);if (_view != null){_view.MustBeResized();_view.Redraw();}}protected override void OnMouseDown(MouseEventArgs e){if(e.Button ==MouseButtons.Left){}else if(e.Button == MouseButtons.Right){SetDegenerateModeOn();StartRotation(e.X, e.Y);}myXmin = e.X; myYmin = e.Y;myXmax = e.X; myYmax = e.Y;}protected override void OnMouseUp(MouseEventArgs e){}protected override void OnMouseMove(MouseEventArgs e){if(e.Button == MouseButtons.Left){Zoom(myXmax, myYmax, e.X, e.Y);myXmax = e.X; myYmax = e.Y;}else if(e.Button == MouseButtons.Right){Rotation(e.X, e.Y);}else if(e.Button == MouseButtons.Middle){Pan(e.X - myXmax, myYmax - e.Y);myXmax = e.X; myYmax = e.Y;}else{Move(e.X, e.Y);}_view.Redraw();}protected void Move(int x, int y){_context.MoveTo(x, y, _view, true);}protected void Zoom(int x1, int y1, int x2, int y2){_view.Zoom(x1, y1, x2,y2);}protected void Rotation(int x, int y){_view.Rotation(x, y);}protected void StartRotation(int x, int y){_view.StartRotation(x, y);}protected void SetDegenerateModeOn(){_view.SetComputedMode(false);_view.Redraw();}protected void Pan(int x, int y){_view.Pan(x,y);}我也刚刚接触 OCCT 也在学习中,希望互相交流。
这篇关于C# OCCT Winform 界面搭建的文章就介绍到这儿,希望我们推荐的文章对编程师们有所帮助!


