本文主要是介绍cesium按照参数绘制不同形状的船舶,希望对大家解决编程问题提供一定的参考价值,需要的开发者们随着小编来一起学习吧!
俺们公司之前有个自创的所谓前端GIS框架,是用Cesium搞的。我对该框架不熟悉,用它在地图上作画,画船舶符号,看以前的代码,感觉十分艰深晦涩,什么材质、纹理,令人头大如斗。我4年前用过一阵Cesium,后来荒废了,到现在已经完全失忆。
一、不知道怎么判断船舶类型
最难点在于,原先的代码,不知道是怎么判断船舶类型,因而画相应的形状的。比如说我们有一个变量type,0代表渔船,1代表货船,2代表海盗船。按照一般思维,就是我判断这个type,是1就怎么怎么画,2就如何如何涂。但是,在我们那个框架代码里,这个type传着传着,就不知道变成啥样了,像这样

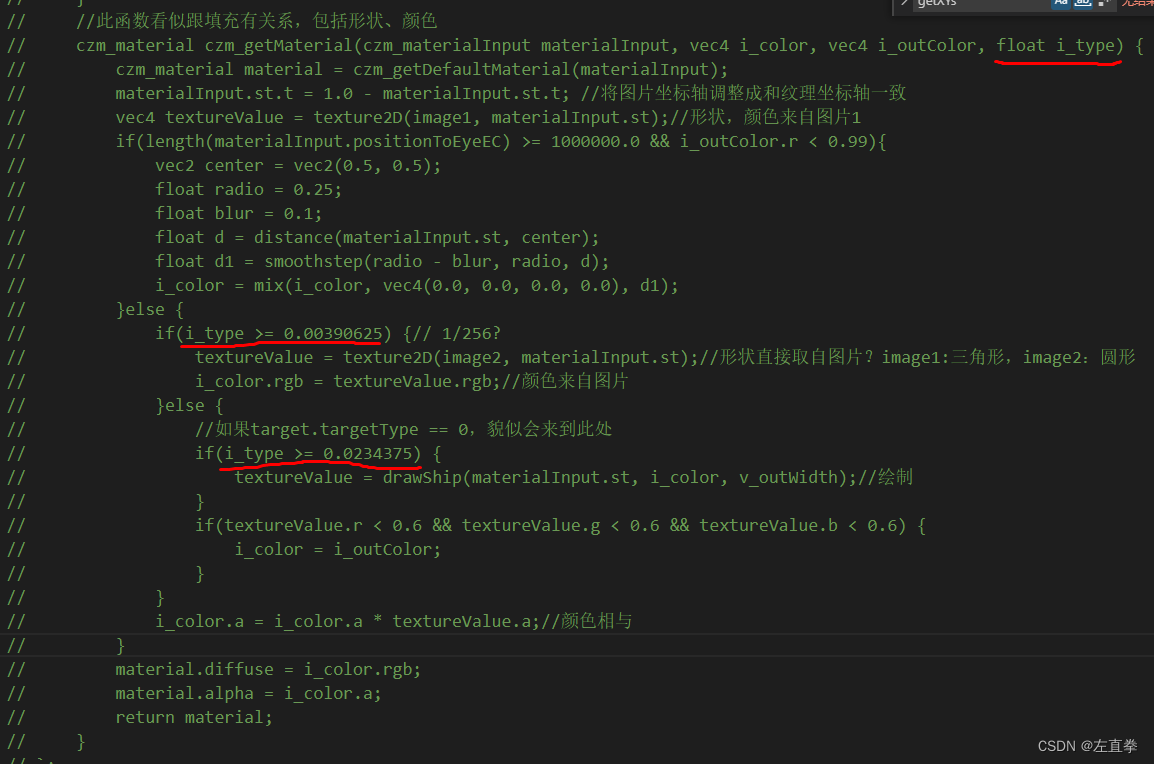
这个 i_type 貌似就是我们想用于判断船舶类型的type,但由于Cesium作画独树一帜,我们当初设好的type,命名是个整数,到了这里就变成这个鬼样子,是个奇怪的小数,似乎是256种颜色的等分的其中之一。如上图所示,根本就没办法判断类型,也不知道这个小数是怎么来的。
这里面的对象关联很复杂,我试着描述一下:
const targetPrimitiveCollection: Cesium.PrimitiveCollection = props.context.scene.primitives.add(new Cesium.PrimitiveCollection());let shipGeometryInstances = [];
shipGeometryInstances.push(new Cesium.GeometryInstance({。。。type:。。。{value: [type]}
}));
targetPrimitiveCollection.add(ShipPrimitive(。。。, shipGeometryInstances));
而上面说的判断type类型的方法
czm_material czm_getMaterial(czm_materialInput materialInput, vec4 i_color, vec4 i_outColor, float i_type){}
是ShipPrimitive()内的某个着色器定义里的方法。晕吧?
二、努力判断船舶类型
可以说,不能判断船舶类型,绘制不同形状就无从谈起。必须能判断。由于我基本靠AI指导才调试成功,而还没有完全理解,只能贴代码,而说不出一个子丑寅卯。
import image1 from '@/assets/target_icon/渔船.png'
import image2 from '@/assets/target_icon/货船.png';
import image3 from '@/assets/target_icon/海盗船.png';const image01 = new Image();
image01.src = image1;
const image02 = new Image();
image02.src = image2;
const image03 = new Image();
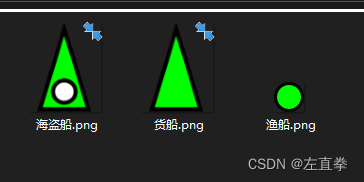
image03.src = image3;let uniforms = {image1: image1,//三角形image2: image2, //圆形image3: image3 //三角形 + 圆形
};const targetPrimitiveCollection: Cesium.PrimitiveCollection = props.context.scene.primitives.add(new Cesium.PrimitiveCollection());let type = 。。。//得到0,1,2let shipGeometryInstances = [];
shipGeometryInstances.push(new Cesium.GeometryInstance({id: 。。。,geometry: 。。。,modelMatrix: 。。。,attributes: {type: new Cesium.GeometryInstanceAttribute({componentDatatype: Cesium.ComponentDatatype.FLOAT,componentsPerAttribute: 1,value: [type]}),outWidth: 。。。,color: 。。。,outColor: 。。。},
}));targetPrimitiveCollection.add(ShipPrimitive(uniforms, shipGeometryInstances));const ShipPrimitive = (uniforms: any = {}, shipGeometryInstances: Cesium.GeometryInstance[]) => {/*** fragmentShaderSource属性在Cesium的MaterialAppearance或WebGL编程中起到了核心作用,* 它定义了片段着色器(Fragment Shader)的源代码。片段着色器是图形管线中的一个关键阶段,* 负责计算场景中每个像素的最终颜色。** 顶点着色器(Vertex Shader)和片段着色器(Fragment Shader)是图形渲染管线中的两个核心着色器阶段** 先顶点后片段*///片段着色器const fragmentShaderSource = `varying vec4 v_color;varying vec4 v_outColor;varying vec3 v_positionEC;varying vec3 v_normalEC;varying vec2 v_outWidth;varying vec2 v_st;varying float v_type;uniform sampler2D image1; // 第一个纹理uniform sampler2D image2; // 第二个纹理uniform sampler2D image3; // czm_material getMaterial(czm_materialInput materialInput){czm_material material = czm_getDefaultMaterial(materialInput);materialInput.st.t = 1.0 - materialInput.st.t; //将图片坐标轴调整成和纹理坐标轴一致vec4 textureValue;vec4 i_color = v_color;if (v_type == 2.0) {//海盗船textureValue = texture2D(image3, materialInput.st);i_color.rgb = textureValue.rgb;//颜色来自图片} else if (v_type == 1.0) {//货船textureValue = texture2D(image2, materialInput.st);i_color.rgb = textureValue.rgb;//颜色来自图片} else{//渔船textureValue = texture2D(image1, materialInput.st);i_color.rgb = textureValue.rgb;}i_color.a = i_color.a * textureValue.a;//颜色相与material.diffuse = i_color.rgb;material.alpha = i_color.a; return material;}void main() {vec3 positionToEyeEC = -v_positionEC;vec3 normalEC = normalize(v_normalEC);#ifdef FACE_FORWARDnormalEC = faceforward(normalEC, vec3(0.0, 0.0, 1.0), -normalEC);#endifczm_materialInput materialInput;materialInput.normalEC = normalEC;materialInput.positionToEyeEC = positionToEyeEC;materialInput.st = v_st;czm_material material = getMaterial(materialInput);#ifdef FLATgl_FragColor = vec4(material.diffuse + material.emission, material.alpha);#elsegl_FragColor = czm_phong(normalize(positionToEyeEC), material, czm_lightDirectionEC);#endif}`;//顶点着色器const vertexShaderSource = `attribute vec3 position3DHigh;attribute vec3 position3DLow;attribute vec3 normal;attribute vec2 st;attribute float batchId;varying vec4 v_color;varying vec4 v_outColor;varying vec3 v_positionEC;varying vec3 v_normalEC;varying vec2 v_outWidth;varying vec2 v_st;varying float v_type;void main() {vec4 p = czm_computePosition();v_positionEC = (czm_modelViewRelativeToEye * p).xyz;v_normalEC = czm_normal * normal;v_st = st;v_outWidth = czm_batchTable_outWidth(batchId);v_color = czm_batchTable_color(batchId);v_outColor = czm_batchTable_outColor(batchId);v_type = czm_batchTable_type(batchId);vec4 positionPC = czm_modelViewProjectionRelativeToEye * p;gl_Position = positionPC;}`;let shipPrimitive = new Cesium.Primitive({asynchronous: false,geometryInstances: shipGeometryInstances,appearance: new Cesium.MaterialAppearance({flat: true,material: new Cesium.Material({fabric: {type: "image2D",uniforms: uniforms,//source: imageSource,// <------- //-------------修改关键点,上面说的方法czm_getMaterial()就定义在imageSource里面},}),vertexShaderSource: vertexShaderSource,fragmentShaderSource: fragmentShaderSource,})});let fps = 5;let oldUpdate = shipPrimitive.update;shipPrimitive.update = function (frameState: { context: any; }) {oldUpdate.call(this, frameState);if (this._colorCommands[0] && fps > 0) {fps--;let uniformMap = this._colorCommands[0].uniformMap;uniformMap.image1 = function () {return new Cesium.Texture({//渔船,绿底圆形context: frameState.context,source: image01,sampler: new Cesium.Sampler()});}uniformMap.image2 = function () {//货船,绿底三角形return new Cesium.Texture({context: frameState.context,source: image02,sampler: new Cesium.Sampler()});}uniformMap.image3 = function () {//海盗船,绿底三角形 + 白底圆形return new Cesium.Texture({context: frameState.context,source: image03,sampler: new Cesium.Sampler()});}}}return shipPrimitive;
}
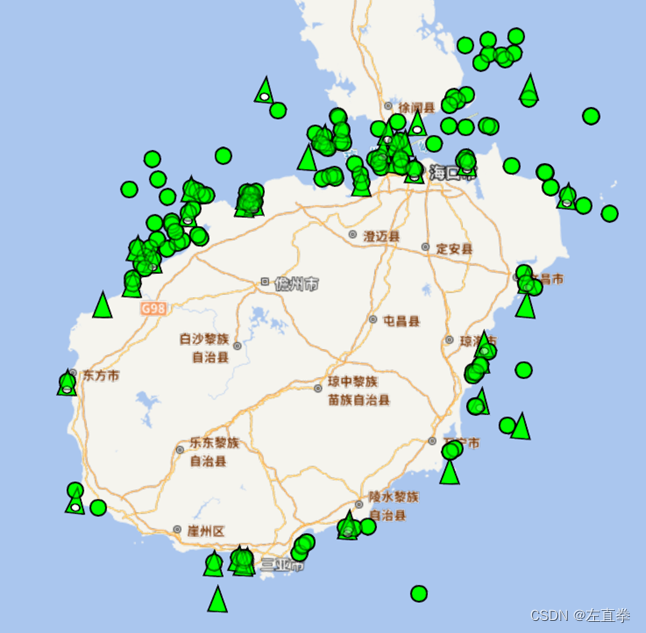
三、成果
这篇关于cesium按照参数绘制不同形状的船舶的文章就介绍到这儿,希望我们推荐的文章对编程师们有所帮助!


