本文主要是介绍Retrofit 注解参数详解,希望对大家解决编程问题提供一定的参考价值,需要的开发者们随着小编来一起学习吧!
添加依赖
implementation 'com.squareup.retrofit2:retrofit:2.9.0'
implementation 'com.squareup.retrofit2:converter-gson:2.9.0'
初始化Retrofit
val retrofit = Retrofit.Builder().baseUrl("http://api.github.com/").addConverterFactory(GsonConverterFactory.create()).build()GET
一个简单的get请求:http://api.github.com/News
@GET("News")Call<NewsBean> getItem();@Path
interface ApiService {@GET("users/{user}/repos")fun listRepos(@Path("user") user: String): Call<List<Repo>>
}
创建 ApiService 实例
val service: ApiService = retrofit.create(ApiService::class.java)
service.listRepos("zyj1609wz").execute()
请求url
https://api.github.com/users/zyj1609wz/repos抓包如下:

@Query
Query参数在URL问号之后
interface ApiService {@GET("users/{user}/repos")fun listRepos(@Path("user") user: String, @Query("sort") sort: String):Call<List<Repo>>
}
抓包如下:

@QueryMap
多个参数在URL问号之后,且个数不确定
interface ApiService {@GET("users/repos")fun listRepos(@QueryMap map: Map<String, String>): Call<List<Repo>>}
POST
@Body
body 传字符串
@POST("users/repos")fun listRepos(@Body name: String): Call<List<Repo> body 传对象, retrofit 会自动把对象解析成 json 字符串
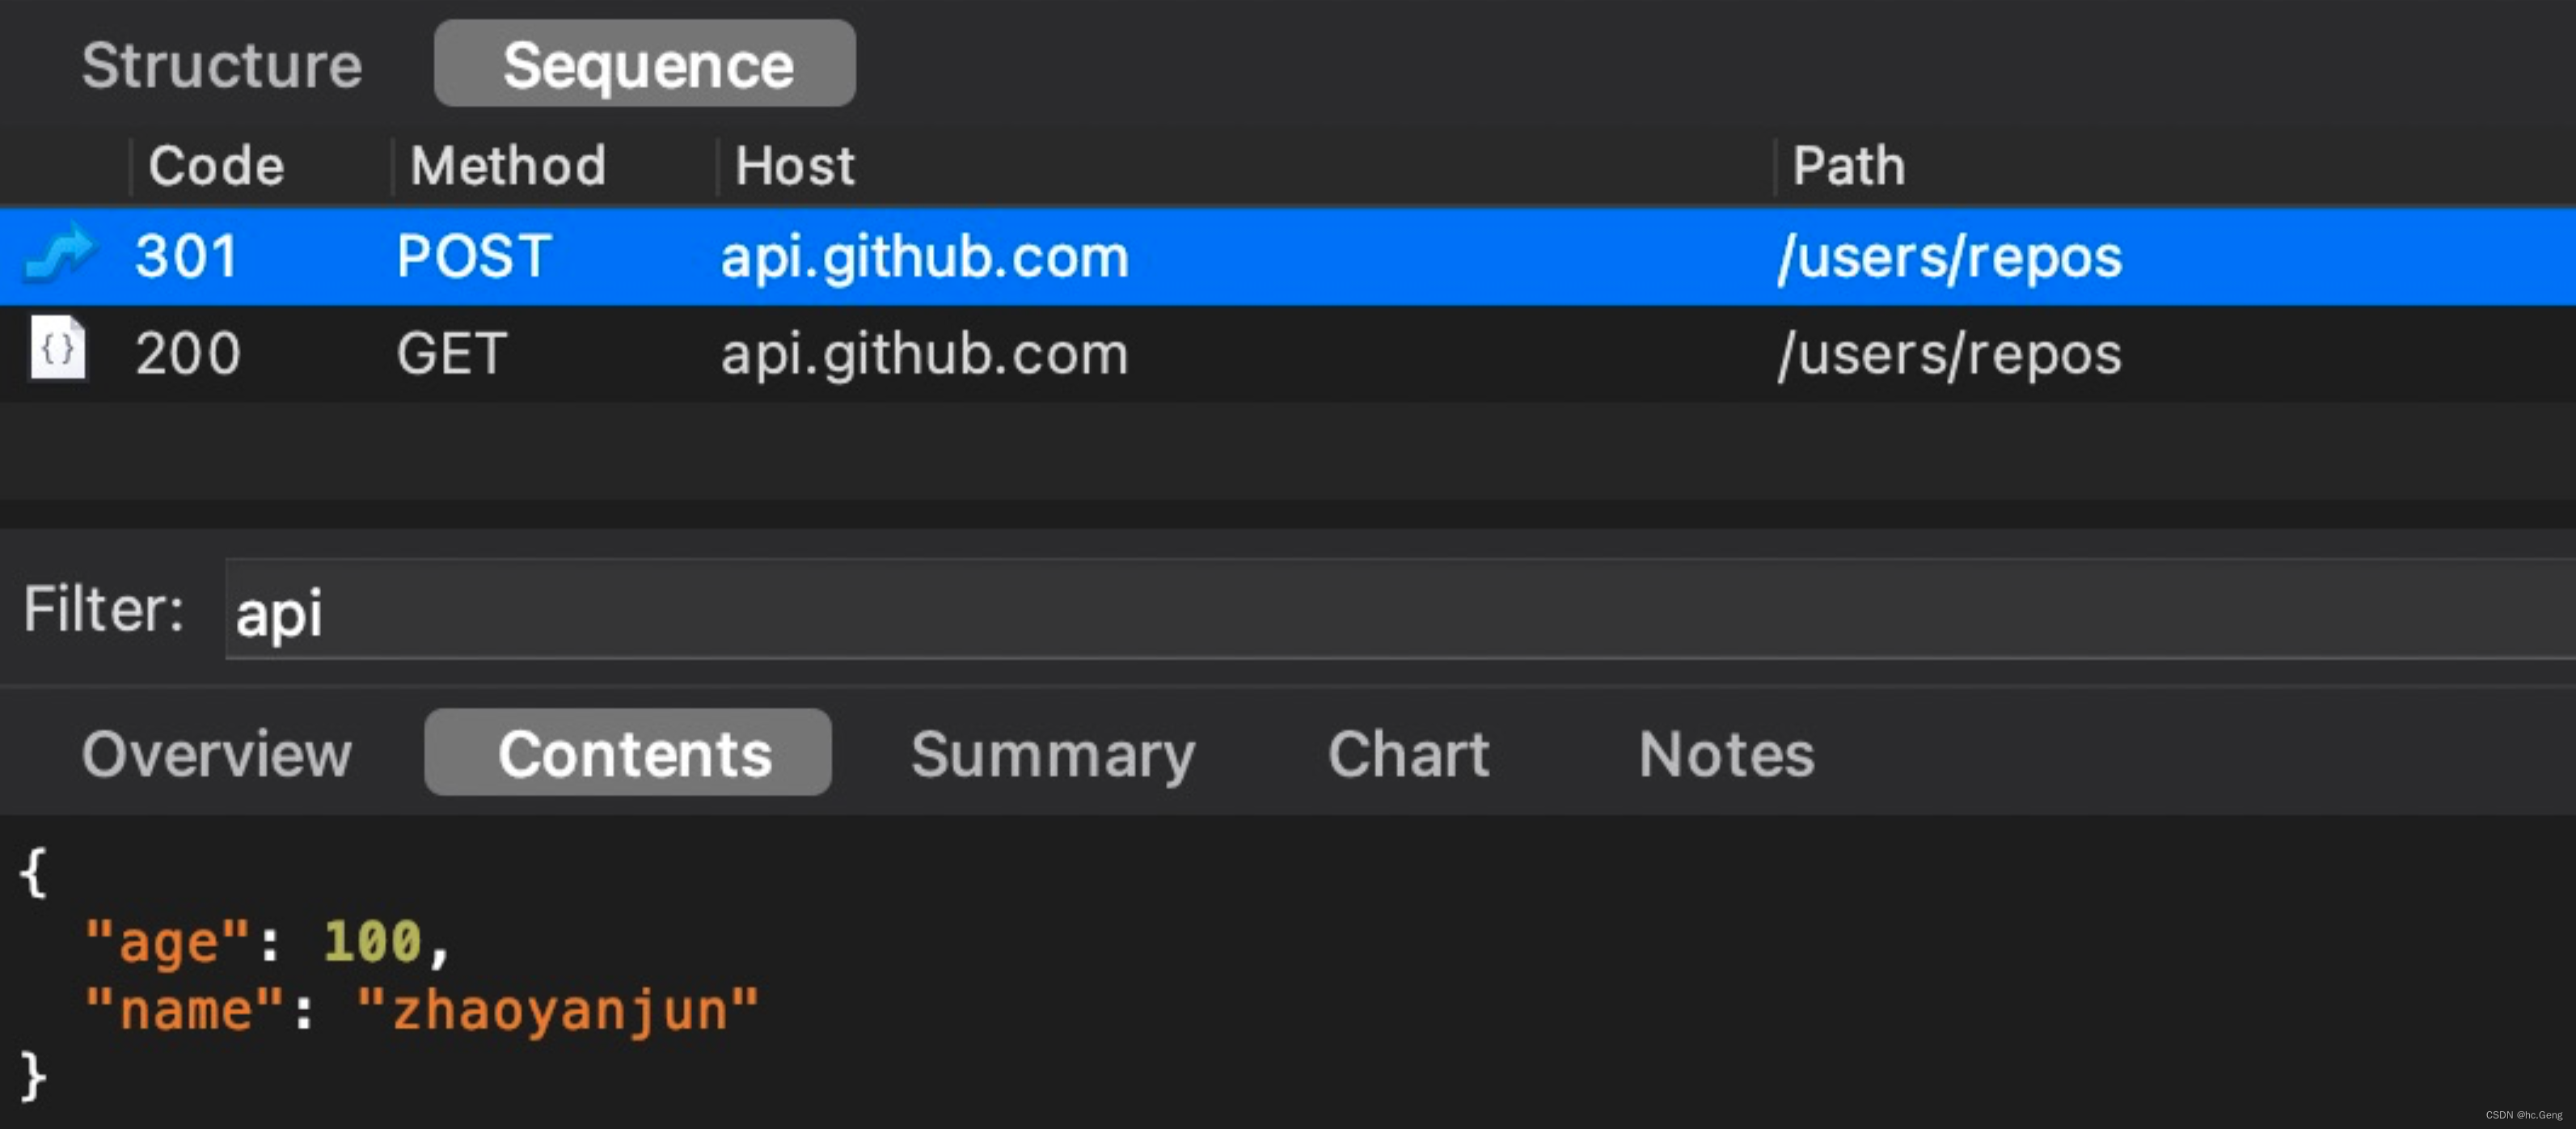
@POST("users/repos")
fun listRepos(@Body user: User): Call<List<Repo>>
抓包看结果
form表单1:@FormUrlEncoded 、@Field
Form 表单提交数据, 数据也是放在 body 里面,通常 Form 表单和 @Field 注解联合使用。
Content-Type:application/x-www-form-urlencoded
使用 form表单提交数据,首先要在接口方法上添加 @FormUrlEncoded 注解。参数使用 @Field 、 @FieldMap
@POST("users/repos")
@FormUrlEncoded
fun listRepos(@Field("name") name: String): Call<List<Repo>>
抓包来看结果:
body 数据如下:name=zhaoyanjun

多个 @Field 字段
@POST("users/repos")
@FormUrlEncoded
fun listRepos(@Field("name") name: String, @Field("age") age: Int): Call<List<Repo>>
抓包看结果:
body 数据格式如下:name=zhaoyanjun&age=20
多个参数除了用多个 @Field ,还可以用 @FieldMap
@POST("users/repos")
@FormUrlEncoded
fun listRepos(@FieldMap name: Map<String, String>): Call<List<Repo>>
form表单2:FormBody
出了上面的 @FormUrlEncoded 我们还可以使用 FormBody 的方式提交。
首先定义接口:
@POST("users/repos")
fun listRepos(@Body body: RequestBody): Call<List<Repo>>
构建 FormBody
val body = FormBody.Builder().add("name", "zhaoyanjun").add("age", "20").build()service.listRepos(body).execute()结果如下:
可以看到 Content-Type: application/x-www-form-urlencoded
body 参数是:name=zhaoyanjun&age=20
完美实现 form 表单提交数据。
@Multipart
其实无论什么库,只要是发送 Http 请求,都得遵守 Http 协议,所以熟悉协议内容对理解库原理、调试是有很大帮助的。
Http 上传协议为 MultiPart。下面是通过抓包获取的一次多文件+文本的上传消息,每行前面的行数是为了标注说明方便加上的,实际请求中没有。
上传单个文件
@POST("find")
@Multipart
fun listRepos(@Part part: MultipartBody.Part): Call<List<Repo>>
使用:
val file = File(externalCacheDir?.absolutePath + File.separator + "123.txt")
val requestFile = file.asRequestBody()
//创建 Part
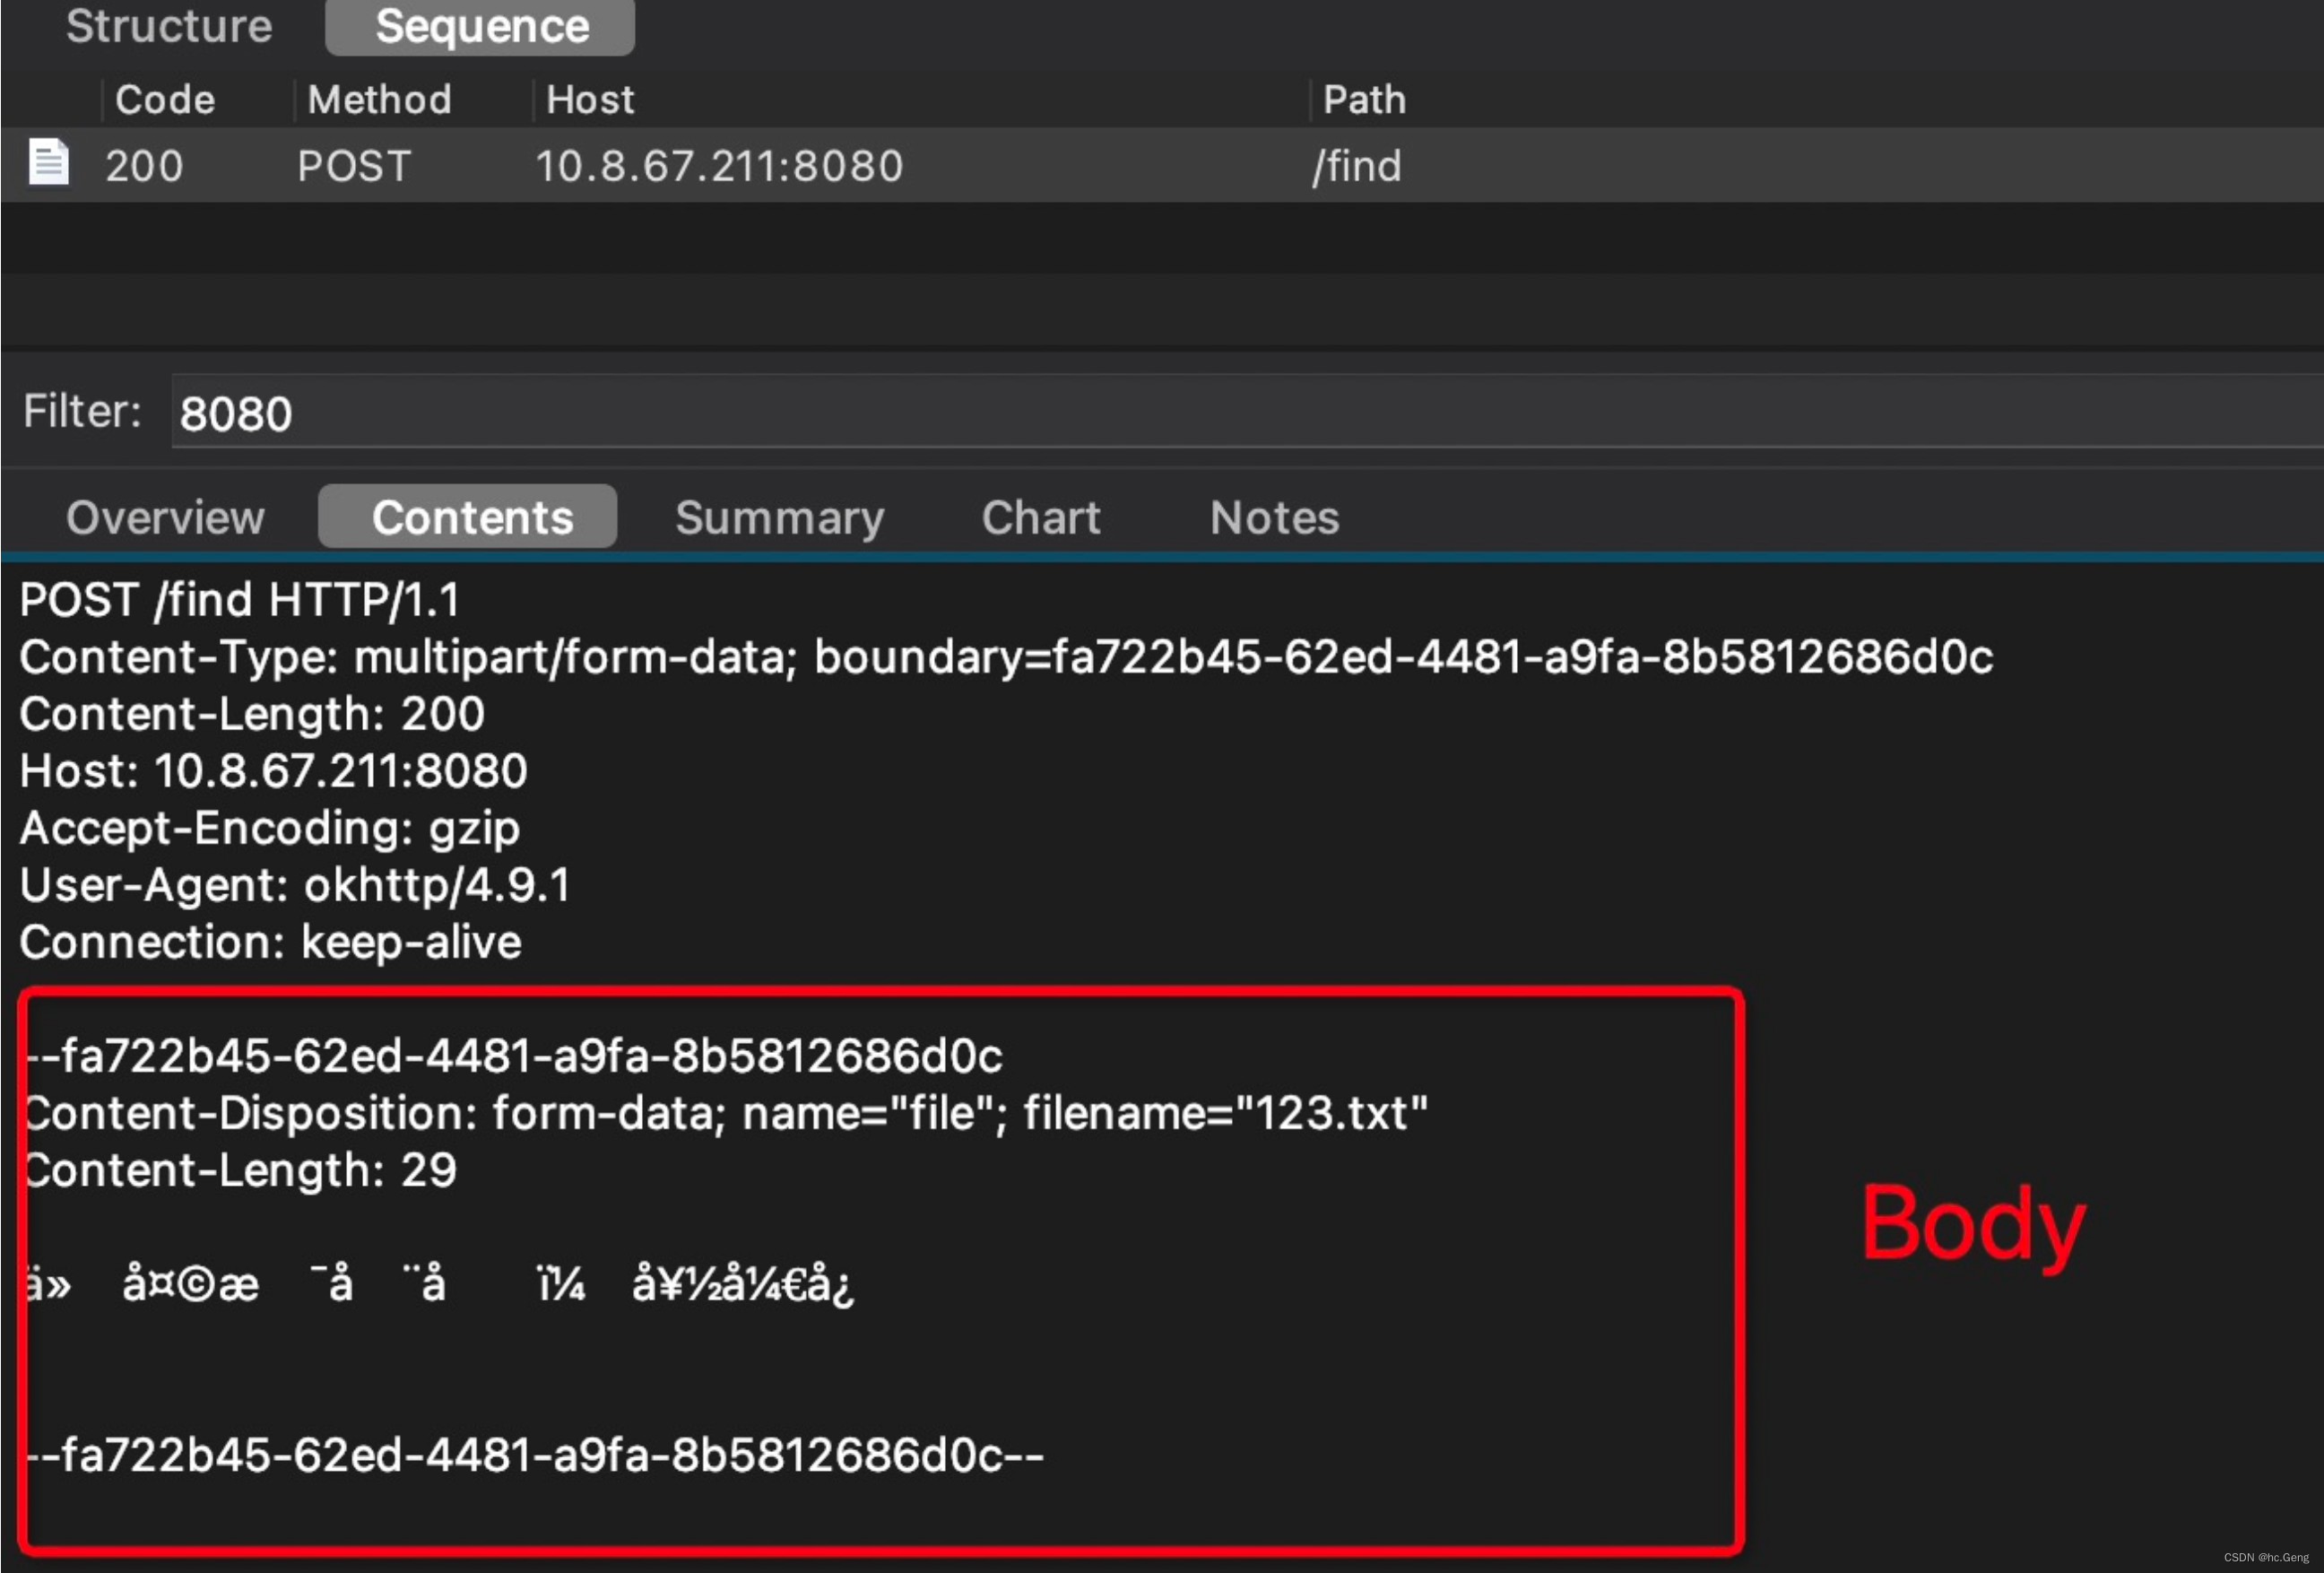
val filePart = MultipartBody.Part.createFormData("file", file.name, requestFile)//发起请求
service.listRepos(filePart).execute()抓包看结果:
Content-Type: multipart/form-data; boundary=fa722b45-62ed-4481-a9fa-8b5812686d0c
上传多个文件
【方式一】
第一种方式, 写多个 MultipartBody.Part ,比如:
@POST("find")
@Multipart
fun listRepos(@Part part: MultipartBody.Part, @Part part2: MultipartBody.Part): Call<List<Repo>>
使用:
//创建第一个 Part
val file = File(externalCacheDir?.absolutePath + File.separator + "123.txt")
val requestFile = file.asRequestBody()
val filePart = MultipartBody.Part.createFormData("file", file.name, requestFile)//创建第二个 Part
val file2 = File(externalCacheDir?.absolutePath + File.separator + "456.txt")
val requestFile2 = file2.asRequestBody()
val filePart2 = MultipartBody.Part.createFormData("file2", file2.name, requestFile2)//执行
service.listRepos(filePart, filePart2).execute()
抓包看结果:
上传多个文件【方式二】
@POST("find")
fun listRepos(@Body body: MultipartBody): Call<List<Repo>>
使用
//创建第一个 Part
val file = File(externalCacheDir?.absolutePath + File.separator + "123.txt")
val requestFile = file.asRequestBody()
val filePart = MultipartBody.Part.createFormData("file", file.name, requestFile)//创建第二个 Part
val file2 = File(externalCacheDir?.absolutePath + File.separator + "456.txt")
val requestFile2 = file2.asRequestBody()
val filePart2 = MultipartBody.Part.createFormData("file2", file2.name, requestFile2)//构建 body
val body = MultipartBody.Builder().setType(MultipartBody.FORM)// .addFormDataPart("file", file.name, requestFile)    .addPart(filePart)//  .addFormDataPart("file2", file2.name, requestFile2)           .addPart(filePart2).build()//发起请求
service.listRepos(body).execute()
复核参数
构建普通参数的 Part
val part = MultipartBody.Part.createFormData("age", "20")//或者
val body = MultipartBody.Builder().setType(MultipartBody.FORM).addFormDataPart("age", "20").build()
@Header
添加 Header 方式一
@POST("find")
fun listRepos(@Header("Accept-Encoding") encoding: String): Call<List<Repo>>
抓包看结果
添加多个 Header , 使用 @HeaderMap
@POST("find")
fun listRepos(@HeaderMap headers: Map<String, String>): Call<List<Repo>>
添加 Header 方式二
单个参数
@POST("find")
@Headers("token:zhaoyanjun")
fun listRepos(): Call<List<Repo>>
多个参数
@Headers("name:zhaoyanjun", "age:20")
@POST("find")
fun listRepos(): Call<List<Repo>>
添加 Header 方式三:拦截器
private val client = OkHttpClient.Builder().addInterceptor(HeaderInterceptor()).build()private val retrofit = Retrofit.Builder().baseUrl("http://10.8.67.211:8080").client(client).addConverterFactory(GsonConverterFactory.create()).build()class HeaderInterceptor : Interceptor {override fun intercept(chain: Interceptor.Chain): okhttp3.Response {val oldRequest = chain.request()val builder = oldRequest.newBuilder()builder.addHeader("name", "zhaoyanjun")builder.addHeader("age", "20")val request = builder.build()return chain.proceed(request)}
}
添加 Header 方式四:Request
val client = OkHttpClient.Builder().build()val request = Request.Builder().url("http://www..").addHeader("name", "zhaoyanjun").addHeader("age", "20").build()client.newCall(request).execute()
原文链接:https://blog.csdn.net/zhaoyanjun6/article/details/121000230
这篇关于Retrofit 注解参数详解的文章就介绍到这儿,希望我们推荐的文章对编程师们有所帮助!


