本文主要是介绍【运维知识大神篇】运维界的超神器Kubernetes教程14(RBAC三种认证方式详解:基于用户+基于用户组+基于服务账号),希望对大家解决编程问题提供一定的参考价值,需要的开发者们随着小编来一起学习吧!
本篇文章继续给大家介绍Kubernetes,内容依旧烧脑,不过内容也已经过了一大半了,如果你把我Kubernetes前面的教程都看懂了的话,那么你已经很厉害了,坚持下去!本篇文章主要介绍RBAC的三种认证方式,分别是基于用户、基于用户组、基于服务账号的三种认证。
目录
RBAC
一、RBAC之基于用户授权案例
二、RBAC之基于用户组授权
1、创建用户组案例展示
2、创建用户加入用户组案例展示
三、RBAC基于服务账号
1、应用场景
2、创建方式
3、授权容器中的Python程序对K8s API访问权限案例
4、基于服务账号授权案例
RBAC
一、RBAC之基于用户授权案例
1、使用K8s ca签发客户端证
可以使用这个证书管理工具
下载地址:Releases · cloudflare/cfssl · GitHub
选择cfssl、cfssl-certinfo、cfssljson,当然下载下来名字不叫这个,我做了更名处理
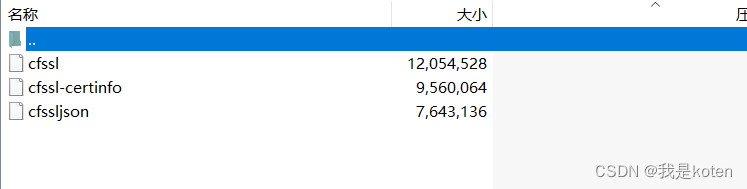
将命令下载到主机加入/usr/bin下,再给予执行权限
[root@Master231 ~]# chmod +x cfssl*
[root@Master231 ~]# mv cfssl* /usr/bin/
编写证书请求
cat > ca-config.json <<EOF
{"signing": {"default": {"expiry": "87600h"},"profiles": {"kubernetes": {"usages": ["signing","key encipherment","server auth","client auth"],"expiry": "87600h"}}}
}
EOFcat > koten-csr.json <<EOF
{"CN": "koten","hosts": [],"key": {"algo": "rsa","size": 2048},"names": [{"C": "CN","ST": "BeiJing","L": "BeiJing","O": "k8s","OU": "System"}]
}
EOF[root@Master231 user]# ls
ca-config.json  koten-csr.json
根据json配置文件生成证书
[root@Master231 user]# cfssl gencert -ca=/etc/kubernetes/pki/ca.crt -ca-key=/etc/kubernetes/pki/ca.key -config=ca-config.json -profile=kubernetes koten-csr.json | cfssljson -bare koten#生成后可以用这个命令查看证书详细信息
[root@Master231 user]# cfssl-certinfo -cert koten.pem
2、生成kubeconfig授权文件
编写生成kubeconfig文件的脚本
cat > kubeconfig.sh <<'EOF'
# 配置集群
# --certificate-authority
#   指定K8s的ca根证书文件路径
# --embed-certs
#   如果设置为true,表示将根证书文件的内容写入到配置文件中
#   如果设置为false,则只是引用配置文件,后续使用配置文件会去找证书,不利于在别的主机使用
# --server
#   指定APIServer的地址。
# --kubeconfig
#   指定kubeconfig的配置文件名称
kubectl config set-cluster koten-linux \--certificate-authority=/etc/kubernetes/pki/ca.crt \--embed-certs=true \--server=https://10.0.0.231:6443 \--kubeconfig=koten-linux.kubeconfig# 设置客户端认证
kubectl config set-credentials koten \--client-key=koten-key.pem \--client-certificate=koten.pem \--embed-certs=true \--kubeconfig=koten-linux.kubeconfig# 设置默认上下文
kubectl config set-context linux \--cluster=koten-linux \--user=koten \--kubeconfig=koten-linux.kubeconfig# 设置当前使用的上下文
kubectl config use-context linux --kubeconfig=koten-linux.kubeconfig
EOF
生成kubeconfig文件
[root@Master231 user]# bash kubeconfig.sh
Cluster "koten-linux" set.
User "koten" set.
Context "linux" created.
Switched to context "linux".
3、创建RBAC授权策略
不会写可以手动创建一个-o yaml看它生成的yaml文件,或者去官网搜相关字样,不知道怎么看它所在的apiVersion可以通过下面命令查看
[root@Master231 storageclasses]# kubectl api-resources
创建rbac等配置文件
[root@Master231 user]# cat rbac.yaml
kind: Role    # 定义权限
apiVersion: rbac.authorization.k8s.io/v1
metadata:namespace: defaultname: linux-role-reader
rules:# API组,""表示核心组,该组包括但不限于"configmaps","nodes","pods","services"等资源.# 暂时这样理解:#    如果一个资源是apps/v1,则其组取"/"之前的,也就是apps.#    如果一个资源是v1,则默认为"/"。# 如果遇到不知道所述哪个组的也别着急,他会有报错提示,如下所示:#    User "koten" cannot list resource "deployments" in API group "apps" in the namespace "default"# 如上所示,表示的是"deployments"的核心组是"apps"。
- apiGroups: ["","apps"]  # 资源类型,不支持写简称,必须写全称哟!!# resources: ["pods","deployments"]  resources: ["pods","deployments","services"]  # 对资源的操作方法.# verbs: ["get", "list"]  verbs: ["get", "list","delete"]
- apiGroups: ["","apps"]resources: ["configmaps","secrets","daemonsets"]verbs: ["get", "list"]
- apiGroups: [""]        # 该规则可以解读为核心组的secrets资源有delete权限,其他规则依次类推resources: ["secrets"]verbs: ["delete"]  ---kind: RoleBinding    # 将权限绑定给用户
apiVersion: rbac.authorization.k8s.io/v1
metadata:name: koten-linux-resources-readernamespace: default
subjects:# 主体类型
- kind: User  # 用户名name: koten  apiGroup: rbac.authorization.k8s.io
roleRef:# 角色类型kind: Role  # 绑定角色名称name: linux-role-readerapiGroup: rbac.authorization.k8s.io
应用rbac授权
[root@Master231 user]# kubectl apply -f rbac.yaml
访问测试,发现有查看删除的Pod的权限和查看deploy,ds,svc,cm的权限,不想指定可以将该配置文件放在家目录下的隐藏目录.kube下的config文件
[root@Master231 user]# kubectl get pods --kubeconfig=koten-linux.kubeconfig
NAME        READY   STATUS    RESTARTS   AGE
linux-web   1/1     Running   0          8s
[root@Master231 user]# kubectl delete pods --all --kubeconfig=koten-linux.kubeconfig
pod "linux-web" deleted
[root@Master231 user]# kubectl get deploy,ds,svc,cm --kubeconfig=koten-linux.kubeconfig
NAME                 TYPE        CLUSTER-IP   EXTERNAL-IP   PORT(S)   AGE
service/kubernetes   ClusterIP   10.200.0.1   <none>        443/TCP   2m40sNAME                         DATA   AGE
configmap/kube-root-ca.crt   1      10d
configmap/nginx.conf         1      4d20h
二、RBAC之基于用户组授权
用户组的好处是无需单独为某个用户创建权限,统一为这个组名进行授权,所有的用户都以组的身份访问资源。
1、创建用户组案例展示
需求说明: 为koten用户组统一授权
将certs.sh文件中的"koten-crs.json"下的O字段改成dev,并重新生成证书和kubeconfig文件;
将dev用户组绑定Role(pod-reader);
经测试,只要O字段都是dev,对于'CN'字段可以是任意用户,这些用户持有的kubeconfig文件都拥有相同的权限。
资源清单示例
apiVersion: rbac.authorization.k8s.io/v1
kind: RoleBinding
metadata:name: read-podsnamespace: default
subjects:
- kind: Groupname: kotenapiGroup: rbac.authorization.k8s.io
roleRef:kind: Rolename: pod-readerapiGroup: rbac.authorization.k8s.io
温馨提示
1、APIserver会优先校验用户名(CN字段),若用户名没有对应的权限,则再去校验用户组(O)的权限。
CN标识的是用户名称,比如"linux"。
O标识的是用户组,比如"dev"组。
2、用户,用户组都是提取证书中的一个字段,不是在集群中创建的。
1、使用K8s ca签发客户端证书
编写证书请求
cat > ca-config.json <<EOF
{"signing": {"default": {"expiry": "87600h"},"profiles": {"kubernetes": {"usages": ["signing","key encipherment","server auth","client auth"],"expiry": "87600h"}}}
}
EOFcat > koten-csr.json <<EOF
{"CN": "linux","hosts": [],"key": {"algo": "rsa","size": 2048},"names": [{"C": "CN","ST": "BeiJing","L": "BeiJing","O": "koten","OU": "System"}]
}
EOF
生成证书
[root@Master231 group]# cfssl gencert -ca=/etc/kubernetes/pki/ca.crt -ca-key=/etc/kubernetes/pki/ca.key -config=ca-config.json -profile=kubernetes koten-csr.json | cfssljson -bare koten-groups
2、生成kubeconfig授权文件
编写生成kubeconfig文件的脚本
cat > kubeconfig.sh <<'EOF'
kubectl config set-cluster koten-linux-groups \--certificate-authority=/etc/kubernetes/pki/ca.crt \--embed-certs=false \--server=https://10.0.0.231:6443 \--kubeconfig=koten-linux.kubeconfig# 设置客户端认证
kubectl config set-credentials koten \--client-key=koten-groups-key.pem \--client-certificate=koten-groups.pem \--embed-certs=false \--kubeconfig=koten-linux.kubeconfig# 设置默认上下文
kubectl config set-context linux-groups \--cluster=koten-linux-groups \--user=koten \--kubeconfig=koten-linux.kubeconfig# 设置当前使用的上下文
kubectl config use-context linux-groups --kubeconfig=koten-linux.kubeconfig
EOF
生成kubeconfig文件
[root@Master231 group]# bash kubeconfig.sh
Cluster "koten-linux-groups" set.
User "koten" set.
Context "linux-groups" created.
Switched to context "linux-groups".
3、创建RBAC授权策略并运行授权
[root@Master231 group]# cat rbac.yaml
kind: Role
apiVersion: rbac.authorization.k8s.io/v1
metadata:namespace: defaultname: linux-role-reader
rules:# API组,""表示核心组,该组包括但不限于"configmaps","nodes","pods","services"等资源.# 想要知道哪个资源使用在哪个组,我们只需要根据"kubectl api-resources"命令等输出结果就可以轻松判断哟~# API组,""表示核心组。
- apiGroups: ["","apps"]  # 资源类型,不支持写简称,必须写全称哟!!resources: ["pods","nodes","services","deployments"]  # 对资源的操作方法.verbs: ["get", "watch", "list"]  ---kind: RoleBinding
apiVersion: rbac.authorization.k8s.io/v1
metadata:name: koten-to-linux-role-readernamespace: default
subjects:# 主体类型
- kind: Group# 用户名name: koten  apiGroup: rbac.authorization.k8s.io
roleRef:# 角色类型kind: Role  # 绑定角色名称name: linux-role-readerapiGroup: rbac.authorization.k8s.io[root@Master231 group]# kubectl apply -f rbac.yaml
4、验证权限
[root@Master231 group]# kubectl get pods --kubeconfig=koten-linux.kubeconfig
NAME        READY   STATUS    RESTARTS   AGE
linux-web   1/1     Running   0          37s
[root@Master231 group]# kubectl delete pods --all --kubeconfig=koten-linux.kubeconfig
Error from server (Forbidden): pods "linux-web" is forbidden: User "linux" cannot delete resource "pods" in API group "" in the namespace "default"
# 这个错误提示是因为用户 "linux" 没有在 "default" 命名空间中删除 "pods" 资源的权限。
2、创建用户加入用户组案例展示
创建一个kotenuser用户,将其加入koten组,并验证权限,全程只需要修改json文件的用户即可
1、使用K8s ca签发客户端证书
编写证书请求
cat > ca-config.json <<EOF
{"signing": {"default": {"expiry": "87600h"},"profiles": {"kubernetes": {"usages": ["signing","key encipherment","server auth","client auth"],"expiry": "87600h"}}}
}
EOFcat > koten-csr.json <<EOF
{"CN": "kotenuser","hosts": [],"key": {"algo": "rsa","size": 2048},"names": [{"C": "CN","ST": "BeiJing","L": "BeiJing","O": "koten","OU": "System"}]
}
EOF[root@Master231 kotenuser]# ls
ca-config.json  koten-csr.json
生成证书
cfssl gencert -ca=/etc/kubernetes/pki/ca.crt -ca-key=/etc/kubernetes/pki/ca.key -config=ca-config.json -profile=kubernetes koten-csr.json | cfssljson -bare koten-groups2、生成kubeconfig授权文件
编写生成kubeconfig文件的脚本
cat > kubeconfig.sh <<'EOF'
kubectl config set-cluster koten-linux-groups \--certificate-authority=/etc/kubernetes/pki/ca.crt \--embed-certs=true \--server=https://10.0.0.231:6443 \--kubeconfig=koten-linux.kubeconfig# 设置客户端认证
kubectl config set-credentials koten \--client-key=koten-groups-key.pem \--client-certificate=koten-groups.pem \--embed-certs=true \--kubeconfig=koten-linux.kubeconfig# 设置默认上下文
kubectl config set-context linux-groups \--cluster=koten-linux-groups \--user=koten \--kubeconfig=koten-linux.kubeconfig# 设置当前使用的上下文
kubectl config use-context linux-groups --kubeconfig=koten-linux.kubeconfig
EOF
生成kubeconfig文件
[root@Master231 kotenuser]# bash kubeconfig.sh
Cluster "koten-linux-groups" set.
User "koten" set.
Context "linux-groups" created.
Switched to context "linux-groups".
3、直接验证,无需给kotenuser授权,因为其加入了koten组,该组是有权限的!
[root@Master231 kotenuser]# kubectl get pods --kubeconfig=koten-linux.kubeconfig
NAME        READY   STATUS    RESTARTS   AGE
linux-web   1/1     Running   0          10m[root@Master231 kotenuser]# kubectl delete pods linux-web --kubeconfig=koten-linux.kubeconfig
Error from server (Forbidden): pods "linux-web" is forbidden: User "kotenuser" cannot delete resource "pods" in API group "" in the namespace "default# 提示用户kotenuser没有删除default名称空间下linux-web的权限
三、RBAC基于服务账号
RBAC(Role-Based Access Control)基于服务账号是 Kubernetes 群集中一种常用的授权方式。在 Kubernetes 中,服务账号是一种用于身份验证和授权的对象,类似于 Service Account。服务账号能够为 Pod 提供身份验证和授权,以便 Pod 可以访问其需要的 Kubernetes API 资源。
1、应用场景
1、保护敏感数据:通过为访问敏感数据的 Pod 分配不同的服务账号和角色,可以实现细粒度的访问控制,以保护敏感数据不被未经授权的 Pod 访问。
2、实现多租户架构:通过为不同租户的 Pod 分配不同的服务账号和角色,可以实现多租户架构,使不同租户的 Pod 只能访问属于自己的 Kubernetes API 资源。
3、简化管理:通过为不同的应用程序分配不同的服务账号和角色,可以简化管理操作,使管理员只需要管理少量的角色和服务账号,而不需要为每个 Pod 分配具体的访问权限。
4、提高安全性:通过基于服务账号的 RBAC 授权,可以提高 Kubernetes 群集的安全性,避免未经授权的访问和操作,保护 Kubernetes 群集和应用程序的安全。
2、创建方式
Service Account一般用于程序的用户名
响应式创建
[root@Master231 kotenuser]# kubectl create serviceaccount koten-linux
serviceaccount/koten-linux created
[root@Master231 kotenuser]# kubectl get sa
NAME          SECRETS   AGE
default       1         10d
koten-linux   1         20s
[root@Master231 kotenuser]# kubectl delete sa koten-linux
serviceaccount "koten-linux" deleted
[root@Master231 kotenuser]# kubectl get sa
NAME      SECRETS   AGE
default   1         10d
声明式创建
[root@Master231 serviceaccounts]# cat 01-sa.yaml
apiVersion: v1
kind: ServiceAccount
metadata:name: koten-linuxnamespace: default
[root@Master231 serviceaccounts]# kubectl apply -f 01-sa.yaml
serviceaccount/koten-linux created
[root@Master231 serviceaccounts]# kubectl get sa
NAME          SECRETS   AGE
default       1         10d
koten-linux   1         5s
3、授权容器中的Python程序对K8s API访问权限案例
授权容器中的Python程序对K8s API访问权限步骤
1、创建Role
2、创建ServiceAccount
3、将ServiceAccount于Role绑定
4、为Pod指定自定义的ServiceAccount
5、进入容器执行Python程序测试操作K8s API权限
4、基于服务账号授权案例
[root@Master231 serviceaccounts]# cat 01-sa-rbac.yaml
apiVersion: v1
kind: ServiceAccount
metadata:name: koten-python
---
apiVersion: rbac.authorization.k8s.io/v1
kind: Role
metadata:name: koten-pod-reader
rules:
- apiGroups: [""]resources: ["pods"]verbs: ["get", "watch", "list"]
#- apiGroups: ["apps"]
#  resources: ["deployments"]
#  verbs: ["get", "watch", "list"]---
kind: RoleBinding
apiVersion: rbac.authorization.k8s.io/v1
metadata:name: koten-sa-to-role
subjects:
- kind: ServiceAccount name: koten-python
roleRef:kind: Rolename: koten-pod-readerapiGroup: rbac.authorization.k8s.io---apiVersion: apps/v1
kind: Deployment
metadata:name: koten-python3-sa
spec:replicas: 2selector:matchExpressions:- key: appsvalues: - "python"operator: Intemplate:metadata:labels:apps: pythonspec:# 指定sa的名称,请确认该账号是有权限访问K8S集群的哟!serviceAccountName: koten-pythoncontainers:- image: harbor.koten.com/koten-tools/python:3.9.16-alpine3.16name: c1command:- tail - -f- /etc/hosts[root@Master231 serviceaccounts]# kubectl apply -f 01-sa-rbac.yaml
serviceaccount/koten-python created
role.rbac.authorization.k8s.io/koten-pod-reader created
rolebinding.rbac.authorization.k8s.io/koten-sa-to-role created
deployment.apps/koten-python3-sa created
编写Python程序,进入Python Pod所在容器执行以下Python代码即可
[root@Master231 serviceaccounts]# kubectl get pods
NAME                                READY   STATUS    RESTARTS   AGE
koten-python3-sa-7678bc45d4-gqpbq   1/1     Running   0          36s
koten-python3-sa-7678bc45d4-nk9xc   1/1     Running   0          36s
[root@Master231 serviceaccounts]# kubectl exec -it koten-python3-sa-7678bc45d4-gqpbq -- sh
/ # pip install kubernetes -i https://pypi.tuna.tsinghua.edu.cn/si    #安装python程序依赖的软件包并测试
mple/
/ # cat > view-k8s.py <<'EOF'
from kubernetes import client, configwith open('/var/run/secrets/kubernetes.io/serviceaccount/token') as f:token = f.read()configuration = client.Configuration()
configuration.host = "https://kubernetes"  # APISERVER地址
configuration.ssl_ca_cert="/var/run/secrets/kubernetes.io/serviceaccount/ca.crt"  # CA证书
configuration.verify_ssl = True   # 启用证书验证
configuration.api_key = {"authorization": "Bearer " + token}  # 指定Token字符串
client.Configuration.set_default(configuration)
apps_api = client.AppsV1Api()
core_api = client.CoreV1Api()
try:print("###### Deployment列表 ######")# 列出default命名空间所有deployment名称for dp in apps_api.list_namespaced_deployment("default").items:print(dp.metadata.name)
except:print("没有权限访问Deployment资源!")try:# 列出default命名空间所有pod名称print("###### Pod列表 ######")for po in core_api.list_namespaced_pod("default").items:print(po.metadata.name)
except:print("没有权限访问Pod资源!")
EOF
###### Deployment列表 ######
没有权限访问Deployment资源!
###### Pod列表 ######
koten-python3-sa-7678bc45d4-gqpbq
koten-python3-sa-7678bc45d4-nk9xc
/ #
[root@Master231 serviceaccounts]#
我是koten,10年运维经验,持续分享运维干货,感谢大家的阅读和关注!
这篇关于【运维知识大神篇】运维界的超神器Kubernetes教程14(RBAC三种认证方式详解:基于用户+基于用户组+基于服务账号)的文章就介绍到这儿,希望我们推荐的文章对编程师们有所帮助!


