本文主要是介绍spring集成redis(ehcache缓存改成redis),希望对大家解决编程问题提供一定的参考价值,需要的开发者们随着小编来一起学习吧!
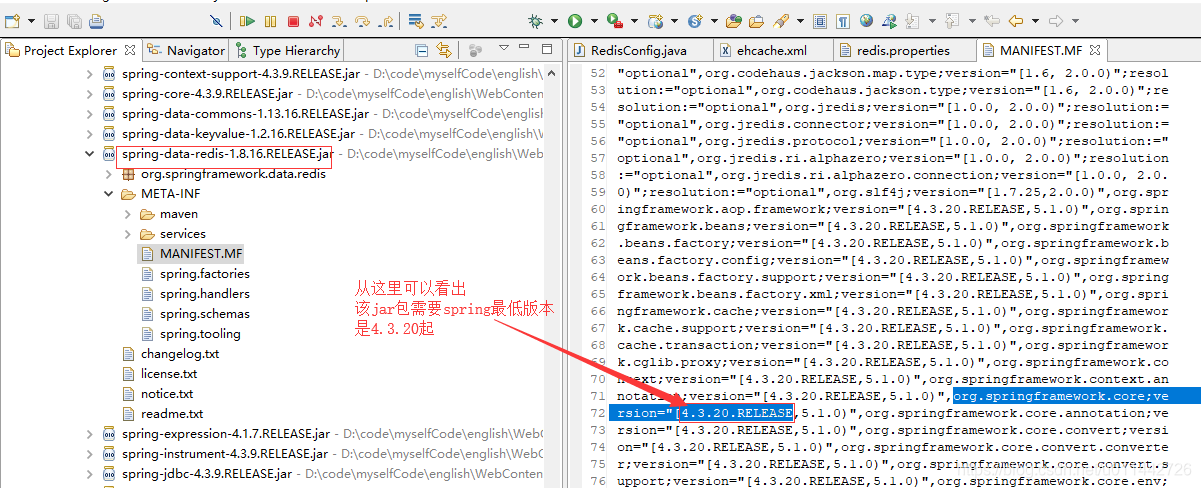
1.先准备要需要的四个和redis相关的jar包
commons-pool2-2.4.2.jar、jedis-2.9.0.jar、spring-data-redis-1.8.16.RELEASE.jar、spring-data-commons-1.13.16.RELEASE.jar
把这个三个jar引进项目里
2.增加一个redis.propertes
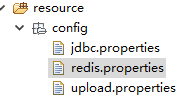
#redis的服务器地址
redis.host=127.0.0.1
#redis的服务端口
redis.port=6379
#密码
redis.password=
#客户端超时时间单位是毫秒
redis.timeout=100000 #最大建立连接等待时间
redis.maxWaitMillis=1000
#指明是否在从池中取出连接前进行检验,如果检验失败,则从池中去除连接并尝试取出另一个
redis.testOnBorrow=true ###################序列号客户端   db0##################################
#最大连接数
redis.maxTotal_db0=100
#最大空闲数
redis.maxIdle_db0=10
#最小空闲数
redis.minIdle_db0=2 ###################session db2###################################最大连接数
redis.maxTotal_db2=100
#最大空闲数
redis.maxIdle_db2=20
#最小空闲数
redis.minIdle_db2=5
3.把spring-cache.xml配置更改
先注释以前的ehcache方式
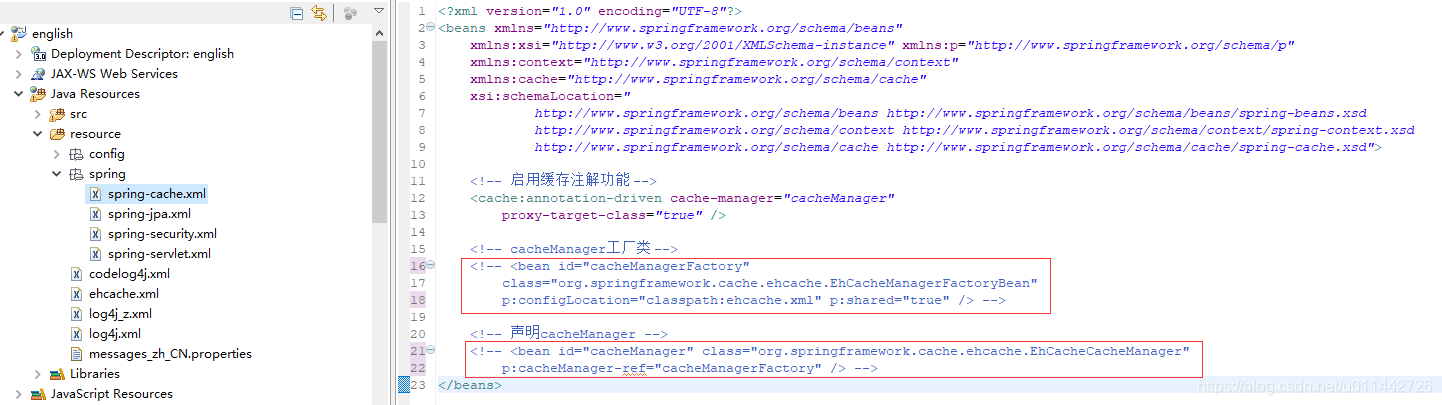
然后改用redis
<?xml version="1.0" encoding="UTF-8"?>
<beans xmlns="http://www.springframework.org/schema/beans"xmlns:xsi="http://www.w3.org/2001/XMLSchema-instance" xmlns:p="http://www.springframework.org/schema/p"xmlns:context="http://www.springframework.org/schema/context"xmlns:cache="http://www.springframework.org/schema/cache"xsi:schemaLocation="http://www.springframework.org/schema/beans http://www.springframework.org/schema/beans/spring-beans.xsdhttp://www.springframework.org/schema/context http://www.springframework.org/schema/context/spring-context.xsdhttp://www.springframework.org/schema/cache http://www.springframework.org/schema/cache/spring-cache.xsd"><!-- 启用缓存注解功能 --><cache:annotation-driven cache-manager="cacheManager"proxy-target-class="true" /><!-- cacheManager工厂类 --><!-- <bean id="cacheManagerFactory"class="org.springframework.cache.ehcache.EhCacheManagerFactoryBean"p:configLocation="classpath:ehcache.xml" p:shared="true" /> --><!-- 声明cacheManager --><!-- <bean id="cacheManager" class="org.springframework.cache.ehcache.EhCacheCacheManager"p:cacheManager-ref="cacheManagerFactory" /> --><!-- spring自己的缓存管理器,这里定义了缓存位置名称 ,即注解中的value --><bean id="cacheManager" class="org.springframework.cache.support.SimpleCacheManager"><property name="caches"><set><!-- 登陆用户访问权限 --><bean class="org.springframework.data.redis.cache.RedisCache"><constructor-arg name="redisOperations" ref="redisTemplate_db2"/><constructor-arg name="name" value="accessDecisionCache"></constructor-arg><!--这是通用的前缀--><constructor-arg name="prefix" value="accessDecisionCache"></constructor-arg><!--这里的单位是秒--><constructor-arg name="expiration" value="7200"></constructor-arg></bean><!-- 动态表单 --><!-- <bean class="org.springframework.data.redis.cache.RedisCache"><constructor-arg name="redisOperations" ref="redisTemplate_db2"/><constructor-arg name="name" value="customFormCache"></constructor-arg>这是通用的前缀<constructor-arg name="prefix" value="customFormCache"></constructor-arg>这里的单位是秒<constructor-arg name="expiration" value="7200"></constructor-arg></bean> --></set></property></bean>
</beans>特别注意:需要把ehcahe.xml里面的缓存信息改写到spring-cache.xml,如上图所示
4.加多一个redis包

里面添加一个config配置文件
package com.hecheng.redis.config;import org.springframework.beans.factory.annotation.Value;
import org.springframework.context.annotation.Bean;
import org.springframework.context.annotation.ComponentScan;
import org.springframework.context.annotation.Configuration;
import org.springframework.context.annotation.PropertySource;
import org.springframework.data.redis.connection.RedisConnectionFactory;
import org.springframework.data.redis.connection.jedis.JedisConnectionFactory;
import org.springframework.data.redis.core.RedisTemplate;
import org.springframework.data.redis.repository.configuration.EnableRedisRepositories;
import org.springframework.data.redis.serializer.Jackson2JsonRedisSerializer;
import org.springframework.data.redis.serializer.StringRedisSerializer;import redis.clients.jedis.JedisPoolConfig;import com.hecheng.core.model.EnumDictable;
import com.hecheng.redis.config.RedisConfig;@Configuration
@ComponentScan("com.hecheng.redis")
@PropertySource("classpath:config/redis.properties")
@EnableRedisRepositories("com.hecheng.redis")
public class RedisConfig {@Value("${redis.host}")private String host;@Value("${redis.port}")private int port;@Value("${redis.password}")private String password;@Value("${redis.timeout}")private String timeout;@Value("${redis.maxWaitMillis}")private int maxWaitMillis;@Value("${redis.testOnBorrow}")private boolean testOnBorrow;/*** 序列号客户端   db0*/@Value("${redis.maxTotal_db0}")private int maxTotal_db0;@Value("${redis.maxIdle_db0}")private int maxIdle_db0;@Value("${redis.minIdle_db0}")private int minIdle_db0;/*** ERPCACHE db2*/@Value("${redis.maxTotal_db2}")private int maxTotal_db2;@Value("${redis.maxIdle_db2}")private int maxIdle_db2;@Value("${redis.minIdle_db2}")private int minIdle_db2;public enum DatabaseEnum implements EnumDictable {序列号(0),ERPCACHE(2);private Integer value;DatabaseEnum(Integer value) {this.value = value;}public Integer getValue() {return this.value;}public String getLabel() {return this.name();}}/*********************************** 序列号客户端   db0  **********************************************//*** 序列号客户端   db0  默认* @return*/@BeanJedisConnectionFactory jedisConnectionFactory_db0() {// 创建连接池JedisPoolConfig poolConfig = new JedisPoolConfig();// 最大连接数poolConfig.setMaxTotal(maxTotal_db0);// 连接池中的最大空闲连接poolConfig.setMaxIdle(maxIdle_db0);// 连接池中的最小空闲连接poolConfig.setMinIdle(minIdle_db0);// 最大建立连接等待时间poolConfig.setMaxWaitMillis(maxWaitMillis);// #指明是否在从池中取出连接前进行检验,如果检验失败,则从池中去除连接并尝试取出另一个poolConfig.setTestOnBorrow(testOnBorrow);JedisConnectionFactory factory = new JedisConnectionFactory();factory.setHostName(host);factory.setPort(port);factory.setPassword(password);factory.setPoolConfig(poolConfig);factory.setDatabase(RedisConfig.DatabaseEnum.序列号.getValue());factory.setUsePool(true);return factory;}/*** 序列号客户端   db0 默认客户端* @return*/@BeanRedisTemplate<Object, Object> redisTemplate() {RedisTemplate<Object, Object> template = new RedisTemplate<Object,Object>();template.setConnectionFactory(jedisConnectionFactory_db0());template.setKeySerializer(new Jackson2JsonRedisSerializer<Object>(Object.class));template.setHashKeySerializer(new Jackson2JsonRedisSerializer<Object>(Object.class));template.setHashValueSerializer(new Jackson2JsonRedisSerializer<Object>(Object.class));template.setValueSerializer(new Jackson2JsonRedisSerializer<Object>(Object.class));return template;}/*********************************** ERPCACHE db2 **********************************************//*** ERPCACHE db2* @return*/@Bean(name="jedisConnectionFactory_db2")RedisConnectionFactory jedisConnectionFactory_db2() {JedisPoolConfig poolConfig = new JedisPoolConfig();// 最大连接数poolConfig.setMaxTotal(maxTotal_db2);// 连接池中的最大空闲连接poolConfig.setMaxIdle(maxIdle_db2);// 连接池中的最小空闲连接poolConfig.setMinIdle(minIdle_db2);// 最大建立连接等待时间poolConfig.setMaxWaitMillis(maxWaitMillis);// #指明是否在从池中取出连接前进行检验,如果检验失败,则从池中去除连接并尝试取出另一个poolConfig.setTestOnBorrow(testOnBorrow);JedisConnectionFactory factory = new JedisConnectionFactory();factory.setHostName(host);factory.setPort(port);factory.setPassword(password);factory.setPoolConfig(poolConfig);factory.setDatabase(RedisConfig.DatabaseEnum.ERPCACHE.getValue());factory.setUsePool(true);return factory;}/*** ERPCACHE 默认客户端* @return*/@BeanRedisTemplate<String,Object> redisTemplate_db2() {RedisTemplate<String, Object> template = new RedisTemplate<String,Object>();template.setConnectionFactory(jedisConnectionFactory_db2());template.setKeySerializer(new StringRedisSerializer());return template;}
}
5.重启一下项目,见证奇迹的时候来了
6.注意一下,redis本身是有16个库的,所以才有最开始时候的db0,db1等不同库的配置信息

最后来一个小提醒
这篇关于spring集成redis(ehcache缓存改成redis)的文章就介绍到这儿,希望我们推荐的文章对编程师们有所帮助!


