本文主要是介绍Unity DOTS技术(六)World详解,希望对大家解决编程问题提供一定的参考价值,需要的开发者们随着小编来一起学习吧!
文章目录
- 一.实体操作
- 1.创建实体
- 2.创建实体并挂载组件
- 4.使用NativeArray存储实体
- 5.查找出所有的组件
- 6.类型条件查询
- 7.删除单个实体
- 8.删除组里的实体
- 9.按查找结果删除组
- 二.组件操作
- 1.添加组件
- 2.组数组批量添加组件
- 3.创建初始化并赋值
- 4.使用特性挂载组件
- 5.获取实体中的组件
- 6.修改实体上的组件值
- 7.删除指实体上的组件
- 8.删除组内所有实体的指定组件
- 9.删除查询结果中的组件
下面讲解World的一些基本操作

一.实体操作
1.创建实体
Entity tempERntity = World.DefaultGameObjectInjectionWorld.EntityManager.CreateEntity();
2.创建实体并挂载组件
Entity tempERntity =World.DefaultGameObjectInjectionWorld.EntityManager.CreateEntity(typeof(PrintComponentData1),typeof(RotationEulerXYZAuthoring3 ));
####3.复制实体
World.DefaultGameObjectInjectionWorld.EntityManager.Instantiate(tempErntity);
4.使用NativeArray存储实体
NativeArray类似于List,在Dots中的实体应当使用NativeArray进行储存及操作.
NativeArray<Entity> tempNativeArray = new NativeArray<Entity>(5, Allocator.Temp);
World.DefaultGameObjectInjectionWorld.EntityManager.CreateEntity(tempEntityArchetype, tempNativeArray);
5.查找出所有的组件
NativeArray<Entity> tempEntitis = World.DefaultGameObjectInjectionWorld.EntityManager.GetAllEntities();
foreach (var item in tempEntitis)
{Debug.Log(item.Index);
}
6.类型条件查询
需要注意的是查询结束后需要释放查询
EntityQuery tempEntityQuery = World.DefaultGameObjectInjectionWorld.EntityManager.CreateEntityQuery(typeof(PrintComponentData1), typeof(RotationEulerXYZAuthoring3));//这里的查询条件是And的关系
NativeArray<Entity> tempEntities2 = tempEntityQuery.ToEntityArray(Allocator.TempJob);
foreach (var item in tempEntities2)
{Debug.Log(item.Index);
}
tempEntities2.Dispose();
7.删除单个实体
//创建
Entity tempErntity = World.DefaultGameObjectInjectionWorld.EntityManager.CreateEntity(typeof(PrintComponentData1), typeof(RotationEulerXYZAuthoring3));
World.DefaultGameObjectInjectionWorld.EntityManager.Instantiate(tempErntity);
//删除
World.DefaultGameObjectInjectionWorld.EntityManager.DestroyEntity(tempErntity);
8.删除组里的实体
//创建组
EntityArchetype tempEntityArchetype = World.DefaultGameObjectInjectionWorld.EntityManager.CreateArchetype(typeof(PrintComponentData1), typeof(RotationEulerXYZAuthoring3));
NativeArray<Entity> tempNativeArray = new NativeArray<Entity>(5, Allocator.Temp);
World.DefaultGameObjectInjectionWorld.EntityManager.CreateEntity(tempEntityArchetype, tempNativeArray);
//删除组
World.DefaultGameObjectInjectionWorld.EntityManager.DestroyEntity(teimpNativeArray);
9.按查找结果删除组
World.DefaultGameObjectInjectionWorld.EntityManager.DestroyEntity(tempEntityQuery);
二.组件操作
1.添加组件
方法一
World.DefaultGameObjectInjectionWorld.EntityManager.AddComponent(tempErntity1, typeof(PrintComponentData1));
方法二
World.DefaultGameObjectInjectionWorld.EntityManager.AddComponent<PrintComponentData1>(tempErntity1);
2.组数组批量添加组件
方法一
World.DefaultGameObjectInjectionWorld.EntityManager.AddComponent<PrintComponentData1>(tempNativeArray);
方法二
World.DefaultGameObjectInjectionWorld.EntityManager.AddComponent(tempNativeArray, typeof(PrintComponentData1));
方法三同时添加多个组件
World.DefaultGameObjectInjectionWorld.EntityManager.AddComponents(tempErntity1, new ComponentTypes(typeof(PrintComponentData1), typeof(RotationEulerXYZAuthoring3)));
3.创建初始化并赋值
World.DefaultGameObjectInjectionWorld.EntityManager.AddComponentData(tempErntity1, new PrintComponentData1()
{printData = 5
});
4.使用特性挂载组件
[GenerateAuthoringComponent]
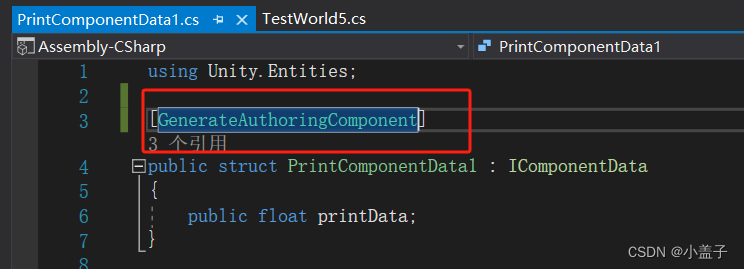
5.获取实体中的组件
PrintComponentData1 temPrintComponentData = World.DefaultGameObjectInjectionWorld.EntityManager.GetComponentData<PrintComponentData1>(tempErntity1);
6.修改实体上的组件值
World.DefaultGameObjectInjectionWorld.EntityManager.SetComponentData(tempErntity1, new PrintComponentData1() { printData = 888 });
7.删除指实体上的组件
World.DefaultGameObjectInjectionWorld.EntityManager.RemoveComponent<PrintComponentData1>(tempErntity1);
8.删除组内所有实体的指定组件
World.DefaultGameObjectInjectionWorld.EntityManager.RemoveComponent<PrintComponentData1>(tempNativeArray);
9.删除查询结果中的组件
World.DefaultGameObjectInjectionWorld.EntityManager.RemoveComponent<PrintComponentData1>(tempEntityQuery);
这篇关于Unity DOTS技术(六)World详解的文章就介绍到这儿,希望我们推荐的文章对编程师们有所帮助!


