本文主要是介绍揭密springboot自动装配(1)--ImportSelector,希望对大家解决编程问题提供一定的参考价值,需要的开发者们随着小编来一起学习吧!
揭密springboot自动装配
- 揭密springboot自动装配(1)--ImportSelector
- 揭密springboot自动装配(2)--AutoConfigurationImportSelector
- 揭密springboot自动装配(3)--ioc及调用selectImposts
- 揭密springboot自动装配(4)--ioc及创建beanFactory
- 揭密springboot自动装配(5)--ioc及@Autowired注解
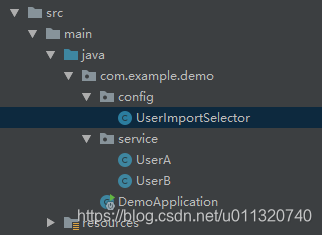
在讲这个之前,我们先来个例子热热身
首先我们先来了解下ImportSelector这个接口的应用,ImportSelector接口是spring中导入外部配置的核心接口,在SpringBoot的自动化配置和@EnableXXX(功能性注解)都有它的存在,具体怎么用下面走个例子看看
1.实现下ImportSelector
public class UserImportSelector implements ImportSelector {@Overridepublic String[] selectImports(AnnotationMetadata annotationMetadata) {return new String[]{UserA.class.getName()};}
}
这里我们看到有个selectImports方法,我们需要实现它,返回内容我们可以看到就是个数组,把需要装配进spring容器中的bean的className放进返回数组即可
2.接着我们在启动类中添加@Import(UserImportSelector.class)
@SpringBootApplication
@Import(UserImportSelector.class)
public class DemoApplication {public static void main(String[] args) {ConfigurableApplicationContext run = SpringApplication.run(DemoApplication.class, args);Object userA = run.getBeanFactory().getBean(UserA.class);System.out.println(userA.toString());Object userB = run.getBeanFactory().getBean(UserB.class);System.out.println(userB.toString());}}
这里UserB我是没有放在selectImports中的,目的是做下对比
3.跑下我们的程序看看结果

这里你会发现UserA可以被拿到,证明已经交给spring容器中可以拿到,而UserB我没有任何处理,是拿不到的这个毫无疑问到这里肯定有人会问,直接@Import(UserA.class)不就行了,搞那么复杂,嗯,这个没错,甚至我可以跑给你们看下
@SpringBootApplication
@Import({UserImportSelector.class,UserB.class})
public class DemoApplication {public static void main(String[] args) {ConfigurableApplicationContext run = SpringApplication.run(DemoApplication.class, args);Object userA = run.getBeanFactory().getBean(UserA.class);System.out.println(userA.toString());Object userB = run.getBeanFactory().getBean(UserB.class);System.out.println(userB.toString());}}

那为什么搞那么复杂?
ImportSelector主要是实现些比较复杂有逻辑性的bean装载,我们可以在selectImports做下逻辑判断,比如@ComponentScan像这个扫描器,我们自己来写一个和它差不多的东西玩玩,起名@UserScan
1.创建注解@UserScan,引用@Import(UserImportSelector.class)
@Retention(RetentionPolicy.RUNTIME)
@Target({ElementType.TYPE})
@Documented
@Import(UserImportSelector.class)
public @interface UserScan {@AliasFor("basePackages")String[] value() default {};@AliasFor("value")String[] basePackages() default {};
}
2.实现UserImportSelector
public class UserImportSelector implements ImportSelector {@Overridepublic String[] selectImports(AnnotationMetadata annotationMetadata) {Map<String, Object> annotationAttributes = annotationMetadata.getAnnotationAttributes(UserScan.class.getName());if(CollectionUtils.isEmpty(annotationAttributes))return new String[0];String[] basePackages = (String[]) annotationAttributes.get("basePackages");ClassPathScanningCandidateComponentProvider scanner = new ClassPathScanningCandidateComponentProvider(false);scanner.addIncludeFilter(new AssignableTypeFilter(Object.class));//这里实现包含,相当@ComponentScan  includeFilters//scanner.addExcludeFilter(new AssignableTypeFilter(Object.class));//这里可以实现排除,相当@ComponentScan  excludeFiltersSet<String> classes = new HashSet<>();for (String basePackage : basePackages) {Set<BeanDefinition> candidateComponents = scanner.findCandidateComponents(basePackage);candidateComponents.forEach(e-> {classes.add(e.getBeanClassName());});}return classes.toArray(new String[classes.size()]);//return new String[]{UserA.class.getName()};}
}
3.使用@UserScan("com.example.demo.service"),表示扫描包下的类
@SpringBootApplication
@UserScan("com.example.demo.service")
public class DemoApplication {public static void main(String[] args) {ConfigurableApplicationContext run = SpringApplication.run(DemoApplication.class, args);Object userA = run.getBeanFactory().getBean(UserA.class);System.out.println(userA.toString());Object userB = run.getBeanFactory().getBean(UserB.class);System.out.println(userB.toString());}
}
4.我们跑起来看看结果

这样可以看到我们是完全可以在spring容器里面拿到UserA和UserB的
好了,热身例子到这里下文将会从源码上分析springboot自动装载的实现,主要和我们前面讲的ImportSelector接口有关,其中有个叫做AutoConfigurationImportSelector的东西,下文将会提到
这篇关于揭密springboot自动装配(1)--ImportSelector的文章就介绍到这儿,希望我们推荐的文章对编程师们有所帮助!


