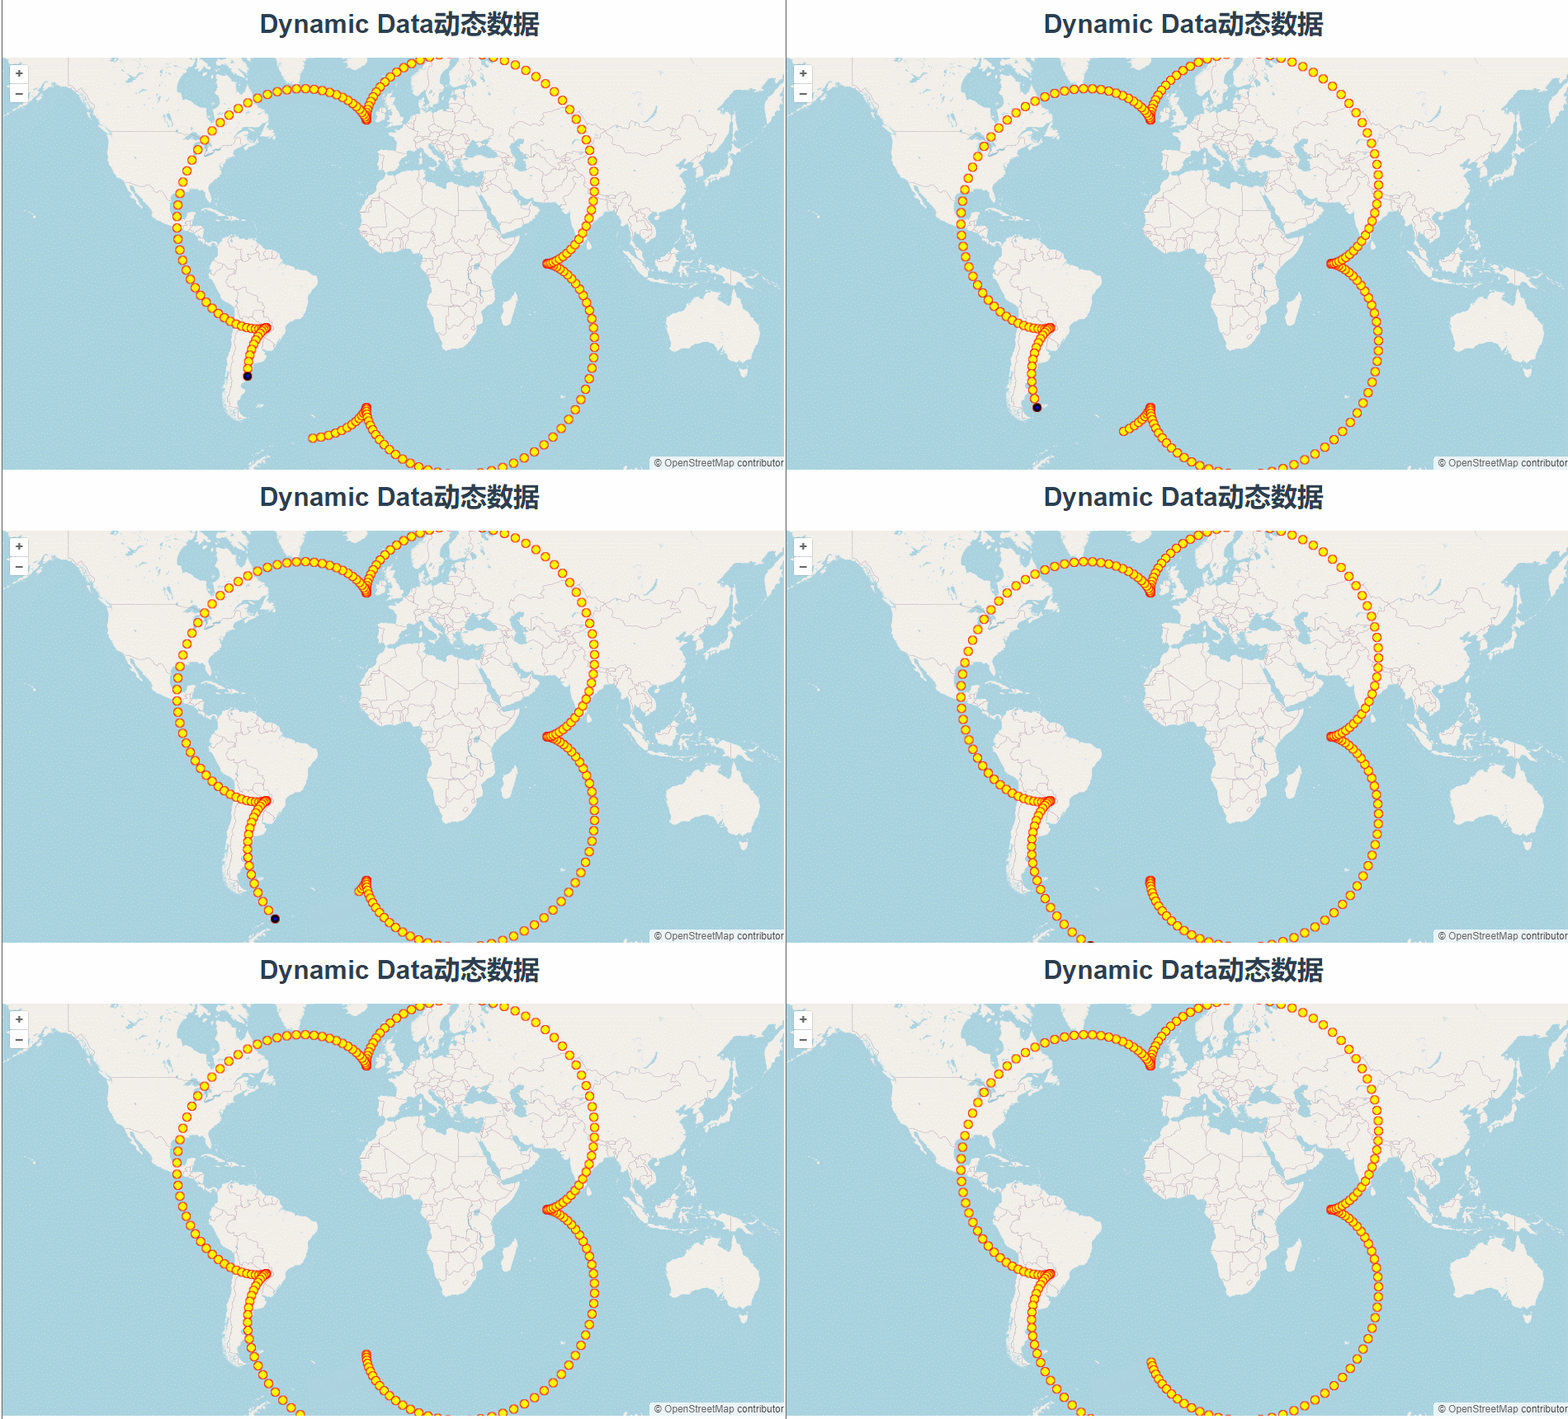
本文主要是介绍三十五、openlayers官网示例Dynamic Data——在地图上加载动态数据形成动画效果,希望对大家解决编程问题提供一定的参考价值,需要的开发者们随着小编来一起学习吧!

官网demo地址:
Dynamic Data
初始化地图
const tileLayer = new TileLayer({source: new OSM(),});const map = new Map({layers: [tileLayer],target: "map",view: new View({center: [0, 0],zoom: 2,}),});创建了三个样式
const imageStyle = new Style({image: new CircleStyle({radius: 5,fill: new Fill({ color: "yellow" }),stroke: new Stroke({ color: "red", width: 1 }),}),});const headInnerImageStyle = new Style({image: new CircleStyle({radius: 2,fill: new Fill({ color: "blue" }),}),});const headOuterImageStyle = new Style({image: new CircleStyle({radius: 5,fill: new Fill({ color: "black" }),}),});绘制动画效果主要还是利用了postrender事件,其原理解析可以参考这篇
十八、openlayers官网示例Custom Animation解析——地图上添加自定义动画、圆圈涟漪效果_unbykey(listenerkey);-CSDN博客
// 点的数量,用于定义图形的分辨率const n = 200;// 角速度常量,用于计算当前时间的角度const omegaTheta = 30000;// 大圆的半径const R = 7e6;// 小圆的半径const r = 2e6;// 距离小圆中心的点的距离const p = 2e6;tileLayer.on("postrender", function (event) {//获取渲染上下文和帧状态//用于在地图上绘制矢量图形const vectorContext = getVectorContext(event);//包含当前帧的状态,包括时间信息const frameState = event.frameState;//计算当前角度 theta 根据当前时间和 omegaTheta 计算当前角度 theta,用于动画效果const theta = (2 * Math.PI * frameState.time) / omegaTheta;//生成外旋轮线的坐标数组const coordinates = [];let i;for (i = 0; i < n; ++i) {const t = theta + (2 * Math.PI * i) / n;const x = (R + r) * Math.cos(t) + p * Math.cos(((R + r) * t) / r);const y = (R + r) * Math.sin(t) + p * Math.sin(((R + r) * t) / r);coordinates.push([x, y]);}vectorContext.setStyle(imageStyle);//设置样式 imageStyle 并绘制多点几何(MultiPoint)vectorContext.drawGeometry(new MultiPoint(coordinates));const headPoint = new Point(coordinates[coordinates.length - 1]);//将头部的圆标注出来设置成不同样式vectorContext.setStyle(headOuterImageStyle);vectorContext.drawGeometry(headPoint);vectorContext.setStyle(headInnerImageStyle);vectorContext.drawGeometry(headPoint);//强制重新渲染地图map.render();});完整代码:
<template><div class="box"><h1>Dynamic Data动态数据</h1><div id="map"></div></div>
</template><script>
import Map from "ol/Map.js";
import OSM from "ol/source/OSM.js";
import TileLayer from "ol/layer/Tile.js";
import View from "ol/View.js";
import { Circle as CircleStyle, Fill, Stroke, Style } from "ol/style.js";
import { MultiPoint, Point } from "ol/geom.js";
import { getVectorContext } from "ol/render.js";
export default {name: "",components: {},data() {return {map: null,};},computed: {},created() {},mounted() {const tileLayer = new TileLayer({source: new OSM(),});const map = new Map({layers: [tileLayer],target: "map",view: new View({center: [0, 0],zoom: 2,}),});const imageStyle = new Style({image: new CircleStyle({radius: 5,fill: new Fill({ color: "yellow" }),stroke: new Stroke({ color: "red", width: 1 }),}),});const headInnerImageStyle = new Style({image: new CircleStyle({radius: 2,fill: new Fill({ color: "blue" }),}),});const headOuterImageStyle = new Style({image: new CircleStyle({radius: 5,fill: new Fill({ color: "black" }),}),});// 点的数量,用于定义图形的分辨率const n = 200;// 角速度常量,用于计算当前时间的角度const omegaTheta = 30000;// 大圆的半径const R = 7e6;// 小圆的半径const r = 2e6;// 距离小圆中心的点的距离const p = 2e6;tileLayer.on("postrender", function (event) {//获取渲染上下文和帧状态//用于在地图上绘制矢量图形const vectorContext = getVectorContext(event);//包含当前帧的状态,包括时间信息const frameState = event.frameState;//计算当前角度 theta 根据当前时间和 omegaTheta 计算当前角度 theta,用于动画效果const theta = (2 * Math.PI * frameState.time) / omegaTheta;//生成外旋轮线的坐标数组const coordinates = [];let i;for (i = 0; i < n; ++i) {const t = theta + (2 * Math.PI * i) / n;const x = (R + r) * Math.cos(t) + p * Math.cos(((R + r) * t) / r);const y = (R + r) * Math.sin(t) + p * Math.sin(((R + r) * t) / r);coordinates.push([x, y]);}vectorContext.setStyle(imageStyle);//设置样式 imageStyle 并绘制多点几何(MultiPoint)vectorContext.drawGeometry(new MultiPoint(coordinates));const headPoint = new Point(coordinates[coordinates.length - 1]);//将头部的圆标注出来设置成不同样式vectorContext.setStyle(headOuterImageStyle);vectorContext.drawGeometry(headPoint);vectorContext.setStyle(headInnerImageStyle);vectorContext.drawGeometry(headPoint);//强制重新渲染地图map.render();});map.render();},methods: {},
};
</script><style lang="scss" scoped>
#map {width: 100%;height: 500px;
}
.box {height: 100%;
}
</style>
这篇关于三十五、openlayers官网示例Dynamic Data——在地图上加载动态数据形成动画效果的文章就介绍到这儿,希望我们推荐的文章对编程师们有所帮助!


