本文主要是介绍在idea中不使用maven,创建springmvc 项目(使用注解)-3(不是maven项目,太繁琐,不推荐),希望对大家解决编程问题提供一定的参考价值,需要的开发者们随着小编来一起学习吧!
一.介绍说明
1.因为不是使用maven创建项目,所以在找包时候特别繁琐。工程的结构如下:

2.在最后面,可以看到:
有些图片加载不出来,发现凡是放到WEB-INF下的静态资源,images图片,均无法加载出来。
和WEB-INF的平级static/images/aa.jpg下的图片,能够读取访问的到。
所以说:idea中的springmvc 无法加载WEB-INF下的静态资源
二.新建项目
2.1 新建项目
勾选Spring MVC 、Web Application(勾选了Spring MVC后IDEA默认会勾选Web Application),Next

2.2 在lib包中添加所有需要jar包

解压到自己创建的lib文件夹里,注意是WEB-INF下自己创建的,不是外部的lib
解压后右键lib文件夹,然后如图操作

2.3 需要在web目录下新建classes和lib,jsp等文件夹
这里的lib,我直接将src上面的lib包,复制到了web-inf下面的lib中

step2: login.jsp页面代码如下:
<%--Created by IntelliJ IDEA.User: jurflDate: 2020/9/12Time: 11:36To change this template use File | Settings | File Templates.
--%>
<%@ page contentType="text/html;charset=UTF-8" language="java" %>
<html>
<head><title>helloworld</title>
</head>
<body>
<h2>${helloMsg}</h2>
<div><img src="./static/images/aa.jpg"></img><img src="${pageContext.request.contextPath}/static/images/aa.jpg"></img><img src="./images/bb.jpg"></img><div>有问题的:</div><img src="./static/images/cc.jpg"></img><img src="../static/images/cc.jpg"></img><img src="../../static/images/aa.jpg"></img><img src="../images/bb.jpg"></img></div>
</body>
</html>
2.5 需要在web目录下存储图片的目录

2.6 在web-info下配置web.xml的内容
<?xml version="1.0" encoding="UTF-8"?>
<web-app xmlns="http://xmlns.jcp.org/xml/ns/javaee"xmlns:xsi="http://www.w3.org/2001/XMLSchema-instance"xsi:schemaLocation="http://xmlns.jcp.org/xml/ns/javaee http://xmlns.jcp.org/xml/ns/javaee/web-app_4_0.xsd"version="4.0"><!--<context-param><param-name>contextConfigLocation</param-name><param-value>/WEB-INF/dispatcher-servlet.xml</param-value></context-param>--><listener><listener-class>org.springframework.web.context.ContextLoaderListener</listener-class></listener><!--DispatcherServlet--><servlet><servlet-name>dispatcherServlet</servlet-name><servlet-class>org.springframework.web.servlet.DispatcherServlet</servlet-class><init-param><param-name>contextConfigLocation</param-name><param-value>/WEB-INF/dispatcherServlet-servlet.xml</param-value></init-param><load-on-startup>1</load-on-startup></servlet><servlet-mapping><servlet-name>dispatcherServlet</servlet-name><url-pattern>/</url-pattern></servlet-mapping><!--encodingFilter--><filter><filter-name>encodingFilter</filter-name><filter-class>org.springframework.web.filter.CharacterEncodingFilter</filter-class><init-param><param-name>encoding</param-name><param-value>utf-8</param-value></init-param></filter><filter-mapping><filter-name>encodingFilter</filter-name><url-pattern>/*</url-pattern></filter-mapping></web-app>
2.7 新建xxx-servlet.xml文件
注意这里xxx-servlet.xml的名字命名要和web.xml中配置的servlet的名字一样,如
<!--DispatcherServlet-->
<servlet>
<servlet-name>dispatcherServlet</servlet-name>
。。。。。
所以的配置文件名为dispatcherServlet-servlet.xml,如下图所示:

<?xml version="1.0" encoding="UTF-8"?>
<beans xmlns="http://www.springframework.org/schema/beans"xmlns:xsi="http://www.w3.org/2001/XMLSchema-instance"xmlns:context="http://www.springframework.org/schema/context"xmlns:mvc="http://www.springframework.org/schema/mvc"xsi:schemaLocation="http://www.springframework.org/schema/beanshttp://www.springframework.org/schema/beans/spring-beans.xsdhttp://www.springframework.org/schema/contexthttp://www.springframework.org/schema/context/spring-context.xsdhttp://www.springframework.org/schema/mvchttps://www.springframework.org/schema/mvc/spring-mvc.xsd"><!-- 1.开启SpringMVC注解驱动 --><mvc:annotation-driven /><!-- 2.静态资源默认servlet配置--><mvc:default-servlet-handler/><!-- 3.配置jsp 显示ViewResolver视图解析器 --><bean class="org.springframework.web.servlet.view.InternalResourceViewResolver"><property name="viewClass" value="org.springframework.web.servlet.view.JstlView" /><property name="prefix" value="/WEB-INF/jsp/" /><property name="suffix" value=".jsp" /></bean><!-- 4.扫描web相关的bean --><context:component-scan base-package="com.test" /><!--    添加MVC 加载静态文件 css、图片等--><!--<mvc:resources location="/WEB-INF/images/" mapping="/images/**"/><mvc:resources location="/WEB-INF/js/"  mapping="/js/**"/><mvc:resources location="/WEB-INF/css/" mapping="/css/**"/>--><mvc:annotation-driven /></beans>
2.8 新建一个applicationContext.xml文件
里面暂时还没有配置内容
<?xml version="1.0" encoding="UTF-8"?>
<beans xmlns="http://www.springframework.org/schema/beans"xmlns:xsi="http://www.w3.org/2001/XMLSchema-instance" xmlns:aop="http://www.springframework.org/schema/aop"xmlns:context="http://www.springframework.org/schema/context"xmlns:mvc="http://www.springframework.org/schema/mvc"xmlns:tx="http://www.springframework.org/schema/tx" xmlns:p="http://www.springframework.org/schema/p"xmlns:util="http://www.springframework.org/schema/util"xsi:schemaLocation="http://www.springframework.org/schema/beans http://www.springframework.org/schema/beans/spring-beans-4.0.xsdhttp://www.springframework.org/schema/aop http://www.springframework.org/schema/aop/spring-aop-4.0.xsdhttp://www.springframework.org/schema/context http://www.springframework.org/schema/context/spring-context-4.0.xsdhttp://www.springframework.org/schema/mvc http://www.springframework.org/schema/mvc/spring-mvc-4.0.xsdhttp://www.springframework.org/schema/tx http://www.springframework.org/schema/tx/spring-tx-4.0.xsdhttp://www.springframework.org/schema/util http://www.springframework.org/schema/util/spring-util-4.0.xsd">
</beans>
2.9 配置controller层
package com.test.controller;import org.springframework.stereotype.Controller;
import org.springframework.ui.Model;
import org.springframework.web.bind.annotation.RequestMapping;/*** @ClassName: UserController* @Description: TODO* @Author: liujianfu* @Date: 2020/09/12 14:49:27 * @Version: V1.0**/
@Controller
public class UserController {@RequestMapping("/index")public String index(Model model) {model.addAttribute("helloMsg", "HelloWorld,你好世界");return "login";}
}
2.10 配置index.jsp页面
<%@ page contentType="text/html;charset=UTF-8" language="java" %>
<html>
<head><meta http-equiv="Content-Type" content="text/html; charset=UTF-8"><meta name="viewport" content="width=device-width, initial-scale=1, shrink-to-fit=no"><title>spring-mvc:登录页面</title>
</head>
<body>
<h2>欢迎登录</h2>
<div><a href="${pageContext.request.contextPath}/index">去主页</a>
</div>
</body>
</html>
三.进行tomcat相关配置
3.1 Output path配置(此步可跳过):

3.2 相关jar文件夹配置:


3.3 Library相关配置:


四.设置artifacts的war包需要lib

五.tomcat部署发布
step1

step2:

step3:

六.启动服务,访问页面
step1:启动成功

#访问页面
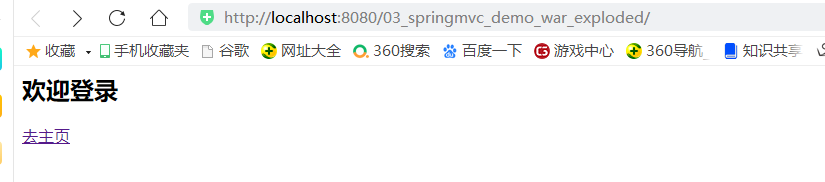
#点击index页面的“去主页”,到login页面

这篇关于在idea中不使用maven,创建springmvc 项目(使用注解)-3(不是maven项目,太繁琐,不推荐)的文章就介绍到这儿,希望我们推荐的文章对编程师们有所帮助!


