本文主要是介绍心链2---前端开发(整合路由,搜索页面,用户信息页开发),希望对大家解决编程问题提供一定的参考价值,需要的开发者们随着小编来一起学习吧!
心链——伙伴匹配系统
接口调试
说书人📖:上回书说到用了两种方法查询标签1.SQL查询,2.内存查询;两种查询效率是部分上下,打的是难解难分,是时大地皴裂,天色聚变,老祖斟酌再三最后决定,使用内存查询,并封印SQL查询。
    /***   根据标签搜索用户。(内存过滤版)* @param tagNameList  用户要搜索的标签* @return*/@Overridepublic List<User> searchUsersByTags(List<String> tagNameList){if (CollectionUtils.isEmpty(tagNameList)){throw new BusinessException(ErrorCode.PARAMS_ERROR);}//1.先查询所有用户QueryWrapper<User> queryWrapper = new QueryWrapper<>();List<User> userList = userMapper.selectList(queryWrapper);Gson gson = new Gson();//2.判断内存中是否包含要求的标签 parallelStream()return userList.stream().filter(user -> {String tagstr = user.getTags();
//            if (StringUtils.isBlank(tagstr)){
//                return false;
//            }Set<String> tempTagNameSet =  gson.fromJson(tagstr,new TypeToken<Set<String>>(){}.getType());//java8  Optional 来判断空tempTagNameSet = Optional.ofNullable(tempTagNameSet).orElse(new HashSet<>());for (String tagName : tagNameList){if (!tempTagNameSet.contains(tagName)){return false;}}return true;}).map(this::getSafetyUser).collect(Collectors.toList());}/***   根据标签搜索用户。(sql查询版)*   @Deprecated 过时* @param tagNameList  用户要搜索的标签* @return*/@Deprecatedprivate List<User> searchUsersByTagBySQL(List<String> tagNameList){if (CollectionUtils.isEmpty(tagNameList)){throw new BusinessException(ErrorCode.PARAMS_ERROR);}QueryWrapper<User> queryWrapper = new QueryWrapper<>();//拼接tag// like '%Java%' and like '%Python%'for (String tagList : tagNameList) {queryWrapper = queryWrapper.like("tags", tagList);}List<User> userList = userMapper.selectList(queryWrapper);return  userList.stream().map(this::getSafetyUser).collect(Collectors.toList());}
Java 8
- stream / parallelStream 流失处理
- Optional 可选类
前端开发
前端整合路由
Vue-Router:直接看官方文档引入
https://router.vuejs.org/zh/guide/#html
Vue-Router 其实就是帮助你根据不同的 url 来展示不同的页面(组件),不用自己写 if / else
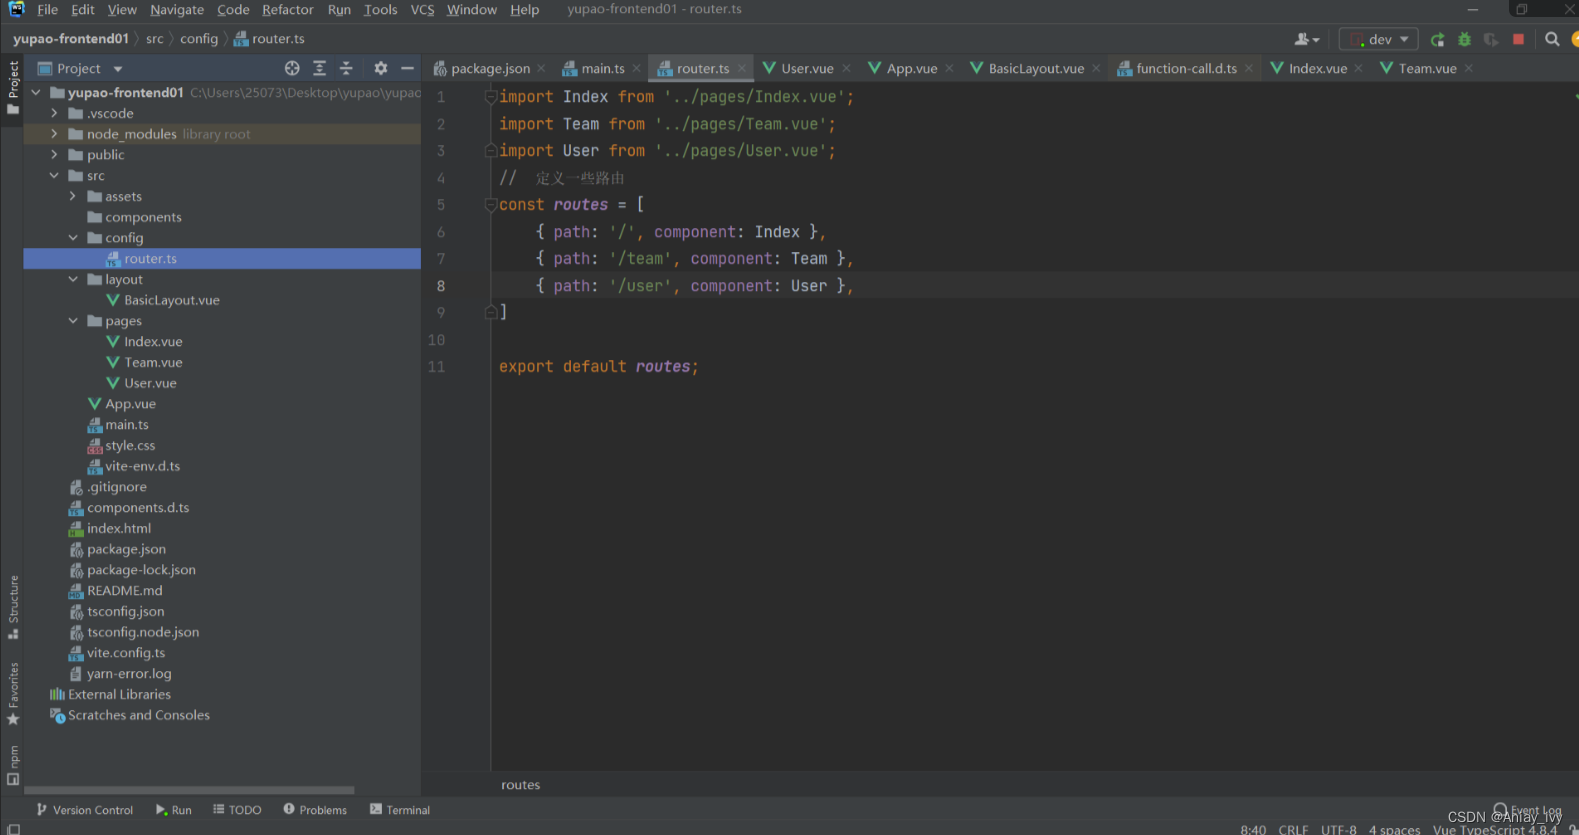
路由配置影响整个项目,所以建议单独用 config 目录、单独的配置文件去集中定义和管理。
有些组件库可能自带了和 Vue-Router 的整合,所以尽量先看组件文档、省去自己写的时间。
import { createApp } from 'vue'
import App from './App.vue'
import  {Icon,Button, NavBar,Tabbar,TabbarItem,Toast} from "vant";// @ts-ignore
import * as VueRouter from 'vue-router';
import routes from "./config/router";const app = createApp(App);
app.use(Button);
app.use(NavBar);
app.use(Icon);
app.use(Tabbar);
app.use(TabbarItem);
app.use(Toast);const router = VueRouter.createRouter({// 4. 内部提供了 history 模式的实现。为了简单起见,我们在这里使用 hash 模式。history: VueRouter.createWebHashHistory(),routes, // `routes: routes` 的缩写
})app.use(router)app.mount('#app')
单独提出路由,新建config文件夹,新建router.ts文件。 (上面调好了的引入了router.ts)
然后就是主页点击跳转要使用路由的操作了。
在Tabbar 标签栏 - Vant 3
Vant 3 - Lightweight Mobile UI Components built on Vue 中有提到路由的使用。
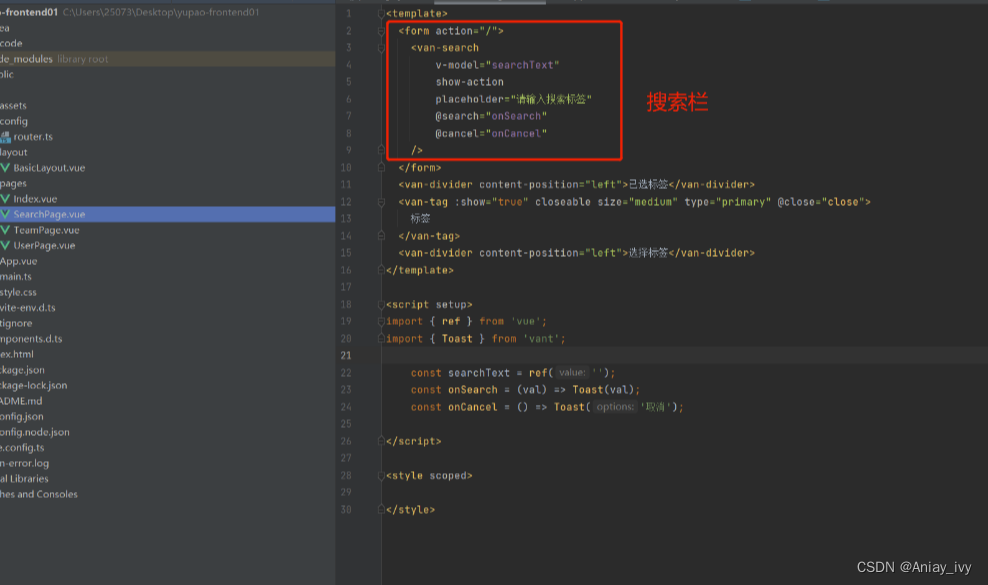
搜索页面
Vant3中找到搜索样式
(事件监听)并添加到新建的搜索页面searchPage.vue里
主页搜索图标跳转路由
编程式导航 | Vue Router

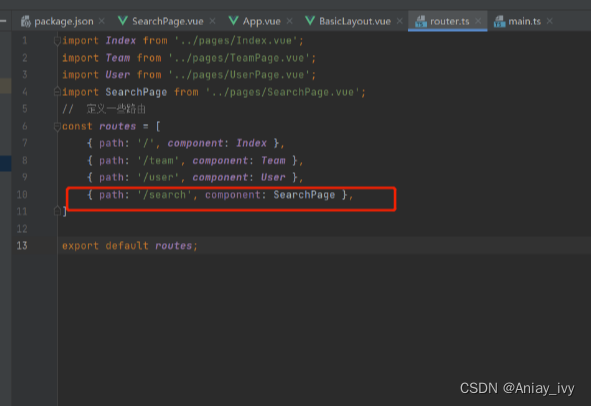
路由挂载
改一下名,引入所有组件(这个是官方不推荐的,体量大。现在官网这个描述看不到了


添加分类选择

选择与标签连接

关闭标签

美化一下标签的间隔样式
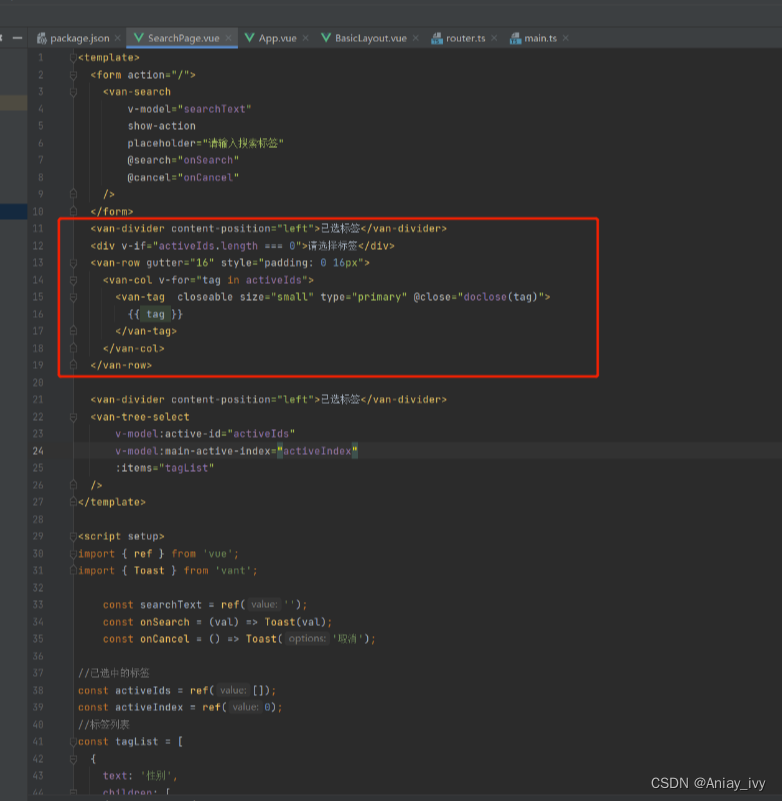
<template><form action="/"><van-searchv-model="searchText"show-actionplaceholder="请输入搜索标签"@search="onSearch"@cancel="onCancel"/></form><van-divider content-position="left">已选标签</van-divider><div v-if="activeIds.length === 0">请选择标签</div><van-row gutter="16" style="padding: 0 16px"><van-col v-for="tag in activeIds"><van-tag  closeable size="small" type="primary" @close="doclose(tag)">{{ tag }}</van-tag></van-col>
</van-row><van-divider content-position="left">已选标签</van-divider><van-tree-select
v-model:active-id="activeIds"
v-model:main-active-index="activeIndex"
:items="tagList"/></template><script setup>import { ref } from 'vue';const searchText = ref('');const originTagList = [{text: '性别',children: [{ text: '男', id: '男' },{ text: '女', id: '女' },{ text: '嬲', id: '嬲' },],}, {text: '年级',children: [{ text: '大一', id: '大一' },{ text: '大二', id: '大二' },{ text: '大三', id: '大三' },{ text: '大四', id: '大四' },{ text: '大五', id: '大五' },{ text: '大六', id: '大六' },],},];//标签列表let tagList = ref(originTagList);/***  搜索过滤* @param val*/const onSearch = (val) => {tagList.value = originTagList.map(parentTag =>{const tempChildren =  [...parentTag.children];const tempParentTag =  {...parentTag};tempParentTag.children = tempChildren.filter(item => item.text.includes(searchText.value))return tempParentTag;})};//取消  清空const onCancel = () => {searchText.value = '';tagList.value = originTagList;};//已选中的标签const activeIds = ref([]);const activeIndex = ref(0);//关闭标签const  doclose = (tag) =>{activeIds.value = activeIds.value.filter(item =>{return item !== tag;})}</script><style scoped></style>
用户信息页
在vant文档里寻找到适合的组件来编写用户信息页面,这里选择了cell单元格,将其黏贴到UserPage.vue中

在src目录下建立models目录,并创建user.d.ts文件,将规范粘贴进去并适当修改如下
/*** 用户类别*/
export type CurrentUser = {id: number;username: string;userAccount: string;avatarUrl?: string;gender: number;phone: string;email: string;userStatus: number;userRole: number;planetCode: string;tags: string[];createTime: Date;
};
在UserPage.vue中引入,自己写点假数据
<template><van-cell title="昵称" is-link to='/user/edit' :value="user.username"/><van-cell title="账号" is-link to='/user/edit' :value="user.userAccount" /><van-cell title="头像" is-link to='/user/edit'><img style="height: 48px" :src="user.avatarUrl"/></van-cell><van-cell title="性别" is-link to='/user/edit' :value="user.gender" /><van-cell title="电话" is-link to='/user/edit' :value="user.phone" /><van-cell title="邮箱" is-link to='/user/edit' :value="user.email" /><van-cell title="星球编号" :value="user.planetCode" /><van-cell title="注册时间" :value="user.createTime.toISOString()" />
</template><script setup>
const user = {id: 1,username: '阿尼亚',userAccount: 'aniya',avatarUrl: 'https://profile.csdnimg.cn/2/B/1/1_qq_56098191',gender: '男',phone: '12131133313',email: '23432444@qq.com',planetCode: '2220',createTime: new Date(),
};
</script><style scoped></style>
编辑页面
新建一个用户编辑页,命名为UserEditPage.vue
在route.ts添加新路由

对UserPage.vue和UserEditPage.vue进行修改 UserPage.vue:

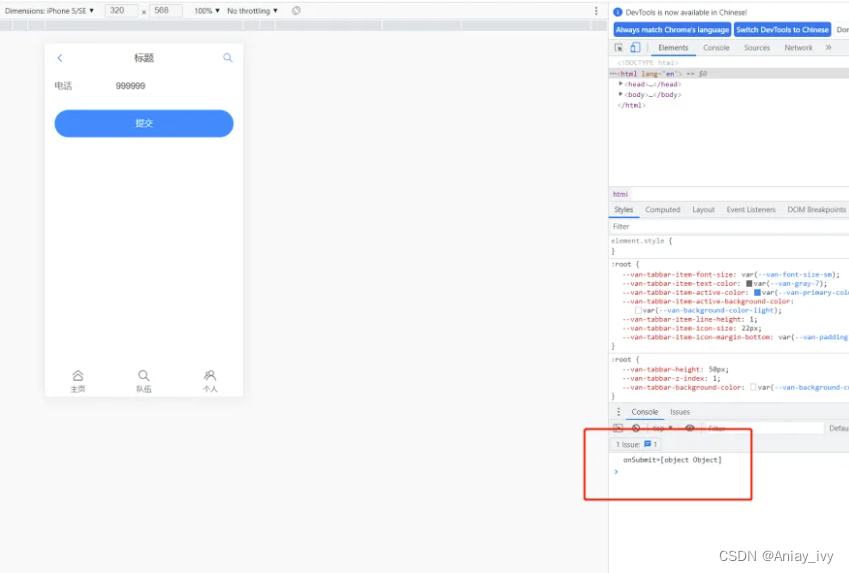
UserEditPage页面添加form表单,并完成获取数值和修改。
<template><van-form @submit="onSubmit"><van-fieldv-model="editUser.currentValue":name="editUser.editKey":label="editUser.editName":placeholder="'请输入${editUser.editName}'"/><div style="margin: 16px;"><van-button round block type="primary" native-type="submit">提交</van-button></div></van-form>
</template><script setup lang="ts">
import {useRoute} from "vue-router";
import {ref} from "vue";
const route = useRoute();
const editUser = ref({editKey: route.query.editKey,currentValue: route.query.currentValue,editName: route.query.editName,
})
const onSubmit = (values) => {//todo 把editKey currentValue editName提交到后台console.log('onSubmit',values);
}</script>
页面返回

这篇关于心链2---前端开发(整合路由,搜索页面,用户信息页开发)的文章就介绍到这儿,希望我们推荐的文章对编程师们有所帮助!


